Roofing Building Codes: What to Know
It’s easy to feel completely overwhelmed when faced with the prospect of a roof replacement or a major repair. Beyond just picking out shingle colors and getting quotes, there’s a whole confusing world of roofing building codes that can make your head spin. You're trying to protect your home, ensure the job is done right, and avoid future headaches, but deciphering these regulations often feels like learning a new language. This guide is here to break down the essential roofing building codes you need to know, helping you understand their purpose, navigate the requirements, and make sure your asphalt roofing project is up to snuff and fully compliant.
Understanding the "Why" Behind Roofing Building Codes
Let's be honest, no one enjoys dealing with bureaucracy. The idea of permits, inspections, and stacks of code books can seem like just another hurdle in an already stressful home renovation project. But beneath the layers of red tape, roofing building codes serve a profoundly important purpose: they protect you, your family, your investment, and even your community. These aren't just arbitrary rules; they're distilled wisdom from countless building failures, engineering studies, and safety improvements over decades. Think of them as the silent guardians of your home's structural integrity.
Protecting Your Investment and Safety
When you invest in a new asphalt roof, you're not just buying shingles; you're buying peace of mind, protection from the elements, and an essential component of your home's overall structure. Building codes are fundamental in ensuring that investment is sound. They mandate specific standards for materials, installation techniques, and structural considerations that directly impact the safety of your home. Imagine a scenario where a strong windstorm rolls through your neighborhood, and your roof, installed without adherence to proper wind uplift codes, fails spectacularly. Not only is your property at risk, but falling debris could endanger neighbors or even emergency responders.
This isn't just about catastrophic events, either. Proper flashing codes prevent insidious leaks that can lead to mold, rot, and serious structural damage over time, turning a minor drip into a costly renovation project. Codes dictate how rafters and trusses should be spaced and connected to support the weight of the roof and potential snow loads, directly preventing sagging or collapse. Without these guidelines, homeowners would be at the mercy of varying contractor quality, potentially leading to unsafe structures, higher insurance risks, and significantly diminished property values. Ultimately, these codes are a baseline to keep your home standing strong and your family safe under its shelter.
Ensuring Quality and Longevity
Beyond immediate safety, roofing building codes are designed to ensure the long-term performance and durability of your roof. An asphalt roof isn't meant to last just a few years; depending on the type of shingle and installation, it should provide decades of reliable protection. Codes contribute to this longevity by specifying minimum quality standards for materials and rigorous installation practices. For example, rather than just slapping down any old shingle, codes might specify the required fire rating for asphalt shingles in a particular area, or mandate the use of specific types of Underlayment Explained: Synthetic vs Felt beneath the shingles to provide an additional layer of moisture protection.
They also dictate things like proper ventilation, which is absolutely crucial for the health and lifespan of your entire roofing system. An attic that's too hot or too humid due to poor ventilation can literally cook your shingles from the inside out, causing them to curl, crack, and degrade prematurely. It can also lead to mold growth in your attic and drive up your energy bills. Codes also cover details like how many fasteners per shingle are required, which directly impacts their ability to resist wind uplift. Adhering to these standards means your roof won't just look good when it's new; it will perform optimally, resist common forms of wear and tear, and reach its expected lifespan, saving you from premature Roof Repair vs Replacement: How to Decide.
Navigating Insurance and Liability
This is a big one that many homeowners overlook until it's too late. Your homeowners insurance policy often hinges on your home, including its roof, being built and maintained to code. If your roof was installed without the necessary permits or failed to meet local building codes, you could face severe challenges when filing an insurance claim for damage. Imagine a scenario where a hurricane rips through the coast of Florida, causing extensive damage to your roof. If your adjuster discovers that the roof was installed five years ago without a permit or failed to meet the state's stringent high-wind nailing patterns, your claim could be denied or significantly reduced.
Beyond insurance, there's also the aspect of personal liability. If a contractor performs work on your roof without a permit, and later that work causes damage to a neighbor's property or, worse, leads to injury, you as the homeowner could potentially be held liable. This is why working with a Licensed and Insured Roofers: Why It Matters is so critical – they understand these rules and take on much of this responsibility. Codes provide a legal framework for construction, ensuring accountability and offering a baseline against which workmanship can be judged. Ignoring these codes isn't just cutting corners; it's opening yourself up to significant financial and legal risks down the line.
Key National and Local Code Bodies
The world of building codes can feel like a labyrinth because it’s not just one big rulebook. Instead, it’s a tiered system, starting with national guidelines that are then adopted and often modified at the state and local levels. This layered approach allows for a baseline of safety and quality while also permitting adjustments for regional climate, geological, and specific community needs. Understanding these different layers is crucial for any homeowner embarking on a roofing project.
The International Residential Code IRC
At the heart of most residential building codes in the United States is the International Residential Code (IRC). Developed by the International Code Council (ICC), the IRC is a comprehensive model code that addresses the construction of one- and two-family dwellings and townhouses. It covers everything from structural integrity and fire safety to energy efficiency and plumbing, and yes, extensive sections on roofing.
The IRC provides robust guidelines for asphalt roofing, detailing requirements for roof deck materials, underlayment, flashing, shingle installation (including nailing patterns for wind resistance), and ventilation. For example, it specifies minimum roof pitches for different roofing materials and lays out requirements for ice barriers in certain climates. While the IRC itself is a model code, meaning it doesn't have legal authority on its own, it is widely adopted by states and local jurisdictions across the country. Many states will take the current edition of the IRC (e.g., the 2021 IRC) and formally adopt it, sometimes with state-specific amendments. So, when your local building inspector talks about "code," they're often referring to their jurisdiction's adopted version of the IRC. It’s the foundational document that professional roofers study to ensure they’re compliant.
State-Specific Adaptations and Amendments
While the IRC provides a strong foundation, states often introduce their own adaptations and amendments to the code. These changes are typically made to address specific regional concerns, enhance safety, or reflect unique building practices. For instance, states in hurricane-prone areas, like Florida or parts of Texas, will have much more stringent High-Wind Roofing Code Requirements than, say, Arizona. The Florida Building Code, for example, is well-known for its robust requirements regarding wind uplift, often mandating higher-grade materials, specific nailing patterns for shingles (like six nails per shingle instead of the standard four), and specialized Ice and Water Shield Explained in vulnerable areas.
Similarly, states in colder climates, such as Minnesota or Michigan, will often mandate more extensive Ice Barrier Code Requirements than the standard IRC recommendation. This might involve requiring ice and water shield to extend further up the roof slope from the eaves, or around all penetrations like chimneys and skylights. These state-level amendments are critical because they override or augment the general IRC provisions. A reputable roofing contractor should be well-versed not only in the general IRC but also in all applicable state-specific amendments. It’s why what's perfectly acceptable for Asphalt Roof Replacement Cost in California might not pass muster for Asphalt Roof Replacement Cost in New York.
Local Ordinances and Homeowner Associations
To add another layer of complexity, cities, counties, and even homeowner associations (HOAs) can impose their own additional regulations, known as local ordinances or covenants. These local rules often address specific community needs, historical preservation, or aesthetic standards. For example, a city might have specific zoning laws regarding building height or material use that impact your roof. Historic districts often have very strict rules about the type and appearance of roofing materials allowed, potentially limiting your choices to specific styles or colors of asphalt shingles to maintain the architectural integrity of the neighborhood.
HOAs are another major player in this regard. If your home is part of a planned community with an HOA, chances are they have their own set of rules governing exterior modifications, including roof replacements. These rules can dictate everything from the approved color palette for shingles to the specific brand or style of asphalt shingle you can use. Some HOAs even require pre-approval for any exterior work, including roofing. Failing to comply with HOA rules, even if you have a valid city permit, can lead to fines, forced removal of the non-compliant roof, or legal action. It’s always best to check with your HOA before starting any roofing project to understand their specific HOA Roof Rules Explained.
| Code Body/Type | Scope | Authority | Examples of Impact on Roofing |
|---|---|---|---|
| International Residential Code (IRC) | Model code for one/two-family dwellings, widely adopted. | Advisory initially, legally binding when adopted by jurisdiction. | Minimum pitches, shingle nailing, underlayment, ventilation. |
| State Building Codes | State-specific adaptations, amendments to IRC or standalone. | Legally binding statewide. | Stricter wind uplift in Florida, extended ice barriers in Minnesota. |
| Local Ordinances (City/County) | Specific rules for a particular municipality/county. | Legally binding within that jurisdiction. | Historic district material restrictions, permit requirements. |
| Homeowner Associations (HOAs) | Covenants and restrictions for a specific community. | Contractually binding for homeowners within the HOA. | Approved shingle colors, styles, pre-approval for work. |
Essential Building Codes for Asphalt Roofing Components
When you’re looking at a roofing project, it’s not just about the visible shingles. A roof is a complex system, and codes apply to every single component that makes up that system. From the foundation your shingles rest on to the very edges that prevent water intrusion, each part has specific requirements to ensure a durable, watertight, and safe installation. Neglecting any one of these elements can compromise the entire roof’s performance and longevity.
Roof Decking Requirements and Materials
The roof decking, sometimes called the sheathing, is the flat surface directly beneath your underlayment and shingles. It's typically made of plywood or OSB (Oriented Strand Board) and is absolutely critical because it provides the structural support for the entire roofing system. Building codes have very specific requirements for roof decking to ensure it can withstand the weight of the roofing materials, snow loads, wind uplift, and foot traffic.
Generally, the IRC and local codes will specify the minimum thickness of the decking, often ¾-inch plywood or OSB for standard residential construction, though this can vary based on rafter spacing. They also dictate acceptable material types – not all plywood or OSB is created equal, and specific grades are required to ensure durability and moisture resistance. Beyond thickness, codes also address the proper fastening of the decking to the rafters or trusses. This includes the type of nails or screws to use, their length, and the spacing pattern, especially crucial in high-wind zones where proper Roof Deck Nailing Code prevents the roof from being peeled off by strong gusts. If your existing decking is damaged, rotted, or doesn't meet current code, a contractor will likely recommend Roof Decking Replacement Cost as part of your project, as it's impossible to build a code-compliant, long-lasting roof on a faulty foundation.
Underlayment and Ice-and-Water Shield Specifications
Think of underlayment as your roof's secondary water barrier, a crucial layer of protection installed directly on the roof decking before the shingles go down. Building codes typically mandate the use of underlayment, and the specific type and installation requirements can vary significantly by climate and local regulations. Traditionally, felt paper was the standard, but modern Synthetic vs Felt Underlayment Cost options are now widely used and often preferred for their durability and moisture resistance.
For many areas, a single layer of asphalt-saturated felt or synthetic underlayment is sufficient. However, in regions prone to ice dams, which are common in colder climates like the Northeast or Midwest, building codes will usually require an Ice and Water Shield Explained. This is a self-adhering, waterproof membrane that provides superior protection against water penetration caused by ice backups or wind-driven rain. Codes specify where the ice and water shield must be installed – typically along the eaves, extending a certain distance up the roof slope (often 24 inches past the interior wall line), in valleys, and around all penetrations like skylights and chimneys. These requirements are essential because they prevent costly water damage to your attic and interior ceilings, which can occur even with perfectly installed shingles if ice dams form.
Shingle Types, Nailing, and Wind Resistance
The asphalt shingles themselves are heavily regulated by building codes to ensure they provide adequate protection and longevity. Not just any shingle will do! Codes will often specify minimum standards for shingle fire ratings, ensuring they meet certain safety benchmarks. For instance, in areas prone to wildfires, higher fire ratings might be mandated. There are also different 3-Tab vs Architectural Shingle Cost Compared and each type has specific code considerations. Architectural shingles, for example, are generally more robust and come with higher wind ratings.
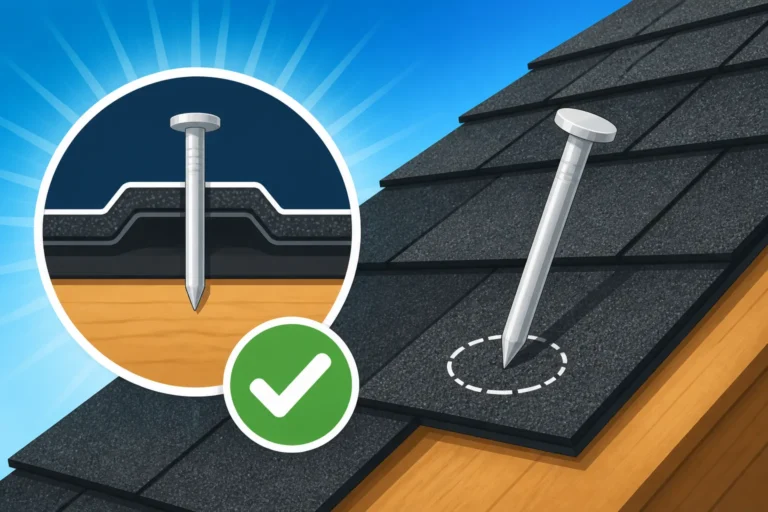
Perhaps one of the most critical code requirements for asphalt shingles revolves around nailing patterns and wind resistance. The IRC generally calls for four nails per shingle, but this is a minimum. In high-wind areas, like coastal regions, local codes often require High-Wind Nailing Cost Premium, specifying six nails per shingle, or even specialized nailing guns and techniques to ensure the shingles can withstand extreme wind uplift pressures. Wind resistance is also influenced by the shingle's sealant strip, which needs proper heat to activate and bond the shingles together. Codes ensure these installation practices are followed so that your roof can stand up to Mother Nature. Without adherence to these nailing specifics, your beautiful new roof could be flying off your home during the first major storm, leading to extensive damage and potential insurance headaches.
Flashing and Drip Edge Standards
These unsung heroes of your roofing system are absolutely critical for preventing water intrusion at vulnerable points. Flashing refers to thin pieces of impervious material, usually metal, installed to divert water away from critical areas of the roof, such as valleys, chimneys, skylights, vent pipes, and where the roof meets a wall. Drip edge is a metal flashing installed along the eaves and rake edges of the roof to direct water away from the fascia and into the gutters. Both are mandated by building codes for very good reasons.
Codes specify the material, gauge, and installation methods for Roof Flashing Explained. For instance, step flashing is required where a roof meets a vertical wall, with each shingle layer overlapping a piece of flashing. Counter-flashing is often used around chimneys, extending over the step flashing to create a watertight seal. Drip Edge: What It Does is also crucial, as it prevents water from wicking back under the shingles and damaging the fascia or soffit. Codes will dictate its proper overlap with the underlayment and how it should be fastened. Neglecting proper flashing or drip edge installation is a primary cause of roof leaks and premature deterioration of your home's exterior, so strict adherence to these code requirements is non-negotiable for a truly watertight and durable roof.
Ventilation and Drainage: Critical Code Considerations
When you think about a roof, you probably picture shingles. But what’s happening under those shingles, and how water leaves the roof, is just as important, if not more so, for the roof's health and your home's energy efficiency. Building codes pay extremely close attention to ventilation and drainage because these systems are vital for preventing moisture issues, premature roof deterioration, and even structural damage.
Attic Ventilation Requirements
Proper attic ventilation is not just a suggestion; it’s a critical component of building code compliance, especially for asphalt roofing systems. An inadequately ventilated attic can lead to a host of problems. In summer, trapped hot air can cause the attic temperature to soar, literally baking your asphalt shingles from below and drastically shortening their lifespan. This excessive heat also radiates down into your living spaces, making your air conditioning work overtime and driving up energy bills. In winter, inadequate ventilation can lead to moisture buildup from household activities (showers, cooking, breathing) rising into the attic. This moisture, when it meets cold roof sheathing, condenses, leading to mildew, mold, and even wood rot in your rafters and decking.
Building codes, particularly the IRC, specify minimum requirements for net free ventilation area (NFVA) in the attic. This typically means a ratio, like 1/300, which indicates that for every 300 square feet of attic floor space, you need one square foot of vent opening. This ventilation should ideally be balanced, meaning an equal amount of intake ventilation (typically through Soffit and Fascia Explained) and exhaust ventilation (often through Ridge Vent vs Box Vent vs Turbine or other roof vents). A balanced system allows cooler, drier air to enter low at the eaves and push hot, moist air out at the ridge, creating a continuous airflow. Your contractor should calculate these requirements precisely, as too little or unbalanced ventilation can void shingle warranties and lead to serious long-term issues.
Ridge Vents, Soffit Vents, and Exhaust Systems
To achieve that crucial balanced attic ventilation, building codes provide specific guidelines for the types and placement of vents. Soffit vents, located under the eaves, serve as the primary intake for fresh air. Codes ensure they are properly sized and unobstructed to allow for continuous airflow into the attic. If your home's soffits are enclosed, a contractor might recommend installing continuous soffit vents or individual rectangular vents to meet the intake requirements.
For exhaust, ridge vents are often preferred and are a common feature on modern asphalt roofs. A continuous ridge vent runs along the peak of the roof, allowing warm air to escape uniformly. Codes govern the installation of these vents, ensuring they are properly sealed against water intrusion and provide the necessary net free area. Other exhaust options, like static box vents or turbine vents, are also covered by codes, with specifications on their number and distribution across the roof. In some cases, especially for larger or more complex roof designs, powered attic fans (either electric or solar-powered) might be used in conjunction with passive vents to enhance airflow. Regardless of the type, codes emphasize the need for adequate and balanced ventilation to protect the roof structure and enhance the overall energy efficiency of the home. Getting Cost of Ridge Vent Installation right is more than just aesthetics; it's about making your roof last.
Proper Roof Drainage and Gutter Codes
Beyond just ventilation, how water is effectively shed from your roof is another major area covered by building codes. Improper roof drainage can lead to water pooling, which accelerates shingle deterioration, encourages moss and algae growth, and can eventually lead to leaks and structural damage. The primary components involved in drainage are the roof pitch, drip edge, and gutters.
Building codes set minimum roof pitch requirements for asphalt shingles, typically around 2:12 (meaning for every 12 horizontal feet, the roof rises 2 feet). Below this pitch, standard asphalt shingles are generally not recommended or require special installation techniques and additional underlayment layers to prevent water penetration, as water drains too slowly. This is why you won't typically see standard asphalt shingles on flat roofs; they simply aren't designed for it. Drip edge, as mentioned before, is mandated by codes to ensure that water running off the roof edge is directed cleanly into the gutters, preventing it from running down the fascia or behind the siding.
And speaking of gutters, while not strictly part of the "roof" per se, they are an integral part of the overall roof drainage system and are often subject to local building codes. These codes might dictate minimum gutter sizes based on roof square footage, proper pitch to ensure water flows efficiently, and secure fastening methods to prevent them from detaching during heavy rains or snowmelt. Without proper drainage, even the best-installed asphalt roof will face premature failure, making code compliance in this area vital for the long-term health of your home.
When and How to Get a Roofing Permit
The topic of roofing permits can cause a lot of anxiety for homeowners. It often feels like an extra layer of bureaucracy and cost. However, understanding when a permit is necessary and how to obtain one is crucial for protecting your investment, ensuring code compliance, and avoiding potential legal and financial headaches. Think of it as your official stamp of approval that the work is done correctly and safely.
The Permit Application Process
The first and most important step in any major roofing project is determining if you Do You Need a Permit to Replace a Roof. In almost all jurisdictions across the United States, a permit is required for a full roof replacement. For repairs, it can be more nuanced: minor repairs (like replacing a few shingles) usually don't need one, but extensive repairs that involve replacing a significant portion of the roof decking or a large area of shingles often do. Your local building department is the ultimate authority, and their website or a quick phone call can clarify specific requirements in your area.
Once you know a permit is needed, the process typically involves submitting an application to your city or county building department. This application will require details about the project, including the type of roofing materials (e.g., asphalt shingles), the scope of work, and often a diagram or description of your existing roof and proposed changes. Most importantly, the permit application will require information about your chosen contractor, including their license number and proof of insurance. A reputable contractor will handle the permit application process for you, as they are familiar with the requirements and paperwork. They'll know exactly Who Pulls the Roofing Permit: You or the Contractor. You should never be pressured to pull the permit yourself unless you are doing the work yourself, as this can transfer liability to you unnecessarily. Expect a permit fee, which varies widely by location but generally covers the administrative costs and the subsequent inspections.
Understanding Roofing Permit Inspections
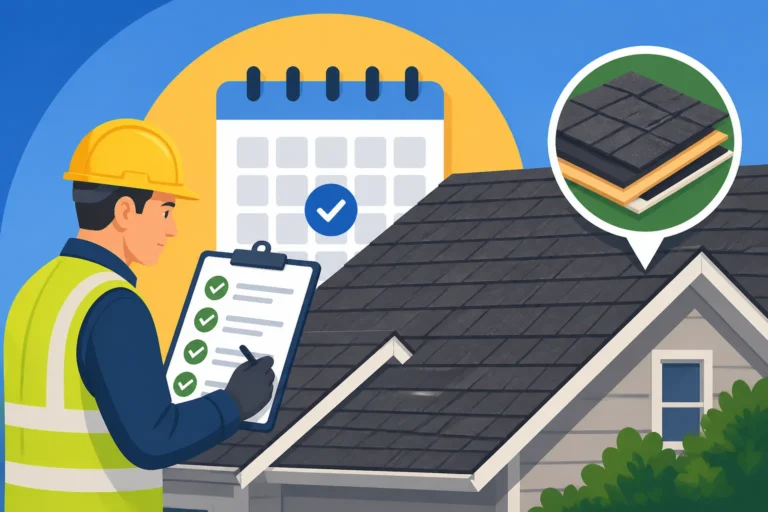
Obtaining a permit isn't just about paying a fee; it's about triggering the inspection process. Building inspections are a vital part of ensuring the work meets established safety and quality standards. For a roof replacement, you'll typically have at least one, and sometimes two, inspections.
The first might be a "mid-roof" or "decking" inspection. This occurs after the old shingles have been torn off but before the new underlayment and shingles are installed. The inspector will check the condition of the roof decking, look for any damage or rot that needs addressing (and verify repairs if made), ensure proper fastening of the decking, and confirm the correct installation of things like drip edge and ice and water shield. This inspection is critical because it's the only time these underlying layers are fully visible. If this inspection isn't passed, the contractor will need to make corrections before proceeding. The second inspection, usually a "final" inspection, occurs after the entire roofing system is complete. The inspector will review the visible components – the new shingles, flashing around penetrations, vent installations, and ensure everything is properly installed and watertight according to code. Passing these inspections is your assurance that the job was done correctly and safely.
Consequences of Skipping a Permit
It might be tempting to skip the permit process to save time or money, but the What Happens If You Skip a Roofing Permit can be severe and far outweigh any perceived benefits. First and foremost, if your local building department discovers unpermitted work, they can issue a stop-work order, forcing your project to halt immediately. You'll then likely face fines, potentially substantial ones, and be required to get the necessary permits retroactively, which can be a more arduous and expensive process than doing it correctly from the start. You might even have to expose parts of the roof for inspection, undoing completed work.
Beyond immediate penalties, skipping a permit can create significant issues when you try to sell your home. Most home buyers' inspectors and mortgage lenders will look for permits for major renovations like a roof replacement. If no permit exists, it can raise red flags, delay or even derail the sale, and force you to address the issue before closing. Furthermore, as discussed earlier, unpermitted work can complicate or even invalidate insurance claims. If a storm damages a roof installed without a permit or inspection, your insurance company might deny coverage. In essence, while skipping a permit might seem like a shortcut, it's a risky gamble that can lead to costly fines, legal complications, and devalued property, making it a decision that is almost never worth the risk.
Common Regional Code Variations and Special Requirements
It would be wonderfully simple if roofing codes were uniform across the entire United States, but alas, that's just not the reality. The geographic diversity of our country, from sunny deserts to snowy mountains and hurricane-battered coastlines, necessitates a flexible code system that addresses specific regional challenges. What’s considered standard practice for asphalt roofing in Ohio might be entirely inadequate for a home in South Florida or a mountain cabin in Colorado. Understanding these regional variations is key to ensuring your roof is truly robust and resilient against local climate threats.
High-Wind and Hurricane Zones
Nowhere are roofing codes more stringent and vital than in high-wind and hurricane zones. States like Florida, Texas, Louisiana, and parts of the Carolinas experience tropical storms and hurricanes regularly, which can generate sustained winds well over 100 mph, capable of tearing roofs right off homes. As a result, building codes in these regions are explicitly designed to enhance a roof's resistance to extreme wind uplift.
For asphalt roofing, this typically means several enhanced requirements. One of the most common is a mandate for more nails per shingle. While the IRC might call for four nails, jurisdictions in hurricane zones often require six nails per shingle, strategically placed to maximize holding power. The use of roofing cement or additional adhesive at shingle tabs can also be mandated. Beyond the shingles themselves, codes will often specify enhanced fastening schedules for the roof decking to the rafters or trusses, using stronger hurricane clips or straps to create a continuous load path that ties the roof securely to the foundation. Cost of an Impact-Resistant Roof Upgrade often becomes a necessity, not just an option. Furthermore, these codes might require specific types of Impact-Resistant Shingle Cost or Class 4 shingles, which are engineered to withstand higher wind speeds and debris impact. Compliance in these areas isn't just about avoiding fines; it's about safeguarding your home and family from devastating natural disasters.
Hail-Prone Regions and Impact Resistance
Beyond wind, some parts of the country frequently experience severe hailstorms. The "Hail Alley" that stretches across states like Texas, Oklahoma, Kansas, Colorado, and Nebraska, for instance, sees millions of dollars in roof damage annually. In these hail-prone regions, building codes, or sometimes insurance incentives, strongly encourage or even mandate the use of impact-resistant roofing materials.
These codes often revolve around specifying Class 4 Shingle Roof Cost or other impact-resistant asphalt shingles. Class 4 is the highest rating for impact resistance under UL 2218, a standard test that involves dropping steel balls from varying heights onto a shingle. While standard asphalt shingles might bruise or fracture under moderate hail, Class 4 shingles are engineered with rubberized asphalt or woven fiberglass mats to absorb impact energy, resisting damage from hail up to 2 inches in diameter. Some cities or counties in hail-prone areas might have local ordinances that require Class 4 shingles for new construction or roof replacements, especially if a certain percentage of the roof's life has passed or after a major hail event. Even where not strictly mandated, homeowners in these regions are often incentivized by insurance companies, with many offering Do Class 4 Shingles Lower Insurance Premiums to homeowners who install Class 4 rated roofs. This not only saves money but provides invaluable peace of mind knowing your roof is better equipped to withstand nature's fury.
Cold Climates and Ice Barrier Rules
For homeowners in the northern states and other cold climates where significant snowfall and freezing temperatures are common, ice dams are a persistent and destructive threat. Ice dams form when heat escapes from the attic, melts snow on the upper parts of the roof, and that water then refreezes at the colder eaves, creating a barrier that prevents meltwater from draining. This trapped water can then back up under shingles and leak into the attic and walls, causing severe damage.
To combat this, building codes in these regions have stringent Ice Barrier Code Requirements. The IRC generally requires ice and water shield, a self-adhering modified bitumen membrane, along eaves in areas where there is a history of ice damming. However, in states like Minnesota, Wisconsin, or New York, local codes often expand these requirements significantly. For instance, the ice and water shield might be mandated to extend two feet inside the heated wall line of the building, which often translates to six feet or more up the roof slope from the edge. It’s also often required in valleys, around chimneys, skylights, and other roof penetrations – basically any area where water might collect or be prone to backing up. This specialized underlayment forms a watertight seal directly to the roof decking, acting as a last line of defense against water penetration even if ice dams form. Without proper ice barrier installation according to code, a winter roof can become a major source of leaks and damage, proving that not all roof installations are created equal for every climate.
Working with Contractors and Ensuring Code Compliance
Navigating the world of roofing building codes can be daunting for any homeowner. That's why choosing the right roofing contractor isn't just about getting a good price; it's about partnering with a professional who is intimately familiar with all applicable codes and committed to upholding them. Your contractor is your primary line of defense against code violations and future problems.
The Importance of Licensed and Insured Contractors
This is perhaps the single most critical piece of advice for any roofing project: always, always hire a How to Choose a Roofing Contractor who is licensed and properly insured. A contractor's license, issued by the state or local municipality, signifies that they have met certain competency requirements, passed exams, and demonstrated knowledge of building codes. It’s a formal acknowledgment that they understand the technical aspects of roofing and are committed to professional standards. Without a license, you have little recourse if something goes wrong.
Equally important is ensuring your contractor carries comprehensive insurance: general liability insurance and workers' compensation insurance. General liability protects you, the homeowner, if the contractor or their crew causes damage to your property during the project (e.g., a dropped shingle breaks a window). Workers' compensation insurance protects the roofing crew in case of an injury on your property. If an uninsured contractor's worker gets hurt on your roof, you, as the homeowner, could be held personally liable for their medical bills and lost wages. This is not a hypothetical; it's a very real and financially devastating risk. A reputable contractor will readily provide proof of both their license and insurance, and you should always verify these documents yourself. This due diligence is crucial to protect yourself from liability and ensure the quality of the work.
Verifying Permits and Inspections
Once you've chosen a licensed and insured contractor, the next step in ensuring code compliance is to confirm that they obtain the necessary permits. As mentioned earlier, a permit is typically required for a full roof replacement. Your contractor should handle the entire permit application process. Make sure you ask to see the physical permit before any work begins. It should be posted conspicuously at the job site, usually in a window or on a sign. This permit is your official record that the project has been approved by the local building authority.
Furthermore, you need to understand the inspection schedule. Your contractor should inform you about when inspections will occur (e.g., decking inspection, final inspection). It's a good practice to be present during these inspections, if possible, or at least to follow up with your contractor about the results. A passed inspection means the local building official has verified that the work, up to that point, meets all applicable codes. Never make final payment until all inspections are passed and the permit is officially closed out. This simple step protects you from hidden issues and ensures that your roofing project is fully compliant and documented. Learning How to Read and Compare Roofing Estimates can also help you spot whether permit fees are included and handled by the contractor.
What to Do If Codes Aren't Met
Despite your best efforts, sometimes things go wrong. What if you suspect your contractor isn't following codes, or an inspector points out deficiencies? The first step is always to communicate directly with your contractor. Bring your concerns to their attention clearly and politely, referencing specific code requirements if you know them. A good contractor will be receptive and willing to explain or correct any issues.
If your concerns aren't addressed or if the inspector fails the work, the contractor is legally obligated to correct the deficiencies until the work passes inspection. This is where a clear contract is vital, outlining the scope of work, adherence to codes, and payment schedule. Do not make further payments until the issues are resolved and inspections are passed. If the contractor is unresponsive or refuses to fix code violations, you have several avenues. You can contact your local building department for guidance; they can often mediate or enforce corrections. You can also file a complaint with the state licensing board against the contractor. In more severe cases, legal action might be necessary. This is why vetting your contractor thoroughly from the outset, verifying their license and insurance, and understanding the permit and inspection process is paramount. It’s always easier to prevent a problem than to fix one after the fact.
Disclaimer
Please remember that building codes are complex and can change frequently. The information provided in this guide is intended for general informational purposes only and does not constitute professional advice. Always consult with your local building department or a qualified, licensed roofing contractor to confirm the specific codes and regulations applicable to your area and your project before starting any roofing work.