Drip Edge: What It Does
Many homeowners spend countless hours researching shingles, debating colors, and comparing warranties, only to overlook some of the most fundamental yet critical components of their roofing system. One such unsung hero, the drip edge, plays a vital role in protecting your home from water damage, yet it's often an afterthought or entirely misunderstood. This comprehensive guide will shed light on exactly what drip edge is, why it's indispensable, and how it contributes to the long-term health and integrity of your asphalt roof.
What Exactly is Drip Edge?
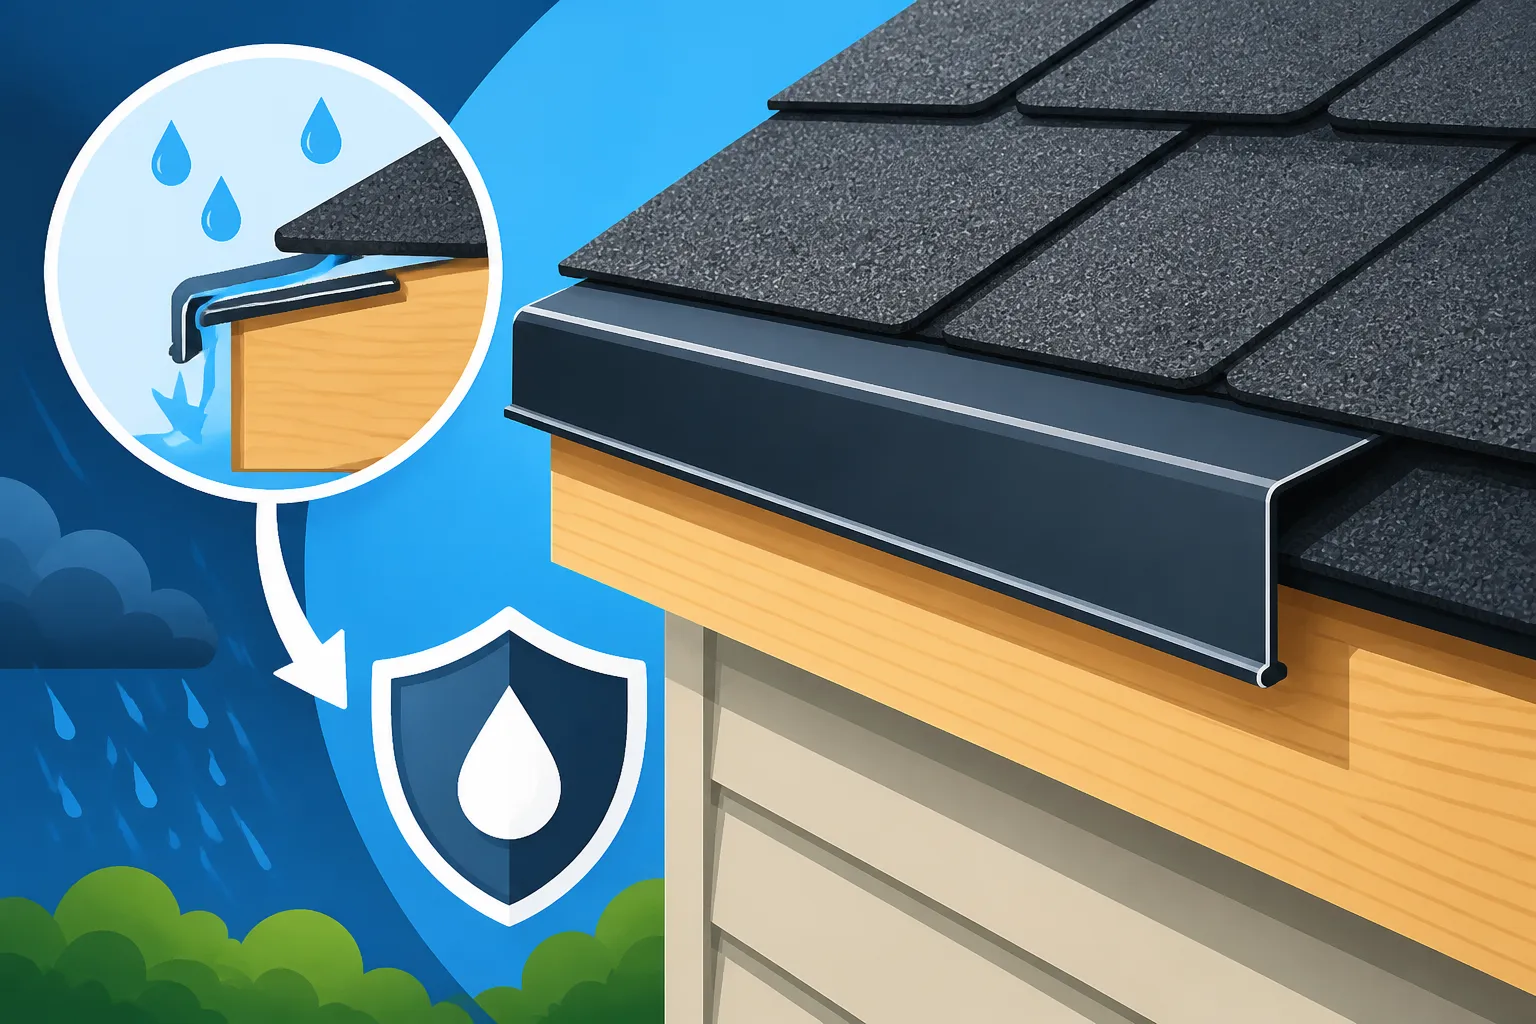
Imagine the edge of your roof, where the shingles end and the roofline meets the fascia board. This is where the drip edge comes into play. Simply put, a drip edge is a non-corrosive metal flashing installed along the edges of your roof. Its primary purpose, as its name cleverly implies, is to control the flow of water, making sure it "drips" away from your house, rather than running down and causing damage to vulnerable areas. It's a small detail, but one that makes a monumental difference in protecting your biggest investment.
When you're looking at the complete system that makes up your roof, from the decking to the shingles, it’s easy to get lost in the bigger, more visible parts. However, understanding the smaller, integral pieces like the drip edge is crucial. It’s part of the foundational layers that ensure everything else works as it should. Without it, even the most expensive, high-quality shingles would struggle to perform their best in a heavy downpour.
The Unsung Hero of Your Roof's Edge
Think of the drip edge as the guardian of your roof's perimeter. Typically made from aluminum, galvanized steel, copper, or even vinyl, it’s a thin, L-shaped, T-shaped, or F-shaped piece of material. It's meticulously installed at all eaves and rake edges of the roof deck, extending slightly beyond the fascia board. This seemingly simple piece of metal is carefully placed before the underlayment and shingles go down on the eaves, and often over the underlayment on the rake edges, to ensure a seamless barrier. Its subtle presence belies its immense importance in your roof's overall structure and function.
The way it’s shaped and positioned is no accident. The slight outward kick or hem at the bottom of the drip edge is specifically designed to create a small gap. This gap is the secret to its success, ensuring water can't just wick its way back onto the roof deck or down the fascia. It’s a purposeful design that directs water precisely where it needs to go: safely into your gutters or away from your home's siding and foundation.
More Than Just a Metal Strip
Many homeowners might dismiss drip edge as just another "extra" a roofer is trying to sell, but that couldn't be further from the truth. It's a fundamental component of proper roofing and weatherproofing. Beyond diverting water, it offers additional layers of protection that are absolutely vital for extending the lifespan of your roof and preventing costly structural issues. It acts as a shield against the elements, preventing everything from rot to pest infestations.
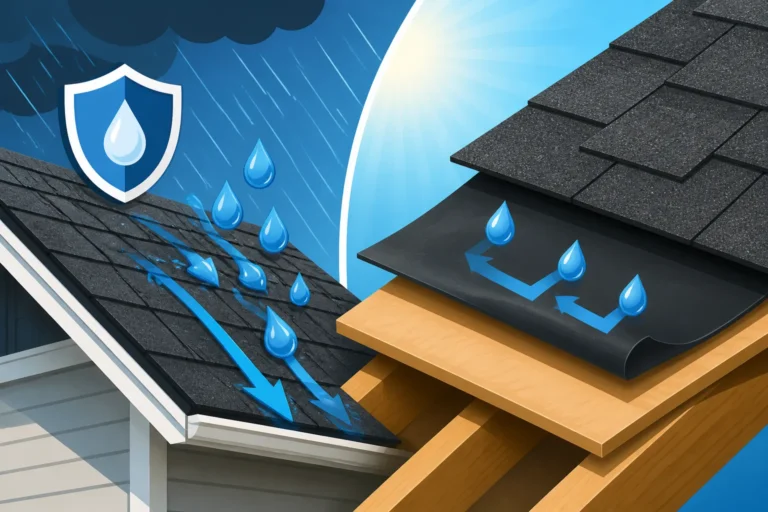
Without a drip edge, water runoff, especially during heavy rains or melting snow, wouldn't have a clear path. It would cling to the underside of the shingles and the roof deck, seeping into the fascia board and potentially rotting the wood. This can lead to a domino effect of problems, including damaged siding, compromised structural integrity, and even water intrusion into your attic or walls. It truly is a silent protector, diligently working to keep your home dry and sound.
The Primary Functions of Drip Edge
Now that we know what drip edge is, let’s really dig into the why. Its functions are diverse and each one is critical for the long-term health of your roof and your entire home. From protecting delicate wood components to enhancing the effectiveness of your gutters, the drip edge plays multiple roles you might not have even considered.
Directing Water Away from Fascia and Foundation
This is arguably the most recognized function of a drip edge. When rain falls or snow melts on your roof, the water naturally flows downwards over the shingles. Without a drip edge, this water would tend to curl around the edge of the roof deck and run directly down the fascia board. Over time, this constant exposure to moisture can cause the fascia to rot, warp, and deteriorate. Nobody wants to deal with rotting wood around their beautiful home!
By installing a drip edge, you create a barrier that extends past the fascia, effectively breaking the surface tension that would otherwise allow water to cling to the roof edge. The water then "drips" cleanly off the edge and into your gutters, or directly to the ground if gutters aren't present. This protection isn't just for the fascia; it also prevents water from saturating the ground directly next to your foundation, which could lead to soil erosion, foundation cracks, and even basement flooding. It's a crucial step in ensuring your entire home is protected from the damaging effects of water.
Protecting the Roof Deck Edges
The roof deck, typically made of plywood or OSB (Oriented Strand Board), is the structural base for your shingles. While strong, it's highly susceptible to water damage, especially at its exposed edges. These edges, if left uncovered, can absorb moisture from splashing rain or capillary action, leading to swelling, delamination, and rot. This kind of damage can seriously compromise the structural integrity of your entire roof.
A properly installed drip edge acts as a protective shield for these vulnerable edges. It covers and seals the exposed edge of the roof deck, preventing water from seeping into the wood. This is especially vital at the eaves, where water tends to accumulate. By keeping the roof deck dry, the drip edge helps to prevent costly structural repairs down the line, ensuring that the base of your roof remains strong and stable for decades to come. Think of it as putting a protective case on your phone; it guards the delicate parts from everyday wear and tear and potential damage.
Supporting the Starter Shingles
The starter shingles are the first course of shingles installed along the bottom edge (eave) of your roof. They are specifically designed to provide a sealed, continuous edge, preventing water from getting underneath the main shingle courses. However, because they are the very first layer, they need proper support to ensure they lay flat and create an effective seal.
This is where the drip edge again proves its worth. On the eaves, the drip edge is installed directly onto the roof decking, under the underlayment and starter shingles. It provides a firm, level surface that the starter shingles can rest on. This solid base helps prevent the starter shingles from drooping or sagging over the edge, ensuring they maintain a tight seal and effectively shed water. This contributes significantly to the overall effectiveness of the entire asphalt shingle roof system, creating a truly watertight barrier. For a deeper understanding of how all these components work together, you might want to read about How Asphalt Shingles Are Installed: Step by Step.
Types of Drip Edge and Their Applications
Just like there isn't a "one-size-fits-all" shingle, drip edge also comes in various types and materials, each suited for different applications and climates. Understanding these differences can help you appreciate why your roofing contractor recommends a particular type for your home.
Common Drip Edge Profiles
The shape of the drip edge is crucial to its function. While they all serve the same basic purpose, different profiles offer specific advantages:
- Type C (L-Shaped): This is the most common and basic type. It features a simple L-shape with a small flange that extends down into the gutter. It’s effective for standard roof applications and is often the most economical choice. It's typically installed at the eaves, under the underlayment.
- Type D (T-Shaped or Hemmed): Also known as "T-style" or "f-style," this profile has a longer, more pronounced drip leg that extends further down, sometimes with a hemmed bottom edge for added rigidity and a cleaner look. This type is excellent for directing water well away from the fascia and can provide a slightly more robust finish. It's particularly useful on rake edges (the sloped sides) where it's often installed over the underlayment, and on eaves, under the underlayment. The longer drip leg helps prevent water from curling back and causing damage, especially in areas prone to heavy rain.
- Type F: This less common type features a longer, flat deck flange that extends further onto the roof deck, providing more coverage. It's often used when replacing old roofs where the existing fascia might be slightly damaged or uneven, offering a broader surface to secure the flashing. It can also be beneficial in high-wind areas for added stability.
Your choice of profile might depend on your local building codes, the style of your home, and your roofer's preference for ease of installation and effectiveness. A good roofing contractor, like those found through platforms like Modernize, will explain which type is best suited for your specific roof and why.
Material Matters
The material used for your drip edge impacts its durability, appearance, and cost. Here are the most common options:
- Aluminum: This is the most popular choice due to its excellent corrosion resistance, lightweight nature, and affordability. Aluminum drip edge comes in various colors, allowing it to blend seamlessly with your fascia or roof color. It's also easy to work with and readily available.
- Galvanized Steel: Steel drip edge is more rigid and durable than aluminum, making it a good choice for areas prone to high winds or where extra strength is needed. However, it's heavier and can be more expensive. It's coated with zinc to prevent rust, but if the coating is scratched, rust can eventually form.
- Copper: For homeowners seeking a high-end, classic aesthetic, copper drip edge is an exquisite choice. It's exceptionally durable and develops a beautiful patina over time. However, copper is significantly more expensive than aluminum or steel and is often chosen for historical homes or custom builds where the overall aesthetic justifies the investment.
- Vinyl (PVC): While less common for the entire roof, vinyl drip edge can be found, particularly for shed roofs or smaller structures. It's lightweight, inexpensive, and impervious to rust, but it's not as durable as metal and can become brittle over time, especially in extreme temperatures.
The choice of material often boils down to a balance between cost, durability, and aesthetics. For instance, in coastal areas, aluminum or copper might be preferred over galvanized steel due to salt air corrosion concerns. When discussing your options with your roofer, be sure to ask about the pros and cons of each material in the context of your climate and budget. You can learn more about how all these components add up in the Roof Anatomy: Parts of an Asphalt Shingle Roof article.
Why Drip Edge is Non-Negotiable (and Often Required)
It's clear by now that drip edge isn't just an optional add-on; it's a fundamental part of a robust roofing system. Its benefits extend far beyond simply diverting water, contributing significantly to your home's protection and value. In fact, in many places, it's not just a recommendation—it's the law!
Protecting Your Investment
Your roof is one of the most critical components of your home, protecting everything underneath it. Investing in a new asphalt shingle roof is a significant undertaking, and skipping a relatively inexpensive component like drip edge would be a false economy. The cost of installing drip edge is minimal compared to the potential expenses of repairing rotted fascia, damaged sheathing, or even foundation issues caused by unchecked water flow. Think of it this way: for a small upfront cost, you're buying a long-term insurance policy against common and very costly water damage problems.
A properly installed drip edge extends the life of not just your roof, but also your home's exterior paint, siding, and foundation. It ensures that water is consistently channeled away, preventing deterioration, mold growth, and pest infestations in vulnerable areas. Over time, this protection translates into significant savings on maintenance and repairs, making it an incredibly smart investment. Many homeowners are surprised to learn the Cost of New Flashing and Drip Edge is quite reasonable, especially considering the protection it provides.
Building Code Compliance
This is where drip edge often moves from a "good idea" to a "must-have." Many local building codes, guided by national standards like the International Residential Code (IRC), now mandate the installation of drip edge on asphalt shingle roofs. This requirement isn't arbitrary; it's based on decades of accumulated knowledge about what truly makes a roof durable and resistant to common forms of damage.
For example, the IRC generally requires drip edge at the eaves and rake edges of asphalt shingle roofs. The specific requirements can vary slightly by jurisdiction, including the size, material, and method of attachment. In high-wind areas, there might be stricter rules regarding how it's fastened to ensure it can withstand severe weather. Ignoring these codes can lead to failed inspections, fines, and even complications with your homeowner's insurance policy should a problem arise. Always ensure your roofing contractor is up-to-date with your local Drip Edge Code Requirements and pulls all necessary permits for the job.
Enhancing Curb Appeal
While primarily functional, drip edge also contributes to the aesthetic appeal of your home. A neat, clean edge on your roofline provides a finished look that can elevate your home's exterior. It hides the raw edges of the roof decking and underlayment, providing a clean transition between the roof and the fascia.
Consider a home without drip edge: the exposed edge of the roof deck can look unfinished and rough. Over time, water staining and deterioration will make it look even worse. With a precisely installed drip edge, especially one color-matched to your fascia or trim, your roof will have a crisp, professional appearance that adds to your home's overall curb appeal. It's a subtle detail, but one that contributes to a well-maintained and attractive home, which can even impact its resale value.
Installation Considerations and Best Practices
Like any critical component, the effectiveness of a drip edge hinges on its correct installation. Even the highest quality material won't perform as intended if it's improperly installed. This is why choosing a reputable and experienced roofing contractor is paramount.
Proper Placement and Overlap
The sequence and positioning of drip edge are specific and critical. On the eaves (the lower edges of the roof that run parallel to the ground), the drip edge is typically installed before the underlayment and any ice and water shield. It's fastened directly to the roof deck, with its lowest flange extending into or over the gutter. This ensures that any water that gets under the shingles or underlayment is still directed away.
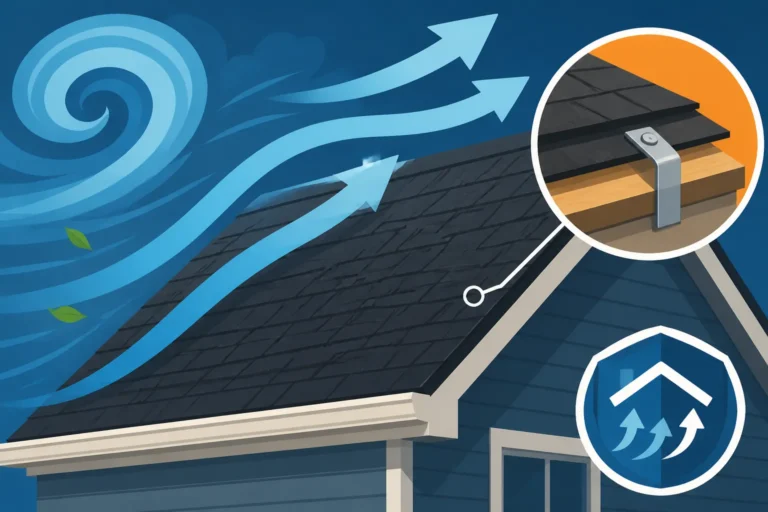
On the rake edges (the sloped sides of the roof), the drip edge is usually installed after the underlayment but before the shingles. This placement helps to hold the underlayment down securely and provides a clean, finished edge for the shingles. Proper overlap between sections of drip edge is also essential, typically 2 inches, to ensure a continuous barrier without gaps for water intrusion. The nailing pattern is also important; fasteners should be placed every 4-8 inches to secure it firmly against wind uplift. For a detailed look at this process, check out How Drip Edge Is Installed.
Coordinating with Underlayment and Flashing
Drip edge isn't a standalone component; it's part of a complete, integrated roofing system. Its installation must be coordinated perfectly with other elements like the roof underlayment and various types of flashing. The underlayment, whether it's synthetic or felt, is installed over the drip edge at the eave to create a continuous waterproof layer. This layering ensures that if water breaches the shingles, it hits the underlayment and is directed over the drip edge and away from the house. If you're wondering what other protective layers are involved, take a look at What Is Underlayment and Why It Matters.
Similarly, drip edge must work in harmony with other flashing, such as step flashing around chimneys or wall junctions, and valley flashing. The entire system is designed to shed water efficiently from every part of the roof. A skilled roofing contractor understands this intricate dance and ensures all components are installed in the correct order and with proper overlaps to create a truly watertight envelope. This attention to detail is what makes a roof truly resilient and ensures your home is protected from the elements for decades. When considering a roof replacement, it's vital to choose a contractor who prioritizes these details, and Modernize can help connect you with experienced professionals who understand the nuances of a proper installation.
Final Thoughts on Drip Edge
It’s easy to get caught up in the big decisions of a roof replacement – the shingle color, the brand (like GAF or Owens Corning), or even the overall Asphalt Roof Replacement Cost: Complete Breakdown. But neglecting the smaller, often unseen components like the drip edge can lead to big problems down the road. This unassuming metal strip is a workhorse, tirelessly protecting your home’s eaves, fascia, and foundation from the relentless assault of water.
A well-installed drip edge ensures proper water diversion, prevents rot, guards against pest intrusion, and maintains the structural integrity and aesthetic appeal of your home for years to come. It’s a testament to the fact that in roofing, every single component plays a vital role. So, next time you're thinking about your roof, remember the unsung hero that is the drip edge—it's silently doing a massive job keeping your home dry and safe. When you are looking to hire someone, be sure to ask them about their plan for these crucial components, it's one of the Questions to Ask a Roofing Contractor Before Hiring.
Disclaimer
This article is intended for informational purposes only and does not constitute professional advice. Always consult with a qualified and licensed roofing contractor for specific recommendations and installation services tailored to your property. Building codes and regulations vary by location, and it is the homeowner's responsibility to ensure compliance.