How Drip Edge Is Installed
Few things are as frustrating as seeing water damage creeping into your fascia or soffit, or worse, finding it pooling in your gutters after a heavy rain, all because of a tiny oversight during your roof's installation. It’s often the unsung heroes of your roofing system that prevent these headaches, and drip edge is certainly one of them. This comprehensive guide will walk you through exactly how drip edge is installed, demystifying this critical component and empowering you with the knowledge to ensure your home is properly protected.
Understanding Drip Edge and Its Crucial Role
When you're staring up at your roof, thinking about its components, the large, visible parts like shingles usually get all the attention. But just like a good supporting cast in a blockbuster movie, the smaller, often hidden elements are what truly make the whole system shine and keep your home dry. Drip edge is precisely one of those unsung heroes, silently working to safeguard the vulnerable edges of your roof.
What is Drip Edge, Anyway?
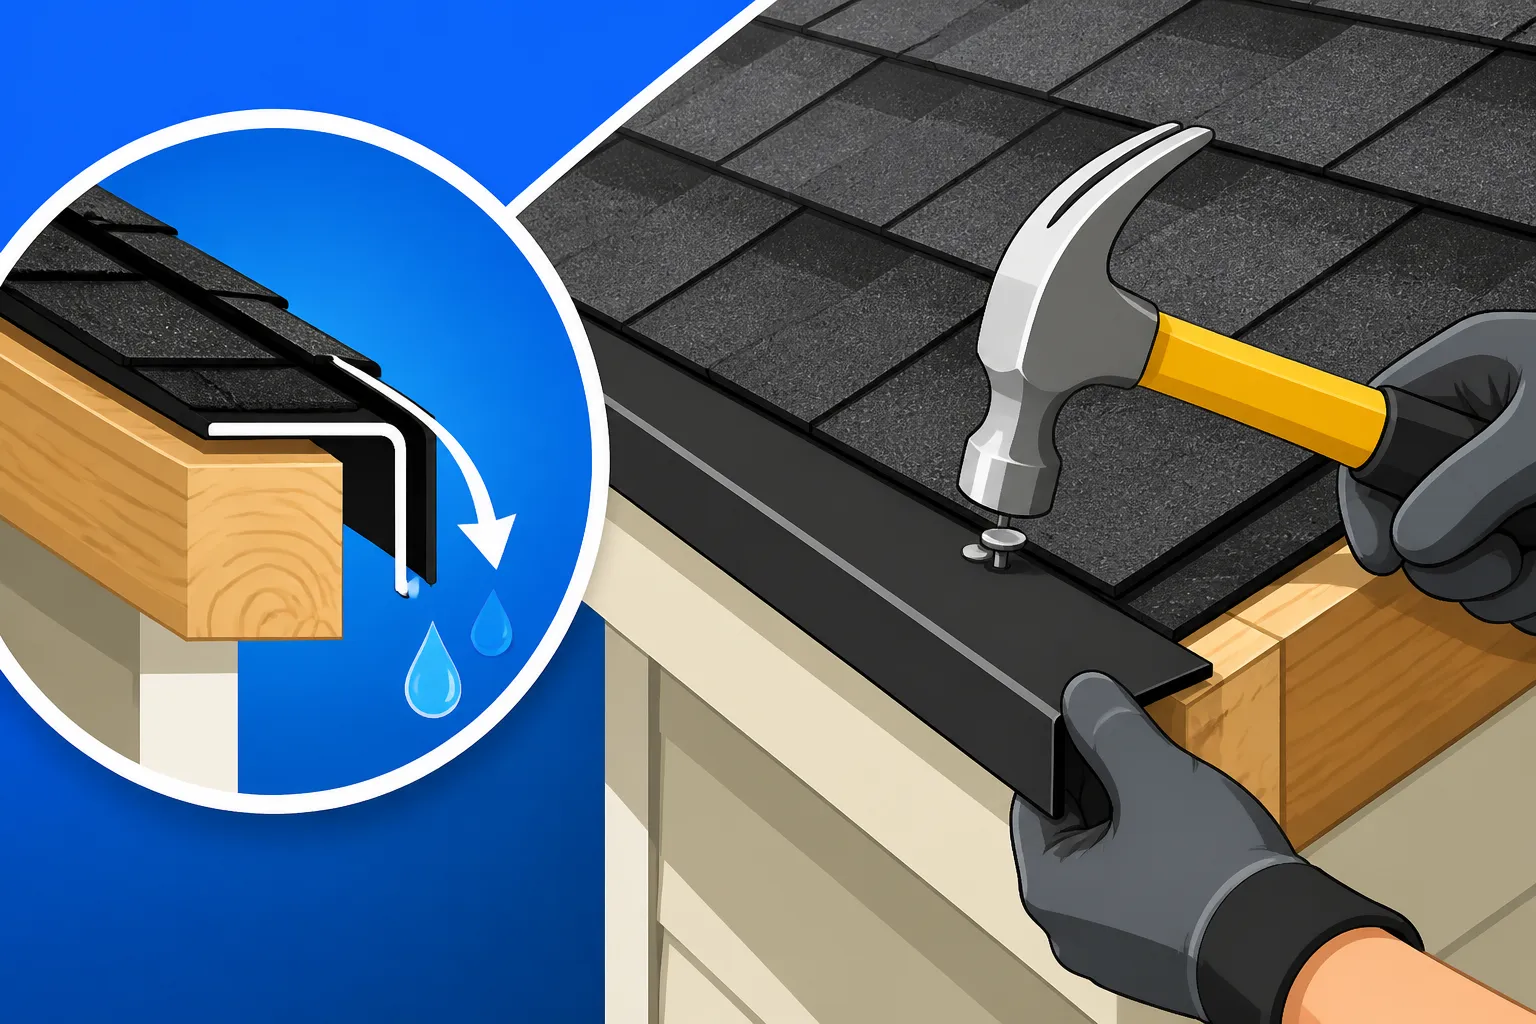
Let's break it down. Drip edge is essentially a metal flashing that's installed along the edges of your roof. It's designed with a small "drip" or "kick-out" at the bottom, creating a slight overhang that directs water away from your fascia and into your gutters. Think of it as a tiny, highly efficient water slide for rain. Without it, water would naturally cling to the underside of your roof edge, potentially seeping behind your gutters, rotting your fascia and soffit, and even causing damage to the roof decking itself. It sounds simple, but this little piece of metal performs a massive job in preventing water intrusion.
There are various styles of drip edge, often categorized by their profile: L-shaped (Type D), T-shaped (Type C), or F-shaped (Type B). The most common for residential asphalt roofing is the L-shaped or Type D profile, which has a vertical flange that sits against the fascia and a horizontal flange that lies flat on the roof deck. The specific shape you choose can depend on local building codes, your roof's design, and personal preference, but the core function remains the same: to create that protective barrier. If you're wondering Drip Edge: What It Does, it's all about ensuring water goes where it's supposed to go and not where it can cause damage.
Why Your Roof Needs Drip Edge
Now, you might be thinking, "Do I really need this? My old roof never had it." This is a common sentiment, especially for older homes built before drip edge became a more widely adopted standard or even a code requirement in many areas. The truth is, modern building codes increasingly mandate drip edge for very good reasons. Its absence leaves your roof's most vulnerable points exposed to the relentless assault of rain and melting snow. Without drip edge, water doesn't just flow off your roof; it has a tendency to curl back underneath the shingles and get into your roof's substructure.
Imagine a heavy downpour in your hometown, say, Atlanta, Georgia. Without drip edge, that torrent of water sheeting off your roof can quickly saturate your fascia boards, leading to rot and decay. This isn't just an aesthetic problem; rotten fascia can compromise the structural integrity of your roof edges and make it harder for your gutters to stay securely attached. It also leaves an open invitation for pests like wasps, birds, and even rodents to find their way into your attic. Over time, constant moisture can even lead to issues with your Roof Decking Replacement Cost if the plywood or OSB sheathing starts to delaminate or rot. Investing in proper drip edge installation is a small expense that offers enormous long-term protection, saving you from much bigger, costlier repairs down the road.
Tools and Materials You'll Need for Drip Edge Installation
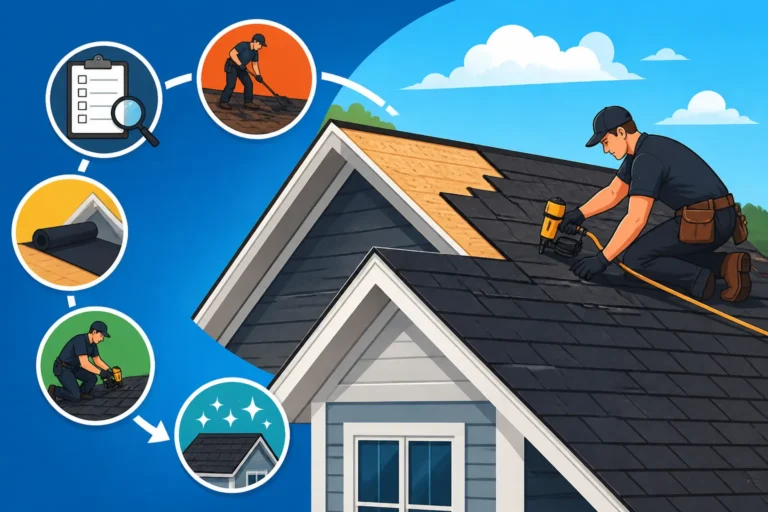
Before you even think about climbing a ladder, taking a moment to gather all your necessary tools and materials is paramount. This isn't just about efficiency; it's about safety and ensuring a quality installation. Trying to find a tool mid-job while you're precariously perched on a roof is a recipe for disaster. This preparation phase is crucial, whether you're tackling a small repair or undertaking a full roof replacement.
Essential Tools for a Clean Install
For a drip edge installation, you don't need a massive arsenal of specialized tools, but having the right ones will make the job much smoother and safer.
Here’s a basic checklist:
- Safety Gear: This is non-negotiable. A sturdy ladder, safety harness (especially for steep roofs), non-slip work boots, work gloves, and eye protection are absolute musts. No drip edge installation is worth an injury.
- Tin Snips (Aviation Snips): You'll need these to cut the drip edge sections to size and to make precise angle cuts for corners and overlaps. Red-handled snips (for cutting left) and green-handled snips (for cutting right) are incredibly helpful.
- Measuring Tape: Accurate measurements are key to minimizing waste and ensuring a professional finish.
- Utility Knife: Useful for scoring underlayment or trimming any errant materials.
- Caulk Gun and Sealant: For sealing joints and preventing water intrusion, especially at corner transitions.
- Hammer or Coil Nail Gun: To secure the drip edge. A nail gun will be faster and more consistent, but a hammer with roofing nails works perfectly fine.
- Chalk Line: To snap straight lines, ensuring your drip edge is perfectly aligned.
- Pry Bar (if removing old drip edge): For carefully taking off any existing components without damaging underlying structures.
A responsible roofing professional, perhaps one you might find through a service like Modernize, will always arrive with these tools and more, demonstrating their commitment to a high-quality job.
Choosing the Right Drip Edge
The drip edge itself comes in various materials, sizes, and profiles. Understanding these options helps you make an informed choice that suits your climate, budget, and aesthetic preferences.
- Materials:
- Aluminum: This is by far the most common choice. It’s lightweight, rust-proof, and comes in various colors to match your home's exterior. Aluminum drip edge is durable and relatively inexpensive.
- Galvanized Steel: A more robust option, galvanized steel drip edge offers superior strength and impact resistance. It’s often used in areas prone to severe weather or for commercial applications. However, it's heavier and typically more expensive.
- Copper: For high-end homes or specific architectural styles, copper drip edge offers unparalleled beauty and longevity. It develops a beautiful patina over time but comes at a significantly higher cost.
- Profile: As mentioned earlier, Type D (L-shaped) is standard for asphalt shingles on eaves, and Type F (F-shaped) is often used for rakes. Ensure the "drip" portion extends far enough to direct water effectively away from the fascia, usually about half an inch to an inch beyond.
- Color: Most aluminum drip edge is available in common roofing and trim colors like white, brown, black, and sometimes even custom options. Matching it to your fascia or roof color can significantly improve curb appeal.
Choosing the appropriate drip edge is as important as its installation. You'll want to consider local building codes which may specify certain materials or profiles, especially in high-wind zones or areas with heavy snowfall. Remember, Drip Edge Code Requirements are there for a reason – to ensure your home is adequately protected and up to current safety standards.
Step-by-Step Drip Edge Installation Process
Installing drip edge isn't rocket science, but it does require precision and a methodical approach. Skipping steps or rushing through the process can compromise its effectiveness and, ultimately, your roof's ability to protect your home. We'll break this down into the typical order of operations: working on the eaves first, then the rakes.
Starting with the Eaves
The eaves are the horizontal edges of your roof, where the gutters are typically located. This is usually the first place drip edge is installed, mainly because it goes under the roofing underlayment to ensure any water that gets past the shingles flows over the drip edge and into the gutters.
- Prepare the Eaves: Before any drip edge goes on, ensure your roof deck is clean, dry, and free of debris. If you're replacing an old roof, this is also the time to inspect your fascia boards. If they're rotting or damaged, replace them now. You might be surprised to learn that a surprising amount of damage is found underneath during a full Roof Replacement Cost: Complete Breakdown.
- Install Ice and Water Shield (if applicable): In colder climates, or where codes require it, a self-adhering ice and water shield is applied directly to the roof deck along the eaves. This membrane goes first. It should extend up the roof from the eave edge to a point at least 24 inches inside the warm wall line of the building.
- Install the Eave Drip Edge: Now, it's time for the drip edge. Position the drip edge along the eave, with the vertical flange tight against the fascia board and the horizontal flange resting flat on the roof deck. The "drip" or "kick-out" should extend slightly beyond the fascia, usually 1/4 inch to 1/2 inch, to ensure water clears the board.
- Secure with Nails: Fasten the drip edge to the roof deck using galvanized roofing nails. Place nails every 12 inches on center, ensuring they penetrate the roof deck. Don't nail through the very edge of the vertical flange; you're securing it to the deck, not just the fascia.
- Overlap Sections: When you need to use multiple pieces of drip edge along a long eave, overlap the sections. The upper piece should overlap the lower piece by at least 2 inches to ensure proper water flow and prevent water from getting underneath the overlap. You can apply a bead of roof sealant between the overlapping sections for extra protection.
- Apply Underlayment Over Drip Edge: Once the eave drip edge is installed, you'll then lay your roofing underlayment (either felt or synthetic) over the horizontal flange of the drip edge. This creates a continuous water-shedding surface from the roof deck, over the drip edge, and into the gutters. This specific layering is critical for preventing leaks. If you're curious about the process, learning How Underlayment Is Installed can provide even more context.
Moving to the Rakes
The rakes are the sloped edges of your roof, running from the eaves up to the ridge. Installation here differs slightly because the drip edge goes over the underlayment, to shed water that runs off the sides of your roof.
- Prepare the Rakes: Just like the eaves, ensure the rake edges are clean and structurally sound. Any repairs to the fascia or siding should be completed before installing drip edge.
- Apply Underlayment First: Unlike the eaves, the roofing underlayment should be installed first on the rakes. The underlayment should extend to or slightly beyond the edge of the roof deck at the rake.
- Install the Rake Drip Edge: Position the drip edge along the rake, with the horizontal flange sitting on top of the underlayment. The vertical flange should be tight against the fascia board, and the "drip" should extend past the fascia, just like on the eaves.
- Secure with Nails: Fasten the drip edge to the roof deck, through the underlayment, using galvanized roofing nails every 12 inches on center. Again, make sure the nails are holding it firmly to the deck.
- Overlap Sections: Just as with the eaves, overlap subsequent sections of rake drip edge by at least 2 inches, ensuring the upper piece overlaps the lower piece. This directs water down the roof and over the previous piece. Seal overlaps for extra protection.
- Seal and Finish: At the eaves, where the rake drip edge meets the eave drip edge, you'll want to ensure a tight, sealed joint. This often involves cutting the rake drip edge to neatly fit over the eave drip edge and then applying a bead of exterior-grade sealant to ensure no water can penetrate. This attention to detail is part of a complete Roof Anatomy: Parts of an Asphalt Shingle Roof that works together.
Handling Corners and Overlaps
Corners are probably the trickiest part of drip edge installation, where poor execution can lead to big problems. There are a couple of ways to handle outside corners:
- Miter Cut: For a clean, professional look, you can miter cut both pieces of drip edge at a 45-degree angle where they meet at an outside corner. This creates a seamless 90-degree joint. However, getting this cut perfectly tight can be challenging. Once fitted, you’ll want to seal the mitered joint with a high-quality sealant.
- Overlap and Trim: A more common and often more practical method for DIYers involves overlapping one piece of drip edge over the other. For instance, extend the eave drip edge past the corner by a few inches. Then, install the rake drip edge, allowing it to overlap the eave drip edge. You then cut the vertical flange of the rake drip edge so it can fold neatly around the corner, creating a tight, waterproof seal. You'll typically trim the excess horizontal flange. Always apply a generous amount of sealant in this area.
No matter which method you use, the goal is to create a tight, continuous seal that prevents water from getting behind the drip edge and into your roof structure. This crucial detail is often what differentiates a professional installation from a less-than-perfect one. If you're tackling this as part of a larger project, like learning How a Roof Replacement Works: The Full Process, it's vital not to overlook these smaller, intricate steps.
| Drip Edge Location | Underlayment Placement | Overlap Direction | Fastening | Notes |
|---|---|---|---|---|
| Eaves (Horizontal) | Drip edge first, then underlayment over it | Overlap lower piece by 2 inches | Nails 12" O.C. | Directs water into gutters |
| Rakes (Sloped) | Underlayment first, then drip edge over it | Overlap lower piece by 2 inches | Nails 12" O.C. | Sheds water off roof sides |
| Corners | Handled with miter cuts or overlapping & sealing | Seal all joints | Nails 12" O.C. | Critical for watertight integrity |
Common Drip Edge Installation Mistakes to Avoid
Even with the best intentions, it's easy to make mistakes during a DIY project, and drip edge installation is no exception. These missteps can undermine the entire purpose of the drip edge, leading to costly damage down the line. Being aware of them is the first step in avoiding them.
Improper Overlaps and Gaps
One of the most frequent mistakes is not properly overlapping the sections of drip edge. If you don't overlap the pieces by at least 2 inches, or if you overlap them in the wrong direction (bottom piece over top piece), you create a pathway for water to seep underneath. Imagine a row of dominoes – if they're not set up correctly, the whole chain fails. Similarly, if your drip edge sections aren't shingled correctly, water will find its way in. A gap, even a small one, is an open invitation for moisture, especially during heavy rains or when ice dams form.
Another common oversight happens at the corners. If the corner pieces aren't meticulously cut and sealed, you'll have an obvious entry point for water. It's like leaving a window open during a storm. This is where using a good quality exterior sealant becomes incredibly important, ensuring that even if there are tiny imperfections in the cuts, the joint remains watertight. This attention to detail isn't just about preventing leaks; it's also about ensuring the longevity of your entire roofing system and avoiding issues that might necessitate fixing Missing Shingles: Repair or Replace prematurely if underlying decking starts to rot.
Incorrect Fastening
How you secure the drip edge is just as important as where you place it. Insufficient nailing, or using the wrong type of nails, can lead to the drip edge becoming loose, flapping in the wind, or even detaching entirely over time. Standard galvanized roofing nails are typically used, driven every 12 inches on center along the horizontal flange. These nails need to go through the drip edge and securely into the roof deck.
A common error is nailing too close to the very edge of the vertical flange, which primarily secures it to the fascia, not the main roof structure. While the vertical flange should be flush against the fascia, the primary fastening points are on the horizontal flange to the roof deck. If the nails don't penetrate deep enough or are spaced too far apart, the drip edge won't withstand wind uplift, which can be particularly problematic in regions prone to strong storms. This is a subtle but critical detail that many homeowners, and even some inexperienced contractors, might overlook. Always use rust-resistant fasteners to prevent staining and premature failure, especially if you live in a coastal area.
When to Call a Professional Roofer
While installing drip edge might seem like a manageable DIY project, especially for handy homeowners, there are definitely times when bringing in a professional roofing contractor is not just advisable, but essential. Your roof is too critical an investment to take unnecessary risks.
First and foremost, safety is paramount. Working on a roof, especially if it's steep, high, or during inclement weather, can be incredibly dangerous. Falls from ladders or roofs are a leading cause of home improvement injuries. If you’re not comfortable with heights, don’t have proper safety equipment, or lack experience working safely on a roof, it’s always best to defer to the experts. They have the training, equipment, and experience to complete the job safely and efficiently.
Secondly, complexity can quickly escalate. If your roof has multiple valleys, dormers, or a very intricate design, or if you're dealing with extensive rot or structural damage to the fascia or roof decking, a professional will have the expertise to handle these challenges. They can identify underlying issues that a DIYer might miss, ensuring that repairs are comprehensive and long-lasting. Services like Modernize can help homeowners connect with reputable, local professionals who are vetted and experienced.
Thirdly, warranty considerations are a big deal. Many shingle manufacturers, like GAF or Owens Corning, offer enhanced warranties that are only valid if their products (including accessories like drip edge) are installed by a certified contractor according to their specifications. Attempting a DIY installation could inadvertently void these valuable warranties, leaving you on the hook for future repair costs that might otherwise have been covered. A professional will not only ensure proper installation but also handle the necessary paperwork for warranty registration. For more information on finding reliable help, check out How to Choose a Roofing Contractor.
Finally, if you're performing a full roof replacement, the drip edge is just one piece of a much larger, interconnected system. A professional roofing contractor understands how all the components—from underlayment to flashing to ventilation—work together to create a watertight and durable roof. They'll ensure every step of the installation, including proper [Drip Edge Installation], adheres to local building codes and industry best practices. While you might save a little on Roofing Material Cost vs Labor Cost by doing it yourself, the peace of mind and long-term protection offered by a professional installation are often well worth the investment.
Disclaimer
Please remember that this guide offers general information and recommendations. Building codes and best practices for roof installation, including drip edge, can vary significantly by location and change over time. Always consult with local building authorities and qualified roofing professionals to ensure your project complies with all applicable codes and regulations. Working on a roof can be dangerous; prioritize safety and consider hiring a licensed and insured professional for any roofing work.