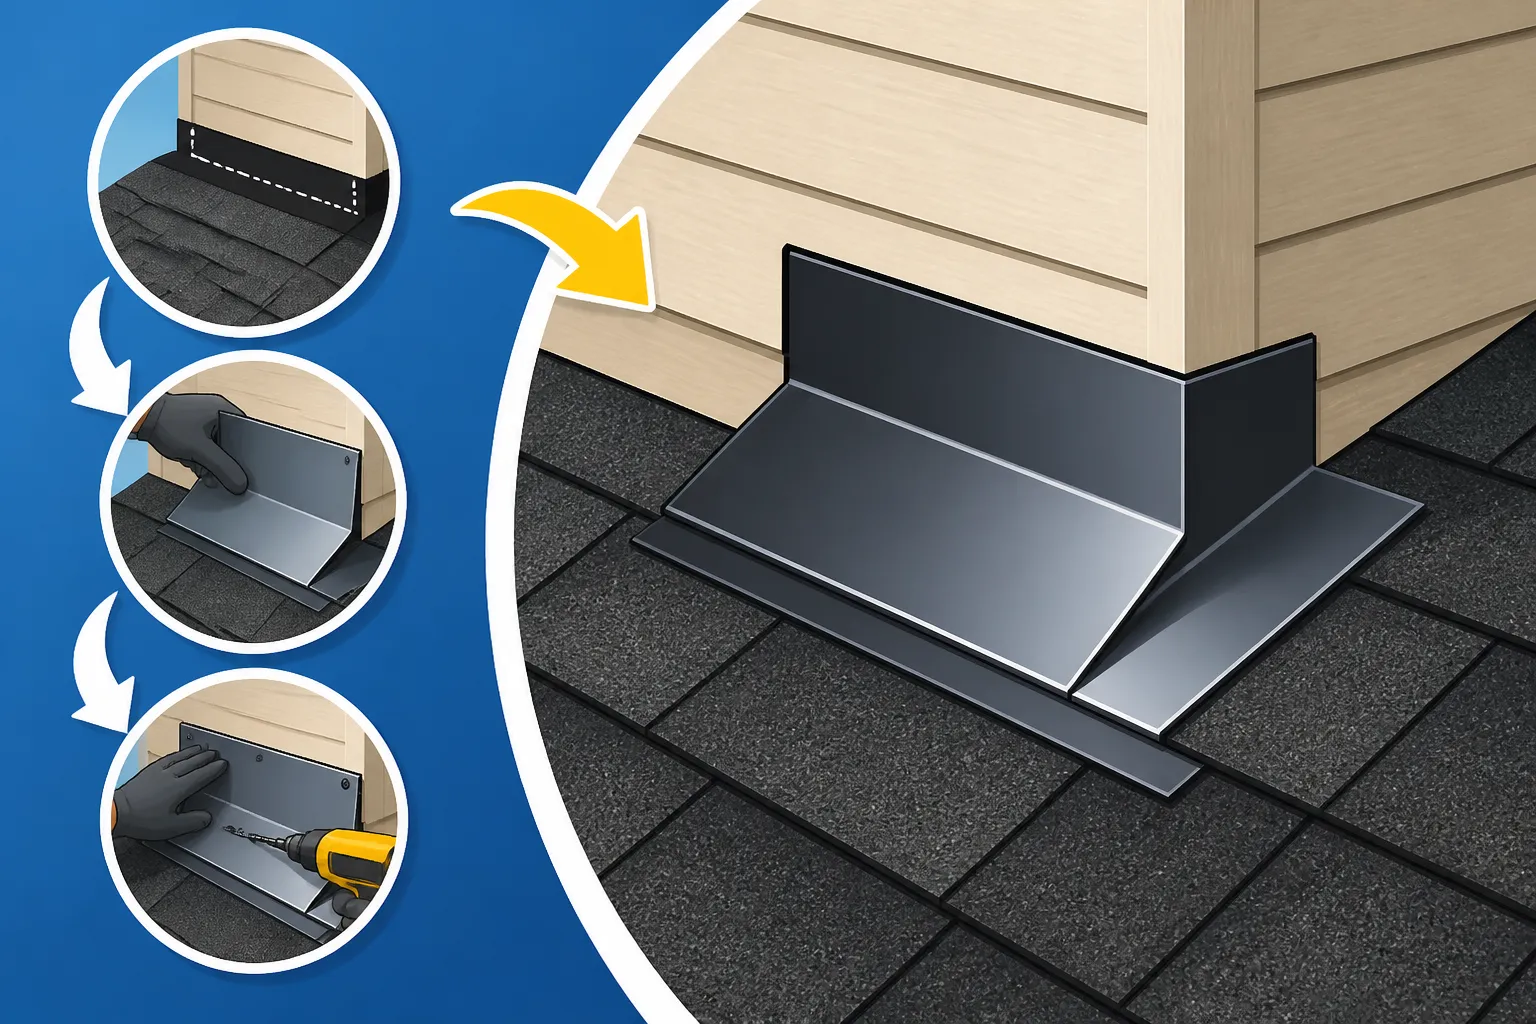
How Flashing Is Installed
The last thing any homeowner wants is a mysterious water stain on their ceiling, especially after a heavy rain. That sinking feeling often points to one of the most common culprits: improper or failed roof flashing. This guide is here to demystify the installation process, breaking down exactly how flashing is correctly put into place to create an impenetrable barrier against water, protecting your home from costly damage.
Understanding the Critical Role of Roof Flashing
Before we dive into the nitty-gritty of installation, it's crucial to grasp why roof flashing is so utterly important. Think of your roof as a giant umbrella protecting your home. While shingles do a fantastic job on the main slopes, your roof isn't just one smooth surface. It's punctuated by chimneys, vent pipes, skylights, and valleys where two roof planes meet. These are the weak spots, the areas where water naturally wants to collect, pool, and find its way in. This is precisely where flashing steps in as the unsung hero, a specialized material designed to redirect water away from these vulnerable points. Without it, even the most beautifully laid asphalt shingles are prone to leaks. If you're wondering, "What is flashing and why it matters?" you're not alone, but understanding its function is fundamental to appreciating proper installation.
What Flashing Actually Does
Flashing acts as a seamless, water-tight seal around any penetration or junction on your roof. It works by creating a barrier that forces water to flow over it and down the roof, rather than seeping into the structure below. It's not just about preventing leaks; it's about channeling water effectively. Imagine rain hitting your roof – it flows down, hits a vent pipe, and if there's no flashing, it would simply run down the side of the pipe and directly into your attic. With proper flashing, the water hits the flashing, is diverted around the pipe, and continues its journey down to the gutters. This redirection is key to maintaining the integrity of your entire roofing system.
Different Types of Flashing and Their Uses
Flashing isn't a one-size-fits-all solution; there are various types, each designed for specific areas and challenges on your roof. Understanding these helps in appreciating the nuanced installation process.
- Step Flashing: These are individual L-shaped pieces of metal, woven in with shingles, typically used where a roof meets a vertical wall or chimney. Each piece overlaps the shingle below and is covered by the shingle above, creating a stair-step effect.
- Counter Flashing: This is installed over step flashing, often mortared into a chimney or attached to a wall, and then bent down to cover the top edge of the step flashing, providing an additional layer of protection and sealing.
- Valley Flashing: Used in roof valleys where two slopes converge. It can be open (a continuous metal channel) or woven (shingles are woven across the valley with no exposed metal).
- Boot or Pipe Flashing: A pre-formed rubber or metal cone-shaped piece designed to fit snugly around vent pipes, plumbing stacks, and electrical conduits.
- Continuous or Apron Flashing: A long, single piece of metal used where a roof meets a wall that runs parallel to the roof slope, like at a dormer's front wall.
- Headwall Flashing: Similar to apron flashing, used at the top of a dormer or chimney where the roof meets a vertical surface.
- Skylight Flashing: Often comes as a kit integrated into the skylight unit itself, specifically designed to seal around the skylight frame.
These different types highlight the tailored approach required for each unique roof feature.
Essential Tools and Materials for Flashing Installation
Proper flashing installation isn't just about knowing where it goes; it's about having the right materials and tools to do the job effectively and durably. Cutting corners here can lead to leaks and costly repairs down the line. A reputable roofing contractor will arrive with everything needed, but it's good for homeowners to know what to expect.
Choosing the Right Flashing Materials
The material you choose for flashing significantly impacts its longevity and performance. While often not visible once installed, the quality here truly matters.
- Aluminum: Lightweight, inexpensive, and easy to bend and cut. It's a popular choice for many residential applications. However, it can corrode if it comes into contact with certain other metals (like copper or treated lumber) and isn't as durable against physical damage as heavier metals.
- Galvanized Steel: More durable than aluminum and resistant to corrosion due to its zinc coating. It's a common choice, especially for pre-formed pipe boots.
- Copper: Highly durable, long-lasting, and aesthetically pleasing as it weathers to a beautiful patina. Copper is excellent for high-end homes or areas where maximum longevity is desired, but it's significantly more expensive.
- Lead: Extremely pliable and durable, making it excellent for complex shapes, especially around chimneys or dormers. However, it's heavy, costly, and has environmental considerations.
- Rubber/EPDM: Often used for pipe boots due to its flexibility and ability to create a tight seal around various pipe sizes.
- Ice and Water Shield: While not flashing itself, this self-adhering modified bitumen membrane is often used in conjunction with metal flashing in critical areas like valleys and around penetrations, providing an extra layer of waterproofing protection. Understanding "What is Ice and Water Shield and why it matters" can help you appreciate this integrated approach.
Here's a quick comparison of common flashing materials:
| Material | Pros | Cons | Typical Use | Durability (1-5, 5=Highest) |
|---|---|---|---|---|
| Aluminum | Inexpensive, lightweight, easy to work with | Can corrode with dissimilar metals, less robust | General purpose, step, continuous | 2 |
| Galvanized Steel | Durable, good corrosion resistance, cost-effective | Can eventually rust if coating is compromised | Valleys, pipe boots, step | 3 |
| Copper | Extremely durable, long lifespan, attractive patina | Expensive, requires skilled installation, heavy | High-end homes, historic properties, complex details | 5 |
| Lead | Very pliable, excellent for complex shapes, durable | Heavy, expensive, environmental concerns, requires expertise | Chimneys, custom details | 4 |
| EPDM/Rubber | Flexible, excellent for sealing around pipes | Can degrade over time from UV exposure, less aesthetic | Pipe boots, vent collars | 2 (for exposed parts) |
Tools for the Job
A professional roofing crew will have all the specialized tools, but here are some common ones involved in flashing installation:
- Tin Snips/Shears: Essential for cutting metal flashing precisely. Different types (straight cut, right cut, left cut) allow for intricate work.
- Hammer/Pneumatic Nailer: For securing shingles and flashing components.
- Caulk Gun: For applying roofing sealant (e.g., polyurethane or silicone) where appropriate, especially at seams and termination points.
- Utility Knife: For cutting underlayment, ice and water shield, and trimming shingles.
- Measuring Tape and Straight Edge: For accurate measurements and cuts.
- Pry Bar/Crowbar: For removing old flashing or loosening components.
- Gloves and Safety Glasses: Always important for protecting hands and eyes.
- Roofing Cement/Sealant: For sealing small gaps, overlaps, and nail heads to ensure a watertight finish.
The quality of these tools and materials directly impacts the quality and longevity of the flashing installation.
Step-by-Step: Installing Flashing in Key Roof Areas
This is where the rubber meets the road (or, rather, where the metal meets the roof!). Proper installation techniques vary slightly depending on the specific area of the roof. However, the underlying principle remains the same: create a shingle-integrated, watertight path for water to flow downward. This often comes after the main roof deck is prepared and the underlayment is installed, but before the final shingle courses are laid around the feature. If you're undertaking a full replacement, understanding "How a roof replacement works: The full process" will give you context for where flashing fits in.
Valleys: Critical Waterways
Valleys are where two roof slopes meet, forming a V-shape. They are major conduits for water, meaning they need robust flashing. There are two primary ways to flash a valley: open valley and closed (woven or cut) valley.
Open Valley Flashing
This method uses a continuous strip of metal running down the center of the valley, exposing the metal.
- Prepare the Valley: After the roof deck is clear, a strip of Ice and Water Shield Explained is laid directly in the valley, extending at least 18-24 inches up each roof slope. This creates a highly resistant waterproof membrane.
- Install Metal Flashing: A long, pre-formed piece of valley metal (often galvanized steel or aluminum) is centered over the ice and water shield, running from the eaves to the ridge. The metal should be wide enough to extend 10-12 inches up each side of the valley.
- Secure the Metal: The valley metal is secured with roofing nails, placed only along the outer edges of the metal, far enough from the center to be covered by the shingles. This ensures no nail penetrations in the water channel.
- Trim Shingles: As shingles are laid on the adjacent roof planes, they are carefully cut along a chalk line parallel to the valley's center, typically 2-3 inches away from the center line. This exposes a strip of the metal flashing.
- Seal Edges: A thin bead of roofing sealant is often applied under the cut edge of the shingles where they meet the metal, especially in high-wind areas, to prevent water from wicking underneath. This method is generally considered more durable and easier to maintain.
Closed Valley (Woven or Cut) Flashing
In a closed valley, shingles either crisscross the valley (woven) or are cut neatly down the valley line, completely concealing the flashing underneath.
- Prepare the Valley: Similar to an open valley, Ice and Water Shield Explained is applied generously in the valley.
- No Exposed Metal: For woven valleys, the shingles from one side are extended across the valley and overlapped by shingles from the other side, interweaving them without exposed metal. For cut valleys, shingles from one side extend a minimum of 12 inches into the adjacent roof plane, and shingles from the second side are then laid over them, trimmed to a straight line along the valley.
- Critical for Water Flow: While there's no exposed metal, the underlying ice and water shield and careful shingle overlap are paramount. This method relies heavily on precise shingle cutting and installation to prevent leaks. The internal link How Valleys Are Flashed provides further deep dive into these techniques.
Chimneys: Complex Intersections
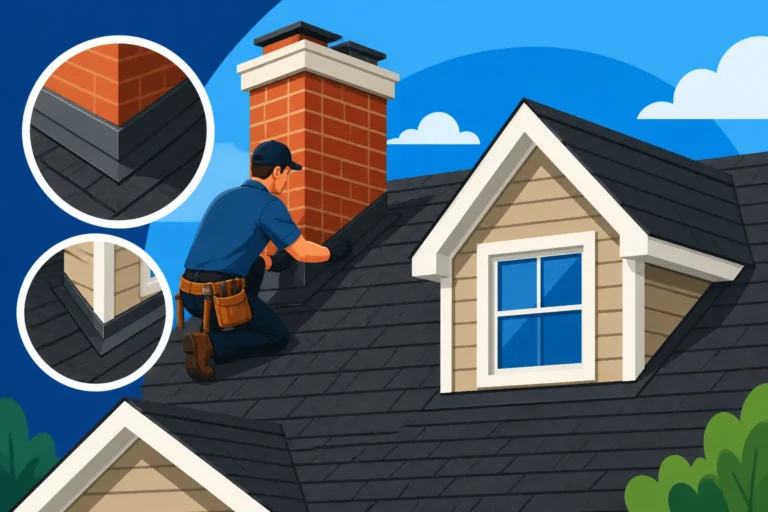
Chimneys are one of the most leak-prone areas on a roof due to their boxy shape intersecting the sloped roof. Flashing here involves multiple layers to handle water from all sides.
- Ice and Water Shield: Again, apply Ice and Water Shield Explained around the base of the chimney, extending it up the chimney sides and onto the roof deck.
- Back Pan/Crickets: For wider chimneys (over 24 inches), a "cricket" (a small, triangular roof structure behind the chimney) is often built to divert water around it. If not, a larger "back pan" piece of metal flashing is installed behind the chimney.
- Apron Flashing (Front): A continuous piece of metal, known as apron flashing, is installed at the front (down-slope side) of the chimney, extending under the shingles above it and bending up onto the chimney face.
- Step Flashing (Sides): Individual L-shaped pieces of step flashing are installed along the sides of the chimney. Each piece is integrated with a single shingle course: one side of the 'L' lies flat on the roof deck and is covered by a shingle, while the other side bends up against the chimney. Each subsequent shingle and step flashing piece overlaps the one below it, like steps on a ladder.
- Counter Flashing: This is the visible part that makes a chimney waterproof. Strips of metal, called counter flashing, are cut and bent. A shallow groove (reglet) is typically cut into the mortar joints of the chimney bricks, and the top edge of the counter flashing is inserted into this groove and sealed with mortar or a flexible sealant. The counter flashing then extends down over the top edge of the step flashing and apron flashing, effectively shielding them from above. This allows the roof and chimney to move independently with temperature changes without breaking the seal. Chimney Flashing Explained delves deeper into these specific techniques.
Walls: Where Roof Meets Vertical Surfaces
When a roof plane meets a vertical wall (like a dormer wall or an addition), it creates another critical area for flashing.
Sidewall Flashing
This occurs when a roof slope runs parallel to a vertical wall.
- Ice and Water Shield: Apply a strip of Ice and Water Shield Explained where the roof deck meets the wall, extending up the wall a few inches and onto the roof plane.
- Step Flashing: Similar to chimney sides, individual L-shaped pieces of step flashing are integrated with each shingle course. The horizontal leg goes under the shingle, and the vertical leg extends up the wall. These pieces are typically nailed to the roof deck, not the wall, allowing the roof to expand and contract.
- Counter Flashing: A continuous piece of metal counter flashing is installed over the step flashing. It can be bent and secured to the wall above the step flashing, or, if the wall has siding, it might be slipped behind the siding, extending down over the top edge of the step flashing. This creates a "slip" flashing system that accommodates movement. Step Flashing Around Walls provides more context.
Headwall Flashing
This is where the top edge of a roof slope meets a vertical wall (e.g., the wall of a dormer facing the ridge).
- Ice and Water Shield: Apply a generous strip of Ice and Water Shield Explained at the base of the headwall, extending up the wall and onto the roof deck.
- Apron Flashing: A continuous piece of L-shaped metal apron flashing is installed. The bottom leg extends down onto the roof deck, covering the top course of shingles, and the vertical leg extends up the wall.
- Seal and Finish: The apron flashing is nailed to the roof deck, and the nails are covered by the next course of shingles. The top edge of the vertical leg against the wall is sealed with a high-quality sealant or integrated behind the wall siding.
Vent Pipes: Simple but Essential
Vent pipes, from plumbing stacks to exhaust vents, are common penetrations that need simple but effective flashing.
- Base Layer: After the shingles are laid up to the vent pipe, a layer of Ice and Water Shield Explained or roofing cement is often applied around the pipe base.
- Pipe Boot: A pre-formed pipe boot (usually rubber or galvanized steel with a rubber collar) is slipped over the pipe. The base of the boot sits flat on the shingles below the pipe, extending up the roof slope.
- Integrate with Shingles: Shingles are then laid around the pipe boot. The bottom flange of the boot sits over the shingles below it, while the top flange is under the shingles above it. This ensures water flows over the boot's base and away from the pipe.
- Seal: The rubber collar is designed to hug the pipe tightly. Sometimes, a bead of exterior-grade sealant is applied where the rubber meets the pipe for an extra seal, though many modern boots are designed not to require this.
Skylights: Integrated Solutions
Skylights typically come with their own integrated flashing systems, which makes installation relatively straightforward if done correctly.
- Rough Opening: The roof deck is cut to create the rough opening for the skylight frame.
- Ice and Water Shield: Ice and Water Shield Explained is applied around the entire rough opening, extending onto the roof deck.
- Skylight Frame Installation: The skylight frame is installed and secured according to the manufacturer's instructions.
- Flashing Kit: The manufacturer-supplied flashing kit is installed around the skylight frame, typically in layers: a sill flashing (bottom piece), side pieces, and a head flashing (top piece). These pieces interlock and often have built-in gutters to channel water effectively.
- Shingle Integration: Shingles are then laid around the skylight, with the flashing components designed to sit over or under the appropriate shingle courses, ensuring a continuous watertight seal. Using a certified installer for brands like Velux or Fakro is crucial here, as incorrect installation can void warranties and lead to leaks.
Ensuring Longevity: Best Practices and Common Mistakes
Even with the best materials, poor installation can render flashing useless. This section highlights critical best practices and common pitfalls that homeowners should be aware of, especially when evaluating bids or inspecting a job in progress. It's not just about getting it done; it's about getting it done right. When reviewing How to Read and Compare Roofing Estimates, pay close attention to the details concerning flashing materials and installation methods.
Best Practices for Durable Flashing
Adhering to these principles ensures that your flashing will stand the test of time, effectively protecting your home.
- Layering with Gravity in Mind: This is the golden rule of roofing. All flashing and shingle layers must be installed from the bottom up, with each subsequent layer overlapping the one below it. This creates a natural shed for water, leveraging gravity rather than fighting it. Water should always flow over the top edge of any lower component.
- Proper Nailing: Flashing should be secured with appropriate roofing nails, but crucially, nails should be placed strategically. For instance, in valley flashing, nails should be along the outer edges, away from the direct water channel. For step flashing, nails typically go into the roof deck (and sometimes into the wall above where covered by siding), not directly through the shingle or in a way that creates a direct path for water. All exposed nails should be sealed with roofing cement.
- Generous Overlap: Wherever pieces of flashing meet or overlap, ensure there's sufficient material to create a robust seal. For example, step flashing pieces should overlap each other generously, and counter flashing should extend well over the step flashing below.
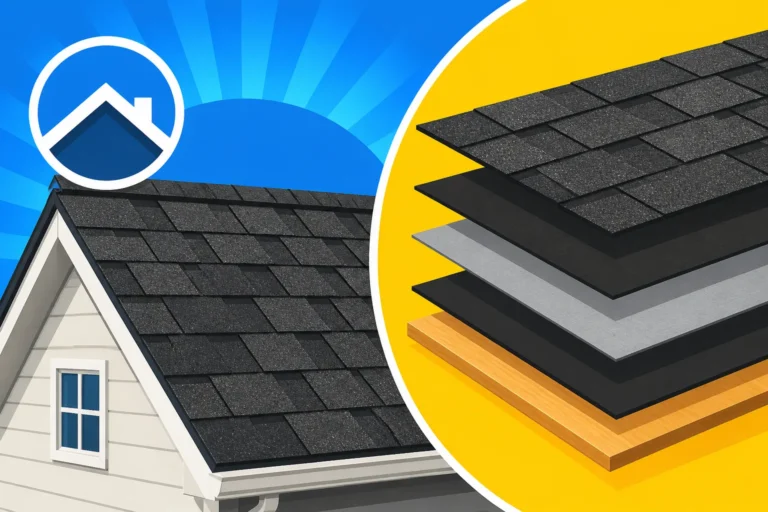
- Integrated with Underlayment: Modern roofing systems often start with Synthetic vs Felt Underlayment Cost and then Ice and Water Shield Explained in critical areas. Flashing should be installed over the underlayment but under the shingles in most cases, creating layers of defense.
- Using High-Quality Sealants: While flashing is primarily a mechanical barrier, sealants play a crucial supporting role at seams, gaps, and around penetrations. Use durable, flexible, exterior-grade sealants (like polyurethane or silicone) that can withstand UV exposure and temperature fluctuations.
- Accommodating Movement: Different materials expand and contract at different rates. Good flashing installation allows for this movement, especially between the roof and a chimney or wall. This is why systems like counter flashing, which sits over step flashing without being rigidly attached to it, are so effective. This "slip" allows for independent movement, preventing cracking and failure.
- Adherence to Building Codes: Local building codes often dictate minimum flashing requirements, material gauges, and installation methods, especially in areas prone to high winds or heavy snow. A reputable contractor will always be aware of and adhere to these codes. You can learn more about this in articles like Roofing Building Codes: What to Know.
Common Flashing Mistakes to Avoid
These errors are frequently the cause of premature flashing failure and leaks. Knowing them can help you spot potential issues or discuss concerns with your roofing contractor.
- "Blind Nailing" in Valleys: Nailing directly through the center of valley metal is a recipe for leaks. The expansion and contraction of the metal will eventually enlarge these holes, allowing water infiltration.
- Insufficient Overlap: Skimping on the overlap between flashing pieces or between flashing and shingles creates weak points where water can seep in.
- Improper Sealing of Exposed Nails: Any nail head that is exposed to the elements needs to be sealed with roofing cement. Skipping this step leaves tiny, but critical, entry points for water.
- Using Too Much or Incorrect Sealant: While sealants are important, they are not a substitute for proper metal bending and layering. Over-reliance on caulk alone, or using the wrong type that cracks or shrinks, will lead to failure. Flashing is a mechanical water diverter first, sealed second.
- Not Integrating with Shingles: Flashing must be integrated with the shingle layers, not simply placed on top or shoved underneath. Each component works together to create a continuous water-shedding surface.
- Damage During Installation: Bending, denting, or scratching metal flashing during installation can compromise its protective coating and structural integrity, leading to premature corrosion or failure.
- Ignoring Roof Pitch: The angle of your roof (its pitch) influences how water flows. Very low-slope areas require even more robust flashing and sealing methods than steep slopes where water runs off quickly.
- Skipping Ice and Water Shield: While an extra cost, installing Ice and Water Shield Explained in critical areas like valleys, around chimneys, and at eaves is a non-negotiable best practice for maximum leak protection, especially in regions with cold winters where ice dams are a concern.
- Hiring Unqualified Contractors: This is perhaps the biggest mistake. Flashing installation requires skill, experience, and attention to detail. A general handyman or an inexperienced crew might not understand the nuances, leading to long-term problems. Platforms like Modernize can help you find experienced roofing professionals who understand these intricate details and can provide a quality installation. Always ask to see proof of licensing and insurance.
Maintaining Your Flashing for Long-Term Protection
Once your flashing is correctly installed, it's not entirely "set it and forget it." Like any part of your roofing system, periodic inspection and maintenance can significantly extend its life and prevent issues. A proactive approach saves money and headaches down the road.
Regular Inspections Are Key
Make it a habit to inspect your roof, or have a professional do it, at least once a year, preferably in the spring or fall. After any major storm event (hail, strong winds), a quick visual check from the ground with binoculars can also catch obvious damage.
- Look for Visible Damage: Are any flashing pieces bent, dented, or torn? Has it pulled away from the chimney or wall? Look for rust spots, especially on galvanized steel.
- Check Sealant: Examine any visible sealant lines (e.g., around vent pipes, where counter flashing meets mortar) for cracks, shrinkage, or signs of deterioration.
- Shingle Integration: Ensure shingles are still properly overlapping the flashing and haven't lifted, curled, or become damaged in a way that exposes the flashing's edge.
- Debris Buildup: Clear leaves, twigs, and other debris from valleys and around chimneys or skylights. Buildup can trap moisture, leading to premature corrosion or water backing up under flashing.
- Moss and Algae: While not directly damaging to metal flashing, heavy moss or algae growth can trap moisture against roof components. Address this by gently cleaning or having a professional treat the roof.
During a professional roof inspection, which is recommended every 3-5 years, a qualified inspector will pay close attention to all flashing points, identifying potential weaknesses that aren't obvious to the untrained eye. For more on what these inspections entail, see Roof Inspection: What They Check.
Simple Flashing Fixes and When to Call a Pro
Minor issues can sometimes be addressed by a handy homeowner, but always prioritize safety and know your limits.
- Resealing Cracks: If you notice small cracks in sealant around a pipe boot or where counter flashing meets the chimney, carefully clean the area and apply a fresh bead of high-quality exterior sealant.
- Flattening Minor Bends: If a piece of exposed metal flashing (like in a valley or around a skylight) has a minor bend from a fallen branch, it might be gently tapped back into place if there's no crease or tear.
- Clearing Debris: Regularly clear leaves and debris from valleys and around chimneys. This is often an overlooked but crucial maintenance task.
However, for anything more significant than a simple reseal or debris removal, it's always best to call a professional roofing contractor.
- Torn or Severely Damaged Flashing: If a piece of metal is torn, severely bent, or has pulled away significantly, it needs to be replaced. This often involves carefully lifting surrounding shingles.
- Persistent Leaks: If you have a recurring leak, even after attempting minor fixes, it's a strong sign of a deeper problem with the flashing or its underlying components. A professional can diagnose the exact issue.
- Chimney Repointing: If your chimney's mortar joints are deteriorating, the counter flashing might lose its seal. This requires a mason or experienced roofer to repoint the chimney and reseal the flashing.
- Safety Concerns: Working on a roof can be dangerous. If you're uncomfortable with heights, lack proper safety equipment, or the weather conditions are poor, always defer to a professional.
Remember, flashing is an integral part of how shingles protect against water. Investing in proper installation and routine maintenance of your flashing is an investment in the long-term health and integrity of your entire home. Don't let a small detail become a massive problem down the line!
Disclaimer
This article is intended for informational purposes only and does not constitute professional advice. Roofing work can be dangerous and should ideally be performed by qualified and experienced professionals. Always consult with a licensed roofing contractor for specific recommendations regarding your home and to ensure compliance with local building codes and safety regulations.