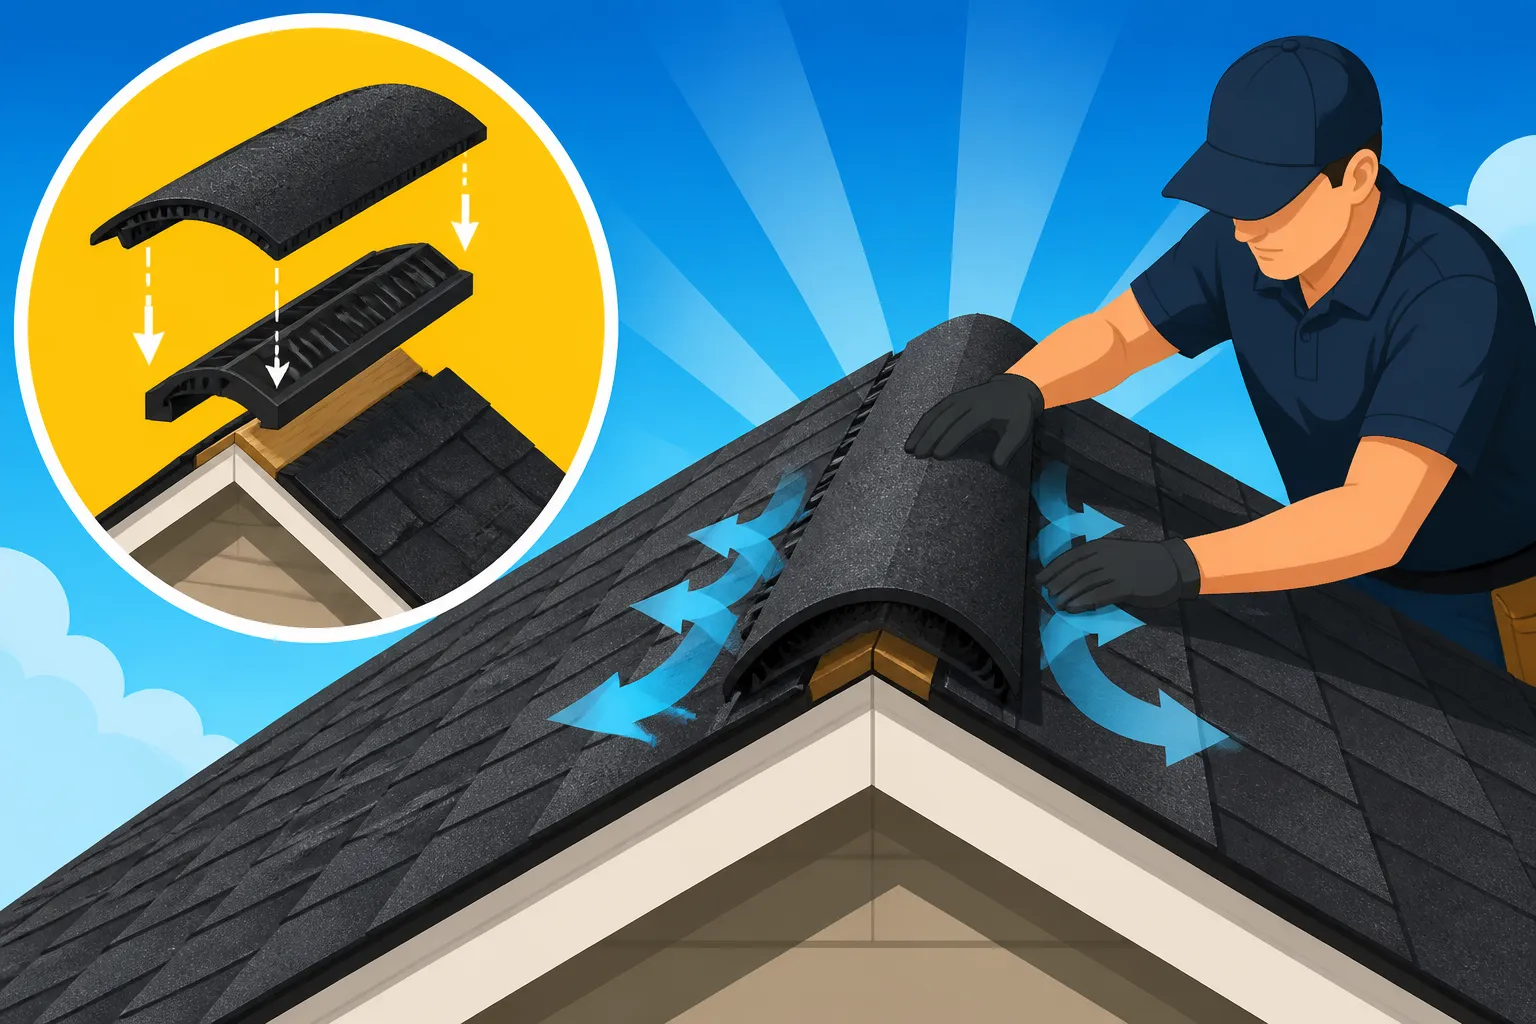
How Ridge Vent Is Installed
It's incredibly frustrating when you're trying to keep your home comfortable and your energy bills reasonable, only to discover that your attic is basically a giant sauna, cooking your roof from the inside out. This often boils down to inadequate attic ventilation, leading to heat buildup, moisture problems, and even premature shingle failure. This comprehensive guide is here to walk you through exactly how a ridge vent is installed, empowering you with the knowledge to understand this crucial component of a healthy roofing system.
Understanding Ridge Vents and Their Importance
Before we dive into the nitty-gritty of installation, let's take a moment to truly appreciate what a ridge vent is and why it plays such a critical role in your home's well-being. It’s not just another piece of roofing material; it’s a silent guardian, working tirelessly to protect your biggest asset.
Why Proper Attic Ventilation Matters
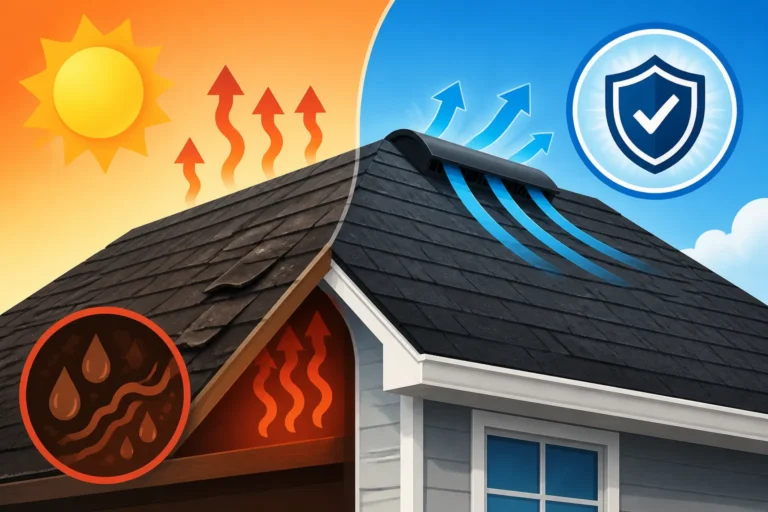
Many homeowners don't realize that their attic isn't just dead space; it's a vital buffer zone between your conditioned living areas and the harsh outdoor elements. Without proper ventilation, this buffer zone can turn into a problem area. In the summer, the sun beats down on your roof, heating the attic air to extreme temperatures. This superheated air then radiates downwards into your home, forcing your air conditioning system to work overtime, driving up those dreaded energy bills. Think about trying to cool your house while leaving an oven door open – that's essentially what a poorly ventilated attic does to your HVAC.
Beyond comfort and cost, heat and moisture trapped in the attic can wreak havoc on your roof's integrity. High temperatures can cause asphalt shingles to bake, curl, and crack prematurely, shortening their lifespan significantly. What's more, moisture can condense in the attic, leading to mold growth, rot in your roof decking, and even structural damage. In colder climates, insufficient ventilation can contribute to ice dam formation, where melting snow refreezes at the eaves, backing up water under your shingles and into your home. A good understanding of how roof ventilation works really underscores the importance of a properly installed system.
What is a Ridge Vent?
A ridge vent is a continuous vent that runs along the peak, or ridge, of your roof. Unlike older, less efficient ventilation methods like static box vents or whirlybird turbines, a ridge vent works in conjunction with intake vents, typically located in your soffits (the underside of your roof's eaves), to create a balanced, continuous airflow system. This design utilizes the natural principle of convection: hot, moist air rises and exits through the ridge vent, while cooler, drier air is drawn in through the soffit vents. It's a remarkably simple yet effective way to keep your attic breathing.
There are a few types of ridge vents, but most fall into categories like external baffle or internal baffle designs. External baffle ridge vents usually have an external cap or cover that helps direct airflow and provides a cleaner aesthetic, often offering better protection against weather elements. Internal baffle designs have internal structures that create the necessary airflow channels. Regardless of the specific design, the core function remains the same: to provide an unobstructed exhaust for rising hot air and moisture. This creates a much healthier environment for your attic and ultimately, your entire home.
Essential Preparations Before Ridge Vent Installation
Installing a ridge vent isn't a job you want to rush into. Like any significant home improvement project, proper planning and preparation are absolutely key to a successful, safe, and long-lasting outcome. Skimping on these initial steps can lead to costly mistakes down the line, or worse, put your safety at risk.
Safety First
Working on a roof inherently carries risks. Falls are a serious concern, so prioritizing safety is paramount. Always use a sturdy ladder placed on firm, level ground, and consider having someone spot you. If your roof has a steep pitch or you're not comfortable with heights, fall protection equipment like a safety harness and rope system is not just a good idea, it's essential. Even for relatively flat roofs, maintaining three points of contact on your ladder is crucial.
Beyond falls, you need to protect yourself from debris, sharp tools, and the elements. Wear heavy-duty work gloves to protect your hands from rough shingles and nails, and safety glasses to shield your eyes from flying debris, dust, or even splinters if you're working with wood. Don't forget proper footwear – non-slip, soft-soled shoes will give you better traction on the roof and help prevent damage to your existing shingles. Staying hydrated and working during cooler parts of the day, especially in hotter climates like Arizona or Florida, will also reduce the risk of heat-related illness.
Tools and Materials You'll Need
Having all your tools and materials organized before you even step onto the roof will save you a ton of time and frustration. There’s nothing worse than being halfway through a job and realizing you need to climb down for a missing item. Here's a checklist of the common items you'll want to have on hand for the installation of a ridge vent:
| Category | Item | Purpose |
|---|---|---|
| Safety Gear | Work Gloves | Hand protection from sharp objects, rough surfaces |
| Safety Glasses | Eye protection from debris, dust | |
| Safety Harness (optional) | Fall protection for steep roofs | |
| Sturdy Ladder | Safe access to the roof | |
| Measuring & Marking | Tape Measure | Accurate measurements for vent slot, shingle placement |
| Chalk Line | Creating straight lines for cutting and alignment | |
| Carpenter's Pencil | Marking measurements on shingles and decking | |
| Cutting & Fastening | Utility Knife/Hook Blade | Cutting asphalt shingles |
| Circular Saw (with depth stop) | Cutting the ridge slot in roof decking | |
| Roofing Nailer (or Hammer) | Fastening ridge vent and cap shingles | |
| Tin Snips | Trimming metal flashing (if applicable) | |
| Sealing & Finishing | Caulk Gun | Applying roofing sealant |
| Roofing Sealant (compatible with asphalt) | Sealing gaps, nail heads | |
| Materials | Ridge Vent Sections | The ventilation units themselves |
| Ridge Cap Shingles | Covering the ridge vent for protection and aesthetics | |
| Roofing Nails | Securing components (specific length for roofing guns) |
When selecting your ridge vent sections and corresponding ridge cap shingles, make sure they are compatible. Leading manufacturers like GAF, Owens Corning, and CertainTeed offer complete roofing systems, including matching ridge vents and cap shingles that are designed to work together seamlessly for optimal performance and warranty coverage.
Checking Existing Ventilation and Roof Decking
Before you even think about cutting into your roof, it's crucial to assess your existing ventilation system. A ridge vent works best when paired with adequate intake ventilation at the eaves, typically provided by continuous soffit vents. If your home only has a few small soffit vents or none at all, simply installing a ridge vent won't solve your ventilation issues; it will create an imbalanced system that won't perform optimally. You need a balanced approach, so make sure your intake is sufficient for the exhaust you're adding. For a deeper dive, check out our guide on how attic ventilation prevents damage.
While you're up there, take the opportunity to carefully inspect the roof decking. This is the plywood or OSB sheathing that forms the base of your roof, and it's what your new ridge vent will be attached to. Look for any signs of rot, water damage, soft spots, or delamination. If you find any damaged sections, they absolutely need to be replaced before you install the ridge vent or any other roofing components. Installing new materials over compromised decking is a recipe for disaster and will undermine the integrity of your entire roof system. A solid foundation is non-negotiable for a long-lasting roof.
Step-by-Step Ridge Vent Installation Process
Alright, with all your preparations complete and safety gear donned, it’s time to get down to business. Installing a ridge vent is a meticulous process, but by following these steps carefully, you can achieve a professional and effective result that will benefit your home for years to come.
Marking and Cutting the Ridge
This is arguably the most critical step, as it involves cutting into your roof deck. Precision is key here. Start by establishing a perfectly straight line along the very peak of your roof using a chalk line. Most ridge vents require a slot of 1 to 1.5 inches on either side of the ridge board. You'll want to measure carefully from the centerline of your roof to ensure this width is consistent along the entire run of the ridge. It's important to leave a few inches uncut at each end of the ridge to maintain structural integrity and prevent weather infiltration at the gable ends. For instance, if your roof is 40 feet long, you might cut a slot that is 38-39 feet, leaving 6-12 inches at each end.
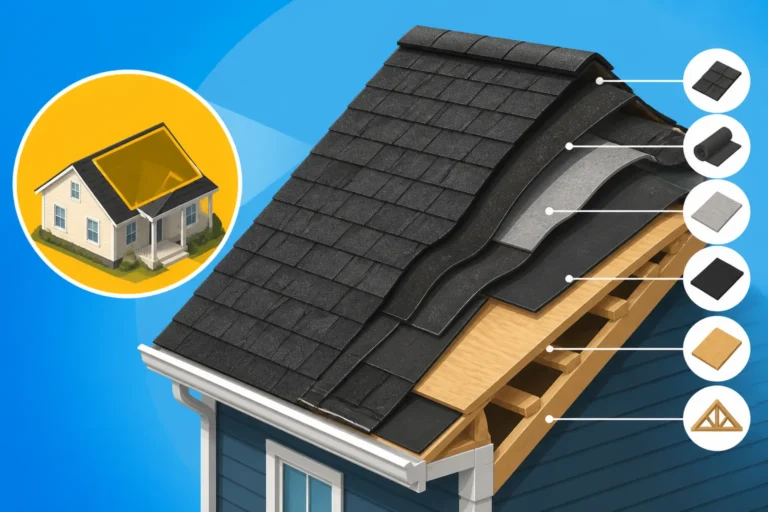
Once your lines are clearly marked, it's time to cut. A circular saw with a depth stop is the safest and most efficient tool for this job. Set the blade depth so it cuts through the roof decking but not into the roof trusses below. This is incredibly important – cutting into a truss can compromise your roof's structural integrity. Slowly and steadily cut along your chalk lines, being mindful of your footing and surroundings. After making the two parallel cuts, remove the strip of decking to create the open slot. You'll now have a clear opening for hot air and moisture to escape. Remember to consult our comprehensive article on the roof anatomy: parts of an asphalt shingle roof to familiarize yourself with these terms.
Installing the Ridge Vent Sections
With the slot cut, you can begin placing the ridge vent sections. Most ridge vents come in 4-foot lengths. Start at one end of the ridge and lay down the first section, ensuring it’s centered over your newly cut opening. These sections typically have overlapping features designed to create a continuous, weather-tight seal. Follow the manufacturer's instructions precisely regarding overlap and fastening. Most manufacturers recommend using roofing nails, driven at a specific angle and frequency to secure the vent to the roof deck. A pneumatic roofing nailer can make this process much faster and more consistent than hammering by hand, ensuring each nail is driven to the correct depth without overdriving or underdriving.
As you lay down subsequent sections, make sure they interlock or overlap correctly to prevent any gaps that could allow water or pests to enter. Pay close attention to the end sections; these will often have specific pieces or require a bit of trimming to ensure a neat finish and proper sealing. In regions prone to high winds, such as coastal areas in North Carolina or hurricane zones in Florida, proper nailing techniques are even more critical. Many manufacturers specify enhanced nailing patterns for high-wind areas to ensure the vent stays securely in place. It's also a good idea to apply a bead of roofing sealant along any seams or joints, especially at the very ends of the ridge vent run, to provide an extra layer of waterproofing protection.
Finishing with Ridge Cap Shingles
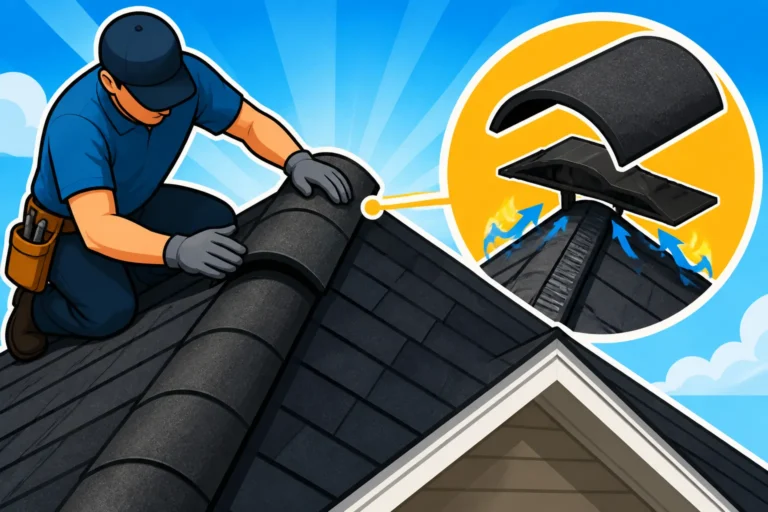
The final step in the installation process is covering the exposed ridge vent sections with ridge cap shingles. These specialized shingles are thicker and pre-formed to fit over the ridge, providing both protection and a finished aesthetic that matches the rest of your roof. They are installed similarly to how the rest of your asphalt shingles are installed, but with a few key differences. Start at one end of the ridge, usually the end furthest from prevailing winds, and secure the first ridge cap shingle with roofing nails. The nails should be driven into the vent flange or framing, ensuring they penetrate the roof decking, but not so low that they are visible from below the next shingle.
Each subsequent ridge cap shingle should overlap the previous one, covering the nails and creating a clean, weatherproof layer. Continue this process along the entire ridge. The final ridge cap shingle will need careful attention; typically, the nails for this shingle are exposed. These exposed nail heads should be generously covered with a high-quality roofing sealant to prevent water infiltration. The goal is to create a seamless, watertight cap that protects the ridge vent and integrates smoothly with your main roof surface. This last layer also protects the vent from UV degradation and weather elements, extending its life and the overall integrity of your roofing system.
Common Pitfalls and Best Practices for Ridge Vent Installation
Installing a ridge vent can seem straightforward, but there are several common mistakes that can undermine its effectiveness and even lead to bigger problems for your roof. Knowing what to watch out for and understanding best practices can save you headaches and ensure your new ventilation system works as intended.
Avoiding Installation Mistakes
One of the most frequent errors is cutting the ridge slot too narrow or too wide. If it's too narrow, you restrict airflow, defeating the purpose of the vent. If it's too wide, you risk compromising the structural integrity of your roof deck or creating an insecure base for the vent itself. Always adhere to the manufacturer's recommended cut width. Another common pitfall is improper nailing. Nails that are too short won't hold the vent securely, while nails that are overdriven can crack the shingle material or even create small openings for water. Using the correct length roofing nails and ensuring they are driven flush is crucial.
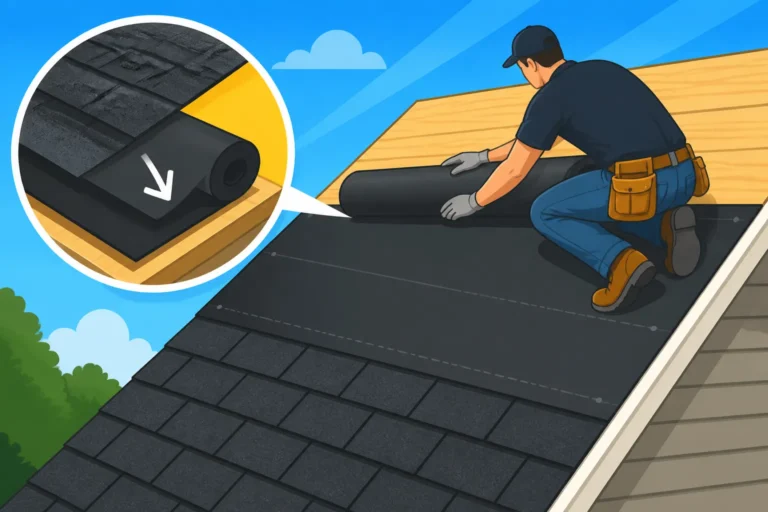
Blocking the vent openings is another subtle but serious mistake. Sometimes, homeowners or even inexperienced installers might inadvertently block the intake (soffit) vents with insulation in the attic, or use incompatible exhaust vents. For instance, pairing a ridge vent with powered attic fans is generally a bad idea because the fan can pull air in through the ridge vent, disrupting the natural convection flow and potentially drawing in moisture or even wildfire embers. It's vital to have a clear understanding of the full roofing system explained and how all components work together. For detailed installation practices and specific material requirements, checking guides on topics like how underlayment is installed or how valley is installed can offer valuable insights into proper roofing techniques.
Maximizing Performance
To truly maximize the performance of your ridge vent, the key is balanced ventilation. This means ensuring you have an equal amount of intake ventilation (typically through soffit vents) as you do exhaust ventilation (your ridge vent). The general rule of thumb is 1 square foot of net free vent area for every 150 square feet of attic floor space, or 1:300 if you have a vapor barrier. Without sufficient intake, your ridge vent can't properly pull in fresh air, leading to a less efficient system and still potentially trapping heat and moisture. Make sure your soffit vents are clear of insulation or debris and are not painted shut.
Another best practice is to avoid mixing different types of exhaust vents on the same roof plane. If you have a ridge vent, you shouldn't also have static box vents, gable vents, or powered fans on the same roof slope. This creates competing airflow, where one vent might draw air from another instead of from the soffits, leading to "short-circuiting" the ventilation system. Sticking to a single, consistent exhaust method like a continuous ridge vent, paired with ample soffit intake, provides the most efficient and effective attic ventilation. This balanced approach helps extend the life of an asphalt roof by keeping the attic cool and dry.
When to Call a Pro
While installing a ridge vent is a definable process, it's not a small undertaking. If the thought of climbing on your roof, operating power tools at height, or making precise cuts into your roof decking makes you queasy, don't worry – it's perfectly normal to bring in the pros. Roofing work can be dangerous and requires a specific skill set to ensure everything is done correctly, safely, and to code. A botched installation can lead to leaks, voided warranties, and even structural issues, turning a cost-saving DIY project into a very expensive repair later on.
Professional roofing contractors have the experience, specialized equipment, and insurance to handle the job safely and efficiently. They'll also be familiar with local building codes and manufacturer specifications, ensuring your ridge vent is installed to the highest standards. If you're unsure about any part of the process, or simply prefer to leave it to the experts, don't hesitate to reach out to a reputable roofing company. Platforms like Modernize can be a fantastic resource for connecting with local, vetted roofing contractors in your area, making it easier to get quotes and compare options from trusted professionals. Getting multiple estimates and checking references, as detailed in our guide on how to choose a roofing contractor, is always a smart move. When you consider the cost of ridge vent installation, remember that professional labor often comes with peace of mind and long-term savings.
Disclaimer
Please note that this guide provides general information on ridge vent installation. Building codes, safety regulations, and manufacturer specifications can vary significantly by location and product. Always consult your local building department, the specific ridge vent manufacturer's instructions, and a qualified roofing professional before undertaking any roofing project. DIY roofing work carries inherent risks, including personal injury and property damage.