How Nailing Patterns Affect Wind Resistance
There’s nothing quite as gut-wrenching as looking up at your roof after a severe storm and seeing shingles missing, torn, or flapping in the wind. It’s a terrifying moment that leaves you wondering if your home is truly protected. Often, the culprit isn’t just the strength of the storm, but how well your asphalt shingles were secured in the first place. This comprehensive guide will peel back the layers to reveal how specific nailing patterns are absolutely critical to your roof's wind resistance, keeping your home safe and sound.
The Unseen Battle: How Wind Challenges Your Roof
Wind isn't just a gentle breeze; it's a relentless force that can wreak havoc on even a seemingly sturdy roof. Understanding how wind interacts with your roofing system is the first step in appreciating why nailing patterns are so vital. It's not just about things blowing off your roof, but also about the complex pressures at play.
Understanding Wind Uplift
Imagine a plane taking off. The shape of its wing creates a lower pressure zone above it, lifting it into the air. Your roof, especially if it has a moderate pitch, experiences a similar phenomenon during high winds. As wind flows over your roof, it creates an area of lower air pressure above the shingles. Simultaneously, wind can get under the eaves and exert positive pressure upwards from below. This combination of upward suction and upward push is called "wind uplift," and it's the primary force trying to rip your shingles right off your roof deck.
It’s a sneaky force because it’s often invisible, slowly working at the edges and corners of your shingles, prying them loose nail by nail. If your shingles aren't securely fastened, this uplift can cause them to lift, tear, or even entirely detach, exposing your underlayment and decking to the elements. This is why a strong, consistent nailing pattern is your roof's first line of defense against Mother Nature's fury.
The Critical Role of Shingle Adhesion
Beyond the mechanical fastening of nails, modern asphalt shingles rely heavily on thermal sealing strips to bond them together. These strips, typically a line of asphaltic adhesive, are activated by the sun's heat after installation, essentially fusing each shingle to the one below it. This creates a monolithic barrier, greatly enhancing the roof's ability to resist wind. However, this seal is only as good as the foundation it's built upon.
If the shingles aren't nailed correctly, the adhesive strips can't perform their job effectively. A shingle that's not held down firmly by nails might flap in the wind before the seal has a chance to fully cure, or it might break the seal once cured, especially in cold weather when the seal is more brittle. Think of it like a chain: the nails are one strong link, and the adhesive is another. Both need to be robust and properly installed to ensure maximum wind resistance. This is also why understanding how Shingle Sealant Strips Activate is so important to a roof's overall performance.
Standard Nailing vs. High-Wind Nailing Patterns
When it comes to securing asphalt shingles, there isn't just one way to nail them down. Different manufacturers and local building codes specify various patterns depending on the shingle type, the expected wind conditions, and other factors. It’s a nuance that many homeowners might not even consider, but it can make a world of difference when a storm rolls through.
The "Four-Nail" Standard: What It Means
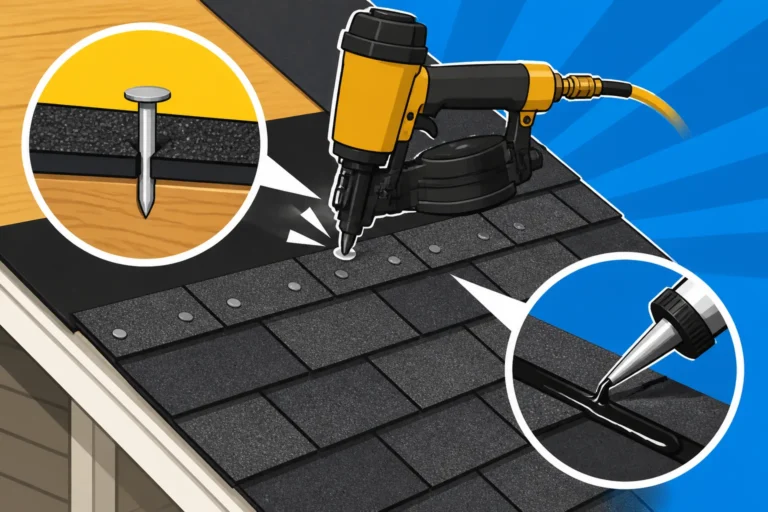
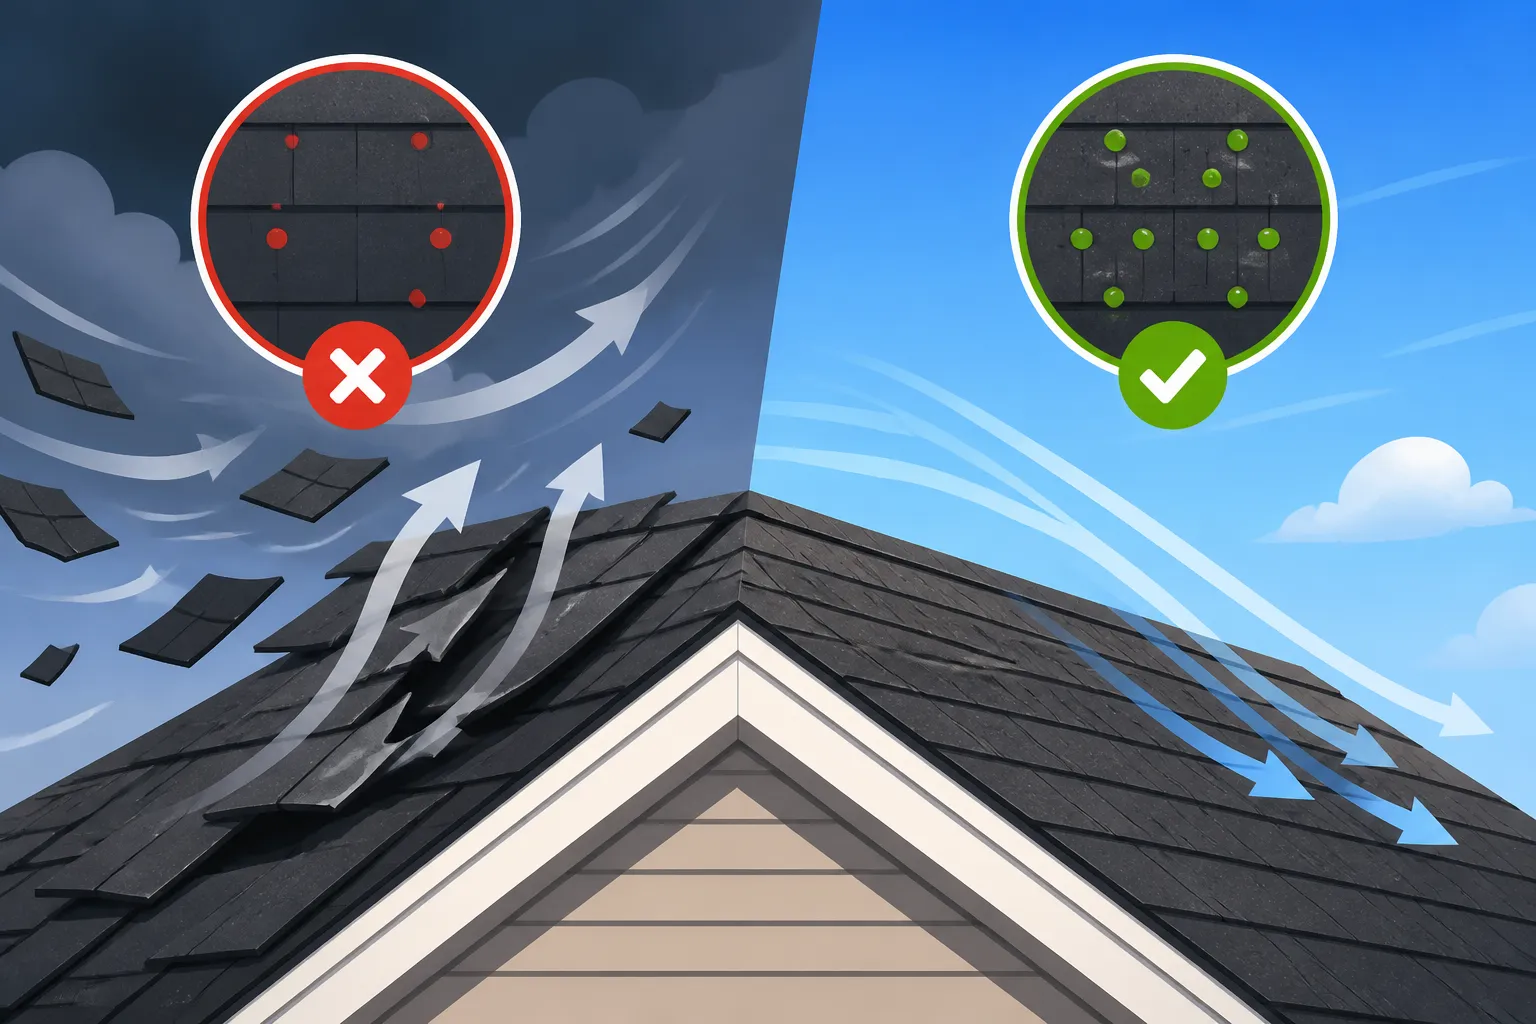
For most architectural asphalt shingles in areas not prone to extreme winds, the standard nailing pattern calls for four nails per shingle. These nails are typically placed across the shingle's common bond area, which is the strip designed by the manufacturer to be the most effective point for fastening. This area is usually just above the shingle's exposure, ensuring that the nails pass through both the overlapping shingle above and the shingle below, creating a strong mechanical bond to the roof deck.
In a standard four-nail application, the nails are usually positioned about an inch or so from each end of the shingle, and two more are evenly spaced in between. This pattern, when done correctly, provides sufficient resistance for typical wind conditions and meets most basic building codes. It's a balance between material usage, labor efficiency, and adequate protection. However, if you live in a region known for powerful gusts, this standard might not be enough.
Stepping Up to "Six-Nail" for Enhanced Protection
When facing stronger winds, particularly in hurricane-prone zones like coastal Florida or hail-prone states like Colorado, a "high-wind nailing pattern" often becomes the requirement. This usually means using six nails per shingle instead of four. The two additional nails are typically placed between the standard four, creating a denser pattern of fasteners. This significantly increases the shingle's resistance to wind uplift and sheer forces.
For example, manufacturers like GAF, Owens Corning, and CertainTeed all offer shingles with enhanced wind resistance, and they often specify a six-nail application in their installation instructions for areas with higher wind loads. This can be critical in meeting local High-Wind Roofing Code Requirements, which can vary wildly by region. Some codes might even mandate additional measures, such as a specific nail type or length, or even the use of specialized high-wind starter strips.
Let's look at a simple comparison of these two common patterns:
| Feature | Standard 4-Nail Pattern | High-Wind 6-Nail Pattern |
|---|---|---|
| Number of Nails/Shingle | 4 | 6 |
| Typical Location | Most inland, moderate wind zones | Coastal areas, hurricane/tornado zones, high-wind regions |
| Wind Resistance | Good for typical conditions (e.g., up to 110 mph) | Significantly enhanced (e.g., up to 130 mph or more) |
| Shingle Warranty | Meets basic warranty requirements for standard conditions | Often required to achieve full enhanced wind warranty coverage |
| Cost Impact | Lower labor and material cost per square | Higher labor and material cost per square |
| Primary Benefit | Cost-effective protection for average homes | Superior durability against extreme weather events |
When gathering bids for a new roof, especially if you live in an area prone to severe weather, it's absolutely crucial to confirm that your contractor plans to use the appropriate nailing pattern. A reputable contractor, possibly found through platforms like Modernize, will explicitly detail this in your roofing estimate and contract.
Manufacturer Specifications: Your Roofing Blueprint
Every asphalt shingle manufacturer, whether it's Owens Corning, GAF, or CertainTeed, provides detailed installation instructions. These instructions are not suggestions; they are the blueprint for how their product must be installed to perform as intended and for your warranty to remain valid. Ignoring these specifications, particularly regarding nailing patterns, can void your manufacturer warranty, leaving you exposed if there's a problem down the line.
These specs will clearly show the "common bond" or "nailing zone" – the specific area on the shingle where nails should be driven. They'll also outline the number of nails required per shingle, and often, stricter requirements for specific climates or wind zones. A good contractor will be intimately familiar with these specifications for the particular brand and shingle type you choose. Always ensure your contractor is a Manufacturer-Certified Roofer Explained, as this often means they've received specialized training directly from the manufacturer on proper installation techniques, including nailing.
Precision Matters: Optimal Nail Placement for Durability
It’s not enough to simply use the right number of nails; where those nails are placed and how they are driven into the shingle is equally, if not more, important. A single misplaced or improperly driven nail can compromise the integrity of an entire shingle, creating a weak point for wind and water to exploit.
The Common Misstep: Improper Nail Zone Placement
Shingles are designed with a specific "nailing zone" or common bond area, typically a strip about an inch wide, just above the shingle's cutout or exposure. This zone is engineered to ensure that the nail passes through the thickest part of the shingle and also secures the top edge of the shingle below it.
Driving nails above this zone, often called "high nailing," means the nail might only penetrate the top shingle, missing the shingle below entirely or only catching its very edge. This significantly reduces the shingle's resistance to wind uplift, making it far more likely to blow off. Conversely, driving nails below the nailing zone, or "low nailing," can expose the nail head to the elements, making it vulnerable to water intrusion and potentially causing the shingle to buckle or curl prematurely. Even worse, if a nail is driven through the exposure area, it could be visible and vulnerable to water. These tiny errors, compounded across an entire roof, can lead to widespread shingle failure, granule loss, and costly leaks.
Penetration and Fastener Type: Beyond Just Placement
Beyond the precise location on the shingle, the depth and type of fastener are also critical. Nails should be driven flush with the shingle surface, but not so deep that they cut into or "overdrive" the shingle material. An overdriven nail creates a small hole, compromising the shingle's integrity and allowing water to penetrate. A proud nail (one not driven far enough) can snag subsequent shingles, prevent proper sealing, and eventually lift or rub through the overlapping shingle.
Most asphalt shingles require corrosion-resistant roofing nails, typically galvanized or stainless steel, with a large head (often 3/8" or 7/16") to provide maximum holding power. The length of the nail is also important; it needs to be long enough to penetrate through the shingle layers, any underlayment, and at least 3/4 inch into the roof decking, or entirely through thinner decking materials. Using staples instead of nails, or nails that are too short, can significantly reduce wind resistance and often voids manufacturer warranties. This level of detail highlights why a professional, experienced contractor is indispensable.
The Synergy with Shingle Sealants and Underlayment
It's important to remember that nailing patterns are just one part of a comprehensive roofing system. The nails work in synergy with other components to provide ultimate protection. As mentioned earlier, the thermal sealant strips on the shingles themselves are crucial for bonding layers together. If nails are incorrectly placed or driven, these seals may not form properly or can be broken more easily by wind, leading to delamination and blow-offs. You can learn more about how Shingle Sealant Strips Activate to understand their importance.
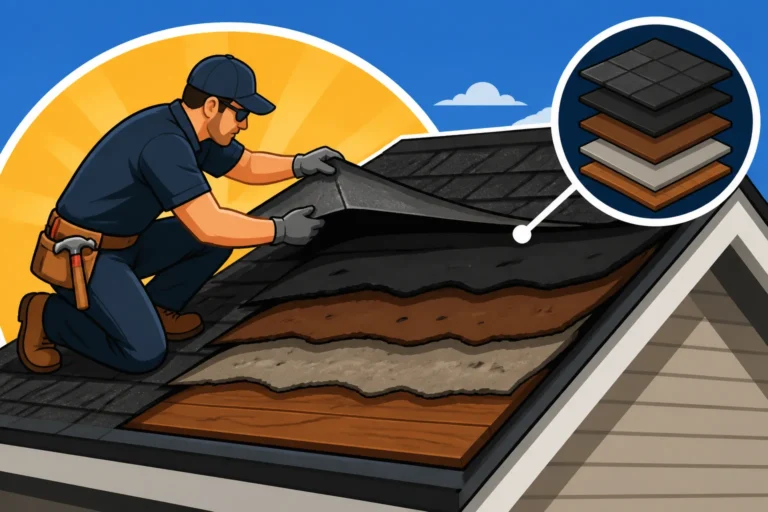
Furthermore, a quality underlayment, whether traditional felt or modern synthetic, provides an extra layer of defense against water penetration should a shingle be compromised. It’s the last resort before water reaches your roof decking. Proper underlayment installation, combined with correct nailing, creates a resilient barrier against both wind and water. This explains why Underlayment Explained: Synthetic vs Felt is such a crucial topic when considering a new roof.
The Consequences of Poor Nailing and What to Look For
It’s easy to overlook something as seemingly minor as a nailing pattern, but the impact of improper installation can be severe, leading to early roof failure and expensive repairs. Knowing what to look for, both immediately after installation and years down the line, can save you a lot of headaches and money.
Visible Signs of Failure After a Storm
The most obvious sign of poor nailing after a significant wind event is missing shingles. If your neighbors' roofs weathered the storm just fine, but you're suddenly spotting bald patches on your roof, inadequate nailing might be a primary cause. Look closely at the remaining shingles:
- Creased or Folded Shingles: Wind can lift a shingle and then fold it back on itself, leaving a tell-tale crease even if it doesn't detach completely. This often happens when the shingle's adhesive seal fails and the nails are the only thing holding it, allowing it to flap.
- Shingles Pulled Through: You might see shingles still on the roof, but with visible circular tears around the nail heads. This indicates that the wind uplift was strong enough to pull the shingle material right through the nail head, suggesting the nails were either improperly placed (e.g., too high or too low in the shingle tab) or not enough nails were used.
- Curling or Cupping: While curling shingles can also be a sign of aging or manufacturing defects, improper nailing can exacerbate the issue. If nails are driven too tightly, they can restrict the shingle's natural expansion and contraction, leading to distortion over time.
These visible cues are clear Signs You Need a New Roof or at least significant repairs. Don't delay in addressing them, as they compromise your home's protection.
Hidden Weaknesses: Why Inspections are Crucial
Not all issues from poor nailing are immediately visible from the ground. Sometimes, shingles might be loosened but not entirely detached, or the seals may be broken without obvious damage. This is where regular roof inspections come into play. A trained inspector can spot subtle signs of stress, such as:
- Soft Spots or "Trampolining" Shingles: If the nails aren't firmly gripping the decking, shingles might feel soft or bouncy when walked on. This is a clear indicator of a compromised fastening system.
- Nail Pops: These occur when a nail works its way partially out of the decking, pushing up on the shingle above it, creating a small bump. While often caused by roof deck movement or moisture, improper nailing during installation can contribute to them.
- Improper Shingle Overhang: If shingles are poorly aligned or nailed, they might not overhang the drip edge correctly, leaving vulnerable sections for wind to catch and pry.
A professional inspection, especially after a major storm or every few years, can catch these hidden weaknesses before they escalate into major problems. Many local building codes and insurance companies recommend periodic inspections, as outlined in Roofing Building Codes: What to Know.
The Long-Term Impact on Your Roof's Lifespan
The cumulative effect of poor nailing patterns is a significantly shortened roof lifespan. A roof designed to last 20-30 years might show signs of failure in half that time if the shingles weren't properly secured. This leads to premature replacement costs, increased insurance claims, and the constant stress of worrying about your home's integrity.
Furthermore, improper nailing can void your manufacturer warranty. Most warranties explicitly state that the product must be installed according to the manufacturer's instructions, and inadequate nailing is a common reason for denied claims. This can turn a seemingly small oversight into a financially devastating situation, costing you thousands in an unbudgeted roof replacement. Understanding What Voids a Shingle Warranty is paramount for homeowners. This also ties into Roofing Wind Warranty Requirements – if your roof wasn't nailed to spec for high winds, that warranty may not stand.
Choosing the Right Protection for Your Home
Navigating the complexities of roof replacement, especially when considering technical details like nailing patterns, can feel overwhelming. However, by understanding your home's specific needs and partnering with the right professionals, you can ensure your new roof offers optimal protection.
Assessing Your Home's Wind Exposure
Before you even start looking at shingles, consider where your home is located. Do you live in:
- A coastal region frequently battered by hurricanes or strong ocean winds?
- An open, rural area where wind can travel unimpeded across flat terrain?
- A valley or mountainous region that might experience localized wind tunnels?
- A Midwestern state prone to severe thunderstorms and tornadoes?
These geographical factors directly influence the wind loads your roof will experience. Research local building codes, as they often have specific requirements for wind resistance based on your region. For instance, in many parts of Florida and Texas, strict codes for High-Wind Nailing are mandated. Discuss these factors openly with prospective contractors. A good contractor will perform a thorough assessment, taking into account not just your location but also the pitch and shape of your roof, which can further affect wind vulnerability. This is where a service like Modernize can help connect you with local pros who understand regional challenges.
Working with a Qualified Contractor for Peace of Mind
This really is the most critical step. Even the highest-quality shingles with the best wind ratings won't perform if they're not installed correctly. That's why choosing a reputable and experienced roofing contractor is non-negotiable. Here's what to look for:
- Experience with Local Conditions: Ensure they have a proven track record of installing roofs in your specific climate and understand local building codes related to wind resistance. Ask them about their approach to High-Wind Nailing Cost Premium, if applicable.
- Manufacturer Certifications: As mentioned, certifications from major shingle manufacturers (like GAF Master Elite, Owens Corning Platinum Preferred, or CertainTeed SELECT ShingleMaster) indicate that the contractor has undergone specific training and meets stringent quality standards. This is a strong indicator they will adhere to proper nailing patterns and installation protocols. Learn more about Manufacturer-Certified Roofers Explained.
- Detailed Proposals: A good contractor will provide a comprehensive proposal that explicitly details the type of shingles, the underlayment, and crucially, the number of nails per shingle they plan to use. If it's not specified, ask!
- References and Reviews: Check online reviews and ask for local references. Speak to previous clients about their experience with the contractor’s workmanship and adherence to quality. You want to avoid Roofing Contractor Red Flags to Avoid.
- Proper Permits: Ensure your contractor handles all necessary permits. Roofing Permits Explained details why this is important, as local authorities will inspect the work to ensure it meets code, including fastening standards.
Ultimately, your roof's ability to stand up to the wind is a direct reflection of the quality of its installation, with nailing patterns playing a starring role. By being informed and choosing your contractor wisely, you're not just getting a new roof; you're investing in your home's long-term safety and your own peace of mind.
Disclaimer
Please remember that the information provided in this guide is for general informational purposes only and does not constitute professional advice. Roofing projects can be complex and involve significant safety risks. Always consult with a qualified and licensed roofing professional for specific advice tailored to your property and local building codes. Do not attempt complex roofing repairs or installations without proper training, equipment, and safety precautions.