How Ice And Water Shield Is Installed
When you're facing down a harsh winter, or even just regular heavy rain, the last thing you want is water creeping under your shingles and into your home. That nightmare scenario, often caused by ice dams or wind-driven rain, is a constant worry for homeowners. This guide is going to walk you through the nitty-gritty of how ice and water shield is installed, demystifying a crucial step in ensuring your asphalt roof truly protects your most valuable asset.
Understanding Ice and Water Shield and Why It's Essential
Let's be honest, few homeowners think about the layers under their shingles until there's a problem. But an ounce of prevention is worth a pound of cure, especially when it comes to roofing. Ice and water shield, also known by various brand names like LeakBarrier, is one of those unsung heroes working hard beneath the surface. It’s a specialized roofing underlayment designed to provide an extra layer of waterproofing in the most vulnerable areas of your roof.
What Exactly Is Ice and Water Shield?
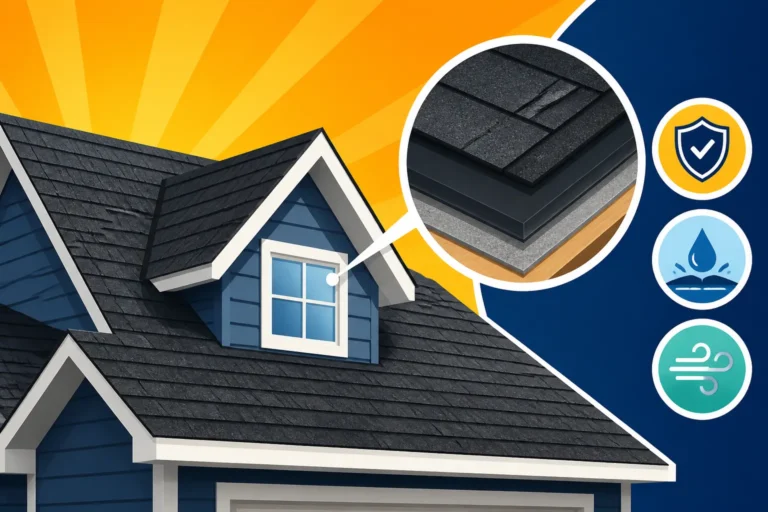
At its core, ice and water shield is a self-adhering, self-sealing modified bitumen membrane. That's a mouthful, right? Essentially, it's a sticky, rubberized asphalt sheet, often reinforced with fiberglass or polyester, with a waterproof top surface. Unlike traditional felt paper or even synthetic underlayments, its key feature is that sticky underside. When you peel off the release liner, it adheres directly to your roof deck, creating a watertight seal. And here's the magic trick: it's "self-sealing." This means when a nail penetrates it, the rubberized asphalt material actually flows around the nail shank, sealing the hole and preventing water from seeping through. This is a game-changer compared to regular underlayment, which simply sits on the deck and gets punctured by every nail. For a deeper dive, check out our guide on what is ice and water shield and why it matters.
Why Is It So Crucial for Your Roof?
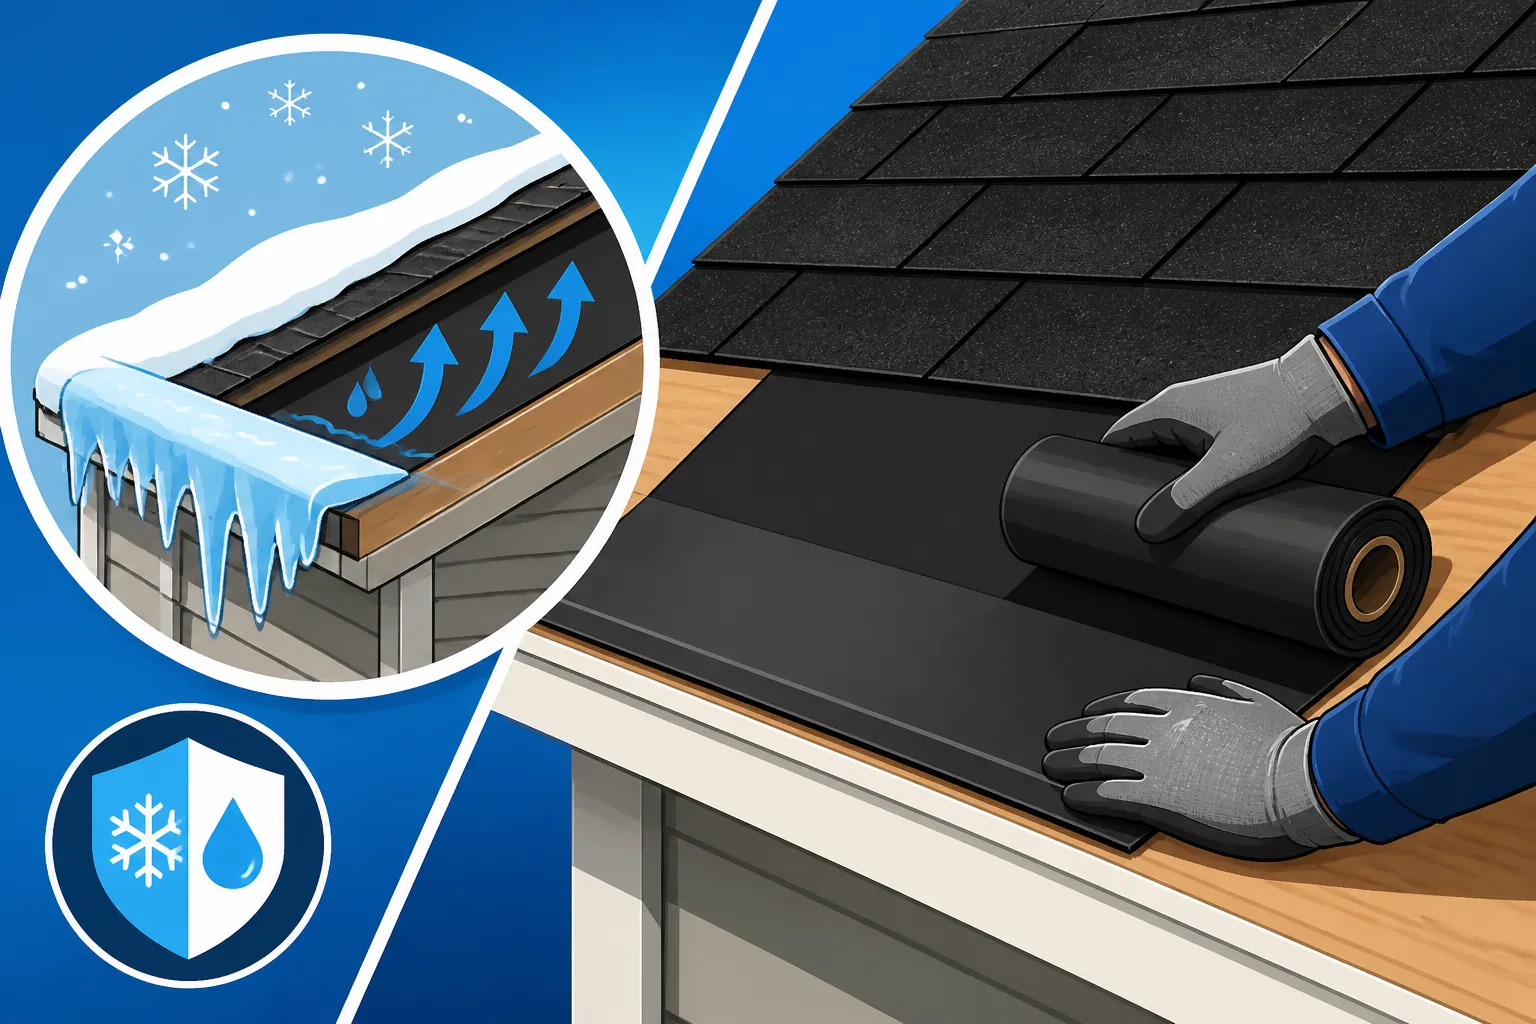
The primary nemesis that ice and water shield combats is, you guessed it, ice dams. In colder climates, when heat escapes from your attic and warms the roof deck, snow can melt, trickle down to the colder eaves (where there's no attic heat), and refreeze. This process repeats, forming a ridge of ice – an ice dam – that traps melting water behind it. This trapped water has nowhere to go but under your shingles. Standard underlayment can’t stop it, and suddenly, you have a leaky ceiling. Ice and water shield acts as an impenetrable barrier, preventing that water from reaching your roof deck and entering your home.
But it’s not just for ice dams. This membrane is also vital in areas prone to heavy, wind-driven rain, especially here in regions like Florida or coastal North Carolina. Even without ice, powerful winds can force rain sideways and upward, pushing it past shingle edges and through tiny gaps. Placing this barrier along eaves, valleys, and around penetrations ensures that even if water gets under your first line of defense (your shingles), it hits this second, impenetrable layer. It’s a critical component of a robust roofing system, especially for those who want peace of mind through all four seasons.
Preparing Your Roof Deck for Installation
Installing ice and water shield isn't just about slapping it on; proper preparation is key to its effectiveness and longevity. Think of it like painting a wall – if you don't prep properly, the best paint in the world won't look good or last long. The same goes for your roof.
The Importance of a Clean and Dry Surface
Before a single roll of ice and water shield is laid down, your roof deck must be absolutely pristine. This means any old roofing materials, including existing shingles, felt paper, and nails, must be completely removed. This process is often referred to as a "tear-off" and understanding the cost of roof tear-off and disposal is a good place to start planning. If you're replacing your roof, the entire deck should be exposed.
Once exposed, the deck needs a thorough cleaning. Sweep away all debris, dust, and granules. Any loose particles can prevent the adhesive on the shield from bonding properly, creating air pockets or weak spots where water could eventually penetrate. Next, and this is crucial, the roof deck must be completely dry. Moisture trapped beneath the ice and water shield can lead to long-term issues, including mold, mildew, and even rot in the decking itself. If it has rained recently, or if there's any morning dew, you need to wait until the sun has completely dried the surface before proceeding. A perfectly smooth, clean, and dry surface ensures maximum adhesion and the self-sealing properties can perform their best.
Necessary Tools and Materials
Having the right tools on hand makes the installation process much smoother and safer. You're not just dealing with rolls of sticky material; you're working on a roof, often at heights, and precision matters.
Here's a breakdown of what you'll typically need:
- Ice and Water Shield Rolls: Of course! Make sure you have enough to cover all necessary areas with proper overlap.
- Utility Knife or Hook Blades: Essential for cutting the membrane to size. Hook blades are often preferred by roofers as they're less likely to damage the roof deck underneath when cutting.
- Measuring Tape: For accurate cuts and overlaps.
- Chalk Line: To snap straight lines, ensuring your membrane is installed squarely and with consistent exposure.
- Hammer and Roofing Nails (for temporary fastening): While self-adhering, a few nails can hold the top edge temporarily in steep pitches before shingles are installed.
- Roller (or a clean, heavy blunt object): To ensure firm, uniform adhesion, pressing out any air bubbles or wrinkles.
- Safety Gear: Gloves, safety glasses, and fall protection (harness, ropes) are non-negotiable when working on a roof.
- Primer (Optional but Recommended for Low-Temp or Dusty Surfaces): Some manufacturers recommend a primer for cold weather applications or unusually dusty surfaces to enhance adhesion.
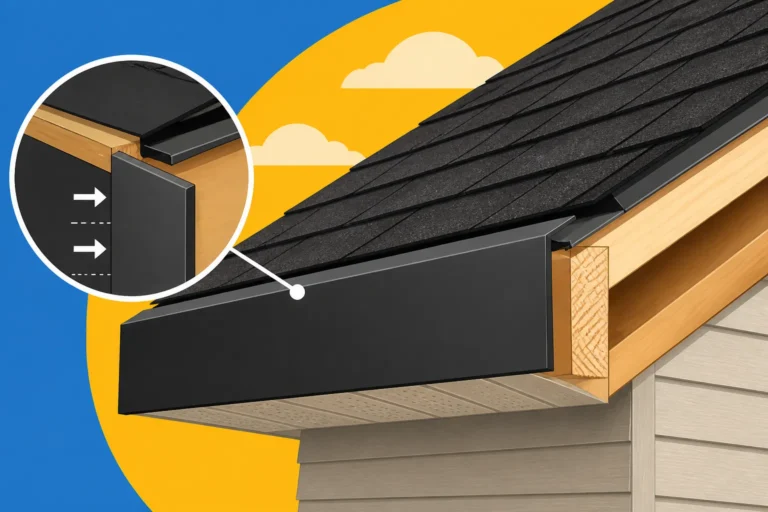
- Drip Edge: This metal flashing is typically installed after the ice and water shield at the eaves, but before at the rake edges. Knowing the purpose of drip edge and why it matters is important for proper integration.
Step-by-Step Installation Process of Ice and Water Shield
Alright, the deck is prepped, tools are ready. Now for the actual installation. While it sounds straightforward, patience and precision are your best friends here. Rushing this step can compromise the entire roof system. Many reputable contractors like those found through platforms such as Modernize prioritize meticulous ice and water shield installation because they know it's a foundational element of a long-lasting roof.
Starting at the Eaves and Working Up
This is where the magic begins. Most building codes, especially in colder regions, require ice and water shield to extend a certain distance up from the eaves – typically 24 inches inside the exterior wall line. This means the total width on the roof can be anywhere from 36 to 48 inches or more, depending on your overhangs.
- First Course at the Eaves: Start at the lowest edge of your roof (the eaves). Roll out a manageable section of the ice and water shield, aligning one edge perfectly with the drip edge (or slightly over it, depending on the manufacturer's instructions). Make sure it’s straight and parallel to the eave. Don't peel off the entire release liner at once!
- Peel and Stick: Carefully peel back a portion of the release liner, exposing the adhesive. Press the membrane firmly onto the clean, dry roof deck, working from the center outwards to avoid trapping air bubbles. Use your roller to ensure firm contact. Work your way down the length of the eave, peeling a bit, pressing a bit. This might be easier with two people: one to peel, one to press.
- Overlapping the Next Roll: When you need to start a new roll or extend a course, ensure proper overlap. Manufacturers typically specify a horizontal overlap of 3-6 inches. The upper piece of the membrane should always overlap the lower piece, mimicking the way shingles shed water. This creates a shingle-like shedding plane, directing water down and off the roof.
- Working Upwards: Continue laying courses of ice and water shield up the roof slope, maintaining the specified overlaps. Remember, your local roofing building codes will dictate how far up the roof slope this membrane needs to extend, often based on the roof pitch and climate zone.
Handling Valleys, Rakes, and Penetrations
While the eaves are critical, other areas of your roof are equally vulnerable, if not more so. Valleys, rake edges, and any penetrations like chimneys or vent pipes are notorious weak spots where water loves to find its way in. This is where the self-sealing properties truly shine.
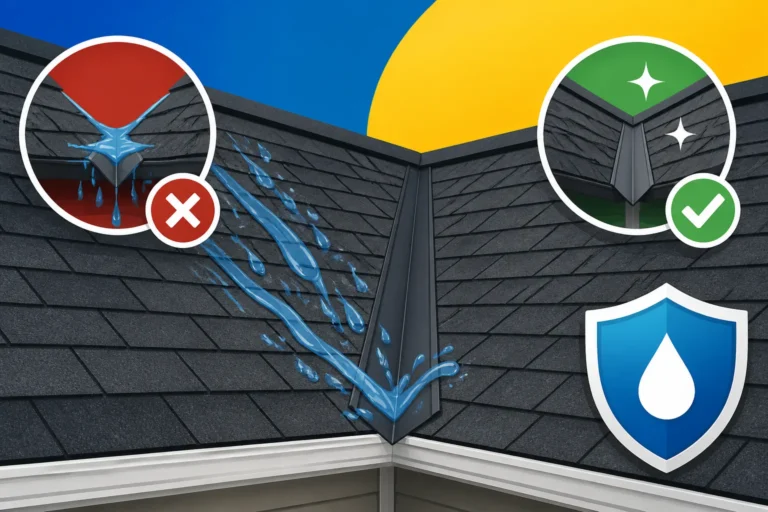
- Valleys: Valleys are channels where two roof planes meet, funneling a significant amount of water. Ice and water shield is absolutely essential here. It should be installed first in the valley, running continuously from the eave to the ridge. It should extend at least 18-24 inches to either side of the valley centerline. You'll cut the membrane to fit the angle of the valley, ensuring a smooth, wrinkle-free application. Subsequent shingle courses and metal valley flashing will be installed over this. Learn more about how valleys are flashed for context.
- Rake Edges: These are the sloped edges of your roof. While not as prone to ice dams as eaves, wind-driven rain can easily get under shingles here. Many codes require ice and water shield along rake edges, extending in from the edge. This provides extra protection against lateral water infiltration.
- Penetrations (Chimneys, Skylights, Vent Pipes): Any opening in your roof is a potential leak source. Ice and water shield should be installed around these areas, extending up and around the base of the penetration. It acts as a primary seal before metal flashing is installed. For example, around a chimney, the membrane should extend up the chimney sides, overlapping the deck membrane, and then proper chimney flashing explained will be installed over it. For vent pipes, the shield should be cut with a hole slightly smaller than the pipe, stretched over it, and then sealed with a pipe boot. This ensures a tight, watertight seal that will self-seal around the nails of the flashing.
Sealing and Securing the Membrane
Once the ice and water shield is laid down, don't just walk away. The proper sealing and securing of the membrane are what guarantee its long-term performance.
- Firm Pressure and Rolling: After each section is placed, use a heavy roller (a clean, wallpaper roller works, but a heavier, wider floor roller is even better) to apply firm, even pressure across the entire surface. This activates the adhesive and ensures it bonds fully to the roof deck and to any overlapping sections. Pay special attention to edges and overlaps. Any trapped air bubbles or wrinkles can become weak points.
- Temperature Considerations: Most ice and water shield products have specific temperature ranges for optimal installation. Installing in very cold weather (below 40°F / 4°C) can make the adhesive less sticky, hindering proper bonding. Conversely, extremely hot weather can make it overly pliable and difficult to handle without stretching or distorting. Always check the manufacturer's instructions for recommended installation temperatures. If you must install in colder conditions, some products require a primer to aid adhesion. For tips on working in challenging conditions, you might find our article on roof installation in cold weather helpful.
- Temporary Fastening (if needed): On steeper roofs, the self-adhering nature might not be enough to hold the top edge of the membrane perfectly flat until the shingles are applied, especially if there's a delay. In such cases, a few strategically placed roofing nails at the very top edge of the sheet, where they will be covered by subsequent layers of underlayment or shingles, can temporarily secure it. Remember, the self-sealing properties will work around these nails, but minimize their use.
Common Mistakes to Avoid During Installation
Even experienced roofers can make mistakes, but as a homeowner, being aware of potential pitfalls can help you oversee the process or ensure your DIY efforts are solid. These missteps can undermine the entire purpose of installing ice and water shield, leading to costly leaks down the road. This is why choosing a highly skilled and experienced roofing contractor is so crucial.
Improper Overlap and Gaps
One of the most frequent and critical errors is failing to achieve the correct overlap between courses or at seams. Every manufacturer specifies a minimum overlap, typically 3 to 6 inches, for both horizontal and vertical seams.
- Consequences: If the overlap is too narrow, or if there are gaps where two pieces meet, water can easily find a path through these exposed areas directly to your roof deck. It defeats the entire purpose of a waterproof membrane. Imagine trying to make a rain jacket out of duct tape but leaving small gaps between the strips—it just wouldn't work.
- Correction/Prevention: Always measure and mark your overlaps with a chalk line. When laying subsequent courses, ensure the upper sheet always overlaps the lower sheet to maintain a continuous shedding plane. If you have to patch a small gap, use a piece of ice and water shield that extends well beyond the gap in all directions and apply firm pressure. When hiring a contractor, make sure they clearly outline their installation process and adhere to manufacturer specifications, which you can verify by checking the product packaging.
Wrinkles, Bubbles, and Creases
Because ice and water shield is a flexible, adhesive membrane, it's susceptible to developing wrinkles, bubbles, and creases during installation, especially if not handled carefully.
- Consequences: Any wrinkle or bubble creates an air pocket and prevents the membrane from fully adhering to the roof deck. These non-adhered spots are prime candidates for water to get trapped and, over time, can lead to lifting, tearing, or even premature failure of the membrane. Creases can also be weak points where the material is stretched thin or even cracked, compromising its watertight integrity.
- Correction/Prevention: The key here is patient, deliberate installation and firm rolling. When laying a piece, start by securing one edge, then slowly unroll and press it down, working outward to push out any air. Using a heavy roller is non-negotiable for pushing out bubbles and ensuring complete adhesion. If a large bubble or wrinkle forms, sometimes it's better to carefully lift that section and re-lay it rather than trying to flatten it forcefully, which can stretch the material. Small, unfixable bubbles might need to be carefully slit with a utility knife and then rolled flat, ensuring the slit is completely sealed with a patch of new membrane.
Incorrect Temperature Application
As mentioned earlier, temperature plays a huge role in the performance of the adhesive. Ignoring manufacturer guidelines for installation temperature is another common mistake.
- Consequences: Installing ice and water shield in temperatures that are too cold (typically below 40°F / 4°C for many products) means the adhesive won't bond effectively. It might feel sticky initially, but over time, it could lose its grip, leading to sections lifting or detaching. This is especially problematic in the long run as the roof goes through freeze-thaw cycles. Conversely, installing in excessively hot temperatures can make the membrane too soft, difficult to manage, prone to stretching and tearing, and potentially create too strong of a bond too quickly, making corrections impossible without damaging the material.
- Correction/Prevention: Always check the manufacturer's data sheet for the specific product you're using. If you're working in borderline cold temperatures, consider using a compatible primer designed for low-temp adhesion. Schedule your roofing project during favorable weather conditions. This also applies to the larger roofing process, as proper roof installation in hot weather or cold weather requires specific considerations for all materials.
| Feature | Ice and Water Shield (Self-Adhering Underlayment) | Standard Felt or Synthetic Underlayment |
|---|---|---|
| Primary Function | Waterproofing, Ice Dam & Wind-Driven Rain Barrier | Secondary Water Barrier, Deck Protection |
| Material Type | Rubberized Asphalt, Modified Bitumen | Asphalt-saturated Felt or Woven Polypropylene |
| Adhesion | Self-Adhering to Roof Deck & Self-Sealing Around Nails | Lays on Deck, Fastened with Cap Nails/Staples |
| Water Resistance | Excellent (Impermeable) | Good (Water-Resistant, Not Fully Waterproof) |
| Flexibility | Highly Flexible, Conforms to Deck Irregularities | Less Flexible, Can Tear/Wrinkle |
| Typical Placement | Eaves, Valleys, Rakes, Around Penetrations | Entire Roof Deck (Over Ice & Water Shield) |
| Cost | Higher | Lower |
| Lifespan | Designed to last as long as the shingles | Generally similar to shingles |
When to Consider Professional Installation
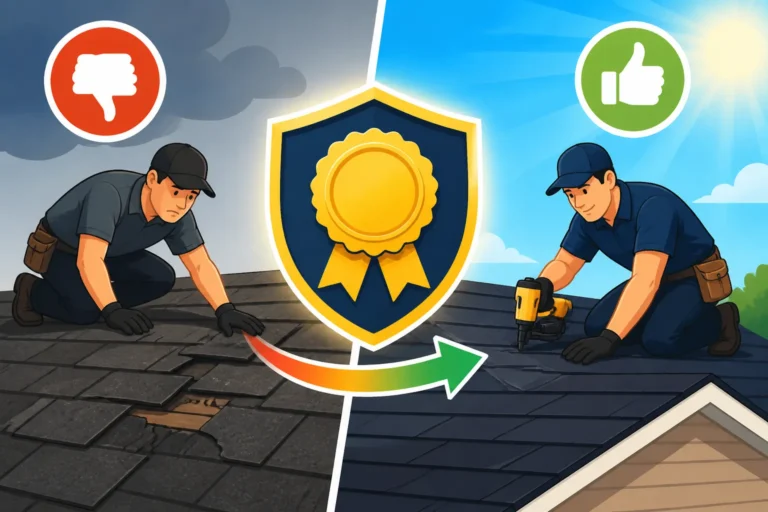
Installing ice and water shield isn't rocket science, but it is an exacting task that forms the foundational waterproofing layer of your entire roof. If it's done improperly, the consequences can be severe and expensive. For many homeowners, the complexity, safety concerns, and importance of getting it right make professional installation the smartest choice.
The Value of Experienced Roofers
A professional roofing contractor brings a wealth of experience, specialized tools, and often, manufacturer certifications that can impact your warranty. They understand the nuances of various roof types, pitches, and local building codes. For instance, they know exactly how far up the roof slope the ice and water shield needs to extend in your specific climate zone to meet code, or if you need an impact-resistant shingle upgrade due to local weather patterns.
- Expertise in Problem Areas: Experienced roofers are adept at handling challenging areas like complex valleys, skylights, and multiple pipe penetrations. They know the best cutting and sealing techniques to ensure these notorious leak spots are truly watertight. This knowledge comes from years of hands-on work and can't be gained from a single online tutorial.
- Proper Adhesion and Sealing: They have the right rollers and techniques to ensure complete adhesion, eliminating bubbles and wrinkles that can compromise the membrane's integrity. They also understand how temperature and humidity affect the adhesive and will schedule installation accordingly, or use appropriate primers when necessary.
- Warranty Compliance: Many enhanced manufacturer warranties, like those offered by GAF or Owens Corning, require the use of their specific roofing system components, including ice and water shield, and often stipulate that the installation must be performed by a certified contractor. Failing to meet these requirements can void your warranty, leaving you without coverage if issues arise. You can learn more about how a complete roof system qualifies for warranty coverage.
- Safety: Roofing is dangerous. Professionals have the necessary safety equipment, training, and insurance to work at heights safely, protecting both themselves and you from liability.
Finding a Reputable Contractor
If you decide to go the professional route, which I highly recommend for roof replacements, selecting the right contractor is paramount. There are fantastic roofers out there, and unfortunately, some less-than-stellar ones.
- Look for Local and Established Companies: Start by researching local roofing companies with a strong track record. Online reviews (Google, BBB, etc.) are a good starting point, but always verify their licensing and insurance. You can find out how to choose a roofing contractor who is right for your project.
- Check for Manufacturer Certifications: Look for contractors who are certified by major shingle manufacturers like GAF Master Elite, Owens Corning Platinum Preferred, or CertainTeed SELECT ShingleMaster. These certifications mean the contractor has undergone additional training, meets strict quality standards, and can often offer enhanced warranties that a non-certified installer cannot. Understanding what these certifications mean, like GAF Master Elite Contractors Explained, can help you ask the right questions.
- Get Multiple Detailed Estimates: Don't just get one bid. Contact at least three different companies. Make sure their estimates are detailed and clearly itemize the components, including the type and amount of ice and water shield they plan to install. Compare not just the price, but the scope of work and materials proposed. Our guide on how to read and compare roofing estimates can walk you through this process.
- Ask for References and See Past Work: A good contractor will be happy to provide references. Ask to see examples of their work, especially on homes similar to yours.
- Review the Contract Thoroughly: Before signing anything, read the entire contract. Ensure it specifies the exact materials to be used, the scope of work, the payment schedule, and warranty details. Make sure they pull all necessary roofing permits. For general guidance, our article on what a roofing estimate should include can be really helpful.
Investing in a proper ice and water shield installation, whether you do it yourself with extreme care or, more commonly, entrust it to seasoned professionals, is an investment in the long-term health and integrity of your asphalt roof. It's the silent protector that keeps your home dry and safe, even when Mother Nature throws her worst your way.
Disclaimer
Please remember that this guide provides general information for homeowners. Roofing work can be complex and dangerous. Always consult with a qualified, licensed, and insured roofing professional for specific advice tailored to your home's needs and to ensure compliance with all local building codes and safety regulations. Improper installation can void product warranties and lead to serious damage.