Roofing Permits Explained
Getting a new roof or even making significant repairs can feel overwhelming, and one of the most confusing parts for many homeowners is navigating the world of roofing permits. It’s not just about picking out shingles or finding a reliable contractor; you also have to deal with paperwork, inspections, and local ordinances, which can make a straightforward project feel like a bureaucratic maze. This comprehensive guide is here to demystify roofing permits, helping you understand why they're needed, when to get one, and how to ensure your project stays compliant and hassle-free.
Understanding the "Why" Behind Roofing Permits
I know what you're thinking: "Another layer of bureaucracy? Isn't replacing my roof complicated enough?" It's a completely valid frustration, and I hear it all the time. But the truth is, roofing permits aren't just some arbitrary hoops to jump through. They're a vital part of protecting you, your family, your home, and even your community. Think of it less as red tape and more as a safety net designed to ensure your biggest investment—your home—remains structurally sound and safe for decades to come.
Ensuring Safety and Structural Integrity
At its core, a roofing permit is about safety. When you undertake a major project like replacing your roof, you're not just swapping out old shingles for new ones; you're dealing with the very integrity of your home's protective shell. A roof is a complex system, and if it's not installed correctly, it can lead to serious issues, not just leaks, but structural damage, inadequate ventilation, and even hazards during severe weather.
Local building departments issue permits to ensure that any work done on your roof meets established safety standards and structural requirements. This means they're looking out for things like proper nailing patterns, adequate roof decking strength, and correct flashing installation. Imagine a scenario where a storm blows through your town. If your roof wasn't permitted and installed to code, it could be far more susceptible to damage, putting your home and potentially your family at risk. The permit process ensures that a qualified professional is at least theoretically overseeing the work, reducing the chances of dangerous shortcuts or improper techniques that could compromise your home's stability. It’s a peace of mind that's truly invaluable, especially when Mother Nature decides to throw her worst at us.
Upholding Building Codes and Standards
Every city, county, and even some states have specific building codes that dictate how construction and renovation projects must be carried out. These codes aren't just suggestions; they are legal requirements designed to ensure uniformity, quality, and safety across all construction in the area. Roofing permits are the primary mechanism by which these codes are enforced.
When you apply for a permit, you're essentially telling your local building department, "Hey, I'm planning to do work that meets your standards." They then have the opportunity to review your plans and inspect the work at various stages to confirm that it aligns with current building codes. For example, some areas might have specific requirements for ice and water shield in colder climates or mandates for high-wind nailing patterns in coastal or tornado-prone regions. If you skip the permit, there's no official oversight to ensure your contractor adheres to these crucial local regulations. This adherence is particularly important with asphalt roofing, as installation methods, underlayment choices, and even shingle types can be dictated by local codes. For example, some jurisdictions may require a certain fire rating for shingles, or demand specific ventilation standards to prevent moisture buildup in the attic, which can lead to premature roof failure. Understanding these nuances is part of why it's essential to comply with local guidelines.
Protecting Homeowners from Shoddy Work
Let's be honest, finding a good roofing contractor can sometimes feel like a gamble. You want someone reliable, skilled, and honest, but how do you really know if you're getting quality work? This is another significant area where permits offer a layer of homeowner protection.
When a contractor pulls a permit, they are putting their company's name on the line with the local building department. This adds a level of accountability. They know their work will be inspected by a neutral, third-party official. This oversight often discourages less reputable contractors from cutting corners or performing substandard work because they risk failing an inspection, incurring fines, or even losing their ability to pull future permits. It's a powerful incentive for them to do things correctly the first time. Moreover, the permit process often requires contractors to be licensed and insured, which protects you further in case of accidents or damages. Without a permit, you're essentially removing this layer of official scrutiny, making it much easier for an unscrupulous contractor to take advantage of you. You might end up with a poorly installed roof that fails prematurely, costing you more in the long run.
When a Roofing Permit is Absolutely Necessary
It can be confusing to figure out when a permit is genuinely required. Many homeowners assume it’s only for "new construction," but that’s rarely the case, especially with roofing. The general rule of thumb is: if you're making a significant change to your roof's structure or replacing a substantial portion of its weather-facing surface, you'll almost certainly need a permit. Even seemingly minor repairs can sometimes trigger a permit requirement, depending on your local regulations.
Full Roof Replacements and Major Reroofs
This is perhaps the most common scenario where a roofing permit is mandatory. If you're undertaking a full roof replacement, tearing off the old shingles and installing a brand-new system, a permit is essentially non-negotiable. This project involves exposing your home's critical structural elements, like the roof decking, and then building an entirely new protective layer. Because of the scale and critical nature of this work, local authorities want to ensure that it's done correctly and safely from the ground up.
During a full replacement, the inspector will often check the condition of your existing roof deck once the old materials are removed. If there's rot or damage, they’ll want to ensure those issues are addressed before the new roof goes on. They'll also verify that the new underlayment, drip edge, flashing, and shingles are installed according to current building codes. This is a crucial step in understanding the full process of how a roof replacement works. For instance, if you're replacing your entire asphalt shingle roof in a place like Dallas, Texas, the city's building department will require a permit to ensure that the new installation meets their specific wind uplift and material standards, which are updated periodically. Without a permit, you risk installing a roof that doesn't meet these requirements, potentially leading to insurance complications down the road.
Roof Overlays and Adding Layers
Sometimes, homeowners or contractors consider installing new shingles directly over existing ones, a process often called a "roof overlay" or "re-roofing." While it might seem like a simpler, less invasive job than a full tear-off, it still profoundly impacts your home and often requires a permit. The reason is twofold: weight and structural integrity.
Adding a second layer of asphalt shingles significantly increases the load on your roof's structure. Local building codes are very specific about how much weight your roof framing can safely support. An inspection during the permit process ensures that your home’s structure can handle the additional load. Furthermore, many building codes restrict how many layers of shingles are legal, typically limiting it to two layers to prevent excessive weight and issues with proper fastening. For example, if you live in Seattle, Washington, and try to put a third layer of shingles on your home, you'd be in direct violation of local codes, and a permit would flag that issue immediately. When considering an overlay versus a full tear-off, the permit helps to ensure you're making a safe and compliant choice. Without a permit, you might inadvertently overload your roof, leading to sagging, structural stress, and potential long-term damage that could be costly to fix.
Significant Repairs and Structural Changes
Here's where it can get a little murky. What constitutes a "significant repair"? Generally, minor repairs like replacing a handful of missing shingles, re-sealing a small area of flashing, or patching a tiny leak usually don't require a permit. However, if your repair involves replacing a large section of the roof, altering the roof's structure (like adding a dormer or changing the pitch), or repairing significant storm damage that impacts the decking, then a permit is very likely necessary.
For instance, if a large tree branch falls and damages a 50-square-foot section of your roof, including the underlying decking and rafters, that's almost certainly a permit-triggering event. The local building department wants to ensure that any structural damage is properly repaired and that the new roofing materials are integrated correctly to maintain the home's weatherproofing and structural integrity. Even if it's just a repair, the principles of ensuring safety, upholding building codes, and protecting against shoddy work still apply. For example, if you're fixing a significant section of your roof after a hailstorm in Colorado, even if it's not a full replacement, the local county might require a permit to ensure any repairs meet their specific impact-resistant roofing requirements. Always err on the side of caution and check with your local building department if you're unsure.
The Roofing Permit Application Process, Step-by-Step
Navigating the permit application process can feel like a daunting task, especially if you've never done it before. But trust me, it's far less complicated than it might seem, particularly when you work with a reputable roofing contractor. They'll often handle the bulk of this for you, but it’s still good for you, the homeowner, to understand the steps involved. Knowing the process helps you ask the right questions and ensures nothing falls through the cracks.
Gathering Necessary Documentation
Before you even step foot in your local building department (or click "submit" online), there’s usually some homework to do. The exact documents required can vary from one municipality to another, but there's a common core that you can anticipate. Typically, you'll need a completed permit application form, which asks for basic information about your property, the scope of work, and the contractor performing the job.
You'll also likely need a detailed scope of work or a roofing estimate that clearly outlines what's being done, including the type of materials (e.g., specific asphalt shingle brand and model like GAF Timberline HDZ, underlayment, flashing), the square footage of the roof, and any structural repairs planned. Many cities also ask for a site plan or a simple drawing of your property showing the house footprint and the areas of the roof being worked on. For some projects, especially if structural changes are involved, architectural drawings or engineering plans might be required. If your contractor is pulling the permit, they will have all these details ready. Ensure they provide you with copies of everything. A reputable contractor will be transparent about the entire process, including providing documentation for the roofing contract.
Submitting Your Application
Once all your documents are in order, it's time to submit the application. In many areas, this can now be done online through a city or county portal, which is a huge convenience. You might need to create an account, upload your documents, and fill out the digital forms. Other municipalities still prefer in-person submissions at the local building department office.
When you submit, you'll also pay the permit fee. This fee varies widely based on location and the scope of your project, but it generally covers the administrative costs and the cost of the inspector's time. After submission, the application usually goes through a review process. City planners or building officials will look over your documents to ensure they meet all local zoning ordinances and building codes. This review period can take anywhere from a few days to a few weeks, depending on how busy your local department is. During this time, they might reach out with questions or request additional information if something is unclear. It’s important to be responsive to avoid delays. If your contractor is handling this, they should keep you updated on the status.
Awaiting Approval and Inspections
After your application is reviewed and approved, you'll receive the official permit. This permit usually needs to be prominently displayed on your property, often in a window or on a sign in the yard, so that the inspector can easily see it when they arrive. This signals to anyone passing by, including city officials, that the work being done is authorized.
The permit will also outline the required inspection schedule. For roofing, there are typically two main inspections:
- Mid-roof or Decking Inspection: After the old roof is torn off and any decking repairs are made, but before the new underlayment and shingles are installed. This is crucial for checking the integrity of the roof deck.
- Final Inspection: Once all the roofing materials are installed, and the project is complete. This inspection ensures everything from the flashing to the shingle installation meets code.
It's the contractor's responsibility to schedule these inspections at the appropriate times. They should have a clear understanding of the local inspection process and ensure the site is ready for the inspector. Failing an inspection can lead to delays and additional costs, so your contractor should be meticulous in their work. Remember, the permit is not just permission to build, but also permission to be inspected, ensuring your home's safety and compliance with all the rules.
Who is Responsible for Pulling the Permit?
This is a question that comes up a lot, and for good reason. It's easy to assume that since it's your house, the permit responsibility falls squarely on your shoulders. However, in the vast majority of cases, especially with roofing, the heavy lifting of permit acquisition usually falls to the contractor. Knowing who is supposed to do what can save you a lot of headaches and potential legal troubles down the line.
The Contractor's Role: The Standard Practice
When you hire a professional, reputable roofing contractor, it is almost always their responsibility to pull the necessary permits. Think about it: they are the experts who know the local building codes inside and out, they understand the application process, and they have the direct interaction with the building department. It's a standard part of their service, and honestly, it’s one of the key indicators that you're dealing with a legitimate, professional company.
A good contractor will include the permit application and fees in their overall estimate. They'll gather all the necessary project details, fill out the paperwork, submit it to the local authority, and schedule the inspections. This streamlines the process for you and ensures that the permit is obtained correctly. If a contractor suggests you pull the permit yourself, or worse, suggests skipping it entirely, that's a massive red flag. This often signals that they might not be properly licensed or insured, or they intend to cut corners that wouldn't pass inspection. Always confirm that your contractor is licensed and insured roofers; it's non-negotiable for your protection. For example, if you hire a GAF Master Elite Contractor, part of what makes them "Master Elite" is their commitment to quality and adherence to local regulations, which includes managing the permit process seamlessly.
Homeowner-Pulled Permits: When and Why
While it's less common for roofing, there are situations where a homeowner might choose to pull their own permit. This usually happens if you, the homeowner, are acting as your own general contractor for a project or if you're undertaking the work yourself as a DIY enthusiast.
If you decide to pull the permit yourself, be prepared for a steeper learning curve. You’ll be responsible for understanding all local building codes, submitting accurate plans, scheduling inspections, and ensuring the work meets all regulatory standards. The building department will treat you as the contractor, meaning you assume all legal responsibility for the work's compliance. While it might save you a small amount on the contractor's administrative fee, the time commitment and potential for error can be substantial. For a complex project like a full roof replacement, I generally advise against homeowners pulling their own permits unless they have significant construction experience. The nuances of proper installation, like how asphalt shingles are installed step by step, are often best left to those with professional expertise and licensing. If you're going to hire a contractor, they should be the one pulling the permit.
Verifying Permit Status
Regardless of who pulls the permit, it is your right and your responsibility as the homeowner to verify that a permit has actually been obtained before any significant work begins. Do not just take your contractor's word for it.
Here’s how you can verify:
- Ask for a Copy: Request a copy of the official permit from your contractor. It should have a permit number, the scope of work, and the property address clearly listed.
- Check Online: Many local building departments have online portals where you can search for permits by address. This is a quick and easy way to confirm.
- Call the Building Department: If you can't find it online or want extra assurance, simply call your local building department and provide your address. They can confirm if a permit has been issued for your property.
I once knew a homeowner in Phoenix, Arizona, who trusted their contractor, only to find out halfway through the job that no permit had been pulled. The city issued a stop-work order, and the homeowner faced fines and delays. It was a nightmare. A simple phone call beforehand could have prevented all that stress. Verifying the permit is a quick step that offers immense protection against unscrupulous contractors or honest mistakes.
| Who Pulls the Permit? | Pros for Homeowner | Cons for Homeowner |
|---|---|---|
| Contractor (Recommended) | Peace of mind, expertise, compliance handled, usually included in service. | May include a small administrative fee in the total cost. |
| Homeowner (DIY/GC) | Potential cost savings on administrative fees. | Assumes full legal responsibility, requires understanding of codes, time-consuming, risk of errors. |
What Building Inspectors Look for During a Roofing Inspection
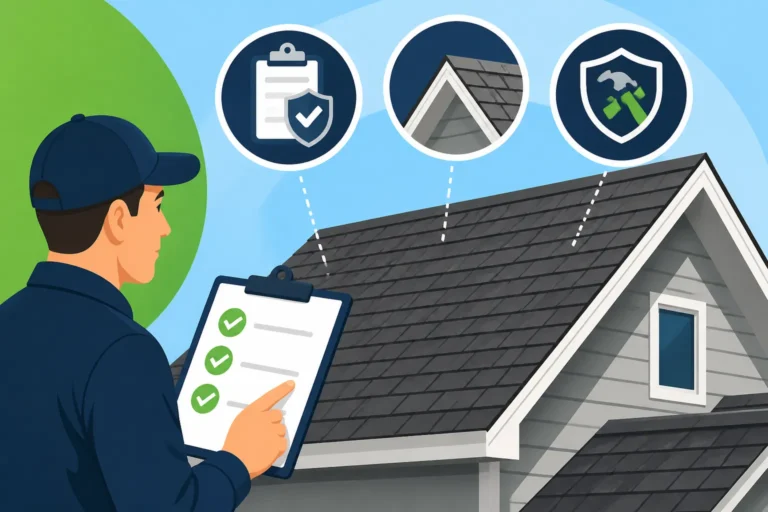
When you think about a building inspector, you might envision someone meticulously combing over every nail, but it's a bit more practical than that. Their role is to ensure that the work meets the minimum safety and code standards. They're not there to micromanage your contractor but to perform critical checks at specific stages of the roofing process. Understanding what they're looking for can give you confidence in the quality of your roof and help you spot any potential issues yourself.
Pre-Installation Inspection: Decking and Underlayment
The first critical inspection often occurs after the old roof has been torn off but before any new materials like underlayment or shingles are installed. This is a crucial window because it's the only time the roof decking is fully exposed. This inspection is often referred to as the "mid-roof" or "decking" inspection.
During this phase, the inspector will primarily focus on:
- Decking Condition: They'll check the existing plywood or OSB decking for any signs of rot, water damage, or structural weakness. If any sections are compromised, the inspector will require them to be replaced before new materials go on. This is vital because a strong deck is the foundation for a durable roof. Understanding roof decking replacement cost is key here.
- Fastening: They'll confirm that the existing decking is properly fastened to the rafters, ensuring it can withstand wind uplift and the weight of the new roofing system.
- Structural Integrity: If any structural changes were part of the permitted work (e.g., new rafters, changes to the roofline), they would verify these meet engineered specifications.
- Preparation: They'll check that the roof surface is clean, smooth, and ready for the new installation, with no protruding nails or debris that could damage the underlayment.
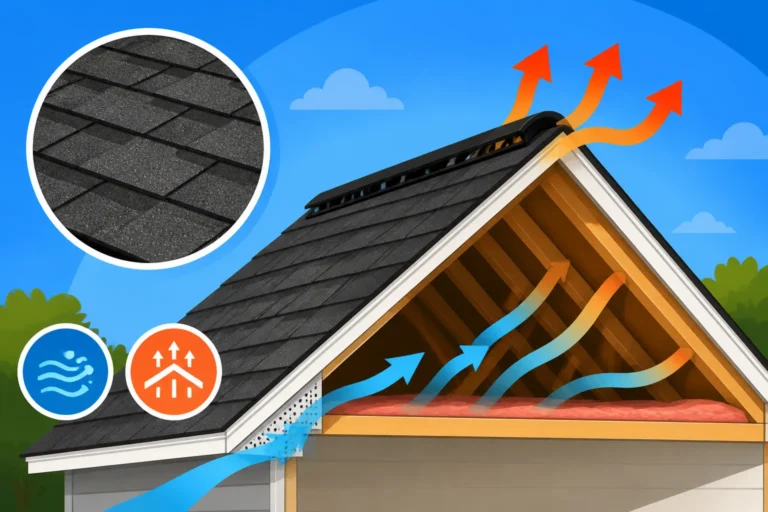
- Ventilation: In some cases, they might check for existing attic ventilation and ensure it meets current requirements, as proper roof ventilation works by preventing heat and moisture buildup.
It's absolutely critical that your contractor doesn't proceed with installing the new underlayment until this inspection has passed. Covering up issues with the decking is a major red flag and can lead to significant problems that won't become apparent until years later, when it's much harder and more expensive to fix.
Final Inspection: Shingle Installation and Flashing
Once the entire roofing system has been installed, and all work is complete, the final inspection takes place. This is where the inspector ensures that all visible components of your new asphalt roof are correctly in place and meet code. This doesn't mean they're counting every single nail, but they are looking for key indicators of a quality, compliant installation.
During the final inspection, they'll typically check:
- Shingle Installation: They'll look at the shingle alignment, proper overlap, and fastening. They might randomly lift a shingle to ensure the correct number of nails is used in the right locations (e.g., high-wind nailing requirements).
- Flashing: This is a huge one! Flashing around chimneys, skylights, vent pipes, and in valleys is critical for preventing leaks. The inspector will ensure that all flashing is properly installed, sealed, and integrated with the shingles according to code. Improper flashing is a primary cause of roof leaks. They'll also check the drip edge.
- Underlayment: While much of it is covered, they may verify that ice and water shield was installed in required areas (like eaves and valleys, especially in colder climates) and that the synthetic or felt underlayment is consistent with the permit.
- Vents and Penetrations: They'll ensure that all roof penetrations (like plumbing vents, exhaust vents, and attic vents) are properly sealed, flashed, and in good working order. They might check if a ridge vent was installed correctly.
- Workmanship: While subjective, they'll assess the overall quality of the installation, looking for obvious signs of poor craftsmanship, such as wavy shingle lines, damaged shingles, or excessive sealant.
- Cleanliness: Sometimes, they’ll even check that the job site has been cleaned up properly and that no debris or nails are left behind.
Passing the final inspection means your roof is officially signed off as being code-compliant and safely installed. This document is often required for insurance purposes and can be important if you ever sell your home.
Code Compliance and Workmanship Standards
It's important to remember that building codes are minimum standards. A good contractor will often exceed these minimums, especially when it comes to workmanship. However, the inspector's job is to ensure at least those minimums are met.
They are checking for compliance with a wide array of specific requirements, which can include:
- Fire Ratings: Ensuring your shingles meet local fire resistance standards (e.g., Class A fire rating).
- Wind Resistance: Verifying the nailing pattern and shingle type are adequate for the local wind zone.
- Material Compatibility: Making sure all components of the roofing system (shingles, underlayment, flashing) are compatible and work together effectively.
- Ventilation Requirements: Confirming that the attic has adequate intake and exhaust ventilation to prevent moisture issues and premature roof aging.
Think of the inspector as an impartial third party looking out for your long-term investment. They ensure that the significant amount of money you're spending on your new roof is going towards a safe, durable, and code-compliant installation. If an inspector finds an issue, they will usually issue a "correction notice" or "red tag," requiring the contractor to fix the problem before re-inspection. This ensures that any deficiencies are addressed, ultimately giving you a better roof.
The True Cost of a Roofing Permit
When you’re budgeting for a new roof, you’re probably thinking about the big-ticket items: the shingles, the labor, maybe the cost of roof tear-off and disposal. But tucked into that overall expense is often the price of the roofing permit itself. While it’s typically a relatively small portion of the total asphalt roof replacement cost, it's a mandatory fee, and understanding how it's calculated can prevent unwelcome surprises.
Understanding Permit Fee Structures
Permit fees are not a flat rate across the board; they vary significantly based on your location and the complexity of your roofing project. Each city, county, or even smaller municipality has its own fee schedule, which is often publicly available on their building department's website.
Common ways permit fees are structured include:
- Flat Fee: Some smaller towns or for very simple projects might charge a single, fixed fee. For example, a permit for any roof replacement in a small rural county might be a flat $150.
- Based on Project Value: This is a very common method. The permit fee is a percentage of the total project cost. So, if your roof replacement is estimated at $15,000, and the permit fee is 1% of the project value, you’d pay $150. This means a larger, more expensive roof replacement, like one on a 3,000 sq ft house, will naturally have a higher permit fee.
- Based on Square Footage (or "Squares"): Some jurisdictions charge based on the size of the roof. Since roofing is often measured in "squares" (a square equals 100 square feet), they might charge X dollars per square. So, if your roof is 30 squares and the fee is $5 per square, that's $150.
- Tiered System: A combination of the above, where there might be a base fee, plus additional charges for specific elements like roof decking replacement, structural alterations, or if it's a multi-story roof with a steep roof cost premium.
It's important to clarify with your contractor how the permit fee is calculated and that it's clearly itemized in your roofing estimate. Don't be shy about asking questions about these fees; transparency is key in any good contractor relationship.
Additional Costs and Potential Fees
While the base permit fee covers the initial application and standard inspections, there can sometimes be additional, less obvious costs or potential fees to be aware of. These usually arise in specific circumstances or due to unforeseen issues.
- Re-inspection Fees: This is the most common additional cost. If your contractor's work fails an inspection for some reason (e.g., improper nailing, flashing issues), the inspector will require them to correct the problem and then schedule a re-inspection. Many municipalities charge a separate fee for each re-inspection. This is usually borne by the contractor, but if you're pulling the permit as a homeowner-general contractor, it falls on you. This is why choosing a highly skilled contractor who understands local codes is vital.
- Expedited Permit Fees: In some bustling cities, if you're in a hurry and need your permit fast, there might be an option for an expedited review process, but it often comes with a higher fee.
- Planning Department Fees: If your roofing project involves significant changes to the structure or footprint that require review by a planning or zoning department in addition to the building department, there might be separate fees.
- Historical District Fees: If your home is in a designated historical district, there can be additional review processes and fees to ensure the new roof conforms to historical aesthetic guidelines.
- Penalty Fees: If you start work without a permit and get caught, the city will not only issue a stop-work order but will almost certainly hit you with hefty penalty fees, which can be several times the original permit cost. This is definitely one of those hidden costs in a roof replacement you want to avoid.
How Permit Costs Compare Regionally
The cost of a roofing permit can vary dramatically depending on where you live. What might be a modest fee in a rural town could be significantly higher in a major metropolitan area or a state with very stringent building codes.
For example, a roofing permit in a smaller city in Ohio might only be $75-$150, while the same permit in a densely populated area of California or Florida (known for strict hurricane or seismic codes) could easily range from $300 to $700 or even more, particularly for larger homes. This regional variation reflects the different administrative overheads of local governments, the complexity of their building codes, and the general cost of living and construction in that area. States with higher populations and more complex geological or weather patterns (like California, Florida, or Texas) tend to have more robust building departments and, consequently, higher permit fees. Always check with your local building department directly or rely on your contractor to provide an accurate estimate for your specific location. This is part of why something like Asphalt Roof Replacement Cost in Texas might differ from a similar project in Michigan.
Ignoring the Permit Process: What Could Go Wrong?
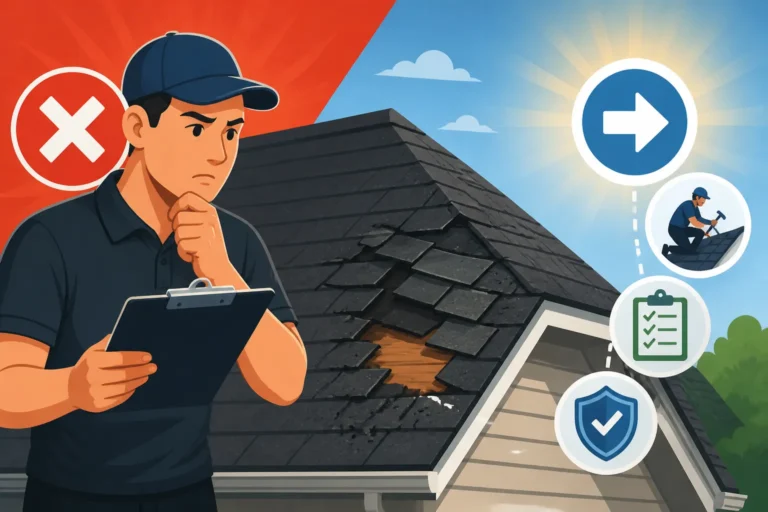
I know, I know. Permits can feel like an inconvenience. It’s tempting to think, "My roof needs fixing, I'll just get a guy to do it, no one will ever know." But trust me, ignoring the permit process is one of the riskiest decisions you can make as a homeowner. The potential consequences far outweigh any perceived savings or convenience of skipping this crucial step. It's not just about avoiding a minor fine; it's about safeguarding your finances, your home's value, and your peace of mind.
Legal and Financial Repercussions
The most immediate and tangible risks of not pulling a permit are the legal and financial penalties. If your unpermitted roofing work is discovered, your local building department has the authority to issue a "stop-work order" immediately. This means all work halts, often leaving your home exposed and unfinished, until you apply for and obtain the proper permits.
Beyond the stop-work order, you're likely to face significant fines. These "work without a permit" fines are often substantially higher than the original permit fee—sometimes two, three, or even ten times the normal cost. In addition to fines, you might be required to open up portions of the new roof (or even tear it off entirely) for retrospective inspections to ensure it meets code. Imagine paying for a whole new roof, only to have to pay again to have it partially deconstructed and then reinstalled, all while incurring hefty penalties. It's a financial nightmare that can easily turn a $15,000 roof replacement into a $30,000 headache. In some extreme cases, if the work is deemed unsafe or structurally unsound, the city could even force you to completely remove the unpermitted work and rebuild it to code, regardless of the cost.
Issues with Insurance and Warranties
This is where ignoring a permit can become a truly catastrophic mistake. Your homeowner's insurance policy is designed to protect you from damage to your property. However, most insurance policies have clauses that can void coverage if damage is caused or exacerbated by unpermitted work or code violations.
Consider this: a powerful storm rips through your area, damaging your unpermitted new roof. When you file a claim, your insurance company's adjuster will likely look for a record of permits for major renovations. If they discover the roof replacement was done without a permit, they could deny your claim entirely, leaving you to pay for all repairs or another full replacement out of pocket. Furthermore, manufacturer warranties on your asphalt shingles, like those from Owens Corning or CertainTeed, often require proper installation in accordance with local building codes. If your roof wasn't permitted and therefore wasn't inspected for code compliance, the manufacturer could argue that the warranty is void due to improper installation, even if the shingles themselves were defective. It's a double whammy: no insurance coverage for damage and no warranty coverage for product failure. This is why understanding how roofing warranties work is so important.
Challenges During Home Resale
Finally, imagine you're ready to sell your beloved home. You’ve maintained it well, and it looks great. But then the buyer's inspector or appraiser discovers that the roof, which you had replaced a few years ago, has no permit on file. This immediately raises a red flag. Potential buyers often become wary of unpermitted work because they know it could lead to future legal, insurance, or structural issues.
Unpermitted work can significantly complicate and delay the sale of your home. Buyers might demand that you get retroactive permits and inspections (which often involves fines and potentially tearing into the roof) before closing. Or, they might demand a hefty discount to compensate for the risk they're taking on. In some cases, a buyer's lender might even refuse to finance a home with significant unpermitted work, essentially killing the sale. You might find yourself in a position where you have to disclose the unpermitted work, which devalues your home and makes it less attractive. It essentially turns what should be a valuable asset (a new roof) into a liability. A roofing permit ensures your roof adds value and peace of mind, not a headache, when it's time to sell.
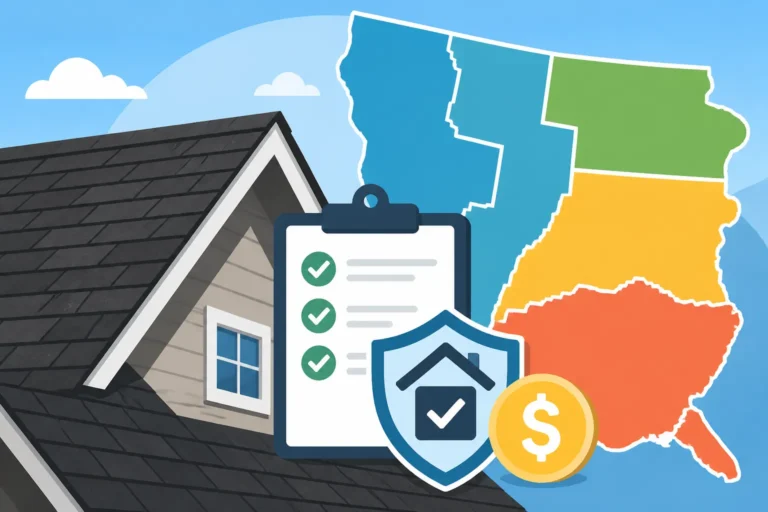
Regional Differences in Roofing Permit Requirements
Just when you think you’ve got a handle on the permit process, you realize that it’s not a one-size-fits-all situation. Roofing permit requirements are highly localized. What's mandatory in one county might be completely different in a neighboring city, or even across state lines. This patchwork of rules can be frustrating, but understanding these regional differences is critical for ensuring your project is compliant, no matter where you live.
State and Local Variations: A Patchwork of Rules
The primary reason for these variations is that building codes are often adopted and enforced at the state and local (county or municipal) levels. While most states adopt a version of the International Building Code (IBC) or International Residential Code (IRC), they often amend these codes to suit local conditions, priorities, and political considerations. This means that a standard like "how many layers of shingles are legal" can differ based on local ordinances.
For example, in Florida, due to its hurricane exposure, roofing codes are exceptionally stringent, with specific requirements for fastening methods, secondary water barriers, and even wind uplift resistance for shingles. An asphalt roof replacement cost in Florida will likely reflect these stricter codes and the associated permit processes. Compare that to a state like Pennsylvania, where while codes are important, they may not have the same emphasis on hurricane-specific reinforcements, leading to slightly different permit requirements and inspection focuses. Some states might have statewide licensing for roofers, while others leave it up to individual cities or counties. This creates a complex regulatory landscape where what's true for "Roofing License Requirements in Texas" might be very different from "Roofing License Requirements in Minnesota." Always remember that the most specific and immediate rules for your home come from your local city or county building department.
Special Climate Zone Considerations
Beyond general state and local variations, specific climate zones often dictate additional, more specialized roofing permit requirements. These are put in place to ensure roofs can withstand the unique environmental challenges of an area.
- Hurricane and High-Wind Zones: Coastal areas or regions prone to hurricanes and severe winds (like the Gulf Coast, Florida, or parts of the Midwest) will have enhanced requirements. Permits in these areas will specifically ensure compliance with high-wind nailing patterns, reinforced starter strips, and potentially thicker, more wind-resistant shingles. They may also require a "secondary water barrier" (like peel-and-stick underlayment) over the entire roof deck, not just at the eaves and valleys, which is standard in many other regions.
- Hail-Prone States: In states frequently hit by hail (such as Colorado, Texas, or Oklahoma), building codes might encourage or even mandate the use of Class 4 impact-resistant shingles. Permits in these areas would ensure that new installations meet these standards, often providing a discount on homeowner's insurance premiums as an incentive.
- Cold Climates and Ice Dam Zones: Northern states and regions experiencing heavy snowfall and freezing temperatures (like the Northeast or upper Midwest) will have strict requirements for ice and water shield. Permits ensure that these critical barriers are installed at the eaves, in valleys, and around penetrations to prevent ice dams from forming and causing water infiltration. The exact amount of ice and water shield required (e.g., extending 24 inches or 36 inches beyond the interior wall line) can vary by locale.
- Wildfire Zones: In areas prone to wildfires, particularly in the West (e.g., California), roofing codes often mandate fire-resistant materials, such as Class A fire-rated asphalt shingles, and may have specific requirements for eaves and soffit protection to prevent ember intrusion.
These specialized requirements are all part of the permitting process, ensuring that your roof isn't just aesthetically pleasing but also engineered to protect your home against the specific threats it faces year after year.
How to Find Your Local Requirements
Given this complexity, how do you, as a homeowner, find out exactly what's required for your specific roofing project in your exact location? It's simpler than you might think, and there are a few reliable avenues to explore.
- Your Local Building Department's Website: This is your absolute best first stop. Almost every city and county in the U.S. has a dedicated website for their building and planning department. Look for sections on "Permits," "Building Codes," or "Residential Roofing." They often have downloadable guides, checklists, and even FAQs tailored to roofing projects. You can usually find information on specific topics like "Do You Need a Roofing Permit in New York" or "Roofing Permit Cost in Illinois."
- Contacting the Building Department Directly: If the website is unclear or you have specific questions, don't hesitate to call or visit your local building department. Their staff is there to help residents understand and comply with the rules. Be prepared with your property address, a brief description of the work you plan to do, and any questions you have.
- Ask Reputable Local Contractors: A seasoned, licensed, and local roofing contractor will be intimately familiar with the permit requirements in your area. They deal with these regulations every day. In fact, a good contractor should be able to tell you exactly what permits are needed for your specific job without you even having to ask. This is one of the key questions to ask a roofing contractor before hiring. If they're vague or dismissive about permits, that's a serious red flag.
By taking these steps, you can confidently navigate the regional differences and ensure your roofing project proceeds smoothly, legally, and safely, providing the long-term protection your home deserves.
Disclaimer
Please remember that building codes and permit requirements are constantly subject to change and vary significantly by location. The information provided in this guide is intended for general informational purposes only and should not be considered legal advice or a substitute for professional consultation. Always confirm the specific requirements with your local building department and a licensed roofing contractor before beginning any roofing project. Failure to obtain necessary permits can result in fines, project delays, and potential issues with insurance coverage or future home sales.