Roofing Nail Code Requirements
Thinking about getting a new roof can be a whirlwind of decisions, and frankly, it often feels like trying to navigate a maze blindfolded. One aspect that homeowners frequently overlook, but which is absolutely critical, is understanding roofing nail code requirements. This might sound like a minor detail, but incorrect nailing is a silent killer of roofs, leading to premature failure, voided warranties, and even safety hazards. This guide will meticulously break down everything you need to know about these essential codes, helping you ensure your next asphalt roof is installed correctly and built to last.
Why Roofing Nail Codes Are Far More Than Just Technicalities
When you think about a new roof, your mind probably jumps to shingle colors, durability, and the overall aesthetic. The nitty-gritty details of how those shingles are fastened often get relegated to the "contractor's problem" pile. But let me tell you, as someone who’s seen countless roofing projects, understanding the why behind roofing nail codes is paramount. It’s not just about adhering to some arbitrary government rule; it's about the very integrity and lifespan of your entire roofing system.
The Unseen Heroes: How Nails Protect Your Investment
Imagine building a house with weak glue instead of sturdy nails. It wouldn't stand up to much, would it? The same principle applies to your roof. Each shingle is designed to interlock and shed water, but it's the nails that physically anchor them to your home's roof deck. Without proper nailing, even the best shingles from manufacturers like GAF, Owens Corning, or CertainTeed are essentially just decorative tiles waiting for the next gust of wind to send them flying. Proper nail placement and quantity directly impact how well your roof can resist wind uplift, heavy rain, and even hail. It’s the difference between a roof that withstands a major storm and one that leaves you with interior water damage and a massive headache.
Safeguarding Your Warranty and Insurance Coverage
This is where it really hits home for many homeowners. Most reputable asphalt shingle manufacturers offer warranties that can last for decades, protecting you from defects in materials. However, almost every single one of those warranties has a clause that stipulates the roof must be installed according to their specific guidelines and local building codes. If your roof isn't nailed correctly, your expensive warranty could be completely voided, leaving you on the hook for repairs or even a full replacement if something goes wrong down the line.
Similarly, in the unfortunate event of storm damage, your insurance company will send out an adjuster to assess the roof. If they find that the damage was exacerbated or even primarily caused by improper installation – specifically, incorrect nailing – your claim could be denied or significantly reduced. It's a frustrating scenario to imagine, paying for insurance only to find it doesn't cover your faulty roof, but it's a very real possibility if you don't ensure code compliance from the get-go. This is why understanding your homeowner's insurance policy and roof claims is so important.
Deciphering the Nailing Pattern: The Nitty-Gritty Details
Okay, so we've established why nailing codes matter. Now, let's dive into the specifics of what those codes typically require. This isn't rocket science, but it does require attention to detail, which is exactly what a good roofing contractor provides. These requirements are standardized by national building codes, like the International Residential Code (IRC), but are then often adapted or enhanced by local jurisdictions based on regional climate and specific environmental challenges.
Nail Quantity and Placement: The Crucial Foundation
Most asphalt shingles require a minimum number of nails per shingle to ensure adequate wind resistance and adherence. The standard for typical architectural or dimensional shingles in many areas is four nails per shingle. However, in high-wind zones – think coastal areas prone to hurricanes or plains states known for severe thunderstorms – this often jumps to six nails per shingle. This difference is critical for a roof's ability to resist wind uplift, as discussed in our guide on .
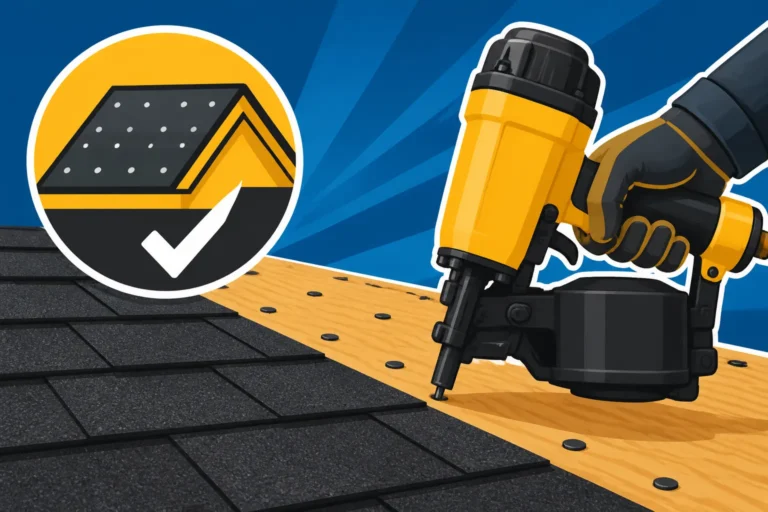
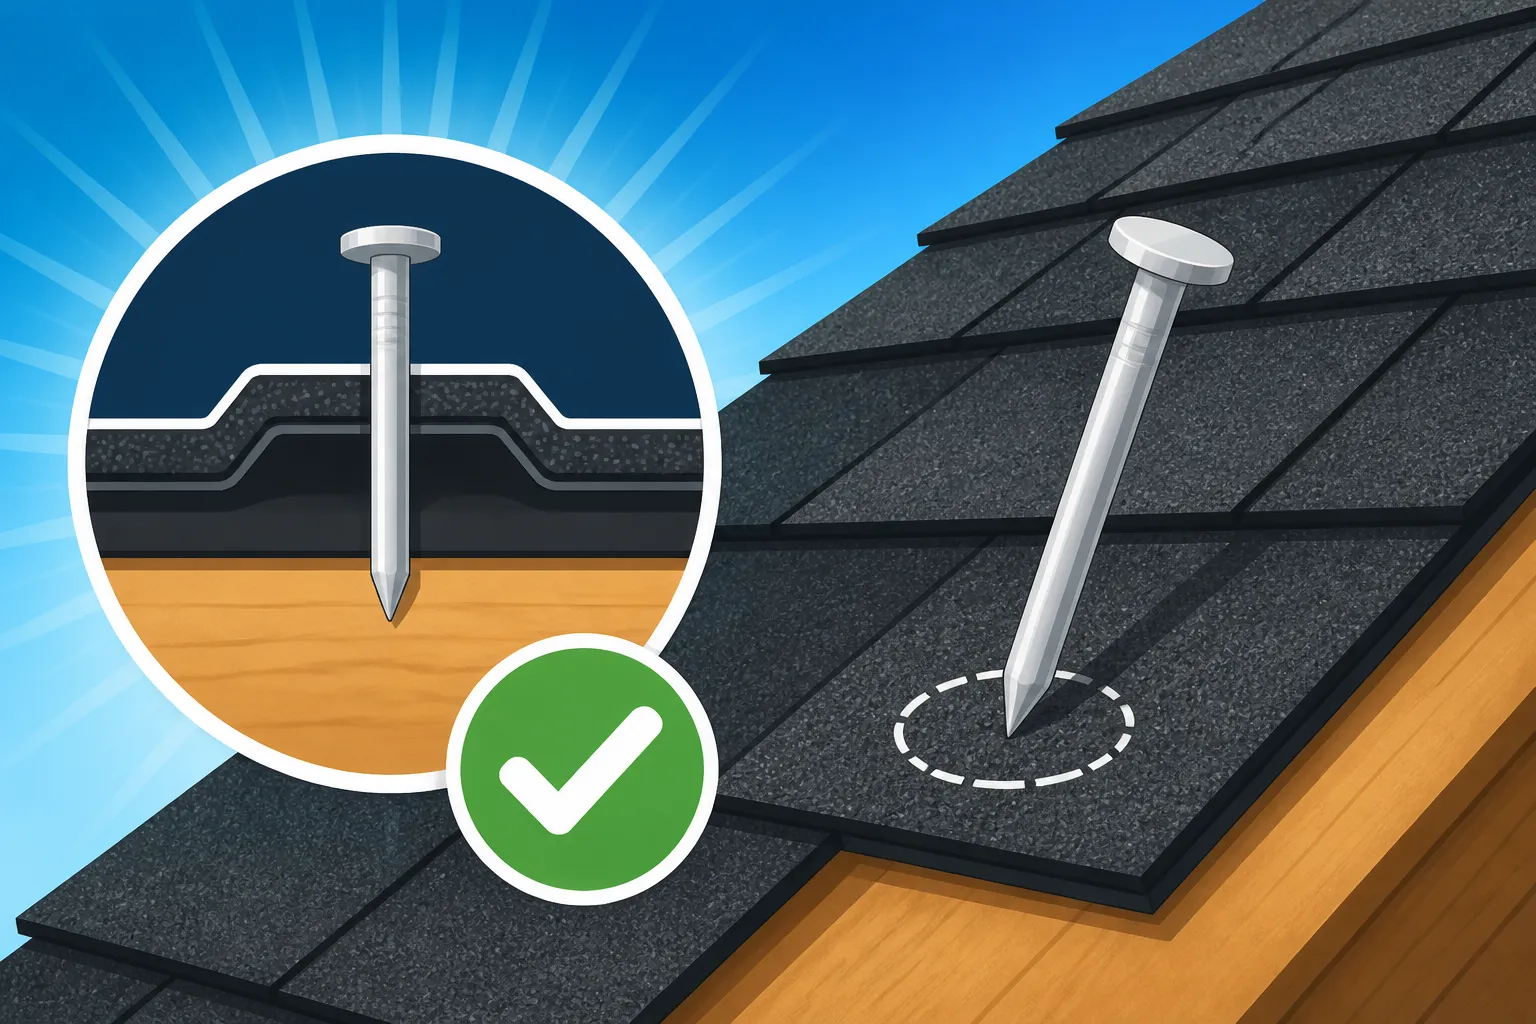
Beyond the number, the placement of these nails is equally vital. Each shingle manufacturer designs a specific "nailing strip" or "fastener zone" on their shingles. This is usually a clearly marked area, often a horizontal line, where the nails should be driven. Nailing above or below this line, or too close to the edge of the shingle, can prevent the shingle from sealing properly, making it susceptible to wind damage and water intrusion. Nails should be driven straight, not angled, and they should penetrate all layers of the shingle and the underlying roof deck, without over-driving or under-driving.
Here's a quick look at common nailing requirements:
| Shingle Type & Climate | Minimum Nails Per Shingle | Nail Placement | Minimum Deck Penetration |
|---|---|---|---|
| Standard 3-Tab (Low-Wind) | 4 | Nailing strip | 3/4 inch |
| Architectural (Low-Wind) | 4 | Nailing strip | 3/4 inch |
| Architectural (High-Wind) | 6 | Nailing strip | 3/4 inch |
| Designer/Luxury (High-Wind) | 6 | Nailing strip | 3/4 inch |
Note: These are general guidelines. Always consult local building codes and manufacturer specifications.
Proper Nail Length and Penetration
The length of the nail isn't just about getting through the shingle; it's about getting into the roof deck securely. The general rule of thumb is that the nail must penetrate at least 3/4 of an inch into the roof sheathing (OSB or plywood) or completely through it if the sheathing is thinner. If your roof deck is 1/2-inch plywood, a 1 1/4-inch roofing nail should penetrate cleanly through. For thicker decking, or if you have an existing layer of shingles you're roofing over (which is often not recommended and might have specific rules, as detailed in our article on ), a longer nail, typically 1 1/2 inches or 1 3/4 inches, might be necessary.
Why is this important? Too short a nail won't grip the roof deck firmly enough, allowing shingles to lift easily. Too long a nail that protrudes into the attic can create condensation points and potentially pierce any vapor barrier or insulation. Furthermore, the head of the nail needs to be flush with the shingle surface – not sunken in (over-driven) which can cut through the shingle, and not sticking up (under-driven) which can prevent overlying shingles from lying flat and sealing, creating a potential leak path.
Approved Nail Types and Materials
You can't just use any old nail you have lying around in the garage. Roofing nails are specifically designed for this purpose. They are typically short, stout, and have a wide head to provide maximum holding power without tearing through the shingle material. The most common type is a 10- or 11-gauge hot-dipped galvanized steel nail, which is resistant to rust and corrosion. Aluminum nails are sometimes used, particularly in coastal areas to resist salt air, but they are generally softer and can bend more easily. Stainless steel nails are the premium option, offering superior corrosion resistance, but they come at a higher cost.
Using the wrong type of nail – say, a standard framing nail – can lead to premature roof failure. Framing nails have smaller heads that don't hold the shingle as effectively and are often not galvanized, meaning they'll rust and stain your roof. Always ensure your contractor uses appropriate roofing nails that meet both local codes and the shingle manufacturer's recommendations.
Nailing Variations by Shingle Type and Local Climate
It’s easy to think a roof is a roof, but the truth is, the specific requirements for nailing can change quite a bit depending on the type of shingle you choose and, perhaps most significantly, where your home is located. What works in a calm, inland climate might be completely inadequate for a home in a hurricane-prone region.
How Different Shingle Types Influence Nailing
While the basic principles remain, different shingle types have unique characteristics that can affect nailing.
- 3-Tab Shingles: These are the most basic and typically require four nails per shingle, placed above the cutout and below the sealant strip. Because of their lighter weight and simpler construction, they are often less resistant to high winds, making precise nailing crucial.
- Architectural (Laminated/Dimensional) Shingles: These are thicker, heavier, and offer a more dimensional look. They also often come with higher wind ratings. Most manufacturers recommend four nails in the designated nailing zone. However, if these shingles are rated for higher winds (e.g., 110 mph or 130 mph), the manufacturer and local codes will often require a six-nail pattern, strategically placed to maximize uplift resistance. Brands like GAF Timberline HDZ and Owens Corning Duration shingles often feature wider nailing zones, like GAF's "StrikeZone" or Owens Corning's "SureNail" technology, designed to make it easier for installers to achieve correct fastening. This helps ensure that the enhanced performance features of these shingles, like their strong adhesive strips, can perform as intended.
- Designer/Luxury Shingles: These are the heaviest and most robust asphalt shingles, mimicking the look of slate or wood shakes. Due to their weight and often high-wind ratings, these almost universally require a six-nail pattern. Their complex layers demand careful attention to nail placement to ensure adequate penetration without damaging the shingle.
The key takeaway here is to always check the specific installation instructions provided by the shingle manufacturer for the exact product being installed. A reputable contractor will have these readily available and follow them to the letter.
High-Wind Zones and Enhanced Nailing Schedules
This is where local climate plays a massive role. In areas prone to hurricanes, tornadoes, or sustained high winds, building codes are significantly more stringent regarding roof fastening. States like Florida, with its rigorous Florida Building Code, or coastal regions in Texas and North Carolina, often mandate an enhanced nailing schedule.
Instead of the standard four nails, homes in these areas often require six nails per shingle. These nails also need to be spaced precisely and often include specific requirements for fasteners along hips, ridges, and rake edges. The IRC (International Residential Code) has specific provisions for high-wind areas, and local municipalities frequently adopt or even exceed these requirements. For instance, in Miami-Dade County, Florida, the requirements are exceptionally strict, often demanding longer nails and specific adhesion techniques beyond just nailing to ensure the roof can withstand Category 5 hurricane-force winds. Our guide on and further explains these specific regional needs.
If you live in a high-wind zone, your contractor should be intimately familiar with these enhanced requirements. Don't be shy about asking them to explain the specific nailing pattern they plan to use and how it complies with local high-wind codes. This proactive approach can literally save your roof during the next big storm.
What Happens When Codes Aren't Followed and How to Ensure Compliance
Knowing the codes is one thing, but ensuring they are actually implemented on your roof is another challenge entirely. Unfortunately, corners can be cut, either due to inexperience, negligence, or simply trying to rush a job. The consequences of improper nailing can be severe, leading to costly problems down the road.
The Dire Consequences of Improper Nailing
When a roof isn't nailed according to code or manufacturer specifications, a cascade of issues can arise, often before the roof has reached even half of its expected lifespan.
- Premature Shingle Blow-Off: This is the most immediate and visible problem. Inadequate nailing means shingles are easily ripped off by even moderate winds, leaving your roof deck exposed to the elements. This isn't just an aesthetic issue; it can lead to massive water damage inside your home, ruined insulation, and damaged ceilings.
- Reduced Wind Resistance: Even if shingles don't immediately blow off, improper nailing weakens the entire roof's ability to resist wind uplift. Over time, the constant stress from wind can cause shingles to loosen, crack, or delaminate. This compromises the sealant strip, which needs proper nail pressure to activate and bond effectively.
- Water Infiltration and Leaks: Under-driven nails can cause bumps in the shingles, preventing them from lying flat and creating channels for water to seep underneath. Over-driven nails, on the other hand, can puncture the shingle's asphalt layer, creating a direct pathway for water to enter, especially during heavy rains. Nails driven incorrectly into the "cut-out" sections of 3-tab shingles can also lead to leaks.
- Voided Warranties: As we discussed, almost all manufacturer warranties depend on proper installation. If a problem arises and an inspector finds that the nails were incorrectly placed, too few were used, or the wrong type of nails were installed, your warranty claim will likely be denied. This can be a huge financial blow, leaving you without recourse for a faulty roof. Our guide on delves into more detail about how these issues can void your coverage.
- Safety Hazards: A roof that isn't properly secured is a safety hazard, both for those working on it and for anyone below during a storm. Loose shingles can become projectiles, and structural integrity can be compromised in extreme cases.
Empowering Yourself: Ensuring Your Contractor Complies
As a homeowner, you're not expected to be a roofing expert, but you can certainly empower yourself with knowledge and ask the right questions to ensure your contractor adheres to all roofing nail code requirements.
-
Ask for Specifics: When getting estimates, don't just ask for a price. Ask your potential contractors to explain their nailing strategy. For example, "Will you be using four or six nails per shingle, and why?" "What length of nails will you be using, and what will the penetration be into the deck?" "What kind of nails (galvanized, stainless steel) are included?" A reputable contractor will be happy to discuss these details and show you the manufacturer's installation instructions. This is one of the key questions to ask a roofing contractor before hiring.
-
Verify Local Codes: Building codes can vary significantly from one municipality to the next. You can usually find your local building department's website online, which often lists specific roofing requirements. Share these with your contractor and ensure their plan aligns. Remember, it's typically the contractor's responsibility to pull the necessary permits, but verifying the code is your right as a homeowner.
-
Check Manufacturer Certifications: Many top shingle manufacturers offer certification programs for contractors. For example, GAF has their Master Elite® Contractors, Owens Corning has their Platinum Preferred Contractors, and CertainTeed offers their SELECT ShingleMaster™ credential. These certifications often mean the contractor has undergone specific training in the manufacturer's installation guidelines, including nailing patterns, and can offer enhanced warranties. While not a guarantee, it's a strong indicator of a contractor's commitment to quality.
-
On-Site Inspection (If Comfortable): During installation, if you feel comfortable and it's safe to do so (stay away from active work areas and never go on the roof yourself!), you can observe the process from a distance. Look for consistency in nail placement. Some homeowners even ask their contractor to nail a few shingles on a piece of scrap wood before the actual installation so they can see the correct nail depth and placement for themselves. You can also ask for photos of the nailing patterns on your roof before the next course of shingles covers them up.
-
Review the Contract Thoroughly: Your roofing contract should explicitly state that the installation will comply with all local building codes and manufacturer specifications. Don't sign anything until you're confident that these critical details are included and understood. Our guide on how to read and compare roofing estimates can help you with this.
Remember, your roof is a major investment. By understanding roofing nail code requirements and being an informed homeowner, you can ensure that your new roof is not just beautiful, but also robust, long-lasting, and properly protected.
Disclaimer
The information provided in this article is intended for general guidance and informational purposes only, and does not constitute professional advice. Roofing codes and manufacturer specifications can vary significantly by location and product. Always consult with a qualified, licensed, and insured roofing professional and your local building department to ensure compliance with all applicable codes and regulations for your specific project.