Roof Ventilation Code Requirements
It's easy to overlook what's happening up in your attic and under your roof, that is, until you start noticing sky-high energy bills, peeling paint, or even worse, mold. Many homeowners don't realize how critical proper roof ventilation is, or that there are specific code requirements designed to protect your home. This comprehensive guide will walk you through everything you need to know about roof ventilation codes, why they matter, and how to ensure your home meets them.
Why Ventilation Codes Even Exist and Why They Matter to You
You might think of a roof as just shingles and wood, but it's part of a complex system designed to protect your home. Ventilation plays a silent, crucial role in that system. Building codes aren't just arbitrary rules dreamed up by bureaucrats; they're in place to ensure structures are safe, durable, and energy-efficient. When it comes to your roof, proper ventilation is key to all three, and failing to meet these standards can lead to a host of headaches and costly repairs down the line.
Protecting Your Home from Moisture and Heat
One of the primary reasons for strict ventilation codes is to combat the twin threats of moisture and excessive heat in your attic. In the summer, the sun beats down on your roof, transferring heat into the attic space. Without adequate exhaust, that heat gets trapped, baking your shingles from below and driving up the temperature in your living spaces. This isn't just about comfort; it means your air conditioner has to work overtime, leading to those frustratingly high energy bills we all dread.
Beyond heat, moisture is an even more insidious enemy. Every day, moisture from inside your home – from showers, cooking, laundry, and even breathing – rises and can enter the attic. If this moist air gets trapped, it condenses on cooler surfaces like the underside of your roof deck. Over time, this condensation can lead to serious problems like wood rot, mildew, and black mold growth, which can compromise your home's structural integrity and even pose health risks. Proper ventilation creates a continuous airflow that sweeps away this excess moisture, keeping your attic dry and healthy.
Extending Your Roof's Lifespan
Believe it or not, the lifespan of your asphalt shingle roof is directly impacted by how well your attic is ventilated. Shingles are designed to withstand the elements, but they have their limits. When hot air is trapped in your attic, it literally cooks your shingles from the underside. This accelerates the degradation of the asphalt and causes the protective granules on the surface to shed prematurely. You might start seeing shingles curl, crack, or become brittle long before their expected lifespan is up.
Think about it: if your shingles are rated for 25 or 30 years, but poor ventilation causes them to fail in 15, you're looking at a significant investment in a new roof much sooner than anticipated. This is a common and costly frustration for homeowners who overlook the importance of ventilation during installation. A well-ventilated attic helps maintain a more consistent temperature across the entire roof system, allowing your shingles to perform as intended and last their full, advertised term. Understanding how this system works is paramount to maintaining your home and helps explain why you might want to consider an Extended Roof Warranty: Worth the Cost.
The Basics of Roof Ventilation: Key Principles
At its core, roof ventilation is about creating a continuous, balanced airflow through your attic space. It's not enough to just have a hole in your roof; you need a system that pulls fresh air in and pushes hot, moist air out. This continuous movement is what prevents the buildup of heat and moisture, which are the primary culprits behind many common roofing and attic problems. Many homeowners find themselves scratching their heads when roofers start talking about "intake" and "exhaust," but it's simpler than it sounds once you understand the basic principles.
Understanding Intake and Exhaust
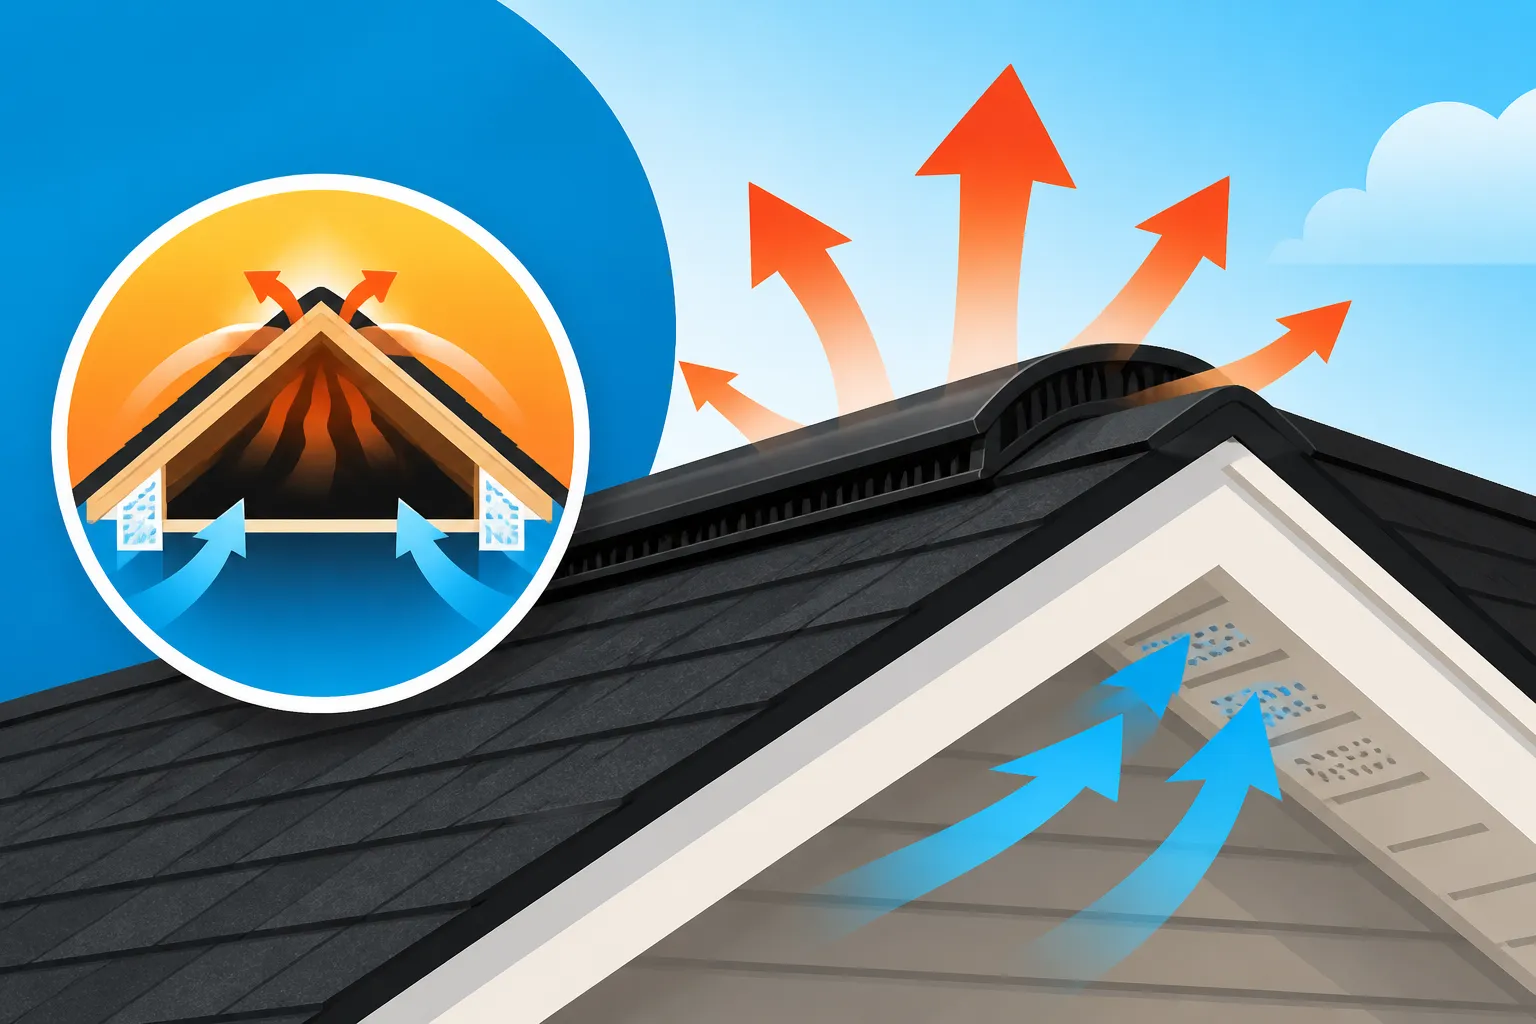
Every effective roof ventilation system relies on two crucial components: intake and exhaust vents. Think of your attic as a giant lung – it needs to breathe.
- Intake vents are typically located low on the roof, often at the soffits (the underside of your roof's eaves). Their job is to draw cooler, drier air from outside into the attic. This air comes in from the lowest point of your roof, creating a natural pathway. Common types of intake vents include continuous soffit vents, individual soffit vents, and sometimes even gable vents (though gable vents are more effectively used as exhaust or in conjunction with dedicated intake).
- Exhaust vents are positioned at or near the highest point of your roof. As the cooler air enters through the intake, it naturally pushes the warmer, lighter air upwards. The exhaust vents provide an escape route for this heated, moisture-laden air. Ridge vents, which run along the peak of your roof, are highly efficient and visually discreet. Other exhaust options include box vents (also known as static vents), turbine vents (which spin with the wind), and powered attic fans.
The goal is to create a "stack effect" or "chimney effect" where air naturally flows up and out. Without both intake and exhaust, your system becomes inefficient or even counterproductive. For instance, if you only have exhaust vents, they might end up pulling conditioned air from your home's living space into the attic, which is definitely not what you want! If you're curious to dive deeper into the mechanics, our guide on How Roof Ventilation Works breaks it down even further.
The Importance of Balanced Airflow
Just having intake and exhaust vents isn't enough; they need to be balanced. "Balanced airflow" means that the amount of air coming into your attic through the intake vents is roughly equal to the amount of air leaving through the exhaust vents. Most building codes aim for a 50/50 split between intake and exhaust, or at least a very close ratio.
Why is this balance so critical? If you have too much exhaust and not enough intake, your exhaust vents will struggle to pull in enough fresh air from the outside. Instead, they might create negative pressure that sucks air from inside your home through any cracks or penetrations in your ceiling, defeating the purpose of insulation and increasing energy costs. Conversely, too much intake without adequate exhaust means hot, moist air gets trapped, unable to escape, leading to the same problems we discussed earlier – heat buildup, moisture condensation, and premature roof aging. A truly balanced system ensures a smooth, continuous flow of air, effectively removing heat and moisture without drawing air from unintended sources. This is a key part of how How Attic Ventilation Prevents Damage and maintains a healthy roof and home.
Common Roof Ventilation Codes and Standards
When it comes to building codes, you'll often hear about specific ratios and requirements that dictate how much ventilation your attic needs. These standards are typically based on the attic's square footage and are designed to ensure adequate airflow for the average home. While local jurisdictions can and do have their own specific amendments, the underlying principles often stem from national model codes like the International Residential Code (IRC).
The 1/300 and 1/150 Rules
The most widely referenced standards for attic ventilation are the "1/300 rule" and, in certain circumstances, the "1/150 rule." These numbers refer to the ratio of net free ventilating area (NFVA) to the attic's insulated ceiling area. NFVA is the actual unobstructed area through which air can pass, often measured in square inches.
-
The 1/300 Rule: This is the general baseline requirement. It states that for every 300 square feet of attic floor space (or insulated ceiling area), you need at least 1 square foot (or 144 square inches) of net free ventilation area. So, if your attic floor is 1,800 square feet, you would need 1,800 / 300 = 6 square feet, or 864 square inches, of total NFVA. This total NFVA is then ideally split equally between intake and exhaust (e.g., 432 sq. in. intake and 432 sq. in. exhaust). This rule generally applies to attics with a vapor barrier and where at least 40% of the required ventilation is located in the upper portion and at least 40% in the lower portion of the roof.
-
The 1/150 Rule: This more stringent rule comes into play when certain conditions aren't met. If there is no vapor barrier present in the attic, or if less than 40% of the required ventilation is in the upper part (exhaust) and less than 40% in the lower part (intake), then the code typically requires 1 square foot of net free ventilation area for every 150 square feet of attic floor space. Using our 1,800 sq. ft. attic example, under the 1/150 rule, you would need 1,800 / 150 = 12 square feet, or 1,728 square inches, of total NFVA. This significantly increases the amount of ventilation required, highlighting the importance of vapor barriers and balanced placement.
These rules ensure that a minimum amount of air can move through your attic. It's not just about meeting the bare minimum, though. A well-designed system will often exceed these requirements to provide even better performance, especially in hot or humid climates.
Specific Requirements for Different Vent Types
While the 1/300 and 1/150 rules provide the overall target, the type of vents you choose also has specific code considerations. Different vents have different "net free areas" even if they look similar in size. Manufacturers will typically provide the NFVA for their products.
- Ridge Vents: These are popular for their discreet appearance and efficiency. Code usually dictates that they run as close to the entire length of the roof ridge as possible. The NFVA for ridge vents is typically measured per linear foot. For example, a common ridge vent might provide 18 square inches of NFVA per linear foot. You'd calculate how many linear feet you need based on your total NFVA requirement.
- Soffit Vents: Whether continuous or individual, soffit vents must be unobstructed. This means ensuring insulation in the attic doesn't block the airflow from the soffit into the attic space. Baffles or chutes are often required to maintain a clear channel for air.
- Box Vents (Static Vents): These mushroom-shaped vents are distributed across the upper sections of the roof. Code often specifies minimum distances between them and from the ridge to ensure effective coverage.
- Powered Attic Fans: While they offer powerful exhaust, codes often treat them differently. They typically don't count towards the required balanced natural ventilation and should usually be accompanied by adequate natural intake. Some codes may even restrict their use or require specific controls to prevent them from back-drafting combustion appliances.
- Gable Vents: Traditionally placed at the peaks of gable walls, they can be part of a ventilation system but are often less effective than a ridge-to-soffit system. If used as exhaust in conjunction with soffit intake, they must be properly sized and placed to avoid creating "dead air" spots in the attic.
Here's a quick comparison of common ventilation ratios:
| Attic Condition | Required NFVA Ratio (sq ft NFVA / sq ft attic floor) | Example: 1,800 sq ft Attic Floor | Notes |
|---|---|---|---|
| With Vapor Barrier AND balanced high/low vents | 1/300 | 6 sq ft (864 sq in) | Most common requirement, preferred for optimal performance. |
| No Vapor Barrier OR unbalanced high/low vents | 1/150 | 12 sq ft (1,728 sq in) | Applies if conditions for 1/300 are not met, requiring double the ventilation. |
| Minimum Intake/Exhaust Split | 50% Intake / 50% Exhaust | 3 sq ft intake / 3 sq ft exhaust | Essential for proper airflow; uneven distribution can lead to issues. |
| Maximum Ridge Vent NFVA (per linear foot) | Varies by product (e.g., 18 sq in) | Approx. 48 linear feet for 864 sq in | Check manufacturer specifications carefully for actual net free area. |
| Maximum Soffit Vent NFVA (per linear foot) | Varies by product (e.g., 9-12 sq in) | Approx. 72-96 linear feet for 864 sq in | Ensure soffit is continuous or individual vents are spaced correctly and not blocked. |
Understanding these specific requirements and how they apply to different components is essential, especially when dealing with various types of asphalt shingles or considering an upgrade to something like Impact-Resistant Shingles, which require the same foundational ventilation.
State and Local Variations in Ventilation Codes
It would be wonderfully simple if all building codes were the same across the board, wouldn't it? Unfortunately, when it comes to construction and roofing, regulations can vary significantly depending on where you live. What's considered standard practice in a sunny, dry climate might be completely insufficient or even inappropriate for a region with heavy snowfall or extreme humidity. This patchwork of rules can be a major source of confusion for homeowners planning a roof replacement or even a simple repair.
Why Codes Differ Across Regions
The main reason for these regional differences stems from variations in climate, geology, and historical building practices.
- Climate Conditions: This is perhaps the biggest driver. States like Florida, with its intense humidity and hurricane risks, will have very different ventilation and roofing codes than, say, Colorado, which experiences heavy snow loads and wide temperature swings. Florida's codes, for instance, often emphasize moisture control and require specific wind-resistant installation techniques that indirectly affect ventilation needs. Drier states might focus more on preventing heat buildup, while colder states prioritize preventing ice dam formation, which proper attic ventilation can significantly mitigate. For example, some colder climates might mandate more rigorous ice and water shield installation, which works hand-in-hand with ventilation to protect against moisture.
- Natural Disasters: Regions prone to specific natural disasters often have stricter codes designed to enhance resilience. Coastal areas susceptible to hurricanes or areas known for severe thunderstorms and hail will have codes that demand greater structural integrity, which can influence how ventilation components are fastened and sealed.
- Local Ordinances and Amendments: While most states adopt a version of national model codes (like the International Residential Code or IRC), individual counties, cities, and even towns often add their own amendments. These local ordinances can introduce additional requirements or modify the existing ones to address unique local concerns, population density, or environmental factors. It's not uncommon for a city to require a certain type of attic fan or a specific NFVA calculation that goes beyond the state minimum.
Navigating these differences can feel like a maze, but it's crucial for ensuring your roof is not only up to code but also optimally suited for your specific environment. This is why when homeowners ask about something like Asphalt Roof Replacement Cost in Florida, the local codes are a big factor in the overall project.
How to Find Your Local Requirements
Given these variations, how can you, as a homeowner, find out what applies to your specific property? It's not as hard as it might seem, but it does require a bit of digging.
- Your Local Building Department: This is your absolute first stop. Every city, county, or municipality will have a building or permitting department. Their website is often a treasure trove of information, including downloadable code books, local amendments, and specific handouts for common projects like roof replacements. You can usually find contact information for their office, and they often have staff available to answer questions about specific projects. When planning any significant work, such as a full roof replacement, you'll need to explore the specific requirements for Do You Need a Permit to Replace a Roof anyway, and ventilation codes will be part of that permit process.
- Ask Your Roofing Contractor: A reputable and experienced roofing contractor who regularly works in your area will be intimately familiar with local building codes. They pull permits all the time and know exactly what the local inspectors are looking for. Don't hesitate to ask them explicitly about the ventilation codes for your project and how they plan to meet them. They should be able to explain the "1/300 rule" or "1/150 rule" in the context of your home and local regulations.
- Review the Permit Application: When your contractor applies for a roofing permit, the application itself or the accompanying documentation will often list the specific codes that apply, including ventilation standards. This is a good way to double-check that the project aligns with what the authorities require.
- Online Resources: Many states and larger counties publish their building codes online. While these can be dense legal documents, searching for "attic ventilation code [Your City/County/State]" can often yield relevant results. Be sure to look for the most current adopted version of the code.
By taking these steps, you can ensure that your roof ventilation system isn't just a best practice, but also fully compliant with the specific legal requirements for your home's location, helping you avoid potential problems and fines down the road.
What Happens If Your Ventilation Doesn't Meet Code
Ignoring roof ventilation codes isn't just about cutting corners; it can lead to a cascade of problems that are far more expensive and frustrating to fix than simply doing it right the first time. Homeowners often don't realize the critical role ventilation plays until they start experiencing the costly consequences of an improperly vented attic. It's not just a technicality; it's a fundamental aspect of your home's health and longevity.
Potential Problems and Damages
The immediate and long-term effects of poor attic ventilation can be quite severe, impacting various parts of your home and your wallet.
- Skyrocketing Energy Bills: As mentioned earlier, trapped heat in the attic acts like a giant oven, radiating down into your living spaces during warmer months. This forces your air conditioning system to work harder and longer, consuming more electricity and significantly increasing your utility costs. In colder months, trapped moisture can also cause insulation to become less effective, allowing heat to escape more easily.
- Premature Roof Deterioration: Without proper air circulation, the underside of your roof deck and shingles can reach extreme temperatures. This "cooking" effect accelerates the aging process of asphalt shingles, causing them to crack, curl, and lose their protective granules much faster than they should. This leads to a significantly reduced roof lifespan, meaning you'll need a full roof replacement years ahead of schedule. Our guide on Roof Nearing End of Life: What to Watch offers more details on these signs.
- Moisture-Related Damage: This is arguably the most destructive consequence. Trapped moisture leads to condensation on the cooler surfaces within the attic. This can cause:
- Wood Rot: The wooden components of your roof structure, including rafters and roof decking, can soften and rot, compromising the structural integrity of your entire roof.
- Mold and Mildew Growth: Mold thrives in damp, stagnant environments. Once mold takes hold in your attic, it can spread to insulation, drywall, and even into your living spaces, posing significant health risks to your family and requiring expensive remediation.
- Buckling Shingles and Peeling Paint: Excessive moisture can cause the roof decking to warp, which in turn can lead to shingles buckling and lifting. Inside your home, high humidity from the attic can cause paint on ceilings and walls to peel or blister.
- Ice Dam Formation: In colder climates, insufficient attic ventilation allows heat to escape from the house into the attic, warming the roof deck. This melts snow on the upper parts of the roof, which then refreezes at the colder eaves, forming dangerous ice dams. These dams prevent melting snow from draining off the roof, causing water to back up under shingles and into your home, leading to leaks and interior damage.
These issues are not just inconvenient; they represent serious structural and financial burdens that could have been avoided with proper code-compliant ventilation.
Impacts on Inspections and Warranties
Beyond the physical damage, failing to meet roof ventilation codes can have significant repercussions when it comes to official inspections and your roof's warranty.
- Failed Inspections: If your roof project required a permit (and most replacements do), a building inspector will check for code compliance, including ventilation. If your system doesn't meet local standards, the inspection will fail, and you'll be required to rectify the issues, which can mean additional time, labor, and material costs. This delay can also push back other renovation projects or even the sale of your home.
- Voided Manufacturer Warranties: This is a crucial, often overlooked point. Shingle manufacturers, like GAF, Owens Corning, and CertainTeed, specifically state in their warranty documents that proper attic ventilation is a condition for the warranty to remain valid. If a problem with your shingles arises and an inspection reveals inadequate ventilation, the manufacturer can deny your warranty claim, leaving you solely responsible for the cost of repairs or even a full replacement. It’s a harsh reality that can catch homeowners completely off guard, making it vital to understand What Voids a Shingle Warranty before installation.
- Home Insurance Issues: While less common than warranty denials, some home insurance policies may have clauses related to maintaining your home according to local codes. In the event of damage that could be attributed to poor ventilation (like extensive mold or structural rot), an insurance adjuster might question compliance, potentially affecting your claim.
- Challenges During Home Sale: When you eventually sell your home, a professional home inspection will likely flag non-code-compliant ventilation. This can become a sticking point in negotiations, potentially leading to a lower sale price or requiring you to pay for ventilation upgrades before closing. Buyers are understandably hesitant to take on a home with known code violations that could lead to future problems.
In short, meeting roof ventilation codes isn't just about ticking a box; it's about protecting your investment, ensuring your family's health and safety, and maintaining the long-term value of your home.
Ensuring Code Compliance During Installation
Making sure your new roof or roof repair adheres to all ventilation codes is paramount. It’s not just about the installation itself, but about the entire process from planning to final inspection. You, as the homeowner, play a vital role in overseeing this, even if you’re not up on the roof yourself. The key is clear communication, proper documentation, and working with professionals who understand and respect these critical standards.
Working with a Knowledgeable Contractor
The single most important step you can take to ensure code compliance is to hire the right roofing contractor. This isn't just about finding someone who can nail shingles; it's about finding an expert who understands the intricacies of a full roofing system, including ventilation.
- Ask About Code Knowledge: During your initial consultations, explicitly ask potential contractors about their familiarity with local building codes, especially regarding ventilation. A good contractor should be able to explain the 1/300 or 1/150 rules, how they'll calculate the required NFVA for your specific roof, and what types of vents they recommend to achieve that balance. If they gloss over these details or act dismissive, that’s a red flag. Our guide on How to Choose a Roofing Contractor offers more tips on vetting.
- Permit Handling: A reputable contractor will always pull the necessary permits for your roofing project. This isn't just a formality; it's a critical step that ensures your project will be reviewed by local building officials and inspected for code compliance. If a contractor suggests skipping the permit, walk away immediately. It's a huge risk that can come back to haunt you. The process of Roofing Permits Explained can shed more light on this.
- Manufacturer Certifications: Many top shingle manufacturers, like GAF or Owens Corning, offer certification programs for contractors. A "certified" or "preferred" contractor has undergone specific training and demonstrated expertise in installing their products according to manufacturer specifications, which often exceed minimum building codes. This expertise usually extends to proper ventilation as well, and using such a contractor often unlocks enhanced manufacturer warranties.
- Detailed Proposals: Your roofing estimate or contract should clearly outline the scope of work, including details about the ventilation system. It should specify the type of intake and exhaust vents, their quantities, and how they will achieve code compliance. If the ventilation plan is vague, ask for clarification and ensure it’s documented.
Remember, a contractor who cuts corners on ventilation is likely cutting corners elsewhere, putting your home at risk.
Essential Checks and Documentation
Even with a great contractor, it’s wise to be an informed homeowner and perform some due diligence.
- Understand Your Roof's Needs: Before any work begins, make sure you understand the ventilation requirements for your specific attic. You can use the "1/300 rule" or "1/150 rule" to do a rough calculation yourself based on your attic's square footage. This will empower you to have an informed conversation with your contractor and verify their plan.
- Review the Permit and Plans: Once the permit is pulled, take a look at it. The permit documents or accompanying plans should explicitly state the ventilation requirements and how the contractor intends to meet them. If you have any questions, don't hesitate to contact your local building department for clarification.
- Attend the Final Inspection: If your local municipality requires a final inspection, try to be present. This is your opportunity to hear directly from the building inspector if there are any concerns or if the ventilation system meets all the necessary standards. It provides an official stamp of approval.
- Document Everything: Keep all paperwork related to your roofing project, including the contract, warranty information, and especially the permit and any inspection reports. If you ever need to file a warranty claim or sell your home, having documentation of code-compliant ventilation will be invaluable. This documentation also helps prove that your manufacturer warranty is valid, which is often tied to proper installation and code adherence.
By being actively involved and choosing a professional, code-conscious roofing contractor, you can confidently ensure that your roof's ventilation system is robust, compliant, and ready to protect your home for years to come.
Disclaimer
The information provided in this guide is intended for general informational purposes only and does not constitute professional advice. Building codes and regulations vary significantly by location and can change frequently. Always consult with a qualified, licensed roofing contractor and your local building department to determine the specific requirements applicable to your property before undertaking any roofing project.