How to Spot a Roof Leak
There’s almost nothing worse than the sickening discovery of a water stain spreading across your ceiling or, worse yet, a steady drip in your home. A roof leak isn't just an annoyance; it's a direct threat to your home's structure, insulation, and even your family's health if mold begins to grow. This comprehensive guide will walk you through exactly how to spot a roof leak, both inside and out, so you can address the problem quickly and effectively.
The Unsettling Reality of a Roof Leak
The moment you notice a leak, a cold dread often sets in. It feels like a race against time, not just to stop the drip, but to figure out where it’s coming from. The tricky part is that the spot where you see water inside isn't always directly above the actual leak on your roof. Water is a sneaky traveler, often wicking along rafters, pipes, or electrical conduits before finally showing itself. Understanding the initial signs and how water behaves is crucial to narrowing down the problem area.
Early Signs Indoors: What to Look For
Most homeowners first discover a roof leak from inside their home, often by accident. You might be watching TV, and a faint discoloration catches your eye, or you feel a small drip while reaching for something in the attic. These initial signs are your early warning system, and catching them promptly can save you a world of trouble and expense down the line.
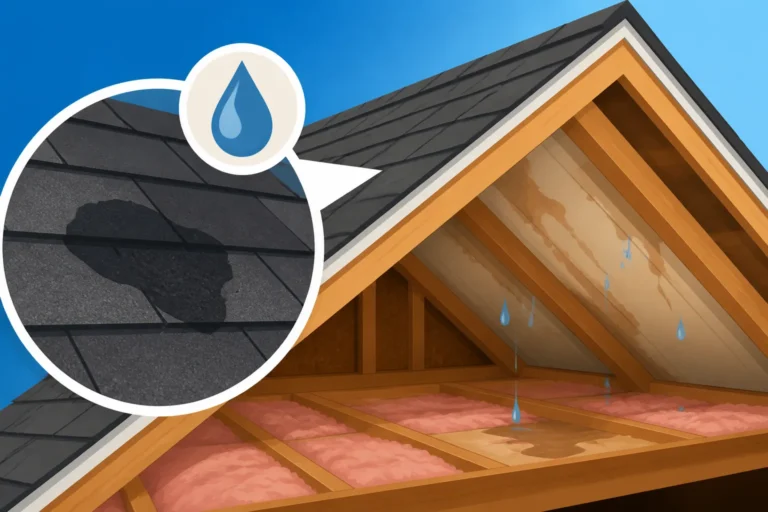
The most obvious sign is, of course, a visible water stain on your ceiling or walls. These stains usually start small and yellow or brown, but over time, they can grow significantly, darken, and even cause the drywall or plaster to bubble, crack, or sag. If the leak is severe, you might even see water dripping directly from the ceiling, which is a clear emergency. Don't ignore these even if they seem minor; a small stain today can indicate a much larger, hidden problem that's been developing for a while. Pay close attention after heavy rain or snowmelt, as these are prime times for leaks to manifest.
Beyond the Drip: Subtler Interior Clues
Sometimes, the signs of a leak aren't as dramatic as a dripping ceiling. Water damage can be insidious, working behind the scenes until it becomes a major issue. Being aware of these subtler clues can help you catch a leak before it escalates into something requiring extensive repairs. This is why regular inspections, even of your attic space, are so important.
One common subtle sign is a musty odor, particularly in your attic or near exterior walls. This smell often indicates the presence of mold or mildew, which thrives in damp, dark environments caused by chronic leaks. If you notice a persistent earthy or stale smell that doesn't go away, especially after rain, it’s time to investigate. Another clue can be peeling paint or wallpaper on ceilings or upper walls. Water infiltrating from the roof can cause these finishes to lose adhesion and flake off, even if you don't see a direct stain. Additionally, if your insulation in the attic looks matted, damp, or discolored, or if you can see visible mold growth on your attic rafters, sheathing, or insulation, you’ve almost certainly got a leak. These areas are excellent indicators of water entry and can help you trace the water's path to its origin. If you spot any of these signs, it's wise to consider a professional Roof Damage Assessment: A Homeowner's Guide to get a clear picture of the situation.
Pinpointing the Leak Source from the Outside
Once you suspect a leak from inside, the real detective work begins: finding the actual entry point on your roof. This often involves getting up on the roof or, at the very least, a careful visual inspection from the ground. Safety is paramount here; if you're uncomfortable or inexperienced working on a ladder or a roof, it’s always best to call a professional. However, understanding what to look for can help you communicate effectively with a contractor or even identify obvious issues yourself.
Visual Inspection from the Ground Up
Before you even think about climbing a ladder, a thorough ground-level inspection can reveal many clues. Grab a pair of binoculars and walk around your house, paying close attention to every slope and edge of your roof. Look for anything that seems out of place or damaged.
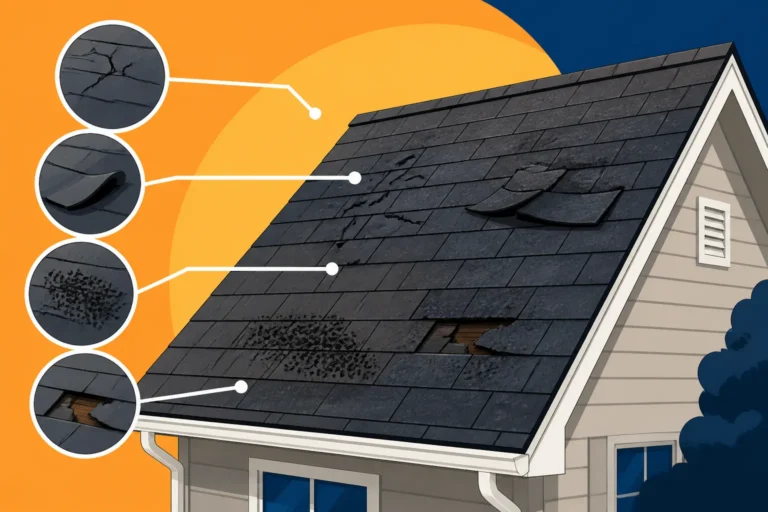
Start by looking for missing, broken, or curled shingles. Missing Shingles: Repair or Replace can create direct pathways for water, while curled or cracked shingles lose their protective seal, allowing water to seep underneath. Pay attention to the valleys (where two roof slopes meet) and dormers, as these are common areas for water to accumulate and breach. Also, check for any visible granule loss on your shingles, which might look like bald spots or piles of grit in your gutters. This granular material protects the asphalt from UV rays, and its absence indicates the shingles are deteriorating. Examine your gutters for excessive debris, especially shingle granules, which could signal aging shingles that are shedding their protective layer. Finally, check your chimney for any visible cracks in the masonry or flashing, and ensure that all roof vents and pipes appear intact and properly sealed.
Close-Up Roof Scan: What to Examine
If the ground inspection doesn't reveal an obvious culprit, or if you feel comfortable and safe doing so, a closer look from a ladder or directly on the roof is often necessary. Remember to always use proper safety equipment and have someone spot you if you're on a ladder.
Once you’re closer, you can get a better view of the shingle condition. Look for Cracked Shingles: Causes and Fixes – these often appear hairline at first but can widen over time. Examine any areas where shingles seem lifted or out of place. Critically inspect all areas where the roof surface is interrupted or changed, as these are leak-prone zones. This includes around skylights, chimneys, vent pipes, and dormers. The flashing, which is the metal or material that creates a watertight seal around these penetrations, is a common failure point. Look for bent, rusted, missing, or improperly installed flashing. For instance, Chimney Flashing Explained is a crucial component that can fail over time due to weather exposure or improper installation. Even a tiny gap in the flashing can let in a surprising amount of water.
Tracing the Path of Water on the Roof
Water doesn't always drip straight down. On a roof, it often flows along beams, rafters, or the top of the roof decking before it finds an opening to drip into your attic. This is why the leak inside might be several feet away horizontally from the actual entry point on the roof. Understanding this behavior is key to effective leak detection.
To trace the path, start by locating the highest point of the water stain in your attic. Then, look directly above it and slightly uphill on the roof. Work your way up the roof slope from the interior leak point, examining every shingle, seam, and penetration along the way. For example, if you see a stain near your bathroom, investigate the plumbing vent stack or exhaust fan on the roof directly above. If it's near an exterior wall, check the step flashing or rake edge of the roof. Pay particular attention to roof valleys, which are designed to channel large amounts of water. If the flashing in a valley is damaged or improperly installed, it can be a significant source of leaks. Sometimes, even a misplaced nail from a previous repair can create a tiny, almost invisible hole that allows water to penetrate the Roof Decking Replacement Cost. This kind of detective work can be time-consuming, but it’s essential for accurate diagnosis.
Common Culprits Behind Roof Leaks
Knowing where to look is one thing, but understanding what you're looking for helps immensely. Roof leaks don't just happen randomly; they typically stem from specific, identifiable issues with your roofing system. By familiarizing yourself with these common culprits, you'll be better equipped to diagnose the problem or effectively communicate with a professional.
Failing Shingles and Weather Wear
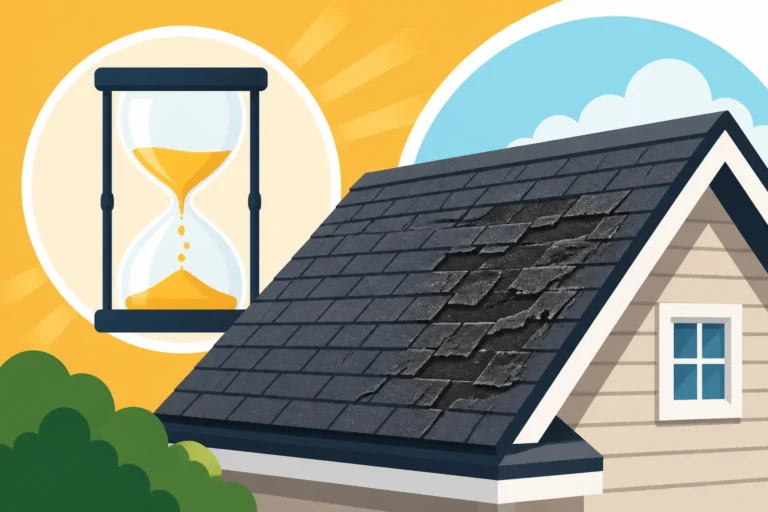
The most common cause of roof leaks, especially in older roofs, is the simple wear and tear of the asphalt shingles themselves. Asphalt shingles have a finite lifespan, and as they age, they become less resilient to the elements.
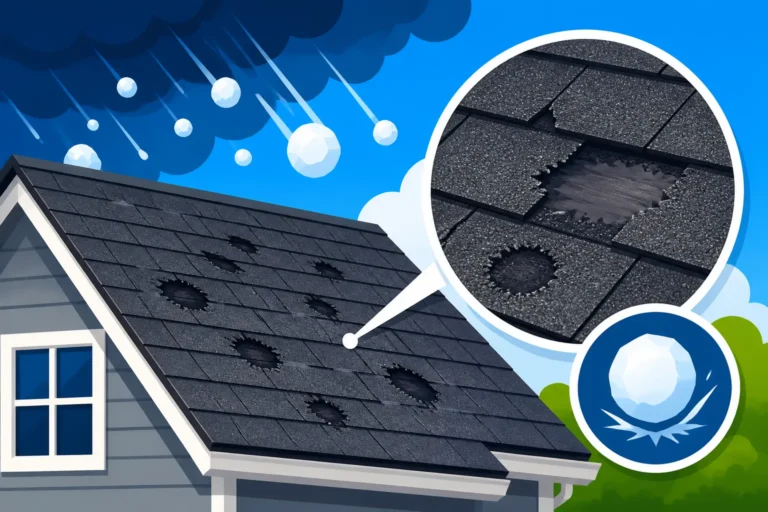
Over time, constant exposure to UV radiation, extreme temperatures, rain, and wind causes the asphalt to dry out and become brittle. This leads to granule loss, which protects the shingle's asphalt core, making them more susceptible to damage. You might notice Granule Loss: Should You Worry if you find gritty deposits in your gutters or bare spots on your shingles. The edges of shingles can also start to curl or lift, a phenomenon known as Curling Shingles: What They Mean. This lifting breaks the sealant bond between shingles and allows wind-driven rain to get underneath. Similarly, cracked shingles, often caused by thermal expansion and contraction or impact damage, provide direct entry points for water. Even hail, which might seem minor, can cause significant Signs of Roof Hail Damage that lead to leaks over time, as it impacts the granules and can compromise the shingle mat. In severe storms, powerful winds can even tear off entire sections of shingles, leaving your roof decking exposed.
Problematic Flashing and Roof Penetrations
While shingles cover the vast majority of your roof, the areas where the roof plane is interrupted are often the weakest links in its defense against water. These are called roof penetrations, and they all rely on flashing to keep them watertight.
Flashing is essentially a waterproof barrier, typically made of metal (aluminum, steel, copper), that's installed around chimneys, skylights, vent pipes, valleys, and wall abutments. Its job is to divert water away from these vulnerable areas. However, flashing can fail for several reasons. It might be installed improperly from the start, leaving gaps or insufficient overlaps. Over time, metal flashing can rust, corrode, or become bent and damaged by high winds or falling debris. The sealants used around flashing (like roofing cement or caulk) can also dry out, crack, and fail, creating an open invitation for water. A common leak spot is around a chimney. Roof Leak Around a Chimney: Fixes often involve inspecting and repairing or replacing the step flashing, counter flashing, and cricket flashing. Similarly, Roof Leak Around a Vent Pipe: Fixes usually points to a cracked rubber boot around the pipe or loose flashing. These areas are complex, and even a small flaw can allow water to seep in, often traveling a long distance before it becomes visible indoors.
Poor Ventilation and Ice Dams
Sometimes, a leak isn't a direct result of a hole in your roof but rather a symptom of poor attic ventilation or specific weather conditions. These issues can create conditions that lead to water intrusion, even on a seemingly intact roof.
Inadequate attic ventilation can lead to a host of problems, including premature aging of shingles and excessive heat buildup. However, in cold climates, it can contribute directly to leaks through the formation of ice dams. An ice dam occurs when heat escapes from your home into the attic, warming the roof deck and melting snow. This meltwater then flows down the roof until it reaches the colder eaves, which are typically unheated. There, it refreezes, forming a barrier of ice. Subsequent meltwater backs up behind this ice dam, unable to drain off the roof. This ponding water can then force its way under your shingles, through nail holes or other small gaps, and into your attic or walls. You'll often see these leaks manifest during freezing and thawing cycles. Similarly, clogged gutters can lead to water pooling at the roof edge, which can also back up under shingles and eventually cause leaks. Ice Dam Damage: Repair Options can be complex, often requiring addressing both the immediate leak and the underlying ventilation issues that cause them. Addressing roof ventilation upgrades can be a preventative measure.
Tools and Techniques for Effective Leak Detection
Becoming a roof leak detective requires a bit more than just a keen eye. Having the right tools and knowing a few clever techniques can significantly cut down on the time and frustration involved in finding that elusive drip. Remember, though, safety should always be your top priority. If you're not comfortable on a ladder or roof, please hire a professional. Many reputable companies, like those found through Modernize, can connect you with experienced roofers who can perform detailed inspections.
Essential Gear for DIY Inspection
Before you even think about climbing onto your roof or poking around in a dusty attic, gather your supplies. Being prepared will make the process smoother, safer, and more efficient.
You'll need a sturdy ladder, preferably one rated for rooftop access, and always ensure it's placed on stable ground. A pair of rubber-soled shoes will give you better traction on the roof itself. Don't forget safety gear like work gloves to protect your hands, and perhaps a harness if you're working on a steep pitch. A bright, powerful flashlight is absolutely indispensable for peering into dark attic corners and under eaves, where subtle water stains or mold might be hiding. Binoculars are great for that initial ground-level scan, allowing you to spot issues from a safe distance. A small pry bar or a flat-blade screwdriver can be useful for gently lifting shingles to inspect underneath, but proceed with extreme caution to avoid further damage. Finally, having a camera or smartphone to take pictures of potential problem areas is invaluable, both for documenting the issue for insurance claims and for showing a contractor later.
Simulating Rain to Confirm Leaks
Sometimes, visual inspection alone isn't enough, especially if the leak is intermittent or only appears under very specific conditions. In these cases, you might need to create a leak to find it. This technique requires patience and, ideally, a helper.
Start by having one person inside the attic near the suspected leak area, armed with a flashlight and a phone. The other person goes onto the roof with a garden hose. Begin by running water over the lowest section of the roof directly above the interior leak, letting it run for several minutes. If no leak appears inside, move up to the next section, then the next, progressively saturating higher areas, always focusing on roof penetrations like How Skylights Are Flashed or vent pipes. The idea is to isolate the area. Once the person inside calls out that water is visible, you know the leak is somewhere in the section you just watered or immediately below it. This methodical approach, working your way up the roof, prevents you from chasing ghosts by watering the entire roof at once. If you're still having trouble, a professional, like those listed by Modernize, can utilize more advanced thermal imaging or moisture detection tools to pinpoint hidden leaks without needing to simulate rain or potentially cause further water damage. This kind of specialized equipment can often detect moisture trapped within walls or ceilings that isn't yet visible to the naked eye.
Immediate Action: What to Do Once You've Spotted a Leak
Discovering a leak can be alarming, but panicking won't help. The good news is that there are immediate steps you can take to mitigate damage and protect your home while you figure out a long-term solution. Acting quickly can save you from more extensive and costly repairs down the line.
Minimizing Interior Damage
Your first priority once you see water inside is to protect your belongings and home's interior finishes. Water spreads quickly and can cause significant damage to drywall, flooring, furniture, and electronics.
If water is actively dripping, place buckets, pans, or towels directly underneath to catch the drips. For larger leaks or widespread saturation, you might need multiple containers. If the ceiling is bulging with water, you might consider carefully poking a small hole in the center of the bulge with a screwdriver to release the water in a controlled manner into a bucket. This can prevent a larger, uncontrolled collapse of the ceiling, which could be much more damaging. Once the immediate drip is contained, move any furniture, rugs, or valuable items away from the affected area to prevent them from getting wet. If possible, turn off electricity to any affected circuits to prevent electrical hazards. Use old towels or rags to blot up any standing water on floors or carpets, and consider using fans or a dehumidifier to help dry out the area and prevent mold growth. Remember that Emergency Roof Tarping Explained is a critical step if the leak is severe and you need to buy time before permanent repairs.
Temporary Fixes for Peace of Mind
While these aren't permanent solutions, temporary fixes can provide crucial peace of mind and prevent further water intrusion until a professional roofer can address the problem properly. It's about damage control and stopping the immediate flow of water.
If you've identified the source on the roof and it's safe to access, a simple temporary patch might be possible. For a small hole or crack in a shingle, a patch of roofing tar or specialized roofing sealant can work. You can spread a generous dollop over the compromised area, ensuring it covers the breach completely. For a missing shingle, you might be able to slide a piece of sheet metal or even a sturdy piece of plastic sheeting underneath the row of shingles above it, extending past the exposed area, and secure it with roofing cement. A common temporary solution for larger areas of damage, especially after a storm, is a tarp. You can secure a durable tarp over the damaged section of the roof, extending several feet beyond the problem area in all directions. Make sure to anchor it securely using furring strips or weighted objects to prevent it from blowing away in the wind. These temporary measures are designed to be a short-term band-aid. They buy you time, but they are not substitutes for professional, lasting repairs. You'll still need to bring in the experts to evaluate the situation and provide a durable solution.
When to Call in the Roofing Professionals
There comes a point where DIY leak detection and temporary fixes just aren't enough. While it's great to be proactive and informed, some roof issues require the expertise, tools, and experience of a licensed roofing contractor. Knowing when to make that call can save you time, money, and stress in the long run.
Knowing Your Limits and Safety First
Your personal safety is always the most important factor when dealing with roof issues. Roofing work, even just inspections, can be dangerous, especially if you’re not accustomed to working at heights or on sloped surfaces.
If your roof is particularly steep, if the weather conditions are windy or wet, or if you simply don't feel steady on a ladder, it's a clear sign to call a professional. Even if you're comfortable with heights, attempting repairs without the proper training or equipment can lead to further damage to your roof, or worse, serious injury. Roof leaks can also be deceptive; what appears to be a small issue might indicate widespread underlying damage to the roof decking or structural components that only an expert can safely assess. If you've tried to locate the leak with no success, or if your temporary patch isn't holding up, it's definitely time to bring in someone who does this for a living. Remember that professionals are equipped with safety gear, specialized tools, and the necessary insurance to work safely on your property. Don't risk a fall or a faulty repair when help is readily available. This is one of the key considerations for When to Call a Pro for Roof Repair.
The Value of a Professional Assessment
Hiring a professional roofer provides not only expertise but also peace of mind. They have the experience to quickly identify the source of even the most elusive leaks and the knowledge to recommend the most effective, long-lasting repair solutions. When you're dealing with something as critical as your home's main protector, a roof, you want it done right.
A reputable roofing contractor will conduct a thorough inspection of your entire roof system, not just the visible leak area. They'll examine the condition of your shingles, flashing, gutters, vents, and attic for any signs of damage or potential future problems. They can assess if your roof has reached its Roof Age: When to Start Planning Replacement or if a simple repair is sufficient. Many will even use advanced tools like infrared cameras to detect hidden moisture that isn't visible to the naked eye. Furthermore, a professional can properly address underlying issues like inadequate ventilation, which can contribute to leaks and ice dams. They'll provide a detailed estimate and explain the scope of work needed. If the damage is extensive due to a storm, they can also guide you through the insurance claim process. Reputable contractors, sometimes found through platforms like Modernize, are often certified by shingle manufacturers like GAF, Owens Corning, or CertainTeed, meaning they adhere to high installation standards and can offer enhanced warranties. When considering a significant repair or even a full roof replacement, understanding How to Read and Compare Roofing Estimates is vital to ensure you're getting a fair deal from a qualified professional.
Here's a quick guide to common leak signs and their potential causes:
| Interior Sign of Leak | Potential Leak Location on Roof | Common Causes | Urgency Level |
|---|---|---|---|
| Water stains on ceiling | Anywhere directly above, or uphill. | Missing/damaged shingles, flashing failure, vent issues. | High |
| Dripping water from ceiling | Direct breach, often severe. | Large shingle damage, severe flashing failure, ice dams. | Immediate |
| Musty odor in attic/home | Hidden leak, mold growth. | Chronic small leak, poor ventilation, ice dams. | High |
| Peeling paint/wallpaper on upper walls | Along exterior walls, near eaves. | Step flashing issues, damaged rake edge, clogged gutters. | Medium |
| Discolored/matted attic insulation | Directly under leak source. | Any roof breach directly above. | High |
| Visible mold/mildew in attic | Anywhere in attic, especially on sheathing/rafters. | Persistent leak, high humidity from poor ventilation. | High |
| Puddles in attic | Directly under active leak. | Significant roof breach. | Immediate |
| Water streaks on interior walls near chimney/skylight | Chimney flashing, skylight flashing. | Flashing failure, sealant degradation. | High |
Disclaimer
The information provided in this guide is intended for general informational purposes only and does not constitute professional advice. While we strive to offer accurate and helpful content, roof inspection and repair can be dangerous and should ideally be performed by qualified, licensed professionals. Always prioritize safety and consult with a reputable roofing contractor for any significant roof issues or before undertaking any work on your roof. We are not responsible for any damage or injury resulting from attempts to use this information without professional assistance.