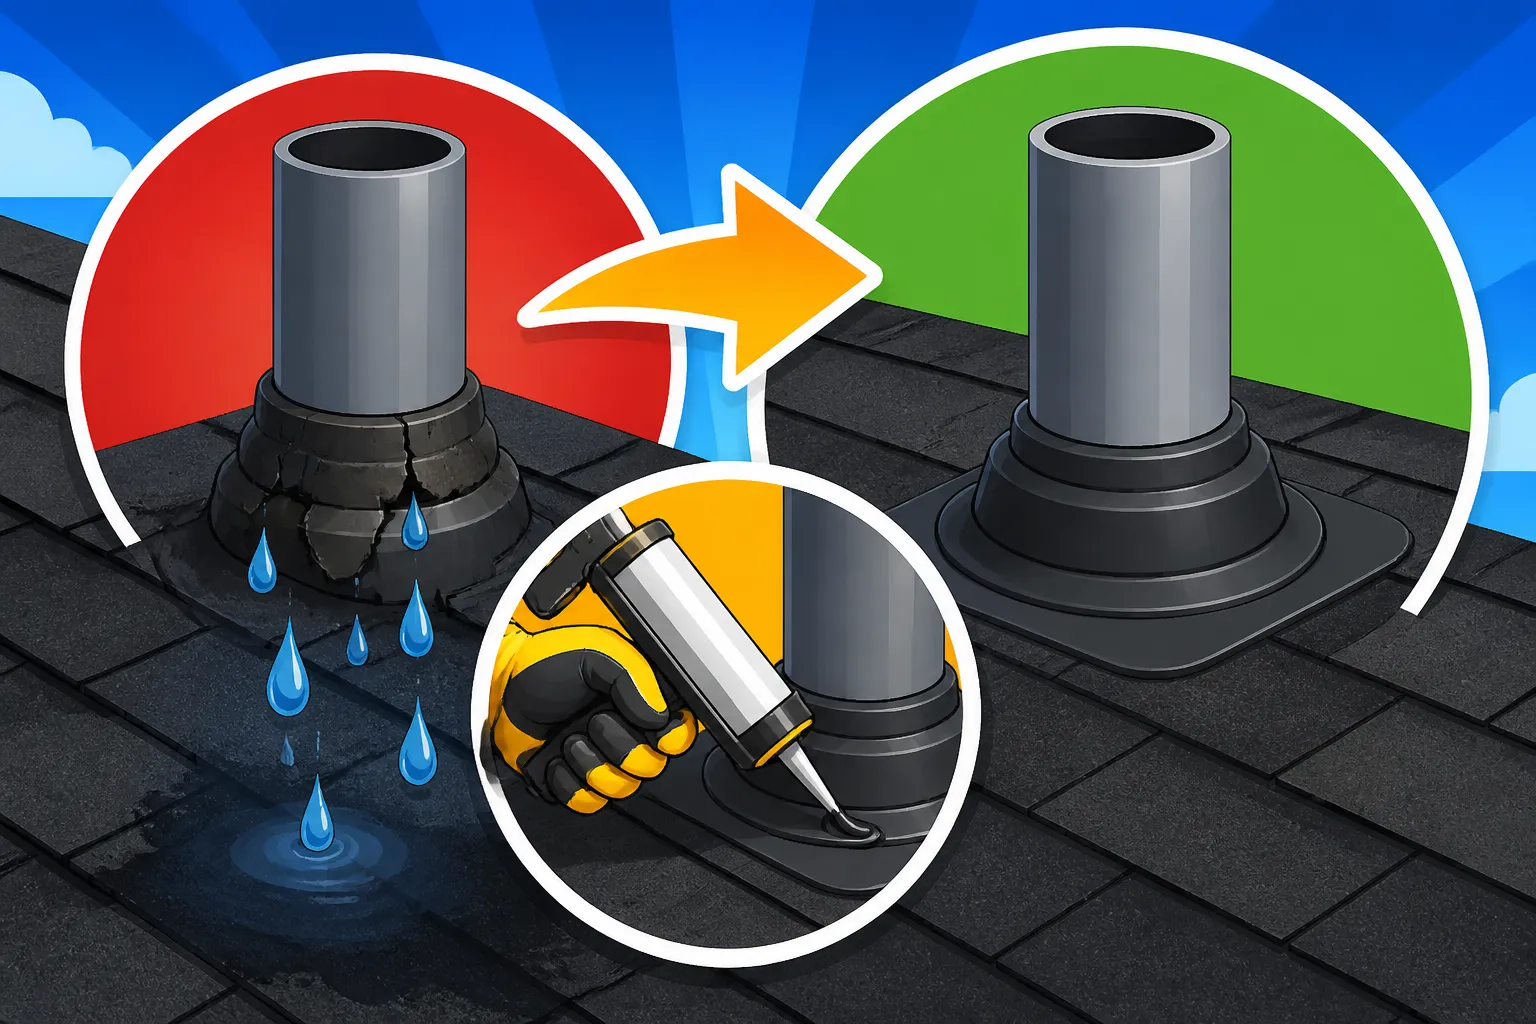
Roof Leak Around a Vent Pipe: Fixes
There are few things more disheartening as a homeowner than spotting that tell-tale stain on your ceiling, especially when you know it means water is finding its way in from above. A common culprit for these frustrating leaks, particularly with asphalt roofing, is often the unassuming vent pipe. This guide will walk you through the various reasons your vent pipe might be leaking, how to pinpoint the problem, and practical solutions, from DIY fixes to knowing when it's time to call in the professionals.
Common Causes of Vent Pipe Leaks
When water starts to trickle down from your ceiling, especially after a good rain, and it's localized around a bathroom or kitchen, a plumbing vent pipe is a prime suspect. These pipes, crucial for equalizing air pressure in your plumbing system and allowing gases to escape, penetrate your roof deck and are notorious spots for water intrusion if not properly sealed or maintained. It’s not usually the pipe itself, but the surrounding components that fail over time.
Deteriorated Rubber Seals
One of the most frequent offenders when it comes to a leaky vent pipe is the rubber seal, often called a vent boot or collar, that's designed to create a watertight seal around the pipe where it exits the roof. Imagine a flexible, funnel-shaped piece of rubber or neoprene that fits snugly around the pipe and is then attached to the base, which is usually metal or plastic. This rubber component is constantly exposed to the elements – scorching summer sun, freezing winter temperatures, torrential rain, and even hail.
Over time, this relentless exposure causes the rubber to degrade. It can become brittle, crack, split, or even completely disintegrate in sections. When this happens, that once-watertight seal is compromised, creating a direct pathway for water to seep directly down the exterior of the vent pipe and into your attic, eventually reaching your ceiling. This is particularly common in older asphalt roofing systems where the original vent boots may be decades old and past their prime. Sometimes, you might even notice chunks of the rubber missing or an obvious gap around the pipe if you can get a good look from the ground or a ladder.
Cracked or Damaged Flashing
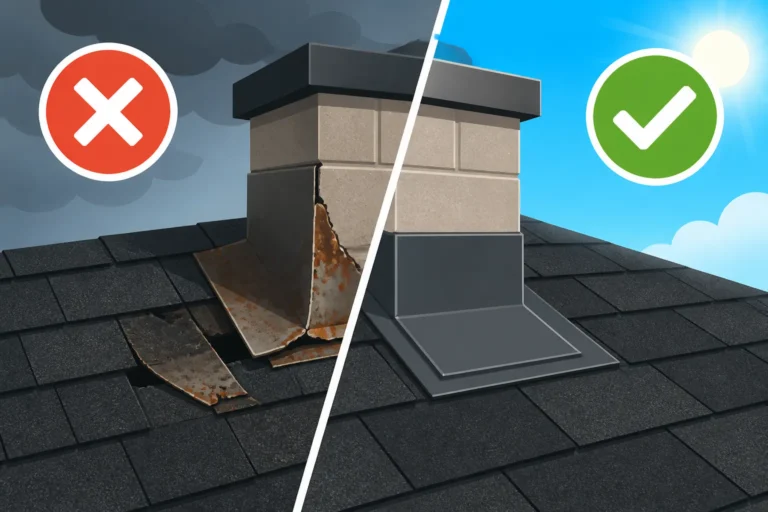
Beyond the rubber seal, the metal or plastic base of the vent boot itself, often referred to as the flashing, can also be a source of leaks. The flashing is typically a flat piece of metal, like aluminum or galvanized steel, that's integrated into the shingle layers around the vent pipe. Its purpose is to divert water away from the penetration point.
However, flashing can suffer its own array of damage. During extreme weather, strong winds can bend or lift the edges of the flashing, creating gaps where water can easily penetrate. Hailstorms can dent or crack the metal, particularly if it's an older, thinner gauge material. Plastic flashing, while resistant to rust, can become brittle and crack due to UV exposure and temperature fluctuations, much like the rubber seal. Furthermore, if the nails used to secure the flashing become loose or pop up over time, they can allow water to enter, or simply create enough movement for the flashing to warp and lose its tight seal against the roof deck.
Improper Installation or Past Repairs
Sometimes, the problem isn't necessarily age or weather, but rather how the vent pipe flashing was installed in the first place, or how a previous repair was attempted. A properly installed vent boot and flashing system is meticulously layered with the surrounding asphalt shingles to ensure a shingle-over-shingle-over-flashing design that sheds water effectively. If this layering is incorrect – for example, if the top edge of the flashing isn't properly tucked under the shingles above it, or if the side edges aren't correctly interwoven – water can easily flow underneath and find its way in.
Inexperienced roofers or DIY homeowners might also make common errors like using too much sealant or caulk in an attempt to "seal" a leak, rather than addressing the underlying issue. While caulk can offer a temporary fix, it's not a permanent solution for a structural flashing problem. Over-reliance on caulk can trap water, preventing proper drainage, and eventually leading to more extensive damage. This is why it’s so critical to ensure that when you’re undertaking any roofing project, from a full replacement to a simple repair, you’re dealing with experienced professionals who understand the nuances of How asphalt shingles are installed: step by step. Poor past workmanship can manifest years later as persistent, hard-to-diagnose leaks.
Identifying a Vent Pipe Leak
Finding the exact source of a roof leak can feel like playing detective. Water has a sneaky habit of traveling along rafters, pipes, and electrical conduits before finally dripping down, often far from its entry point. However, with a vent pipe leak, there are specific clues you can look for both inside and outside your home to help narrow down the search.
Visual Inspection from the Exterior
The first step in diagnosing a leak around a vent pipe is to safely inspect the roof from the exterior. If you have a two-story home or a particularly steep roof, it's best to use binoculars from the ground or hire a professional to ensure your safety. Never get on a ladder or roof if you're not comfortable or if weather conditions are unfavorable.
When looking at the vent pipe from the outside, pay close attention to the rubber collar, often called a vent boot. Are there visible cracks, tears, or missing chunks of rubber? Does it look brittle or dried out? You might see light-colored streaking where water has run down the pipe over time. Next, examine the metal or plastic flashing that the rubber boot is attached to. Is it bent, dented, or rusted? Are any of the shingle tabs surrounding the flashing lifted, curled, or damaged? Check for missing nails or nails that have "popped" up, creating tiny holes. Sometimes, you'll see excessive caulking around the base of the pipe, indicating a previous attempt at a repair that may have failed. Also, take note of any moss or algae growth, as these can sometimes indicate areas where moisture accumulates.
Interior Clues in the Attic or Ceiling
The attic is your best friend when it comes to tracking down a roof leak. If you have attic access, grab a flashlight and head up there, especially after a rainstorm. Look for water stains on the underside of your roof decking, insulation, or rafters. These stains might be dark brown or black, and they often extend downwards from the vent pipe penetration.
Don't just look directly above the ceiling stain; water can travel. Follow any staining back up the rafters or trusses to see where it originates. You might find wet insulation directly surrounding the vent pipe, or even drips of water coming down the pipe itself. Sometimes, the water will have pooled in a low spot on your ceiling drywall, causing a visible bulge or discoloration. Be mindful that if water has been leaking for a long time, you might also find signs of mold or mildew in the attic, which can appear as fuzzy patches or discoloration on wood surfaces. The smell of mildew is another strong indicator of persistent moisture. This interior inspection is crucial for understanding the full extent of the damage, which might include issues with your Roof decking replacement cost if it's extensive.
Water Testing Techniques
If you've inspected both the exterior and interior and still can't definitively locate the source of the leak, or if the leak only appears under specific conditions, a controlled water test can be incredibly effective. This is best done with two people: one on the roof with a garden hose and one in the attic.
Start by applying water to the area below the vent pipe, moving gradually upwards. The person in the attic should be watching for any signs of water intrusion. Once you get to the vent pipe area, isolate it. Run water directly onto the vent boot and flashing for several minutes. If no leak appears, then try running water above the vent pipe, simulating rain flowing down the roof. If the leak appears when you're watering a specific section, you've likely found your culprit. Be patient with this process, as it can take some time for water to travel and manifest as a drip. If the leak is still elusive, sometimes running water directly into the vent pipe itself for a short period can help confirm if the issue is with the pipe or the surrounding roof components. Just be careful not to overfill your plumbing system.
DIY Fixes for Minor Vent Pipe Leaks
When you've pinpointed a minor vent pipe leak, your first thought might be to tackle it yourself. For small issues, there are indeed some temporary and relatively simple DIY fixes that can buy you time and prevent further damage. However, it's crucial to understand the limitations of these fixes – they are often not permanent solutions and may only delay the need for a professional repair. Always prioritize safety when working on your roof.
Sealing with Roofing Caulk or Sealant
For very small cracks in the rubber vent boot or tiny gaps in the flashing, a good quality exterior-grade roofing caulk or sealant can offer a temporary reprieve. Look for products specifically designed for roofing applications, often asphalt-based, silicone, or polyurethane sealants, which are flexible and resistant to UV rays and extreme temperatures. Brands like GE Silicone II or high-quality asphalt mastic are commonly used.
Before applying, ensure the area is completely dry and clean of any loose debris, dirt, or old, failing caulk. Use a wire brush or scraper to remove anything that might prevent a good bond. Then, apply a bead of sealant directly over the crack or gap. Smooth it out with a wet finger or a caulk tool to ensure good adhesion and a watertight finish. The goal is to create a new seal that prevents water from entering. While this can stop a drip for a while, remember that caulk has a lifespan and can harden and crack over time, especially with the constant expansion and contraction of the roof materials. It’s a band-aid, not a cure, especially if the rubber boot is extensively deteriorated or the flashing is severely damaged.
Patching Small Flashing Cracks
If you discover a hairline crack in metal flashing that isn't excessively corroded or bent, you might be able to patch it. This typically involves using a combination of a repair patch and a strong sealant. You can find roofing repair patches made of flexible, self-adhesive asphalt or rubberized material at most home improvement stores.
To patch a small crack:
- Clean and Dry: Ensure the flashing is thoroughly clean and dry. Any moisture or debris will compromise the patch's adhesion.
- Prepare the Patch: Cut a piece of repair patch material that extends at least two inches beyond all edges of the crack. Rounding the corners can help prevent lifting.
- Apply Sealant (Optional but Recommended): For extra protection, apply a thin layer of roofing cement or mastic directly over the crack before applying the patch.
- Apply the Patch: Carefully peel the backing from the self-adhesive patch and firmly press it over the crack, ensuring good contact across the entire surface. If using a non-adhesive patch, embed it into a layer of roofing cement.
- Seal Edges: Apply a bead of roofing caulk around all edges of the patch to create a seamless, watertight seal and prevent water from getting underneath.
This method can temporarily stop leaks from minor cracks, but it's important to recognize that a patch isn't as robust as a full replacement of the flashing or vent boot. If the flashing is significantly compromised, warped, or has multiple large cracks, a patch won't hold up for long. These quick fixes are really for buying you some time, giving you a chance to properly plan for the more extensive and permanent repairs.
Professional Repair Options for Lasting Solutions
While DIY fixes can offer a temporary reprieve, when it comes to your roof, a lasting solution is almost always the best path forward. Professional roofers have the expertise, tools, and materials to address vent pipe leaks effectively, ensuring your home remains protected for years to come. This is where investing in quality workmanship really pays off.
Replacing the Vent Boot
By far the most common and effective long-term solution for a leaky vent pipe is to replace the entire vent boot, including both the rubber seal and its base flashing. This is a task best left to a professional, as it involves carefully dismantling and re-installing several layers of your asphalt roofing system.
The process typically involves:
- Shingle Removal: The roofer will carefully remove the shingles surrounding the vent pipe, usually extending a few rows above and to the sides. This allows access to the existing flashing and underlying roof deck.
- Old Boot Removal: The old, deteriorated vent boot and its flashing will be completely removed. This is where you'll often see the full extent of the damage, including potentially rotting wood on the roof deck if the leak has been persistent.
- Decking Inspection and Repair: The roof deck underneath the old boot will be thoroughly inspected. If any decking material (like plywood or OSB) is soft, water-damaged, or rotted, it will be cut out and replaced before the new boot is installed. Ignoring this step would be a major oversight.
- New Boot Installation: A new, high-quality vent boot, often made with durable EPDM rubber and galvanized steel or copper flashing, will be installed. The base of the flashing is slid into place, with its bottom edge over the course of shingles below and its side edges under the adjacent shingle courses. The top edge is then tucked under the next full course of shingles above it. This critical layering ensures water naturally sheds away from the pipe.
- Sealing and Nailing: The new boot is secured with roofing nails, strategically placed to be covered by the overlapping shingles. A thin bead of roofing cement is often used under the top and side edges of the flashing for added protection.
- Shingle Reinstallation: The removed shingles are then carefully reinstalled, or new matching shingles are used if the old ones were damaged during removal. The roofer ensures proper alignment and sealing.
This comprehensive approach ensures that not only is the immediate leak fixed, but the entire penetration point is reinforced against future water intrusion. Many reputable contractors, like those found through platforms like Modernize, will prioritize this type of thorough repair.
Full Flashing Replacement
Sometimes, the damage isn't just limited to the rubber boot; the metal flashing itself might be extensively corroded, bent beyond repair, or improperly installed from the start. In such cases, merely replacing the rubber portion isn't enough – the entire flashing needs to go. This is a more labor-intensive process than simply swapping out a boot, as it involves a larger section of the roof.
A professional roofer will meticulously remove all the surrounding shingles necessary to fully expose the existing flashing. They'll assess the condition of the roof deck and surrounding underlayment. If the flashing is rusted through, severely bent, or was never properly interwoven with the shingles, a new, correctly sized piece of metal flashing will be fabricated or sourced. This new flashing is then installed using the same careful layering method as a new vent boot, ensuring that water flows over each component, never directly underneath. They'll also ensure that a fresh, high-quality vent boot is paired with the new flashing to create a complete, watertight system. This kind of detailed work is vital, especially when you consider how roof flashing works in a complete asphalt roofing system.
Addressing Decking Damage
A leak around a vent pipe, particularly if it's been ongoing and unnoticed, can lead to significant damage to the roof decking underneath. The decking, typically plywood or OSB, forms the structural base of your roof. When it gets wet repeatedly, it can soften, rot, swell, or delaminate, compromising the integrity of your entire roof system. You can often spot signs of this from inside your attic, looking for dark stains, soft spots, or even visible holes.
If decking damage is discovered during a vent pipe repair, a professional roofer will cut out the compromised sections and replace them with new, sound wood. This isn't an optional step; installing new shingles and flashing over rotting decking would be a waste of time and money, as the compromised structure won't properly hold nails, nor will it provide a stable base for the new roofing materials. This repair adds to the overall cost and complexity of the job, but it's absolutely essential for the longevity and safety of your roof. Your roofer might also check the condition of your underlayment, and if it’s compromised, address its replacement, as outlined in guides like How underlayment is installed.
Preventing Future Vent Pipe Leaks
After dealing with a leaky vent pipe, you certainly don't want to go through that hassle again. Proactive measures and smart choices can significantly reduce the risk of future leaks and extend the life of your entire asphalt roofing system. Prevention, as they say, is worth a pound of cure.
Regular Roof Inspections
The absolute best way to prevent future vent pipe leaks, and indeed many other roofing problems, is to schedule regular roof inspections. Most roofing experts recommend an inspection at least once a year, ideally in the spring or fall, and certainly after any major storm involving strong winds or hail.
During an inspection, a qualified professional will meticulously examine all roof penetrations, including vent pipes, chimneys, and skylights. They'll look for early signs of wear and tear on the rubber seals, check for cracks or corrosion in the flashing, and ensure that all components are properly secured and sealed. Catching a small crack in a vent boot or a loose nail in the flashing early on means a quick, inexpensive fix rather than a major repair after water has already caused interior damage. Think of it as preventative medicine for your home – it's much easier and cheaper to address minor issues before they escalate into full-blown emergencies. Regular inspections also allow you to keep an eye on the overall condition of your roof, helping you understand Signs you need a new roof before it's too late.
Upgrading Vent Pipe Materials
When it's time to replace a leaky vent boot, consider upgrading to higher-quality materials for enhanced durability. While standard rubber and galvanized steel boots are common, there are more robust options available that offer superior longevity and resistance to the elements.
- EPDM or Silicone Boots: These synthetic rubber compounds offer significantly better resistance to UV degradation, extreme temperatures, and ozone compared to traditional rubber. They remain flexible for longer, reducing the likelihood of cracking and splitting.
- Copper or Lead Flashing: For ultimate durability and aesthetic appeal (though at a higher cost), copper or lead flashing can be used instead of galvanized steel or plastic. These materials are highly resistant to corrosion and can last for decades, often outliving the shingles themselves. Lead, in particular, can be custom-formed to create an extremely tight seal around the pipe.
- "No-Calk" Vent Boots: Some manufacturers offer designs that minimize or eliminate the need for external caulk, instead relying on internal gaskets and compression seals. These can be a good choice for homeowners looking for a more maintenance-free solution, as external caulk is a common point of failure over time.
While these upgraded materials might represent a slightly higher upfront cost, their extended lifespan and superior performance can save you money and headaches in the long run by significantly reducing the chances of future leaks.
Ensuring Proper Installation Standards
Even the highest quality materials won't perform as intended if they're not installed correctly. This is where choosing a reputable and experienced roofing contractor becomes paramount. A professional roofer understands the intricacies of proper flashing installation, ensuring every component is correctly layered and sealed according to manufacturer specifications and local building codes.
When hiring a contractor, don't hesitate to ask about their experience with vent pipe flashing, their preferred materials, and their installation methods. Look for contractors who are certified by major shingle manufacturers like GAF, Owens Corning, or CertainTeed, as these certifications often indicate a commitment to higher installation standards and provide access to enhanced warranties. A properly installed vent boot and flashing system should be virtually invisible from a distance, seamlessly integrated into the shingle pattern, and designed to shed water effortlessly. A contractor should also be transparent about the entire process, from how they How roofers measure a roof to the final clean-up. Remember to ask Questions to ask a roofing contractor before hiring to ensure they meet your standards.
How Much Does it Cost to Fix a Leaky Vent Pipe?
Let's be real, one of the first things on every homeowner's mind when facing a roof leak is, "How much is this going to set me back?" The cost to fix a leaky vent pipe can vary quite a bit, depending on the severity of the damage, the materials chosen, and the labor rates in your specific area. It's often not just the pipe itself, but the surrounding components and any underlying damage that drives the price.
Factors Affecting Repair Costs
Several elements come into play when estimating the cost of a vent pipe leak repair. Understanding these can help you budget and make informed decisions.
- Extent of Damage: A minor crack in a rubber boot that just needs a simple replacement is going to be far less expensive than a situation where the leak has caused significant rot to the roof decking and rafters. If water has seeped into the attic and damaged insulation or ceiling drywall, those interior repairs will add considerably to the total cost.
- Type of Vent Boot/Flashing: Standard galvanized steel and rubber vent boots are relatively inexpensive. However, if you opt for upgraded materials like EPDM or silicone boots, or premium copper or lead flashing, the material cost will increase. While more durable, these premium materials often come with a higher price tag.
- Roof Pitch and Accessibility: A low-slope, easily accessible roof will naturally be less expensive to work on than a steep, multi-story roof that requires extensive safety equipment and more labor time. The steeper the pitch, the longer the job takes, and the higher the associated Steep roof cost premium.
- Labor Rates: Roofing labor rates vary significantly by region and by contractor. A highly experienced, certified roofer in a major metropolitan area like Dallas, Texas, might charge more per hour than a smaller operation in a rural community. On average, you can expect to pay anywhere from $75 to $150 per hour for skilled roofing labor, and understanding Roofing material cost vs labor cost can help clarify estimates.
- Permit Requirements: In some municipalities, even a repair might require a permit, especially if structural decking replacement is involved. While the permit itself might only be $50-$200, it adds administrative time and potential inspection fees. It's worth asking your contractor if they handle permits, as knowing Do you need a permit to replace a roof is important.
For a basic vent boot replacement, you might be looking at a range of $200 to $600. If there's some minor decking repair involved, that could push it to $400 to $1,000. More extensive repairs involving significant decking replacement or complex flashing work could run $800 to $2,000+. Remember, these are rough estimates, and getting detailed quotes from several local, reputable contractors is always the best approach. Online tools and services, like those offered by Modernize, can help you gather multiple bids.
Comparing Repair vs. Replacement Costs
Sometimes, a leaky vent pipe isn't an isolated incident but a symptom of a much larger problem: an aging roof that's nearing the end of its lifespan. If your roof is already 15-20 years old, has multiple areas of damage, and you're constantly patching leaks, you might be wondering if it makes more sense to just replace the entire roof rather than investing in another repair. This is a common dilemma homeowners face, and understanding Roof repair vs replacement: how to decide is key.
Here’s a simplified comparison:
| Repair Type | Typical Cost Range (Estimated) | Considerations |
|---|---|---|
| Minor Vent Pipe Repair | $200 – $600 | Simple vent boot replacement, no decking damage. Quick fix, but if the roof is old, other leaks may soon follow. |
| Moderate Vent Pipe Repair | $400 – $1,000 | Vent boot replacement with minor decking repair. Addresses localized issue but doesn't prevent future failures if the overall roof is deteriorating. |
| Extensive Vent Pipe Repair | $800 – $2,000+ | Full flashing replacement, significant decking repair, potentially interior drywall repair. Can be costly and might signal broader roof health issues. |
| Full Asphalt Roof Replacement | $7,000 – $15,000+ | A complete overhaul, providing a brand new roof with a fresh warranty. Eliminates all current and potential future leaks, significantly boosting home value and curb appeal. See How much does an asphalt shingle roof cost for more details. |
If your asphalt roof is already past its prime (typically 20-25 years for 3-tab shingles, 30+ for architectural shingles), investing $800-$2,000+ in a repair for one vent pipe might be a false economy. That money could be better put towards the significant investment of a full roof replacement, which would include brand new flashing and vent boots throughout. A new roof also provides a comprehensive manufacturer and workmanship warranty, giving you peace of mind for decades.
Conversely, if your roof is relatively new (under 10-15 years old) and the vent pipe leak is an isolated incident, then a targeted repair is almost certainly the more economical and logical choice. An experienced contractor can help you assess the overall condition of your roof and provide honest advice on whether a repair or a full replacement is the smartest long-term decision. They should be able to provide clear, detailed estimates, explaining what goes into your Average roof replacement cost this year.
Disclaimer
Please note that the information provided in this article is intended for general guidance and informational purposes only, and does not constitute professional advice. Roofing work can be dangerous and should ideally be performed by qualified and insured professionals. Always consult with a licensed roofing contractor for specific recommendations and estimates regarding your home's roof. Local building codes and regulations may vary, and it is the homeowner's responsibility to ensure compliance.