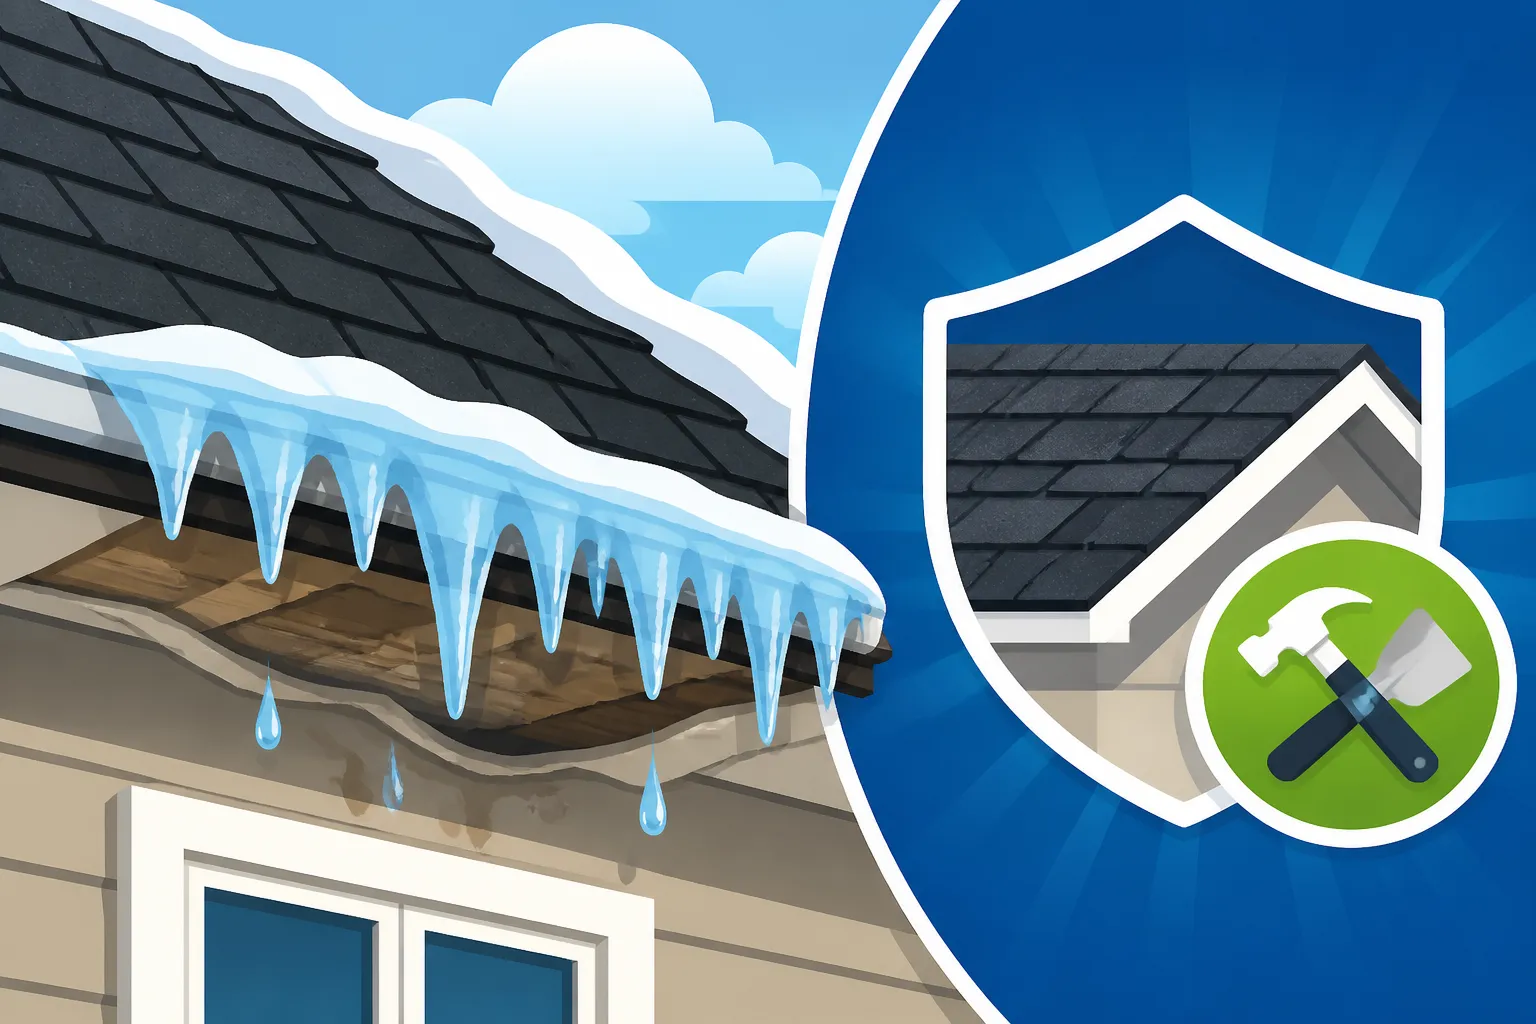
Ice Dam Damage: Repair Options
That sinking feeling when you see massive icicles hanging from your gutters, forming an impenetrable wall of ice along your roof's edge, can be incredibly disheartening. It's not just a pretty winter scene; it's a glaring red flag that dreaded ice dams are at work, potentially pushing water under your shingles and into your home. This guide is here to walk you through understanding ice dam damage, how to address it safely, and most importantly, how to prevent these frosty intruders from wreaking havoc on your asphalt roof and your peace of mind again.
What Exactly Are Ice Dams and Why Do They Form?
Ice dams are one of winter's most frustrating phenomena for homeowners, often causing significant damage long before you even realize what's happening. They're not just big icicles; they're a symptom of a deeper issue related to heat loss and an uneven roof temperature. Once you understand the mechanics, preventing them becomes much clearer.
The Science Behind Ice Dam Formation
At its core, an ice dam forms due to a specific cycle of melting and refreezing snow on your roof. Imagine this: your attic, which should be cold, is actually leaking heat. This warm air rises and heats sections of your roof deck. When snow falls and accumulates on your roof, the heat from below causes the snow on the upper, warmer parts of the roof to melt. This melted snow water then flows down the roof slope.
However, as this water reaches the colder eaves and gutters – areas typically extending beyond the heated envelope of your home and thus remaining at ambient outdoor temperatures – it refreezes. This creates a barrier of ice. More snow melts, more water flows, and more ice accumulates behind this initial barrier, building up into a substantial dam. As this dam grows, it prevents subsequent melted snow from draining off the roof, forcing the water to pool behind it. This pooled water then backs up under your asphalt shingles, where it can seep into your roof decking, attic, and eventually, the interior of your home.
Common Causes of Roof Heat Loss
The primary culprit behind ice dams is inadequate insulation and ventilation in your attic space. It's a tale as old as time: you want your living spaces warm, but you want your attic to be as cold as the outside air. When there's a disconnect, problems arise.
- Poor Attic Insulation: If your attic insulation isn't up to snuff, heat from your living areas escapes through the ceiling and into the attic. Think of it like a leaky bucket, only instead of water, it's heat. This warmth then radiates through your roof deck, melting the snow above. Many older homes, especially, simply don't have enough insulation to meet modern energy efficiency standards. Even in newer homes, sometimes insulation is installed unevenly, leaving thin spots.
- Inadequate Attic Ventilation: Proper roof ventilation is absolutely critical. Even with good insulation, some heat will inevitably rise into the attic. A well-ventilated attic allows this warm air to escape through vents (like ridge vents and soffit vents) and draws in cold, outside air, keeping the attic temperature consistent with the exterior. Without sufficient airflow, trapped warm air accumulates, heating the roof deck and initiating the melt-freeze cycle. Blocked soffit vents, often by insulation, are a common issue that prevents proper airflow.
- Air Leaks from Living Spaces: Beyond general insulation, small cracks and gaps can allow a surprising amount of warm, moist air to leak directly into your attic. These leaks can be around light fixtures, attic hatches, plumbing stacks, electrical wiring penetrations, or poorly sealed ductwork. Even a tiny opening can be a significant source of heat loss, creating localized warm spots on your roof that act as prime ice dam incubators.
How Ice Dams Damage Your Roof and Home
The effects of ice dams extend far beyond just looking unsightly. The pooled water trapped behind an ice dam creates a hydrostatic head, meaning the pressure of the water forces it into places it shouldn't go, specifically under your shingles.
- Compromised Shingles and Underlayment: Asphalt shingles are designed to shed water, not to withstand standing water. When water backs up beneath them, it can lift the shingle tabs, compromising their seal. This can lead to the deterioration of the shingle's asphalt layer and granule loss. The underlayment, typically a synthetic or felt material, offers a secondary barrier, but it's not foolproof, especially if it's older or not properly installed, or if the water sits for an extended period. Over time, repeated freeze-thaw cycles can permanently damage the shingles, leading to cracking, curling, and reduced lifespan. You might find yourself needing a full roof replacement sooner than anticipated if this issue persists.
- Water Intrusion and Interior Damage: This is where the real headaches begin. Once water gets past the underlayment and roof decking, it can saturate your attic insulation, reducing its effectiveness and potentially leading to mold growth. From there, it can drip down into your ceilings, walls, and even window frames. You'll often see telltale water stains on ceilings and walls, bubbling paint, or warped drywall. In severe cases, plaster can crack and crumble, and electrical fixtures can be damaged, posing safety hazards. The cost to repair these interior damages can quickly outstrip the cost of the roof repair itself.
- Gutters, Fascia, and Soffit Damage: The sheer weight of ice dams can be immense. Gutters are often the first structural element to suffer, becoming detached, bent, or even completely torn off the house. The fascia boards, which are the trim pieces directly behind the gutters, can rot or warp from constant exposure to moisture. Similarly, the soffits, the underside of your roof's overhang, can be damaged, compromising your home's aesthetic and ventilation system. Addressing these issues can add to the overall Cost of New Flashing and Drip Edge and other related repairs.
Recognizing the Signs of Ice Dam Damage
Spotting ice dam damage isn't always as obvious as a giant ice formation. Sometimes, the signs are subtle, lurking in unexpected places, and requiring a keen eye or a professional inspection to truly diagnose. Ignoring these early warnings can lead to more extensive and costly repairs down the line.
Obvious Exterior Clues
When you look at your home from the outside, especially after a heavy snow or thaw, there are some undeniable indicators that ice dams are forming or have already caused damage.
- Massive Icicles and Bulging Gutters: This is the most visual and immediate sign. While some icicles are normal, large, thick icicles forming along your roof eaves and gutters are a clear indication of melting snow and refreezing water. If your gutters appear to be pulling away from the house, sagging, or are visibly warped or filled with ice, it's almost certainly due to the excessive weight of ice accumulation from a forming ice dam. The pressure can even cause the fasteners holding the gutters in place to fail.
- Stained Siding and Exterior Walls: Look directly below your gutters and eaves. If water is backing up behind the ice dam, it can overflow the gutters and run down your exterior walls. This often leaves dirty streaks, water stains, or even causes paint to peel or siding to warp. This is particularly common on the shaded side of your house where ice might linger longer. If you have wood siding, prolonged exposure to this moisture can lead to rot and mildew.
- Missing or Damaged Shingles on Eaves: While harder to spot from the ground, if you can safely view your roof (perhaps with binoculars or from an upper-story window), look for shingles that appear lifted, curled, or even missing along the lower edges of your roof. The water backing up under the ice dam can compromise the adhesive seal of the shingles, making them vulnerable to further damage from wind or simply the repeated freeze-thaw cycle. This could be an early sign that you might need to consider a Roof Repair vs Replacement How to Decide.
Subtle Interior Indicators
Sometimes, your home gives you internal clues before the exterior damage becomes overtly visible. These interior signs mean that water has already breached your roof's defenses.
- Water Stains on Ceilings and Walls: This is perhaps the most concerning interior sign. Yellowish or brownish stains appearing on your attic ceiling, bedroom ceiling, or along the top edges of interior walls are almost always a direct result of water intrusion. These stains often appear below the areas where ice dams typically form on your roof. Don't mistake them for old plumbing leaks if they appear suddenly after a winter thaw. The water may travel along rafters before dripping, making the leak point inside not directly below the exterior source.
- Peeling Paint and Damp Drywall: Beyond just stains, prolonged moisture exposure can cause interior paint to bubble, crack, and peel. Drywall might feel soft or damp to the touch. If you have wallpaper, it might start to lift or show signs of discoloration. This indicates that water has not only stained but has begun to saturate the building materials, making structural integrity a concern and increasing the risk of mold growth.
- Damp or Visible Mold in the Attic: If you have attic access, this is a critical area to inspect. Look for any signs of moisture on the underside of your roof decking, insulation that appears wet or matted down, or a musty odor. Mold often manifests as black, green, or white fuzzy patches on wood rafters, insulation, or the roof sheathing itself. Damp insulation loses its effectiveness dramatically, turning your attic into an even greater heat sink and perpetuating the ice dam cycle. Spotting mold early is crucial for effective remediation.
Assessing the Extent of the Damage
Once you suspect ice dam damage, figuring out how bad it is requires a systematic approach. While some initial checks can be done by homeowners, a professional assessment is almost always recommended to ensure nothing is missed.
- Initial Homeowner Checks (Safely!): From the ground, observe the exterior signs. From inside, carefully check your attic, looking for any wet spots, stains, or mold. Use a flashlight to examine rafters, the underside of the roof deck, and insulation. If you have an exhaust fan in a bathroom or kitchen that vents into the attic rather than outside, this can exacerbate moisture issues. Never climb on a snowy or icy roof yourself, as it's extremely dangerous.
- When to Call a Professional: If you see any interior water stains, suspect mold, notice significant exterior damage (like compromised gutters or lifted shingles), or simply aren't comfortable assessing the roof yourself, it's time to call in a reputable roofing contractor. They have the training, equipment, and experience to safely inspect your roof and attic, identify all areas of damage, and provide an accurate assessment. They can also tell you if the problem goes beyond simple shingle repair and points to issues with your Roof Decking Replacement Cost or more extensive damage. Many homeowners use services like Modernize to connect with pre-vetted local professionals.
- Documenting Damage for Insurance: Before any repairs begin, take thorough photos and videos of all damage, both interior and exterior. This documentation will be invaluable if you decide to file an insurance claim. Insurance companies often require solid evidence of the damage before they approve claims related to water intrusion from ice dams. Keep records of all communications, estimates, and repair invoices.
Immediate Steps to Mitigate Ice Dam Damage
When you discover an active leak or a significant ice dam, the instinct is to panic. But swift, safe action can prevent further, more extensive damage to your home. It’s crucial to prioritize safety and understand both effective and dangerous methods of temporary relief.
Safe Ice Dam Removal Techniques
The goal here is to create channels for the trapped water to escape, relieving the pressure that forces it under your shingles. However, this must be done with extreme care.
- Steaming (Professional Method): The safest and most effective way to remove an ice dam is through low-pressure steam. Professional ice dam removal services use specialized steamers that gently melt channels through the ice without damaging your roof, shingles, or gutters. This method avoids the harsh impact of blunt force or the corrosive effects of chemicals. It's an investment, but it protects your roof. You can find experienced local contractors for this specialized service through platforms like Modernize.
- Calcium Chloride (Chemical Melt – Use with Caution): For homeowners, calcium chloride ice melt products (often found in granular form) can be used, but with significant caveats. Do not use rock salt (sodium chloride) or any product containing magnesium chloride, as these can severely damage asphalt shingles, plants, and concrete. Fill old nylon stockings or pantyhose with calcium chloride, then carefully place them across the ice dam, creating channels for water to flow through. The calcium chloride will slowly melt the ice. This is a temporary measure and should only be used in small, manageable applications. Always follow product instructions and wear protective gear.
- Rooftop Snow Removal (Careful!): Reducing the amount of snow on your roof minimizes the source of melting water. A roof rake with a long extension handle can be used from the ground to carefully pull snow off the lower 3-4 feet of your roof. Never pull too hard or scrape the shingles, as this can damage them or pull off granules. Be extremely cautious of power lines and falling snow. Removing snow from the roof's upper sections is usually best left to professionals with proper safety equipment and training. This can also help reduce the overall Roofing Cost Increases Why Prices Went Up if you prevent more severe damage.
What NOT to Do When Removing Ice Dams
Just as important as knowing what to do, is knowing what not to do. Many common, well-intentioned DIY ice dam removal methods can cause far more harm than good.
- Avoid Using Sharp Tools or Bludgeoning: Never use a hammer, axe, shovel, or any other sharp or blunt object to chip away at ice dams. This is a surefire way to severely damage or even puncture your asphalt shingles, gutters, and roof decking. You risk creating leaks that are far worse than the original ice dam. Even a seemingly gentle tap can crack frozen shingles, especially in cold temperatures when they are brittle.
- Steer Clear of Harsh Chemicals and Salt: As mentioned, avoid rock salt (sodium chloride) at all costs. It's highly corrosive and will degrade your shingles, corrode metal flashing and gutters, and kill any plants or grass it drips onto. Other harsh chemicals can also damage roofing materials and runoff into your yard. Stick to calcium chloride if you must use a chemical, but professional steaming is always preferred.
- Do Not Climb on Icy Roofs Without Proper Gear: This is a major safety warning. Climbing onto a snow-covered or icy roof is incredibly dangerous and can lead to severe injury or even death. Even professional roofers use extensive safety harnesses and fall protection when working on roofs in winter conditions. If you can't reach the ice dam safely from the ground with a roof rake, hire a professional. Your safety is paramount.
Temporary Fixes to Stop Active Leaks
If water is actively dripping into your home, you need to stop it as quickly as possible to prevent further interior damage. These are stop-gap measures, not long-term solutions.
- Creating a Drainage Channel (Safe if done with care): If you have an active leak and can safely access the exterior of your home from the ground, you might try to create a small channel through the ice dam using warm water from a garden hose. This is only advisable if the temperatures are above freezing or just barely below, and the ice isn't extremely thick. Pour warm water very slowly and methodically, aiming to create a narrow trench. Never use boiling water, as the sudden temperature change can crack shingles.
- Tarps and Plastic Sheeting: Inside, if you have an active drip, place buckets or containers to catch the water. If the leak is significant, you can try to temporarily divert the water. In the attic, if you can safely reach the leak point, you might place a piece of plastic sheeting or a tarp on the attic floor beneath the leak, guiding the water into a container. This prevents it from saturating insulation or dripping directly onto your ceiling.
- Emergency Repair Patch (Exterior, if safe): For a truly desperate, localized exterior situation (e.g., a tiny area where water is visibly entering), and only if it's safe to access, a small piece of heavy-duty waterproof tape or flexible flashing might be temporarily applied over a suspected entry point after removing any loose ice or snow. This is a very temporary fix and should be done with extreme caution. Remember, these are not meant to solve the root problem but to buy you time until permanent repairs can be made.
Repairing Your Roof After Ice Dam Damage
Once the immediate threat of the ice dam is removed and the weather allows, it's time to assess the damage properly and begin permanent repairs. This often involves a multi-faceted approach, addressing everything from the top layer of shingles down to your interior finishes.
Addressing Shingle and Underlayment Issues
The primary impact of ice dams on your roof's integrity usually starts with the shingles and the protective layer beneath them.
- Replacing Damaged Shingles: Any shingles that are curled, cracked, missing, or have lost a significant amount of their protective granules will need to be replaced. A professional roofer will carefully remove the damaged shingles, ensuring not to disturb surrounding ones, and install new ones. It’s important that the new shingles match the existing ones as closely as possible for aesthetic reasons, although color matching perfectly on an older roof can be a challenge due to weathering. The roofer will also check for any loose nails (nail pops) that may have been exacerbated by the shifting due to ice and address those appropriately.
- Checking for Compromised Underlayment: This step is crucial. If water has backed up under your shingles, there's a good chance it penetrated or damaged the underlayment underneath. This protective layer, whether it's Synthetic vs Felt Underlayment Cost, is your roof's second line of defense against water. A roofer will lift sections of shingles to inspect the underlayment. If it's torn, saturated, or showing signs of deterioration, sections of it will need to be replaced. In areas prone to ice dams, it's highly recommended to have a robust "ice and water shield" membrane installed, extending several feet up from the eaves, as part of any repair or replacement. This self-sealing membrane provides superior protection against water intrusion from ice dams.
- Inspecting and Repairing Roof Decking: If the water penetrated the underlayment, it very likely reached your roof decking. This is the structural foundation that your shingles are nailed to. A roofer will inspect for soft spots, discoloration, or rot. Any compromised sections of plywood or OSB decking will need to be cut out and replaced before new underlayment and shingles are installed. This prevents structural weakening and ensures a solid surface for your new roofing materials. This often contributes significantly to the overall Asphalt Roof Replacement Cost Complete Breakdown if the damage is widespread.
Repairing Gutters, Fascia, and Soffits
The components that manage water drainage around your roof's edge are particularly vulnerable to ice dam weight and water overflow.
- Straightening, Replacing Sections, or Repositioning Gutters: Gutters that have pulled away from the house or are visibly bent will need attention. Depending on the severity, they can sometimes be re-secured and straightened. If sections are too warped or damaged, they'll need to be replaced. Ensuring your gutters are properly pitched toward the downspouts is also key to prevent future standing water, which can contribute to ice formation. If you have older, smaller gutters, you might even consider upgrading to larger ones with more capacity.
- Repairing or Replacing Damaged Fascia and Soffits: The fascia board, which runs along the edge of your roof and supports the gutters, can become waterlogged and rot. Soffit panels, which cover the underside of the eaves and often contain vents, can also be damaged by moisture. Rotted or warped sections of fascia or soffit must be replaced to maintain the structural integrity and aesthetic appeal of your home. If soffit vents are present, ensure they remain unobstructed during repair to maintain proper attic ventilation.
- Painting and Sealing Exterior Trim: Once any structural repairs to the fascia and soffits are complete, these areas should be properly prepped, primed, and painted. This not only restores their appearance but also provides an additional layer of protection against moisture. Ensuring all seams and joints are properly sealed with exterior-grade caulk can help prevent water intrusion in the future.
Fixing Interior Water Damage
The impact inside your home can be just as, if not more, distressing than the roof damage itself. Addressing these issues promptly is vital to prevent secondary problems like mold.
- Drying Out and Replacing Insulation: Any attic insulation that has become wet must be removed. Wet insulation loses its R-value, becoming ineffective, and creates a breeding ground for mold and mildew. Once the leak is permanently fixed, new, dry insulation should be installed. Consider upgrading to a higher R-value while you're at it, as improving insulation is a primary strategy for preventing future ice dams.
- Repairing Drywall, Plaster, and Paint: Water-stained or damaged drywall/plaster in ceilings and walls will need to be cut out and replaced. Even if it appears to have dried, the structural integrity may be compromised, and invisible mold could be lurking. Once new drywall is installed and taped, the area can be primed and painted to match the existing interior. For paint that has simply bubbled or peeled, the surface will need to be scraped, sanded, primed, and repainted.
- Mold Remediation: If mold is detected, it must be addressed immediately and thoroughly. For small areas, bleach solutions or commercial mold removers can be used by homeowners with proper safety gear. However, for larger infestations (more than 10 square feet) or if you have respiratory sensitivities, it's highly recommended to hire a professional mold remediation specialist. They have the expertise and equipment to safely remove mold and prevent its recurrence, ensuring your home's air quality is safe. This can be an unexpected and costly Hidden Costs in a Roof Replacement scenario.
Preventing Future Ice Dams: Long-Term Solutions
The best offense is a good defense when it comes to ice dams. Once you've repaired the damage, focus on addressing the root causes to ensure you don't face the same problems next winter. This involves a strategic approach to your attic and roof's performance.
Improving Attic Insulation
Effective insulation is the first and most critical step in creating a cold attic, which is key to preventing ice dams.
- Recommended R-values: The "R-value" measures a material's resistance to heat flow. The higher the R-value, the better the insulation. The recommended R-value for attics varies by climate zone, but typically ranges from R-38 to R-60 for most of the U.S. In colder climates like New England or the Upper Midwest, R-49 to R-60 is often recommended. If your insulation is visibly below the top of your ceiling joists, you likely don't have enough. Adding blown-in cellulose or fiberglass insulation can dramatically reduce heat transfer from your living space to your attic.
- Sealing Air Leaks: Insulation alone isn't enough if warm air is actively bypassing it through cracks and gaps. Identifying and sealing these air leaks is crucial. Common culprits include gaps around plumbing vents, electrical wiring, light fixtures (especially recessed lights), chimneys, and attic hatches. Use caulk for small gaps and expanding foam for larger ones. Don't forget to check where walls meet the attic floor. Sealing these leaks effectively creates an airtight barrier that complements your insulation.
Enhancing Roof and Attic Ventilation
Even with excellent insulation, some heat will inevitably find its way into your attic. Proper ventilation ensures this warm air is quickly expelled.
- Ridge Vents and Soffit Vents: A balanced attic ventilation system relies on continuous airflow from low (intake) vents to high (exhaust) vents. Soffit vents, located under the eaves, allow cooler outside air to enter the attic. Ridge vents, running along the peak of your roof, allow warmer attic air to escape. This creates a natural convection current that keeps the attic temperature close to the outside air, preventing heat buildup. Ensure that soffit vents are not blocked by insulation, which can often happen during insulation upgrades.
- Ensuring Proper Airflow: The general rule of thumb for attic ventilation is to have 1 square foot of net free vent area for every 150 square feet of attic floor space, with a 50/50 split between intake and exhaust. However, if a vapor barrier is present in your ceiling, this ratio can be adjusted to 1:300. A knowledgeable roofing contractor can assess your current ventilation and recommend upgrades. Sometimes, adding baffles in the attic bays can help ensure clear pathways from the soffit vents to the main attic space, preventing insulation from blocking airflow. This is a critical component to understanding How Roof Ventilation Works.
Upgrading Ice and Water Shield and Drip Edge
These components, though often overlooked, are critical for preventing water intrusion at your roof's most vulnerable points.
- Critical for Vulnerable Areas: Ice and water shield is a self-adhering, waterproof membrane that is installed directly onto the roof deck beneath the underlayment and shingles. It's especially vital along the eaves, valleys, around chimneys, skylights, and other roof penetrations – areas most susceptible to ice dam backup and water penetration. Many building codes now require its installation for a certain distance up from the eaves in colder climates. If your current roof doesn't have it, or has an insufficient amount, upgrading this during a repair or replacement is a smart investment.
- Why It's So Effective: Unlike felt underlayment, ice and water shield forms a watertight seal with the roof deck and around fasteners, preventing water from seeping through, even if it's trapped beneath an ice dam. This provides an invaluable layer of protection that can save you from costly interior water damage. While it adds to the Roof Cost Per Square What You'll Pay, it's a critical component that pays for itself by preventing future damage.
- Drip Edge: Drip Edge What It Does is a metal flashing installed along the eaves and rake edges of your roof. At the eaves, it’s installed under the underlayment but over the fascia board, directing water off the roof and into the gutters, or away from the fascia if there are no gutters. This prevents water from running back under the shingles and protects the edge of the roof decking and fascia from rot. Ensuring your drip edge is properly installed is a simple yet effective way to manage water flow away from your vulnerable roof edges.
Regular Roof Maintenance
Preventative maintenance can go a long way in minimizing the conditions conducive to ice dam formation.
- Timely Snow Removal: After heavy snowfalls, especially if followed by warming temperatures, it's wise to carefully remove snow from the lower 3-4 feet of your roof using a roof rake from the ground. This reduces the amount of snow available to melt and refreeze, significantly lowering the risk of ice dam formation. Remember, safety first – never climb on a snowy roof.
- Gutter Cleaning: Clogged gutters full of leaves, debris, or even frozen slush can exacerbate ice dam problems. They prevent melted snow from draining away, creating a prime spot for water to accumulate and freeze. Regularly clean your gutters, especially in late fall, to ensure they are free-flowing before winter sets in. Consider installing gutter guards if debris accumulation is a chronic issue.
Working with Professionals and Insurance Claims
Dealing with ice dam damage can be overwhelming, but you don't have to navigate it alone. Engaging qualified professionals and understanding your insurance policy are critical steps to a smooth repair process.
Finding a Reputable Roofing Contractor
When your roof has suffered from ice dam damage, the last thing you need is a shoddy repair. Choosing the right contractor is paramount. I often recommend homeowners start their search through platforms like Modernize because they simplify finding local, pre-vetted professionals.
- Importance of Licenses, Insurance, and Reviews: Always verify that any contractor you consider is fully licensed and insured. Licensing ensures they meet state or local requirements for their trade, while insurance (especially general liability and workers' compensation) protects you from liability if an accident occurs on your property. Ask for proof of both. Beyond that, check online reviews on sites like Google, the Better Business Bureau, and Modernize. Look for contractors with consistent positive feedback, specifically mentioning quality workmanship, communication, and professionalism. Don't be afraid to ask for local references you can call. This ensures you’re working with a company that stands by its work, whether it's a minor repair or a complete asphalt roof replacement.
- Getting Multiple Estimates and Comparing Them: Don't settle for the first quote you receive. Obtain at least three detailed estimates from different roofing companies. This allows you to compare not just the price, but also the scope of work, materials proposed, and timelines. A comprehensive estimate should itemize all costs, including tear-off, disposal, underlayment, new shingles, flashing, drip edge, and any deck repairs. Use this opportunity to ask questions about their process and warranties. Don't simply choose the cheapest option; look for the best value that combines fair pricing with a reputation for quality. Understanding How to Read and Compare Roofing Estimates is a skill worth developing.
- Understanding Warranties: A reputable contractor will offer a workmanship warranty on their installation, typically ranging from 5 to 25 years. Additionally, the shingle manufacturer provides its own warranty, often covering material defects. Ask about both. Some manufacturers, like GAF, Owens Corning, and CertainTeed, offer enhanced warranties when their entire roofing system is installed by a certified contractor. For instance, a GAF Master Elite Contractor can offer extended warranties that cover not just the materials but also the workmanship for longer periods, providing an extra layer of protection for your investment and peace of mind.
Documenting Damage for Insurance Claims
Dealing with insurance can feel like a maze, but proper documentation is your best flashlight.
- Photos, Videos, and Timelines: As soon as you discover ice dam damage, take extensive photos and videos of everything – the ice dams themselves, any exterior damage to shingles, gutters, or siding, and especially any interior water stains, peeling paint, or mold. Document the date you noticed the damage. Keep a detailed log of all communications with your insurance company, including names, dates, and what was discussed. The more evidence you have, the stronger your claim.
- Contractor Estimates and Repair Invoices: Your insurance adjuster will want to see detailed estimates for the repairs. Provide them with the comprehensive quotes you've gathered. Once repairs are completed, keep all invoices and receipts. These documents are crucial for substantiating the costs and ensuring you're reimbursed appropriately. Remember, while your insurance may cover some damages, preventive measures might not be.
- Filing Your Claim Promptly: Most insurance policies have time limits for filing claims. As soon as you've documented the damage and contacted a professional for an estimate, notify your insurance company. Delays could jeopardize your coverage. Be honest and thorough in your report, describing how the ice dams caused the damage.
Understanding Your Homeowner's Insurance Policy
Navigating the nuances of your insurance policy can be tricky, but it's essential to know what to expect.
- Coverage for Ice Dam Damage: Generally, standard homeowners' insurance policies do cover interior water damage caused by ice dams, as this is typically considered a sudden and accidental peril. However, policies might not cover the cost of removing the ice dam itself or repairs to the roof if the damage is attributed to neglect or lack of maintenance (e.g., extremely old, poorly maintained shingles). The specific language in your policy is key, so review it carefully or discuss it with your agent. Learn more about Does Insurance Cover Roof Replacement and what that entails for this type of damage.
- Deductibles and Depreciation: Be aware of your deductible, which is the amount you pay out-of-pocket before your insurance coverage kicks in. Also, understand how depreciation is applied. Many policies have "Actual Cash Value" (ACV) coverage for roofs, especially older ones, meaning they'll pay the cost of replacement minus depreciation for age and wear. "Replacement Cost Value" (RCV) policies pay the full cost to replace your roof with new materials, up to your policy limits, without subtracting depreciation. The difference can be substantial.
- Working with Your Adjuster: Your insurance company will send an adjuster to inspect the damage. Be present during this inspection if possible. Provide them with all your documentation and the contractor's estimates. Be prepared to discuss the timeline of events and the visible damage. If you feel the adjuster's assessment is incomplete or unfair, you have the right to challenge it, potentially with additional contractor input or even by hiring a public adjuster.
| Damage Type | Severity | Typical Repair Options | Estimated Cost Range (DIY vs. Pro) |
|---|---|---|---|
| Exterior Damage | |||
| Small Ice Dam / Mild Icicles | Low (Early Stage) | Safe snow removal, calcium chloride socks | $50 – $200 (DIY supplies) |
| Significant Ice Dam / Active Leak | Medium to High | Professional steam removal | $500 – $2,000 (Pro service) |
| Lifted/Missing Shingles | Low to Medium | Replace individual shingles | $200 – $700 (Pro) |
| Damaged Gutters | Medium | Re-secure, straighten, or replace sections | $250 – $1,500 (Pro) |
| Damaged Fascia/Soffit | Medium to High | Replace rotted wood, paint | $500 – $2,500 (Pro) |
| Interior Damage | |||
| Minor Ceiling/Wall Stains | Low | Clean, prime, paint | $100 – $500 (DIY) |
| Peeling Paint / Damp Drywall | Medium | Drywall patch/replacement, prime, paint | $500 – $2,000 (Pro) |
| Wet Attic Insulation | Medium to High | Remove, dry, replace insulation | $1,000 – $5,000 (Pro) |
| Visible Mold Growth | High (Health Hazard) | Mold remediation (professional recommended) | $1,000 – $6,000+ (Pro) |
| Damaged Roof Decking | High (Structural) | Replace rotted plywood/OSB sections | $500 – $2,000+ (Pro) |
Note: Costs are approximate and can vary widely based on location, extent of damage, labor rates, and specific materials used. Always get multiple quotes from qualified professionals.
Disclaimer
Please remember that this guide provides general information and recommendations. Roofing work, especially involving ice and snow, can be dangerous. Always prioritize your safety and consult with licensed and insured roofing professionals for accurate assessments and repairs specific to your home's needs. This content is not a substitute for professional advice.