Roofing Permit Cost and Process
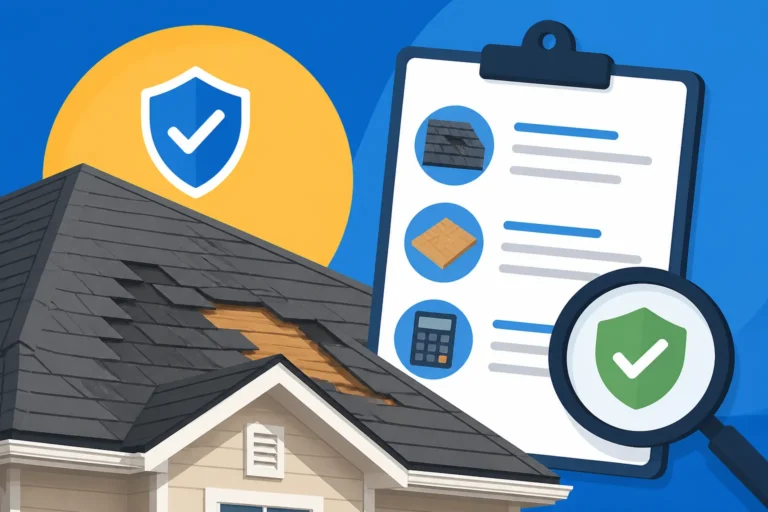
Dealing with a roof replacement or even a significant repair can feel overwhelming, and navigating the world of permits often adds another layer of stress and confusion for homeowners. Many wonder if a permit is truly necessary, how much it will cost, and what the entire process actually entails. This comprehensive guide will demystify the roofing permit process, break down potential costs, and explain why obtaining the correct permits is crucial for your home's safety and your peace of mind.
Understanding Why Roofing Permits Are Necessary
It's easy to view a roofing permit as just another bureaucratic hurdle, an extra step that adds to the overall expense and timeline of your project. But truly, these permits serve a much more important role than simple paperwork. They are a fundamental layer of protection, designed to safeguard not just your property, but also your family, your neighbors, and even the integrity of the community's housing stock. Without proper oversight, there's a higher risk of shoddy workmanship, dangerous installations, and structures that don't meet modern safety standards, which no one wants in their home.
Protecting Homeowners and Neighborhoods
Imagine hiring a contractor who cuts corners to save money, using substandard materials or skipping critical installation steps. Without a permit and the associated inspections, such work could go unnoticed until major problems arise—like a leaking roof or, even worse, a structural failure. Permits act as a homeowner's advocate, ensuring that every significant roofing project is reviewed and approved by local building authorities before work even begins. This means the proposed work adheres to established codes, giving you a baseline level of quality and safety. Beyond your own home, these regulations protect the entire neighborhood by ensuring consistent construction standards, which contributes to overall property values and safety. No one wants to live next to a house that might be falling apart due to uninspected, unsafe construction.
Ensuring Code Compliance and Safety
Building codes aren't arbitrary rules; they are meticulously developed standards born from countless hours of research, engineering, and tragic lessons learned over decades. For roofing, these codes dictate everything from the type of materials allowed in certain wind zones to the proper nailing patterns for asphalt shingles, the amount of ventilation required, and the installation of ice and water shield in colder climates. When you obtain a permit, you're essentially getting an official stamp of approval that your planned roofing project, as documented, meets these critical safety and structural requirements. The subsequent inspections throughout the project then verify that the work is actually being carried out according to those approved plans and codes. This ensures your roof can withstand local weather conditions, provides adequate fire resistance, and won't compromise the structural integrity of your home, helping you avoid issues like a sagging roof down the line.
Maintaining Property Value and Insurance Validity
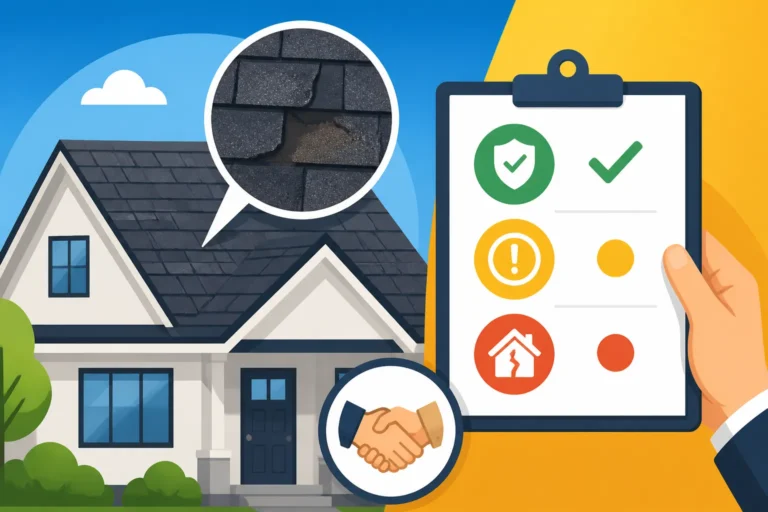
Think about selling your home in the future. A critical question potential buyers and their inspectors will ask is about any major renovations, especially those concerning the roof. If you've had a roof replacement or significant repair without a permit, it can raise serious red flags. Buyers might worry about the quality of the work, and inspectors may flag it as an unpermitted improvement, potentially complicating the sale or even forcing you to get retroactive permits and inspections, which can be far more expensive and frustrating than doing it correctly the first time. Moreover, most homeowner's insurance policies have clauses related to code compliance. If an issue arises with your roof and it's discovered that the work was done without a required permit, your insurance company could deny a claim, arguing that the unpermitted work voided part of your coverage. That's a financial risk no homeowner should take. Always ensure your roof work is permitted to protect your investment and your financial security.
The Typical Roofing Permit Application Process
The thought of dealing with local government offices can make anyone groan, but the roofing permit application process, while it varies slightly by municipality, generally follows a predictable path. Understanding these steps in advance can save you a lot of headaches and keep your project on track. It's often the contractor who handles much of this, but as a homeowner, being informed allows you to ask the right questions and ensure everything is handled correctly. If you're wondering, "Do You Need a Permit to Replace a Roof?", the answer is almost always yes for full replacements and sometimes for significant repairs.
Initial Research and Local Authority Identification
Before any hammer swings, the very first step is to figure out which specific governmental agency handles building permits in your area. For most homeowners, this will be your city's Building Department or, if you live in an unincorporated area, the county's equivalent. You can usually find this information on your city or county's official website. These sites are typically a treasure trove of information, detailing the exact requirements, application forms, fee schedules, and even a list of common roofing building codes. Some areas, particularly in states prone to severe weather like Florida or Texas, might have very specific codes regarding wind resistance or impact-resistant shingles. It's also wise to check if your property falls under any special jurisdictions, like a historic district or a homeowner's association (HOA), as they might have additional, specific requirements on materials, colors, or architectural styles that need approval before a permit can be issued.
Gathering Required Documentation
Once you know who to talk to, the next step is to compile all the necessary paperwork. This is where your chosen roofing contractor truly shines, as they are typically responsible for preparing most of these documents. Common requirements often include:
- A completed permit application form: This is usually available online or at the building department.
- Proof of property ownership: A deed or tax statement is often sufficient.
- Contractor's license and insurance information: The city needs to verify that the contractor is legitimate, licensed, and insured for your protection. You'll want to ensure they provide proof of their current license, like a general contractor license or a specific roofing contractor license, and comprehensive liability and workers' compensation insurance. It's worth researching Licensed and Insured Roofers: Why It Matters if you have any doubts.
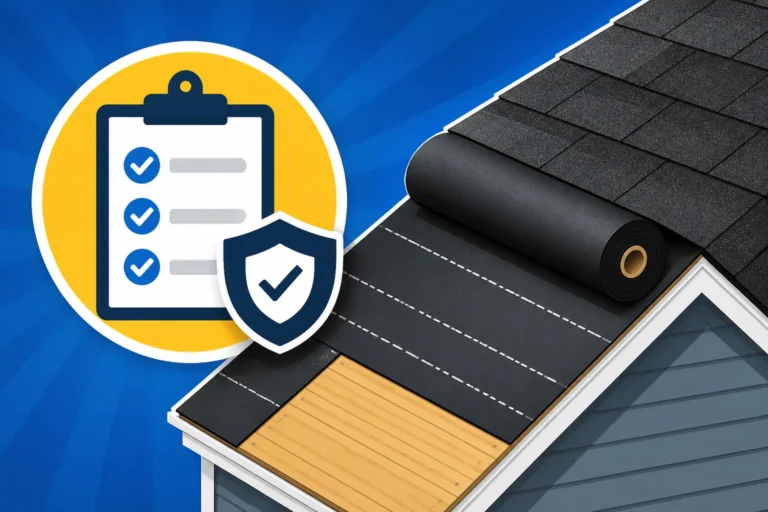
- Detailed scope of work: This document outlines exactly what will be done, including the type of asphalt shingles, underlayment, flashing, and ventilation systems. It should also specify if any roof decking replacement will occur.
- Site plan: A basic drawing showing your property lines and the location of your house on the lot.
- Proof of HOA approval (if applicable): If your community has an HOA, they often require architectural review and approval before you can proceed.
- Manufacturer product specifications: Sometimes, the building department will want to see the technical data sheets for the specific shingles or roofing components to ensure they meet local code requirements. For instance, in areas with high wind, shingles might need a specific wind resistance rating.
The more thorough and accurate these documents are, the smoother your application process will be. Missing or incorrect information is one of the quickest ways to cause delays.
Submitting the Application and Fees
With all your documents in hand, the application is ready for submission. In many municipalities, this can now be done online through a city or county portal, which is a huge time-saver. Some still require in-person submission or mail. At this stage, you'll also pay the permit fees. These fees are essentially what fund the building department's operations, including the review of your plans and the necessary inspections. Once submitted, the application goes through a review process, where a plans examiner checks for compliance with all local building codes. This review period can vary significantly, from a few days to several weeks, depending on the complexity of your project and the workload of the department. It's smart to factor this potential waiting period into your overall project timeline, as no work can legally begin until the permit is officially issued. Your contractor is often the one to follow up on the status, but you can always call the building department directly to inquire. This is all part of what is generally referred to as "Roofing Permits Explained".
What Influences Roofing Permit Costs
The cost of a roofing permit isn't a fixed national standard; it's a dynamic figure that dances to the tune of several local and project-specific factors. It's not just about paying for a piece of paper; it's about covering the administrative costs, the expertise involved in plan review, and the actual on-site inspections. Understanding these influences can help manage your expectations when you receive an estimate from your contractor, as the permit fee will be included in the overall "How Much Does an Asphalt Shingle Roof Cost".
Location, Jurisdiction, and Local Ordinances
The biggest driver of permit cost is undoubtedly your geographical location. A permit in a sprawling metropolitan area like Los Angeles, California, will almost certainly cost more than one in a small rural town in, say, Nebraska. This is due to several factors:
- Cost of Living and Labor: Building department staff salaries and overhead are higher in areas with a higher cost of living, which translates to higher permit fees.
- Complexity of Local Codes: Some jurisdictions, especially those in areas prone to specific natural disasters (hurricanes in Florida, earthquakes in California, severe hail in Colorado or Texas), have more stringent and complex building codes. Enforcing these codes requires more specialized knowledge and time from inspectors, which is reflected in the fees. For instance, coastal areas in Florida often have stricter wind uplift requirements and mandates for specialized fastening, all of which are factored into permit scrutiny and cost.
- Population Density and Demand: In rapidly growing cities, building departments are often inundated with permit applications. To manage this demand and ensure timely processing, they may charge higher fees to fund additional staff or technology infrastructure. For example, a roofing permit in Houston, Texas, might reflect the high volume of construction and the need to maintain a robust permitting system.
- Specific Local Taxes/Surcharges: Some cities or counties may add specific surcharges to building permits to fund local initiatives, infrastructure projects, or even affordable housing programs. These can vary wildly and add an unexpected layer to the base permit fee.
It's not uncommon for a permit fee to range from a couple of hundred dollars in less populous areas to over a thousand dollars in major cities with complex code requirements. For example, homeowners in Miami-Dade County, Florida, might see higher permit costs due to strict hurricane-resistant building codes, while those in smaller Ohio towns might pay significantly less.
Project Scope and Roof Complexity
The nature of the roofing work itself also plays a significant role in determining the permit cost. Simply put, a more extensive or complex job requires more detailed plan review and potentially more or longer inspections, which costs the municipality more to provide.
- Full Replacement vs. Repair: A complete roof tear-off and replacement will almost always require a permit, and the fee will be higher than for a minor repair. Why? Because a full replacement involves structural elements, significant material changes, and a complete overhaul of the weather barrier, warranting more rigorous inspection. If you're only repairing a small section of missing shingles or a minor leak, some municipalities might not require a permit, but this varies. It's always best to check.
- Number of Layers: If your project involves removing multiple layers of existing shingles (a full tear-off) rather than simply roofing over existing shingles, the permit cost might be higher because it impacts disposal fees and potentially reveals more of the roof decking, requiring closer inspection. Knowing "How Many Layers of Shingles Are Legal" in your area is critical.
- Roof Pitch and Size: Steeper roofs or very large roofs can sometimes incur higher permit fees. A steep-pitch roof is considered more hazardous for inspectors to access and takes more time to review and inspect. The total square footage of your roof can directly influence the permit cost in some jurisdictions, as fees might be calculated per square. This is where understanding your "Roof Cost Per Square: What You'll Pay" comes into play for your overall budgeting.
- Structural Changes: If your roofing project involves any structural modifications, such as adding dormers, changing the roofline, or significant roof decking replacement due to rot or damage, the permit will be more expensive and require more extensive engineering plans and inspections, elevating the overall cost.
Inspection Fees and Additional Charges
Beyond the base application fee, a portion of the permit cost is specifically allocated to the required inspections. These inspections are a vital part of the permitting process, ensuring that the work adheres to approved plans and codes.
- Number of Inspections: A standard roof replacement usually requires at least two inspections: a pre-shingle inspection (after the old roof is torn off and underlayment is down, but before shingles are installed) and a final inspection. More complex jobs or those involving structural changes might require additional inspections, each contributing to the overall permit cost.
- Re-inspection Fees: If your project fails an inspection due to non-compliance or incomplete work, you'll typically be charged a re-inspection fee for the inspector to come back out. This is a common hidden cost homeowners face if the contractor isn't meticulous.
- Technology Surcharges: Some municipalities have invested in online portals for permit applications, plan submissions, and scheduling inspections. While convenient, these often come with small technology or convenience fees.
- Expediting Fees: In rare cases, if you need a permit approved exceptionally quickly, some jurisdictions offer expedited review services for an additional, often substantial, fee. This is usually reserved for emergency situations.
Understanding these variables will give you a clearer picture of why your roofing permit costs what it does, ensuring there are no surprises when the final invoice arrives.
Average Roofing Permit Costs Across the Country
Trying to pinpoint a single "average" cost for a roofing permit across the entire United States is like trying to nail jelly to a wall – it's incredibly difficult because of the vast differences in local regulations, economic conditions, and building code complexities. However, we can certainly look at ranges and understand the factors that cause these variations. Generally, you can expect a roofing permit for a typical asphalt shingle replacement to fall anywhere from $75 to $1,500, with most homeowners paying between $200 and $500. But let's dig into what drives these numbers.
State-by-State Variations in Pricing
As we touched on earlier, the state and even the specific county or city within that state can drastically impact permit costs. This isn't just a slight fluctuation; it can be hundreds of dollars difference for essentially the same job.
For example, a roofing permit in a state like Florida, particularly in coastal regions, will typically be on the higher end due to strict hurricane-resistant building codes and the associated enforcement. It's common for permits there to range from $300 to $800, and in some highly populated or high-risk areas, they could even exceed $1,000, especially if the project is large or complex. This is because the state's building codes are among the most robust in the nation, requiring meticulous adherence to wind mitigation techniques, specialized fasteners, and often, specific types of underlayment. The inspections involved are more rigorous, which naturally increases the administrative costs passed onto the homeowner.
Contrast that with a state like Ohio or Michigan, where permit costs for a standard asphalt roof replacement might range from $100 to $400. These states still have important building codes, but generally, they don't face the same level of extreme weather threats as coastal or hail-prone states, leading to slightly less complex—and therefore less costly—permitting processes. However, even within these states, a permit in a large city like Cleveland or Detroit will likely cost more than in a rural county due to higher administrative overhead.
In California, especially in fire-prone areas or densely populated counties like Los Angeles or San Francisco, permit fees can also be quite high, sometimes reaching $500 to $1,200. This is often due to a combination of high cost of living, seismic activity building codes, and strict environmental regulations. Many jurisdictions also implement energy efficiency standards, which can add another layer of review.
Here's a generalized table to give you a sense of typical ranges, but remember these are estimates and highly dependent on the specific municipality:
| State/Region | Typical Roofing Permit Cost Range | Key Influencing Factors |
|---|---|---|
| Florida (Coastal) | $300 – $1,200+ | Hurricane codes, wind mitigation, robust inspections |
| California (Major Metros) | $400 – $1,500+ | High cost of living, seismic codes, environmental regulations |
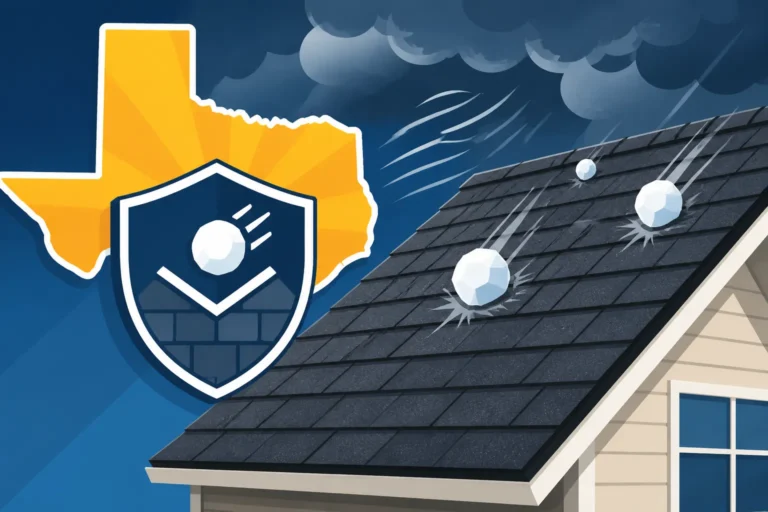
| Texas (Hail-prone areas) | $250 – $700+ | Hail resistance requirements, storm damage recovery volume |
| New York (NYC Metro) | $500 – $1,500+ | High density, complex zoning, multiple agency reviews |
| Colorado | $200 – $600+ | Hail resistance, high altitude considerations |
| Midwest (General) | $100 – $400+ | Lower overhead, less extreme weather-specific codes (generally) |
| Pacific Northwest | $150 – $500+ | Rain and moisture management, environmental considerations |
Urban vs. Rural Cost Differences
The contrast between urban and rural permit costs is another significant factor. Urban areas almost invariably have higher permit fees than their rural counterparts, and for good reason.
- Administrative Infrastructure: Larger cities maintain extensive building departments with numerous staff, advanced software, and often dedicated permit counters. This robust infrastructure is expensive to run, and the costs are recouped through higher permit fees. Rural counties, on the other hand, might have smaller departments, shared resources, and less overhead, leading to lower fees.
- Volume of Work: Urban centers see a much higher volume of construction and renovation projects. While this might seem like it would drive costs down due to economies of scale, it also necessitates more staff and more complex systems to manage the sheer number of applications and inspections efficiently.
- Specific Urban Regulations: Cities often have more intricate zoning laws, historical preservation rules, and specific aesthetic guidelines that don't apply in rural settings. This adds layers of review and approval, increasing the permit's complexity and cost. For example, a home in a designated historic district in Savannah, Georgia, might have specific shingle color or material requirements that add to the permit review process.
- Accessibility for Inspectors: In a dense urban environment, inspectors can often cover more ground in a day, traveling shorter distances between sites. However, parking and access can be challenging. In rural areas, inspectors may need to travel significant distances between properties, incurring higher fuel and time costs, which can sometimes indirectly affect fees or make them less willing to offer smaller, lower-cost permits.
Impact of Permit Expediting Services
For most residential roofing projects, waiting for the standard permit review and issuance is perfectly acceptable. However, there are rare instances where time is of the essence, perhaps due to severe unexpected damage that leaves your home vulnerable, or a tight deadline before a home sale. In these situations, some municipalities offer "expediting services" for permits.
This means that for a significantly higher fee, your permit application can be moved to the front of the line for review. The cost of expediting can often be several times the standard permit fee, sometimes adding $500 to $2,000 or more to the total. This is a premium service designed for urgent situations, and it’s not offered everywhere. It essentially pays for staff to drop other duties and prioritize your application. For example, if your home suffered significant damage from a sudden storm and you need a repair or replacement urgently to prevent further interior damage, an expedited permit might be considered. However, for a typical planned roof replacement, this extra cost is almost never justified. It's crucial to discuss the timeline with your chosen contractor when you "How to Read and Compare Roofing Estimates" to avoid any surprises regarding permit processing times.
The Critical Role of Roofing Inspections
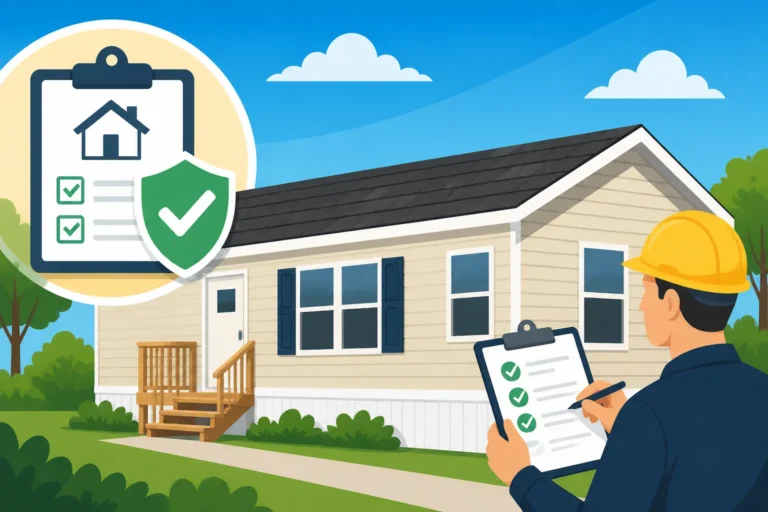
Permits are just the gateway; the true backbone of consumer protection in the roofing process lies in the inspections performed by the local building department. These inspections aren't just a formality; they're critical checkpoints designed to ensure that the work being done on your home meets all safety, structural, and material standards set forth in local building codes. Many homeowners are surprised by how thorough these inspections can be, validating the permit's cost by ensuring quality and compliance. Understanding "Roofing Inspection: What Inspectors Check" is invaluable.
Pre-Installation Inspections
For a full asphalt roof replacement, a pre-installation inspection is almost always required. This happens after the old roofing material has been completely torn off, but before any new underlayment or shingles are installed. This is a crucial window for the inspector to assess the condition of the underlying structure.
- Roof Decking Assessment: The inspector will meticulously check the roof decking (the plywood or OSB sheathing beneath the shingles) for any signs of damage, rot, water saturation, or structural deficiencies. If they find issues like widespread rot or soft spots, they will require these sections of roof decking to be replaced before any new roofing material can go down. This prevents future problems and ensures the new shingles have a solid, stable surface to adhere to.
- Flashing and Penetrations: They'll look at the existing flashing around chimneys, skylights, vent pipes, and wall intersections. While new flashing is typically installed with a new roof, the inspector will note the condition of the substrate and ensure that the plans for new flashing meet code requirements for watertightness. They might also check for proper sealing around any existing roof penetrations.
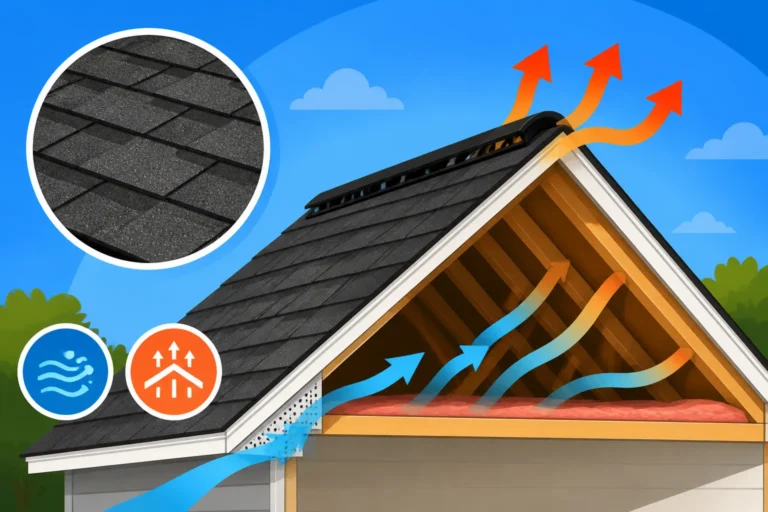
- Ventilation Check: Proper attic ventilation is vital for the longevity of your roof and the energy efficiency of your home. The inspector will often check that adequate ventilation exists and, if new ventilation components are part of the plan (like a new ridge vent), they will ensure the openings are properly cut and sized according to code. Insufficient ventilation can void shingle warranties and lead to premature roof failure.
- Drip Edge Installation: Many codes require drip edge to be installed along the eaves and rakes of the roof. The inspector will confirm its presence and correct installation, ensuring it effectively directs water off the roof and into the gutters, protecting the fascia and decking from water damage. This also plays into proper water management, which is a key component of any roofing system.
If the pre-installation inspection fails, it means there's an issue that needs to be rectified before the project can move forward. This might involve replacing more decking, adjusting ventilation, or making other necessary repairs. The contractor will address the issues, and then a re-inspection will be scheduled, often incurring an additional fee, highlighting the importance of thorough initial preparation.
Mid-Process and Final Inspections
While the pre-installation inspection is vital, it's often followed by at least one more inspection, the final inspection, and sometimes a mid-process inspection, depending on the complexity of the project and local regulations.
- Mid-Process Inspections (Less Common for Standard Roofs): For very large, complex, or multi-phase roofing projects, a municipality might require an inspection after the underlayment is installed and before the shingles go down. This ensures the underlayment (like felt or synthetic) and any ice and water shield are properly installed and sealed according to code, forming a critical waterproof barrier. This is less common for a typical single-family home asphalt re-roof but can occur in some jurisdictions or for commercial properties.
- Final Inspection: This is the last and often most anticipated step in the permit process. Once all roofing materials are installed, all flashing is in place, and the site is cleaned up, the final inspection is scheduled. The inspector will look at:
- Shingle Installation Quality: They'll assess the shingle alignment, proper nailing patterns (ensuring nails are not overdriven or underdriven), and adequate shingle overhangs. They'll also check for consistent granule coverage and that the shingles are lying flat.
- Flashing and Penetration Sealing: The inspector will ensure all new flashing around chimneys, skylights, and vent pipes is correctly installed, watertight, and sealed appropriately. They'll also check for proper sealing around any other roof penetrations.
- Ventilation Functionality: They will verify that ridge vents, soffit vents, or other ventilation components are properly installed and appear to be functioning correctly, allowing for adequate airflow.
- Overall Workmanship: The inspector provides an independent eye to confirm that the entire roof system has been installed according to the approved plans and meets all current building codes, providing your home with the protection it deserves.
Addressing Inspection Deficiencies
It’s not uncommon for minor issues to be flagged during an inspection, especially the pre-installation one. If an inspector finds a deficiency, they will issue a correction notice, detailing exactly what needs to be fixed to bring the project into compliance. This might be something as simple as replacing a few more sheets of compromised decking, adding more nails to certain shingles (in cases where high-wind nailing is required), or improving attic ventilation.
Your contractor is then responsible for addressing these items, often photographing the corrected work, and scheduling a re-inspection. This re-inspection typically incurs an additional fee, which is why it's in everyone's best interest to get it right the first time. Delays and re-inspection fees can be frustrating, but they are ultimately part of the system designed to ensure your roof is safe, durable, and up to code. Refusing to address deficiencies means the permit won't be closed, leaving your project unapproved and potentially causing significant problems down the line, as we'll discuss next.
What Happens If You Skip the Roofing Permit
It might be tempting to save a few hundred dollars or avoid perceived bureaucratic hassle by skipping the roofing permit. Perhaps a contractor suggests it, or you simply aren't aware of the requirement. However, the short-term "savings" almost never outweigh the significant risks and potential financial nightmares that can arise from unpermitted work. This is a topic that can lead to immense homeowner frustration and regret, and it's precisely why understanding "What Happens If You Skip a Roofing Permit" is so vital.
Potential Fines and Legal Ramifications
Local building departments take permits seriously because they are fundamental to ensuring public safety and maintaining community standards. If you undertake a significant roofing project without a required permit and the municipality finds out, you could face severe penalties.
- Stop Work Orders: The first thing that will happen is a "Stop Work Order." This means all construction on your roof must cease immediately. This can leave your home exposed to the elements, potentially leading to water damage if rain hits before the work is properly secured. Imagine a partially torn-off roof sitting exposed for days or weeks while you navigate the legal issues.
- Substantial Fines: Municipalities typically levy hefty fines for unpermitted work. These aren't minor penalties; they can range from several hundred to several thousand dollars, often far exceeding the original permit cost. Some jurisdictions even have daily fines for every day the work remains unpermitted after a violation notice. In some areas, the fine might be a multiple of the original permit fee (e.g., three times the original cost).
- Legal Action: In extreme cases, if you refuse to comply or the unpermitted work is deemed severely unsafe, the city or county could take legal action against you, forcing you to bring the property into compliance or even imposing additional liens on your property. This can be a long, drawn-out, and expensive legal battle.
- Mandatory Tear-Off: The worst-case scenario could involve the city demanding that the unpermitted roof be entirely torn off, re-inspected, and then reinstalled with a proper permit. This would mean paying for the initial work, then paying again for demolition, permit fees, new materials, and new labor. This financial burden can be devastating and highlights the true cost of cutting corners.
Issues with Home Sales and Insurance Claims
The consequences of unpermitted work don't stop at fines and legal woes. They can ripple out, affecting your ability to sell your home and even impacting your homeowner's insurance.
- Hindered Home Sales: When you sell your home, the buyer's inspector will scrutinize every major system, including the roof. If they discover unpermitted work, it will raise a huge red flag. Buyers will likely demand that you get the work permitted retroactively (which is often more difficult and expensive), or they may try to negotiate a significant price reduction, or even walk away from the deal entirely. A home with open violations or unpermitted work is a huge liability for a buyer. Many lenders also require all major work to be permitted and inspected before they will finance a property.
- Voided Warranties: Manufacturer warranties for asphalt shingles often require the roof to be installed according to local building codes. If your roof was installed without a permit and therefore without inspections, proving code compliance might be difficult, potentially voiding your shingle warranty or a workmanship warranty from the contractor.
- Insurance Claim Denials: This is perhaps one of the most frightening consequences. Imagine a severe storm hits, damaging your unpermitted roof. When you file an insurance claim, the adjuster will likely investigate the roof's history. If they discover the roof replacement or repair was done without a required permit, your insurance company could deny your claim entirely, citing that the unpermitted work constitutes a policy violation. This means you would be entirely on the hook for the full cost of repairs or even a complete replacement, potentially tens of thousands of dollars.
Remediation and Retroactive Permitting Challenges
If you're caught with unpermitted work, the path to remediation is usually far more arduous and expensive than simply getting the permit in the first place.
- Increased Costs: Retroactive permits almost always come with higher fees, often including penalty surcharges on top of the original permit cost. You'll likely pay more in fines, re-inspection fees, and potentially for tearing off and redoing work to meet current codes.
- Difficult Documentation: Proving that the unpermitted work actually meets code after it's already installed can be challenging. You might need to expose parts of the roof for inspections, leading to further damage or temporary repairs. Without proper documentation and inspections during the actual construction, demonstrating compliance becomes a logistical nightmare.
- Contractor Unavailability: If the contractor who performed the unpermitted work is no longer in business, or if they were an unlicensed "storm chaser," you'll be left to deal with the fallout yourself, often needing to hire a new, reputable contractor to fix the issues and navigate the retroactive permitting process. This just highlights the importance of asking "Questions to Ask a Roofing Contractor Before Hiring" and ensuring they're legitimate from the start.
Ultimately, skipping the permit is a gamble with incredibly high stakes. The peace of mind, protection, and long-term financial security that a proper permit provides are well worth the initial investment of time and money.
Who is Responsible for Pulling the Permit
This is one of the most common questions homeowners have, and it's a critical one for avoiding legal headaches and ensuring accountability. While it might seem like a small detail, knowing "Who Pulls the Roofing Permit: You or the Contractor" can save you from significant risks.
Homeowner vs. Contractor Responsibilities
In almost all cases, for any significant roofing project performed by a professional company, the roofing contractor should be the one to pull the permit. Here's why:
- Expertise in Building Codes: Reputable contractors are intimately familiar with local building codes, permit requirements, and the application process. They know what documentation is needed, how to fill out the forms correctly, and how to interact with the building department. This expertise is part of what you're paying for when you hire a professional.
- Knowledge of Project Details: The contractor is the one who designs and executes the project. They know the specific materials, installation methods, and timelines involved, all of which are crucial for the permit application.
- Legal Accountability: When a contractor pulls the permit, they are officially taking on the responsibility for ensuring the work meets code and passes inspections. This provides a layer of legal accountability that protects you, the homeowner. If issues arise during an inspection, it's the contractor's responsibility to address them.
- Efficiency: Contractors typically have established relationships with local building departments and are efficient at navigating the permitting bureaucracy, saving you time and potential frustration.
While the contractor should pull the permit, it's ultimately the homeowner's responsibility to ensure a permit is obtained before any work begins. Even if your contractor handles the application, you should always:
- Verify the Permit: Ask for a copy of the permit. In most areas, the permit will be conspicuously posted on your property (usually in a front window or near the construction area) once issued. If you don't see it, ask your contractor immediately. You can also often verify its existence and status by calling your local building department and providing your address.
- Confirm Scope: Ensure the permit accurately reflects the scope of work outlined in your contract.
Risks of Letting an Unlicensed Contractor Pull the Permit
This scenario is a major red flag and one you should actively avoid. If a contractor suggests you pull the homeowner permit for a job they intend to do, it's a huge warning sign that they are likely unlicensed, uninsured, or both.
- No Licensing: Many states and municipalities allow homeowners to pull their own permits for work they intend to do themselves. An unlicensed contractor might try to exploit this by having you pull the permit, essentially making you the "contractor of record" in the eyes of the law. This shifts all legal responsibility, liability, and accountability onto your shoulders. If they are an unlicensed contractor, they are probably avoiding the costs and scrutiny of being properly licensed, which means they are likely cutting corners elsewhere.
- No Insurance: If you're the permit holder and the contractor is uninsured, any accidents, injuries, or property damage that occur during the roofing project become your financial liability. Imagine a worker falling off your roof or damage occurring to your neighbor's property—you could be sued directly. This is why verifying a contractor's insurance, especially workers' compensation, is paramount. You need to ensure your "Should Your Roofer Be Bonded and Insured" before agreeing to any work.
- Substandard Workmanship: Contractors who resort to having homeowners pull permits are often those who can't pass the requirements for licensing or insurance. This typically translates to a lack of proper training, experience, and adherence to quality standards. The chances of getting a shoddy roof job that fails inspection or leaks prematurely are significantly higher.
- No Recourse: If something goes wrong with the work, or if the contractor disappears before the job is finished (a common occurrence with storm chasers), you'll have little to no legal recourse against them because you were technically the one responsible for the work as the permit holder.
Never agree to pull a permit for a contractor. It's a risk that is simply not worth taking. Always choose a reputable, licensed, and insured contractor who will handle the permitting process correctly. Learning "How to Choose a Roofing Contractor" is one of the most important decisions you'll make for your roof project.
Verifying Permit Status and Contractor Credentials
Even when a contractor assures you they will handle the permit, it's wise to double-check. Trust, but verify.
- Online Permit Search: Most modern municipalities have online portals where you can search for permits by address. Before any work begins, go to your city or county's building department website and confirm that a permit for your property has been issued and is active.
- Physical Permit Display: As mentioned, permits are typically posted on the job site. Look for it. If it's not there, ask your contractor to post it.
- Contractor License Check: Before hiring any contractor, verify their license status with your state's contractor licensing board or your local building department. This is a simple online search in most states and will confirm if their license is active and in good standing. This also helps you avoid common pitfalls like those discussed in "Roofing Contractor Red Flags to Avoid".
- Insurance Certificates: Request current certificates of insurance for both general liability and workers' compensation directly from the contractor's insurance provider. Do not just accept a copy from the contractor, as it could be outdated or fraudulent. Call the insurer to confirm coverage.
By being proactive in verifying the permit and your contractor's credentials, you protect your investment, your home, and your financial well-being.
Navigating Common Permit Roadblocks and Delays
Even with a reputable contractor handling the permit, and all good intentions, the permitting process isn't always a straight line. There can be unexpected bumps and delays that can push back your project timeline and sometimes even add to the cost. Being aware of these common roadblocks can help you manage expectations and work effectively with your contractor and the building department.
Incomplete Applications and Missing Information
This is arguably the most frequent cause of permit delays. The building department's plans examiners are meticulous for a reason – they need to ensure every aspect of your proposed roofing project complies with complex codes. If an application is submitted with missing information or incorrect details, it will inevitably be flagged.
- Common Errors: Mistakes might include an outdated contractor license number, missing product specifications for the chosen asphalt shingles or underlayment, an inaccurate roof diagram, or simply an incomplete form. For instance, if the application fails to specify that the new roof will include an ice and water shield where code requires it, the application will be sent back.
- Impact on Timeline: When an application is deemed incomplete, it’s typically put on hold. The building department will issue a "resubmittal request" or a "correction notice," detailing what information is needed. Your contractor then has to gather the missing pieces and resubmit. This process can add days, or even weeks, to your overall timeline, depending on how quickly the contractor responds and the department's review queue.
- Prevention: The best way to avoid this is for your contractor to be extremely thorough from the outset. As a homeowner, you can help by ensuring all your specific property details are accurately provided. A reputable contractor who regularly works in your municipality will usually be well-versed in the local requirements and less likely to make such errors. This attention to detail is often a sign of a high-quality contractor who understands "What a Roofing Estimate Should Include".
Scheduling Conflicts with Inspectors
Once your permit is issued and work is underway, you'll need inspections. But coordinating schedules can sometimes be a challenge. Building inspectors are often very busy, managing a heavy caseload of projects across their jurisdiction.
- Limited Availability: In busy construction seasons or rapidly growing areas, inspectors might have a packed schedule, meaning there could be a wait of several days or even a week for an inspection slot. If your project needs a pre-shingle inspection, this wait can mean your roof deck sits exposed longer than ideal.
- Failed Inspections Requiring Reschedules: If your project fails an inspection, not only will there be a re-inspection fee, but you'll also have to wait for another available slot, doubling the delay for that particular stage of work. This is particularly problematic if the weather forecast looks bad, and your roof is still vulnerable.
- Prevention: Good contractors are proactive. They often schedule inspections well in advance and communicate regularly with the building department. They also ensure their work is meticulously ready for inspection the first time to avoid re-inspections. As a homeowner, while you can't directly control the inspector's schedule, you can stay in communication with your contractor about the expected inspection dates and any potential delays.
Unexpected Code Changes or Requirements
While less common, occasionally, a local municipality might implement new building codes or interpret existing ones differently during your project's timeline. This can throw a wrench into even the most well-planned projects.
- New Regulations: For example, a city might suddenly enforce stricter ventilation requirements or mandate a specific type of underlayment for certain roof pitches if new regional data suggests it's necessary. If your permit was issued just before such a change, the inspector might still apply the new standard, requiring your contractor to make adjustments.
- Interpretive Differences: Sometimes, codes can be open to slight interpretation. An inspector might have a different understanding of a specific code than your contractor, leading to a required adjustment.
- Impact and Resolution: These situations can be frustrating because they are largely out of your or your contractor's control. However, a good contractor will stay abreast of code changes and communicate immediately if such an issue arises. They should then propose the necessary adjustments and integrate them into the project with minimal delay, working with the building department to ensure compliance. While this might add a slight cost or delay, it's essential for your roof's long-term integrity and safety. For instance, if a code update suddenly requires a specific "Cost of Peel-and-Stick Underlayment" product in certain areas, the contractor would need to adapt.
Navigating these roadblocks requires patience, clear communication with your contractor, and an understanding that the building department's ultimate goal is to ensure the safety and quality of your home.
Disclaimer
The information provided in this guide is intended for general informational purposes only and does not constitute professional advice. Roofing permit costs and processes vary significantly by location, project scope, and local regulations. Always consult with your local building department and a qualified, licensed roofing contractor to obtain accurate and up-to-date information specific to your project and geographic area. Building codes and requirements can change frequently, so always verify the latest standards before commencing any work.