How to File a Roof Insurance Claim
Finding out your roof has sustained damage, especially after a wild storm, can feel like a punch to the gut. It's not just the immediate worry about leaks and structural integrity; it's the daunting prospect of dealing with insurance claims, paperwork, and contractors. Many homeowners feel completely overwhelmed, unsure where to even start or what their policy actually covers. This comprehensive guide is here to walk you through the entire roof insurance claim process, making it less intimidating and ensuring you understand every step to get your home the protection it deserves.
Understanding Your Homeowners Insurance Policy's Roof Coverage
Before you even think about picking up the phone to call your insurance provider, it's crucial to really understand what your specific homeowners insurance policy actually covers when it comes to your roof. Policies aren't one-size-fits-all, and the nuances can significantly impact how much financial assistance you receive. Getting familiar with the jargon and specific clauses can save you a lot of headaches and potential financial surprises down the road.
Decoding Policy Language: ACV vs. RCV
One of the most critical distinctions in any homeowners insurance policy, especially concerning roof damage, is whether it offers Actual Cash Value (ACV) or Replacement Cost Value (RCV) coverage for your roof. This isn't just a technical detail; it's the difference between getting a partial payout that factors in depreciation and getting enough to replace your roof with new materials.
Let's break it down. Actual Cash Value (ACV) policies are designed to pay out the cost of replacing your damaged roof minus depreciation. Think of it like this: if your 15-year-old asphalt shingle roof, which has a typical lifespan of 20-25 years, gets hit by a hailstorm, the insurance company will calculate how much that 15-year-old roof was worth at the time of the damage. They'll consider its age, wear and tear, and then deduct that depreciated amount from the cost of a new roof. So, if a new roof costs $20,000, but your old roof had depreciated by 60% due to its age, you might only receive $8,000 (minus your deductible). This can leave a significant gap between what you get and what you actually need to install a brand-new roof. Many homeowners are shocked when they realize their payout is far less than expected, often due to an ACV clause they weren't aware of.
On the flip side, Replacement Cost Value (RCV) coverage is generally the more homeowner-friendly option. With RCV, your insurance company agrees to pay the cost of replacing your damaged roof with new materials of similar quality, without deducting for depreciation. This usually happens in two stages: an initial payment that covers the ACV, and a second payment for the "depreciation holdback" once the repairs or replacement are completed and you've submitted proof of the actual costs. So, using our previous example, you might get an initial $8,000, and once the $20,000 roof is installed and you've submitted invoices, the insurance company sends the remaining $12,000 (minus your deductible). This ensures you have the funds to fully restore your roof to its pre-damage condition, or even better. Understanding these differences is absolutely paramount when you're trying to figure out if Does Insurance Cover Roof Replacement.
Deductibles and Exclusions: What You Need to Know
Beyond ACV vs. RCV, your policy will also detail your deductible, which is the amount you're responsible for paying out of pocket before your insurance coverage kicks in. For roof claims, this can get a bit tricky. While many policies have a standard deductible (often a fixed dollar amount like $1,000 or $2,500), some areas, especially those prone to severe weather like Florida, Texas, Oklahoma, or parts of the Midwest, might have specific wind and hail deductibles.
These specialized deductibles are usually a percentage of your home's dwelling coverage – often 1% or 2%. So, if your home is insured for $300,000 and you have a 1% wind/hail deductible, you're on the hook for the first $3,000 of damage. This can be a substantial sum, so it's vital to know if your policy includes one and what percentage it is. It's a common frustration for homeowners to discover this higher deductible only after a storm hits, suddenly making a seemingly affordable repair much more costly out of pocket.
Then there are exclusions. Insurance policies are designed to cover sudden, accidental damage, not issues stemming from neglect or poor maintenance. Common exclusions for roof claims include:
- Wear and Tear: If your roof is simply old and has reached the end of its natural lifespan (see Roof Age: When to Start Planning Replacement), or it's showing signs of gradual deterioration, insurance typically won't cover it.
- Lack of Maintenance: If you've let moss or algae grow unchecked, or haven't cleared debris from gutters, leading to preventable damage, your claim might be denied.
- Faulty Workmanship or Materials: If a previous repair or installation was done incorrectly, leading to a failure, the original contractor (or their warranty) would usually be responsible, not your homeowners insurance.
- Flooding or Earthquakes: These are usually covered by separate policies. While a hurricane's wind damage to a roof is often covered, direct flood damage is not.
Always take the time to read through your policy's fine print, or better yet, call your agent and ask them to explain the specific coverage and exclusions for roof damage. It’s far better to understand these details proactively than to learn about them when you're in the middle of a stressful claim process.
Initial Steps After Discovering Roof Damage
The moment you realize your roof has been damaged – whether it's from a sudden, fierce storm or a slow leak appearing in your ceiling – can be incredibly jarring. Your first instinct might be panic, but taking a few critical, well-thought-out steps immediately can make a huge difference in the success of your insurance claim and prevent further damage to your home.
Safety First: Assessing the Situation Without Risk
Your personal safety, and the safety of anyone in your home, should always be the absolute priority. Never, under any circumstances, attempt to climb onto a damaged roof yourself, especially if there are active leaks, electrical concerns, or severe weather still present. Roofs can be incredibly slippery and unstable after damage, and a fall could lead to serious injury or worse.
If you suspect damage, start by looking from the ground. Can you see missing shingles? Obvious dents from hail? Water stains on your ceiling or walls inside? If there's active water coming in, your immediate priority should be to contain it to prevent further interior damage. Grab buckets, plastic sheets, or tarps. Move furniture and valuables away from the affected area. If the damage is severe and compromising the structural integrity of your home, or if there's significant water intrusion near electrical components, call emergency services immediately. For less severe but still urgent situations, like a hole that needs covering before another rainstorm, consider getting professional help for temporary measures. Many reputable roofing contractors offer emergency tarping services to protect your home until a full assessment and repair can be performed. This is a critical step in mitigating damage and showing your insurance company you acted responsibly, as detailed in Emergency Roof Tarping Explained.
Documenting the Damage Thoroughly
This is arguably one of the most crucial steps in the entire insurance claim process. The more detailed and comprehensive your documentation, the smoother your claim is likely to be. Your goal is to create an undeniable record of the damage before any repairs begin, and certainly before an adjuster arrives.
Here’s a checklist for thorough documentation:
- Photos and Videos: Use your smartphone or a digital camera to take high-resolution photos and videos. Don't just focus on the obvious damage; get wide shots of your entire roof, then zoom in on every single area of concern. Capture missing shingles, cracks, dents (especially hail dents, which can be subtle), exposed decking, damaged flashing around chimneys or vents, and any interior water stains or damage.
- Date and Time Stamp: Ensure your photos and videos are date and time-stamped. This proves the damage occurred on or around the reported date of loss. Many phone cameras do this automatically, but double-check your settings.
- Contextual Shots: Take pictures of the surrounding areas, like your yard, fences, or vehicles, if they also sustained damage. This helps paint a complete picture of the storm's impact.
- Detailed Notes: Write down everything you observe. When did the damage occur? What kind of weather events happened? What specific areas of the roof or home are affected? Be as precise as possible.
- Collect Debris: If it's safe to do so, collect a few examples of damaged shingles or hail stones (if applicable and preserved) as physical evidence.
This meticulous approach provides concrete evidence for your claim, leaving less room for dispute with your insurance company. Remember, the insurance company needs proof, and you are providing it. For more in-depth advice on what to capture, refer to How to Document Roof Damage for Insurance.
Contacting Your Insurance Company and a Reputable Roofer
Once you've ensured safety and documented everything, it's time to initiate contact. Your first call should be to your insurance company. Many insurance providers have a dedicated claims department or an easy online portal to start the process. Be prepared to provide your policy number, the date and cause of the damage (e.g., windstorm on [Date]), and a brief description of what you've observed. They will assign a claim number and an adjuster.
Simultaneously, or immediately after, you should reach out to a reputable local roofing contractor. Look for contractors with strong local reviews, proper licensing, and insurance. They are often your best ally in this process because they understand roof systems, damage assessment, and how to work with insurance companies. They can provide an independent assessment of the damage, help you understand the extent of repairs needed, and offer insights into what a fair repair or replacement cost should be. A good contractor will also be able to temporarily tarp your roof if needed, preventing further damage and showcasing your diligence to the insurer. Don't simply go with the first company that knocks on your door, especially after a major storm; "storm chasers" are common, and not always reputable. You'll want to choose wisely, following advice like that found in How to Choose a Roofing Contractor.
Navigating the Insurance Claim Process
Filing a roof insurance claim can feel like navigating a maze, but breaking it down into manageable steps makes the journey much clearer. Once the initial damage is assessed and documented, the real work of collaborating with your insurance provider begins. This phase is all about clear communication, providing necessary information, and understanding the role of each party involved.
Filing Your Claim: What Information You'll Need
When you officially file your claim, whether online or over the phone, your insurance company will ask for several pieces of critical information. Having these details ready can significantly speed up the process and reduce your stress levels. Typically, you'll need:
- Your Policy Number: This is essential for them to locate your account and policy details.
- The Date of Loss: The exact date the damage occurred. If it was a storm, provide the date of the storm. If it's a slow leak, provide the date you first discovered the problem.
- Detailed Description of the Damage: Be specific, drawing on your initial documentation. Mention missing shingles, exposed decking, water stains in specific rooms, or any other visible issues. You don't need to be a roofing expert, just describe what you see.
- Cause of Loss: Was it high winds, hail, a fallen tree, or something else? Be honest and accurate.
- Contact Information: Your current phone number and email.
- Preferred Contact Method: How you'd like them to communicate with you regarding updates.
During this initial filing, the insurance company will assign a claim number. This number is your golden ticket for all future communication, so write it down and keep it handy. They will also inform you of the next steps, which almost always involve an adjuster's inspection. The clearer and more concise you are during this initial conversation, the better. It sets the stage for a smooth process, ensuring you're taking How to File a Roof Insurance Claim seriously.
The Adjuster's Visit: Preparing for Their Inspection
Shortly after you file your claim, an insurance adjuster will be assigned to your case. Their job is to evaluate the damage, determine the cause, and estimate the cost of repairs or replacement. This visit is a crucial part of the claim process, and how you prepare can impact the outcome.
Here are a few tips to get ready:
- Be Present: Make every effort to be home during the adjuster's visit. This allows you to point out all areas of concern, ask questions, and ensure they don't miss anything.
- Have Your Documentation Ready: Show them your photos and videos, especially any interior damage that might not be visible from the roof. This reinforces your observations and helps them understand the full scope.
- Consider Having Your Contractor Present: Many experienced roofing contractors, particularly those who deal with insurance claims regularly, will offer to meet the adjuster on-site. This can be incredibly beneficial. Your contractor speaks "roofing language" and can highlight specific damage that might be overlooked, discuss code requirements, and ensure the adjuster's scope of work aligns with what's actually needed. They can advocate for your best interests, preventing potential discrepancies or disagreements later on.
- Clear the Area: Make sure access to your roof and the perimeter of your home is clear. Move cars, outdoor furniture, and anything else that might obstruct their inspection.
- Be Professional and Courteous: While this can be a stressful time, maintaining a professional and polite demeanor can foster a more collaborative environment.
Remember, the adjuster is there to assess, but they can only assess what they see and what you bring to their attention. Being prepared and engaged ensures a thorough evaluation.
Understanding the Adjuster's Report and Settlement Offer
After the adjuster's visit, they will compile a detailed report outlining their findings, the estimated cost of repairs or replacement, and the basis for their decision. This report is often accompanied by an initial settlement offer. It’s important to remember that this offer isn't necessarily the final word, especially with RCV policies.
When you receive the report, take your time to review it carefully. Compare their findings to your own documentation and your contractor's assessment. Look for:
- Scope of Work: Does it accurately describe all the damaged areas? Does it include all necessary components like underlayment, flashing, vents, and drip edge? Does it account for local building codes that might require upgrades (e.g., High-Wind Roofing Code Requirements in Florida, which may necessitate different nailing patterns or materials)?
- Cost Estimates: Do the costs seem reasonable based on what your contractor has quoted? Keep in mind that insurance adjusters use specific software, like Xactimate or Symbility, which generate estimates based on local material and labor costs. However, these don't always capture every nuance or the most current market rates.
- ACV vs. RCV Breakdown: If you have an RCV policy, the initial payment will likely be the Actual Cash Value (ACV), with a depreciation holdback. Make sure the calculation is clear.
- Deductible: Ensure your deductible has been correctly applied.
If you find discrepancies or feel the offer is too low, don't hesitate to question it. Your contractor can be a valuable resource in this discussion, helping you understand why certain items might be missing or under-estimated. This might require submitting a supplemental claim, which we'll discuss later. The goal is to reach a fair settlement that allows you to properly restore your roof, as detailed in articles like Roofing Estimate vs Roofing Bid and How to Read and Compare Roofing Estimates.
Working with Your Roofing Contractor During the Claim
The relationship with your roofing contractor during an insurance claim is arguably one of the most vital aspects of the entire process. They're not just there to swing a hammer; they're your expert advisor, your project manager, and often, your advocate with the insurance company. Choosing the right partner can make a world of difference between a smooth, successful project and a frustrating, drawn-out ordeal.
Choosing the Right Contractor for an Insurance Claim
When your roof is damaged, especially after a major storm, you'll likely see a flurry of roofing companies emerge. It's tempting to go with the first one that offers a quick solution, but resist the urge. This is a critical decision. You need a contractor who is not only skilled at roofing but also experienced in navigating the complexities of insurance claims.
Here’s what to look for:
- Local and Established: Prioritize local companies with a long-standing reputation in your community. They're more likely to be around to honor warranties and less likely to be "storm chasers" who disappear once the work is done.
- Licensed and Insured: This is non-negotiable. Verify their license with your state's licensing board and ask for proof of both general liability and worker's compensation insurance. This protects you from liability if a worker gets injured on your property or if there's damage to your home during the project. You can check out articles like Licensed and Insured Roofers: Why It Matters for more detailed information.
- Experience with Insurance Claims: Ask prospective contractors about their experience working with insurance companies. A good sign is a contractor who offers to meet with your adjuster, helps you understand the estimate, and assists with supplemental claims if needed.
- Clear Communication: They should be transparent about their process, the timeline, and all costs. They should explain things in a way you understand, not in confusing industry jargon.
- References and Reviews: Check online reviews (Google, Yelp, BBB) and ask for local references you can contact. Hear firsthand about other homeowners' experiences.
- Manufacturer Certified: Companies like GAF, Owens Corning, and CertainTeed offer certifications to contractors who meet certain standards. These certifications often allow the contractor to offer enhanced manufacturer warranties, which can be a huge benefit for your new roof's longevity. For instance, a GAF Master Elite Contractor can offer the Golden Pledge warranty.
Don't be afraid to interview a few contractors, get multiple quotes, and ask plenty of questions. This due diligence pays off immensely.
Getting Estimates and Scope of Work Alignment
Once you've chosen your contractor, the next step is to get a detailed estimate for the work needed. A good contractor will provide a comprehensive estimate that includes all materials, labor, and any necessary code upgrades. This estimate should align as closely as possible with the scope of work identified by your insurance adjuster.
Sometimes, there will be discrepancies. The adjuster's initial report might miss certain items or underestimate quantities, or your contractor might identify additional damage or code requirements that weren't included. This is a common part of the process, and it's where your contractor's experience truly shines. They can:
- Review the Adjuster's Report: Your contractor should meticulously go through the adjuster's summary line by line to ensure nothing was missed.
- Prepare a Detailed Xactimate Estimate: Many contractors use the same Xactimate or Symbility software as insurance companies, which helps in creating a consistent, justifiable estimate for the repair work.
- Communicate with the Adjuster: A reputable contractor will communicate directly with your insurance adjuster to point out discrepancies, explain why certain line items are necessary (e.g., additional decking replacement, specific flashing requirements, or new Cost of Ridge Vent Installation to meet current codes), and provide supporting documentation (photos, code citations). This process is often called submitting a "supplemental claim" or a "re-inspection request."
The goal is to ensure the insurance payout is sufficient to cover the full, proper restoration of your roof, rather than leaving you to pay significant out-of-pocket costs for items that should have been covered. This is why a detailed estimate, like those discussed in What a Roofing Estimate Should Include, is so important.
Managing Payments and Lien Waivers
Understanding how payments are handled is crucial to protect yourself financially. With insurance claims, the payment process typically involves two stages, especially with RCV policies. The first payment is usually the Actual Cash Value (ACV) amount, minus your deductible, and it often comes directly to you from the insurance company. This is the initial check that allows work to begin.
When your contractor begins work, they will typically require a deposit, followed by progress payments, and a final payment upon completion. It's rare and a significant red flag if a contractor asks for 100% of the money upfront. You should never pay the full amount until the job is completed to your satisfaction and all final inspections have passed.
Once the roof is installed and you've submitted proof of completion (e.g., final invoices from your contractor) to your insurance company, they will release the depreciation holdback, which is the remaining RCV portion of your claim. This final payment should be enough to cover the remaining balance due to your contractor.
A vital document you should always request from your contractor, especially with final payments, is a lien waiver. A lien waiver is a signed document from the contractor and their subcontractors (if any) stating that they have been paid for their work and materials and waive their right to place a mechanic's lien on your property. This protects you from a subcontractor or supplier who wasn't paid by your primary contractor coming after you for payment. Always get a final, unconditional lien waiver when you make the final payment. This crucial step is often overlooked by homeowners and can prevent major headaches later.
Payment Schedule Example (RCV Policy)
| Stage | Action | Payment Source | Amount | Notes |
|---|---|---|---|---|
| Initial Action | Primary Purpose | Typical Funding Source (for ACV phase) | Notes |
| The | Description | Location | Cause of Damage | Estimate for Repairs | Repair Status |
|---|---|---|---|---|---|
| Missing/Damaged Shingles | Front Slope, Northeast section | Hail Impact (Storm on 10/26) | $8,500 | Pending | |
| Granule Loss | Rear Slope, South section | Hail Impact (Storm on 10/26) | $6,200 | Pending | |
| Flashing Damage | Around Chimney base | Wind Uplift (Storm on 10/26) | $1,800 | Pending | |
| Interior Ceiling Water Stain | Master Bedroom Ceiling | Roof Leak from Damage | $1,500 | Pending | |
| Total Estimated Repair Cost | $18,000 |
This breakdown helps clarify what the insurance company is covering. If you have questions about Roofing Deposit: How Much Is Normal, make sure to discuss them openly with your contractor.
Common Challenges and How to Overcome Them
Even with the best preparation, the path to a fully repaired roof after an insurance claim isn't always smooth. You might encounter roadblocks, misunderstandings, or outright denials. Don't get discouraged! Many of these challenges are common, and knowing how to address them can save you time, money, and a great deal of stress.
Dealing with a Denied Claim or Low Settlement
Receiving a denied claim letter or an offer that feels woefully inadequate can be incredibly frustrating, especially when you know your roof is genuinely damaged. It's a common scenario, and it doesn't mean the fight is over.
If your claim is denied, the first step is to understand why. The denial letter should provide specific reasons. Common reasons include:
- Damage is due to "wear and tear" or "neglect": The insurer believes the damage wasn't sudden or accidental, but rather a result of your roof's age or lack of maintenance.
- Damage is below your deductible: The estimated cost of repairs is less than your out-of-pocket deductible amount.
- Cause of loss is excluded: The damage resulted from an event not covered by your policy (e.g., flood damage instead of wind damage).
If you disagree with the reason, gather all your evidence – your detailed photos, your contractor's assessment, and any historical weather reports for the date of loss. Your contractor can be invaluable here, providing expert testimony and detailed reports that contradict the insurer's findings. You can request a re-inspection, often with your contractor present to advocate for you. If an amicable resolution still seems distant, consider options like involving a public adjuster. A public adjuster is an independent, licensed claims professional who works exclusively for you, the policyholder, to negotiate with your insurance company. They understand the intricacies of policies and can often secure a much higher settlement, though they typically charge a percentage of the final payout. This entire process is covered in depth in Roof Insurance Claim Denied: What to Do.
Supplemental Claims and Code Upgrades
It's common for the initial insurance estimate to not cover all the costs associated with a full roof replacement, especially when factoring in local building codes that have changed since your original roof was installed. This is where a supplemental claim comes into play.
A supplemental claim is essentially an addendum to your original claim, requesting additional funds for items missed or undervalued in the initial adjuster's report. Your roofing contractor typically handles this by providing additional documentation, photos, and a revised estimate to the insurance company, explaining the necessity of these extra costs.
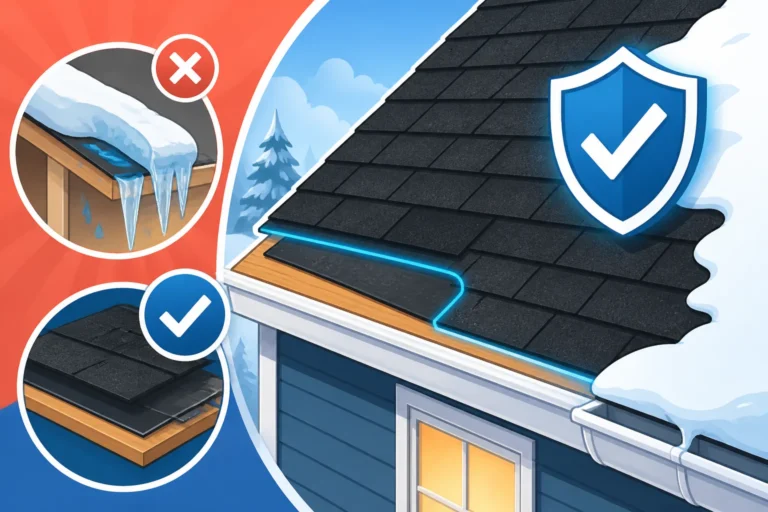
Code upgrades are a prime example of what might require a supplemental claim. Building codes are constantly updated to improve safety and resilience. For instance, after a major hurricane in Florida, local codes might mandate new nailing patterns for shingles, the installation of a specific type of Ice and Water Shield Explained in certain areas, or a more robust drip edge. Your original roof might not have had these features, but your new roof must comply with current codes. While insurance generally covers "matching and like kind" replacements, most policies also have a "Law & Ordinance" clause that covers the increased cost of repairs due to updated building codes. If these code upgrades weren't in the initial settlement, your contractor can submit a supplemental claim to ensure they are covered. This is why choosing a contractor knowledgeable about local building codes and insurance processes is so important – they'll ensure your new roof is not just repaired, but brought up to current standards.
Navigating Depreciation and RCV Holdbacks
If you have an RCV (Replacement Cost Value) policy, understanding how depreciation and the RCV holdback work is critical for receiving your full payout. As we discussed earlier, the insurance company will typically pay you an initial amount based on the Actual Cash Value (ACV) of your damaged roof, holding back the depreciated amount. This "depreciation holdback" is often a significant portion of the total claim.
To receive this depreciation holdback, you usually need to demonstrate that you've completed the roof replacement or repair. This means:
- Work Completion: Your contractor finishes the roofing job.
- Submit Invoices: You or your contractor submit the final, itemized invoice for the completed work to your insurance company. This invoice should clearly show the actual costs incurred.
- Final Payout: Once the insurance company reviews the invoice and confirms the work's completion, they will release the depreciation holdback directly to you (or sometimes jointly to you and your contractor, depending on the check endorsement).
It's crucial to stay on top of this. Don't assume the second check will just arrive automatically. Follow up with your insurance company after the work is done to ensure they have all necessary documentation to release the funds. There can be a specific timeframe within which you need to complete the repairs and submit for the holdback, so be aware of any deadlines specified in your policy or by your adjuster. Failing to submit within this window could mean forfeiting the depreciation amount, leaving you to cover that portion out of pocket. For more details, explore Roof Depreciation and Insurance.
Getting through a roof insurance claim can be a demanding process, filled with paperwork, inspections, and negotiations. But by understanding your policy, meticulously documenting damage, choosing a reliable contractor, and knowing how to navigate common hurdles, you can secure the coverage you need to restore your home's most important defense against the elements.
Disclaimer
Please remember that this guide provides general information about filing a roof insurance claim and should not be considered legal or financial advice. Every insurance policy is unique, and laws vary by state and municipality. It is crucial to review your specific insurance policy, consult with your insurance agent, and seek advice from a qualified roofing contractor and/or legal professional for your individual situation.