Ice Dam Protection Code Requirements
The thought of a beautiful winter wonderland can quickly turn into a nightmare when you spot those menacing icicles hanging from your gutters, especially if they're accompanied by a thick ridge of ice at your roof's edge. This isn't just a picturesque scene; it's a sign of an ice dam, a homeowner's dreaded enemy that can wreak havoc on your roof and home. Understanding ice dam protection code requirements is absolutely essential for anyone living in a colder climate, not just for compliance, but for protecting your most valuable asset. This guide will walk you through everything you need to know about these critical codes and how they safeguard your home.
Understanding What Ice Dams Are and Why They're a Problem
Many homeowners in colder regions have experienced the frustration of seeing ice dams form, but not everyone truly understands the underlying mechanics or the extent of the damage they can inflict. It’s more than just a winter inconvenience; it’s a structural and financial threat.
The Anatomy of an Ice Dam: How They Form
Ice dams aren't just random acts of nature; they're a direct result of an imbalance in heat transfer and the freeze-thaw cycle. It all starts when warm air from your home's interior rises into the attic. If your attic isn't properly insulated and ventilated, this warm air heats up the underside of your roof deck. When snow falls on your roof, the heat from below melts the snow, even if the ambient air temperature is below freezing.
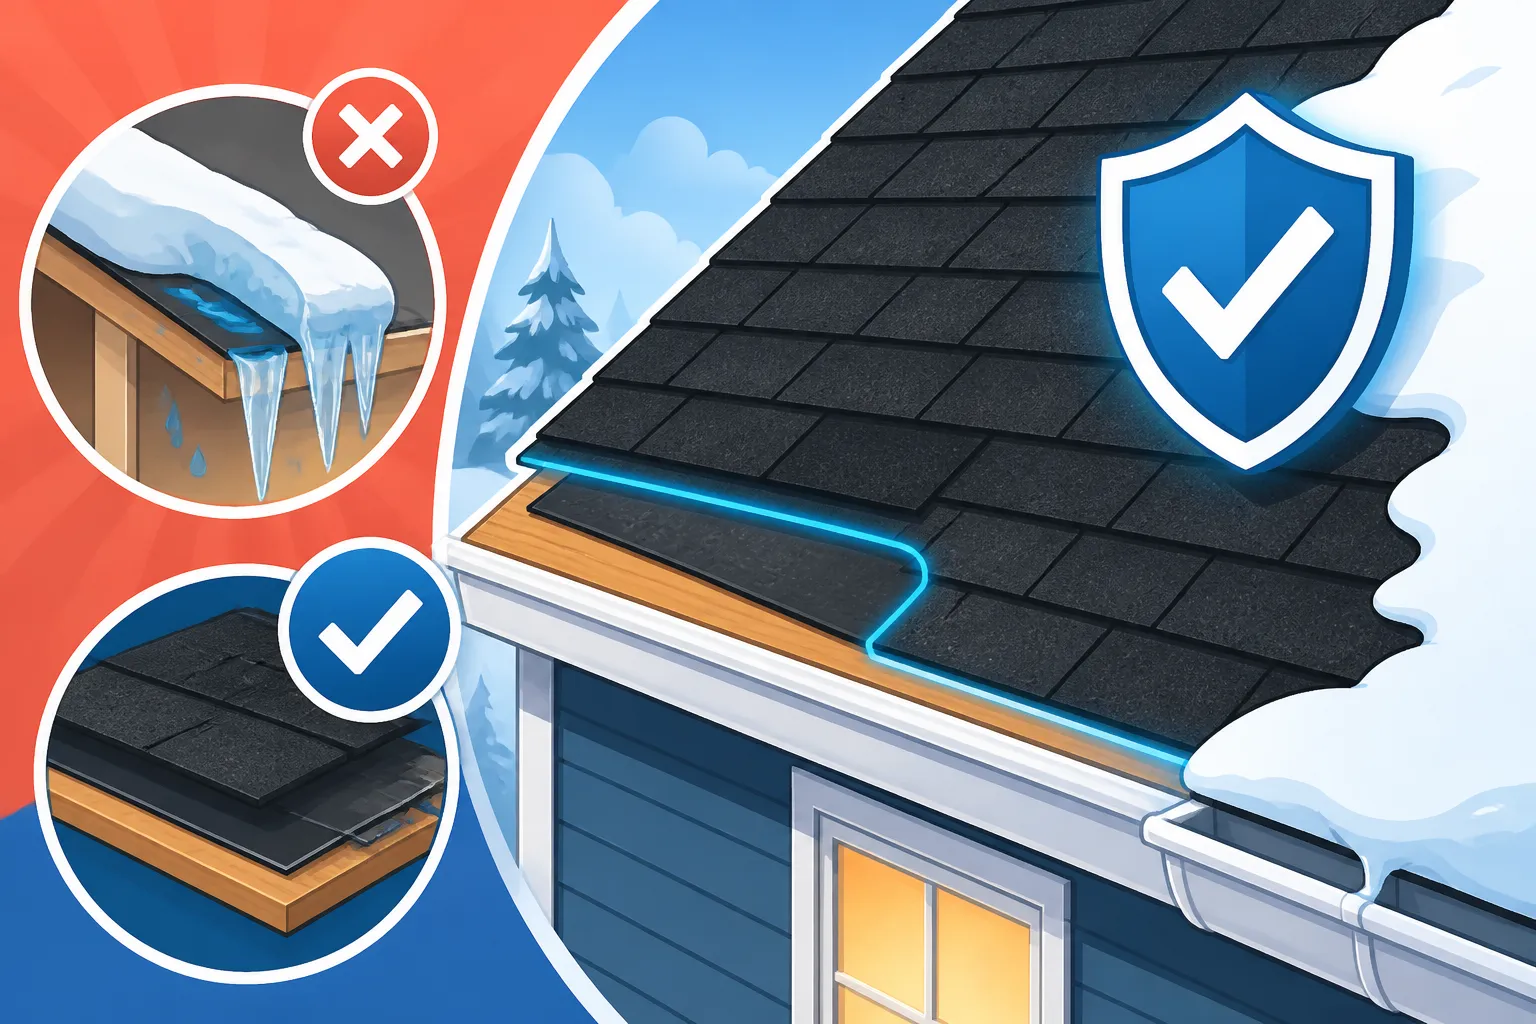
This melted snow water then flows down the roof slope. Here's where the problem begins: as it reaches the eaves and overhangs, these sections of the roof are typically colder because they extend beyond the heated portion of your house and are directly exposed to the cold exterior air. When the melted water hits these colder areas, it refreezes. Over time, this refreezing creates a ridge of ice—the ice dam itself—along the eave. More melted snow gets trapped behind this dam, pools up, and eventually backs up under your shingles. Think of it like a miniature dam holding back a river on your roof, but this river is slowly trying to find its way into your living room.
The Damage They Cause: Beyond Just Aesthetics
While an ice dam might look impressive with its cascading icicles, the potential for damage is anything but beautiful. The most immediate and common issue is water infiltration. When water backs up behind an ice dam, it can seep under your shingles, through the roofing felt, and into your attic space. From there, it can drip down into your insulation, ceilings, and walls. This can lead to a host of problems:
- Damaged Insulation: Wet insulation loses its effectiveness, leading to higher energy bills as your home struggles to retain heat. Once wet, it can also become a breeding ground for mold and mildew.
- Stained Ceilings and Walls: Visible water stains are often the first sign of an interior leak, requiring costly repairs and repainting.
- Compromised Structural Integrity: Persistent moisture can lead to rot in your roof deck, rafters, and wall studs, weakening the structure of your home over time.
- Damaged Gutters and Paint: The sheer weight of an ice dam, especially when combined with heavy snow, can rip gutters right off your house. The trapped water can also cause paint to peel and blister on exterior walls.
- Safety Hazards: Large icicles can fall unexpectedly, posing a serious danger to anyone below.
These damages are not just expensive to fix; they can also be challenging to identify the full extent of until warmer weather reveals all the hidden issues. This is why preventative measures, driven by building codes, are so critical.
The Core of Ice Dam Protection Code Requirements
Given the significant risks that ice dams pose, it's no surprise that building codes across the country include provisions aimed at preventing their formation. These codes are not arbitrary; they are developed to protect homeowners and ensure the longevity and safety of structures, especially in areas prone to cold weather and heavy snowfall.
International Residential Code (IRC) Standards
Most local and state building codes are based on the International Residential Code (IRC), a comprehensive model code that provides minimum requirements for one- and two-family dwellings. When it comes to ice dam protection, the IRC sets forth specific requirements for an "ice barrier," often referred to as ice and water shield.
The IRC (specifically R905.1.2 in various editions) typically mandates the installation of an ice barrier in areas where there is a "possibility of ice forming along the eaves causing a backup of water." This is usually defined geographically, applying to specific climate zones. The code generally requires that this ice barrier extend from the eave's edge to a point at least 24 inches inside the exterior wall line of the building. This measurement is crucial because it ensures that the protective membrane extends past the cold overhang and into the warmer, insulated part of the roof where ice dams typically start to form. The ice barrier must be a self-adhering polymer modified bitumen sheet or equivalent, specifically designed to prevent water penetration. This isn't just about placing a layer of felt; it's about creating a watertight seal that adheres directly to the roof deck.
State and Local Variations: It's Not One-Size-Fits-All
While the IRC provides a foundational guideline, it's vital to remember that building codes are adopted and often modified at the state and local levels. This means that Roofing Building Codes: What to Know can vary significantly depending on where you live. For example, states in the northern United States, like Minnesota, Wisconsin, or those in New England (Massachusetts, New Hampshire), often have more stringent ice barrier requirements than the basic IRC standard.
Some jurisdictions might require the ice barrier to extend further up the roof slope, perhaps 36 or even 48 inches inside the heated wall line, or even across the entire roof deck in extreme cold or low-slope conditions. Other areas might specify minimum thicknesses or types of ice barrier materials. It's also possible that some warmer states, which rarely experience freezing temperatures or heavy snow, might not have any specific ice barrier requirements in their local codes.
For instance, a homeowner in Fargo, North Dakota, a city known for its brutal winters, would find very specific and robust ice dam protection requirements in their local building codes, likely exceeding the IRC minimum. Conversely, someone replacing a roof in Phoenix, Arizona, would probably not encounter any ice dam protection codes at all. This regional difference underscores why checking with your local building department is always the first and most important step before starting any roofing project. Your roofing contractor should also be well-versed in these local requirements.
Key Components of Ice Dam Protection in Roofing Codes
Beyond just the ice barrier, a holistic approach to preventing ice dams involves several critical components that are often addressed within building codes. It's an interconnected system where each part plays a vital role.
Ice and Water Shield (Membrane) Installation
The most recognized and directly referenced component in ice dam protection codes is the ice and water shield, also known as an ice barrier. As discussed, this self-adhering membrane is designed to provide a secondary layer of protection against water penetration, especially from the backup of ice and wind-driven rain.
Proper installation is paramount. The membrane must be applied directly to the clean, dry roof deck, typically starting at the eave. It should overlap any drip edge installed at the eave and then be lapped vertically up the roof. The standard width for these rolls is usually 36 inches, but they come in various lengths. The IRC specifies that the barrier extends from the eave edge to a point at least 24 inches inside the exterior wall line. This effectively means that for a typical 12-inch overhang, the membrane would need to extend at least 36 inches from the eave to meet the 24-inch interior requirement. Many contractors will install two courses (or more) of this product, especially in vulnerable areas like valleys and around penetrations, to ensure maximum protection. This is a critical detail that differentiates a code-compliant roof from one that might look fine but is prone to leaks during winter. Understanding How Ice And Water Shield Is Installed can help you verify your contractor's work.
Proper Attic Ventilation and Insulation
While the ice barrier prevents water from entering, the ultimate goal is to prevent ice dams from forming in the first place, and that’s where proper attic ventilation and insulation come in. Building codes, including the IRC, have extensive sections dedicated to attic ventilation requirements because inadequate ventilation is a primary contributor to ice dam formation.
Ventilation: Codes typically require a specific ratio of net free ventilating area (NFVA) to attic floor area, often 1/150 or 1/300, depending on certain conditions (like whether a vapor retarder is present). This means there must be an adequate balance of intake vents (usually at the soffits or eaves) and exhaust vents (at the ridge or gables) to allow continuous airflow. This airflow helps to equalize the temperature of the attic with the outdoor air, preventing warm spots on the roof deck that cause snow to melt prematurely. A properly designed system might include a continuous Cost of Ridge Vent Installation at the peak and continuous soffit vents at the eaves. These work together to draw in cooler outside air and expel warmer, moist air, keeping the attic cool and dry.
Insulation: Codes also mandate minimum R-values for attic insulation, which vary by climate zone. For example, a home in a northern state might require R-49 or R-60 insulation, while a southern state might require R-38. The goal of this insulation is to create a thermal barrier that prevents heat from escaping your living space and entering the attic. If heat isn't reaching the roof deck, it can't melt the snow, thereby preventing ice dam formation. It's not enough to just have insulation; it needs to be properly installed, free of gaps, and not compressed. Code also often requires baffles to be installed at the eaves to ensure that insulation doesn't block the soffit vents, which would compromise the ventilation system.
Gutter and Downspout Considerations
While gutters and downspouts don't directly prevent ice dams, they are significantly impacted by them, and their installation can be related to overall roof drainage, which is indirectly tied to ice dam issues. Building codes primarily focus on ensuring gutters and downspouts adequately divert water away from the foundation of the home.
However, during an ice dam event, gutters become problematic. They are the first structures to bear the immense weight of ice and snow, often leading to them bending, detaching, or cracking. While codes don't typically require specific features to prevent gutters from forming part of an ice dam (like heated gutters), they do regulate proper slope, sizing, and attachment methods to ensure they function correctly and withstand typical loads. For instance, code might specify minimum gauge for gutter materials or the number of fasteners per linear foot. If your area frequently experiences ice dams, it might be worth considering gutter alternatives like gutter guards or even foregoing gutters on certain sections of the roof if permissible and practical, though this has its own set of drainage considerations. Ultimately, ensuring the roof system is designed to prevent ice dams means that the gutters won't be subjected to the destructive forces of heavy ice.
Navigating Permits and Inspections for Code Compliance
Understanding the codes is one thing; ensuring your roofing project actually adheres to them is another. This is where the permitting and inspection process becomes invaluable. It's not just bureaucratic red tape; it's a critical safeguard for your investment and your home's safety.
When a Permit is Required
For most significant roofing projects, especially a full roof replacement, a building permit is almost always required by local jurisdictions. This includes projects where you're tearing off old shingles and installing new ones, or even in some cases, adding a second layer of shingles over an existing one. The specific requirements for Do You Need a Permit to Replace a Roof will vary by municipality, but generally, any work that changes the structural integrity of the roof, alters the drainage, or significantly upgrades the materials will necessitate a permit.
The permit process ensures that the planned work meets current building codes, including those related to ice dam protection, structural integrity, and material quality. When you or your contractor pull a permit, you're essentially submitting your plans for review by the local building department. This review verifies that the proposed scope of work, including the specified ice and water shield installation, ventilation upgrades, and insulation levels, aligns with local code requirements. Attempting a major roofing project without a permit can lead to significant problems, including fines, stop-work orders, and potentially being required to undo work or remove non-compliant elements, costing you time and money. It can also complicate future home sales, as buyers and their inspectors often look for evidence of proper permits for major renovations.
What Inspectors Look For
Once a permit is issued, your project will typically be subject to one or more inspections by a municipal building official. These inspectors are there to verify that the work is being performed according to the approved plans and, more importantly, in compliance with all relevant building codes. For ice dam protection, they'll be paying close attention to several key areas:
- Ice Barrier Placement and Coverage: The inspector will check if the ice and water shield has been installed correctly, extending from the eave's edge up the roof slope to the code-mandated distance (e.g., 24 inches inside the exterior wall line or more, depending on local amendments). They'll also look for proper overlaps and adhesion to the roof deck.
- Underlayment Installation: Beyond the ice barrier, the full Underlayment Explained: Synthetic vs Felt will be checked for proper coverage and nailing patterns across the rest of the roof deck.
- Ventilation: They'll confirm that adequate intake (soffit) and exhaust (ridge or gable) vents are present and properly sized according to the attic's square footage and code requirements. They'll also look for clear airflow pathways, ensuring insulation isn't blocking soffit vents.
- Insulation (if part of the scope): If attic insulation is being upgraded or reinstalled, the inspector may verify the R-value and proper installation, ensuring no gaps or compression that could lead to thermal bridging.
- Flashing: Critical areas like chimneys, skylights, and vent pipes, which are common points of water intrusion, will be inspected for correctly installed flashing that prevents leaks, as outlined in Roof Flashing Explained.
- Roof Deck Condition: Before new materials go on, the inspector might assess the condition of the roof decking to ensure it's structurally sound and free of rot or damage, which is crucial for a long-lasting roof.
Passing these inspections is a testament to a job well done and code compliance. It gives you peace of mind knowing that your roof is built to withstand the elements and is less susceptible to the damaging effects of ice dams. If an inspection fails, the contractor will typically be required to remedy the deficiencies before the project can proceed or be approved.
Practical Tips for Homeowners in Cold Climates
Even with code-compliant construction, there are additional steps homeowners can take to further prevent ice dams and mitigate their impact. It’s about proactive management and understanding the nuances of your home’s performance in winter.
Proactive Measures to Prevent Ice Dams
Preventing ice dams is a year-round effort, not just a winter concern. Here are some actionable steps you can take:
- Ensure Adequate Attic Insulation: This is your first line of defense. Get an energy audit or check your attic insulation levels. If it's old, sparse, or compressed, consider upgrading it to the recommended R-value for your climate zone. This prevents heat from escaping into the attic and warming the roof deck.
- Improve Attic Ventilation: Insulation alone isn't enough; you need proper airflow. Check that your soffit vents aren't blocked by insulation and that you have adequate exhaust ventilation, such as a continuous ridge vent. The goal is to keep the attic temperature as close to the outdoor temperature as possible. If warm, moist air is trapped in your attic, it will contribute to snowmelt.
- Seal Air Leaks: This is a big one that many people overlook. Drafts and air leaks from your living space directly into the attic are major culprits for heat loss. Check for gaps around light fixtures, plumbing stacks, electrical wiring, and attic hatches. Use caulk, expanding foam, or weatherstripping to seal these penetrations. Even small leaks can allow a surprising amount of warm air to escape.
- Clean Gutters Regularly: While gutters don't cause ice dams, clogged gutters can exacerbate the problem by holding snow and ice, preventing melted water from draining properly. Keeping them clear of leaves and debris, especially before winter, ensures that any water that does melt can flow freely.
- Clear Snow from the Roof (Carefully): For homes in areas with extremely heavy snowfall, or after a particularly intense storm, carefully removing snow from the lower edges of your roof can prevent ice dam formation. Use a long-handled roof rake from the ground, avoiding standing on a ladder or the roof itself. Never use a pickaxe or other sharp tools, as you can easily damage shingles. Focus on the first 3-4 feet up from the eave.
What to Do If You Already Have Ice Dams
If, despite your best efforts, an ice dam forms, here’s what you should and shouldn't do:
- Do NOT Climb on the Roof: It's incredibly dangerous. Ice is slippery, and working on a roof in freezing temperatures is a recipe for disaster. Leave it to professionals if direct intervention is needed.
- Try to Create Channels: For smaller, manageable dams, you can try to melt channels through the ice to allow trapped water to drain. Fill old nylon stockings or pantyhose with calcium chloride (rock salt), knot the ends, and place them across the ice dam so they lie perpendicular to the eave. The calcium chloride will slowly melt through the ice, creating a path for water to escape. Avoid using sodium chloride (table salt) as it can damage your roof and landscaping.
- Call a Professional: If the ice dam is large, causing interior leaks, or you're simply uncomfortable tackling it yourself, call a qualified roofing contractor or an ice dam removal specialist. They have specialized equipment, such as steam removers, that can safely and effectively melt ice dams without damaging your roof. Be wary of contractors who propose using brute force (like hammers or chisels) or high-pressure washers, as these can cause more damage than the ice dam itself.
- Document Damage for Insurance: If water has entered your home, thoroughly document the damage with photos or videos. This will be crucial if you need to file a claim with your homeowners insurance. Understanding Does Insurance Cover Roof Replacement and roof damage can help you navigate this process.
By taking these proactive and reactive measures, you can significantly reduce the risk and impact of ice dams on your asphalt roof and your home.
Summary of Typical Ice Barrier Code Requirements (IRC Basis)
Here's a quick overview of what many local codes, based on the International Residential Code (IRC), typically require for ice barrier protection. Keep in mind that specific local amendments can always apply.
| Requirement Feature | Typical IRC Standard (or Common Local Adaptation) | Notes/Details |
|---|---|---|
| Material Type | Self-adhering polymer modified bitumen sheet | Must be specifically designed as an ice barrier; cannot be standard roofing felt. |
| Coverage Area | From eave edge to a point at least 24 inches inside the exterior wall line. | This means for a 12-inch overhang, the membrane would extend 36 inches up from the eave. Some states like Minnesota require 36" inside the wall line (total 48" up). |
| Installation | Applied directly to a clean, dry roof deck; must overlap any drip edge at the eave. | Adhesion is key to preventing water intrusion. |
| Location | Required in areas where possibility of ice forming along eaves exists (climate zones). | Applies to cold climate regions prone to freezing and snowfall. |
| Valleys | Often required to extend through valleys as well. | Valleys are critical areas for water flow and potential ice buildup. |
| Penetrations | Recommended around chimneys, skylights, and other roof penetrations. | These areas are highly susceptible to leaks. |
This table provides a generalized view. Always consult your local building department for the precise codes in your area before starting any roofing work.
Disclaimer
The information provided in this article is for general informational purposes only and does not constitute professional advice. Building codes and regulations vary by location and are subject to change. Always consult with a qualified local roofing contractor and your local building authority to ensure compliance with all applicable codes and for specific advice regarding your property.