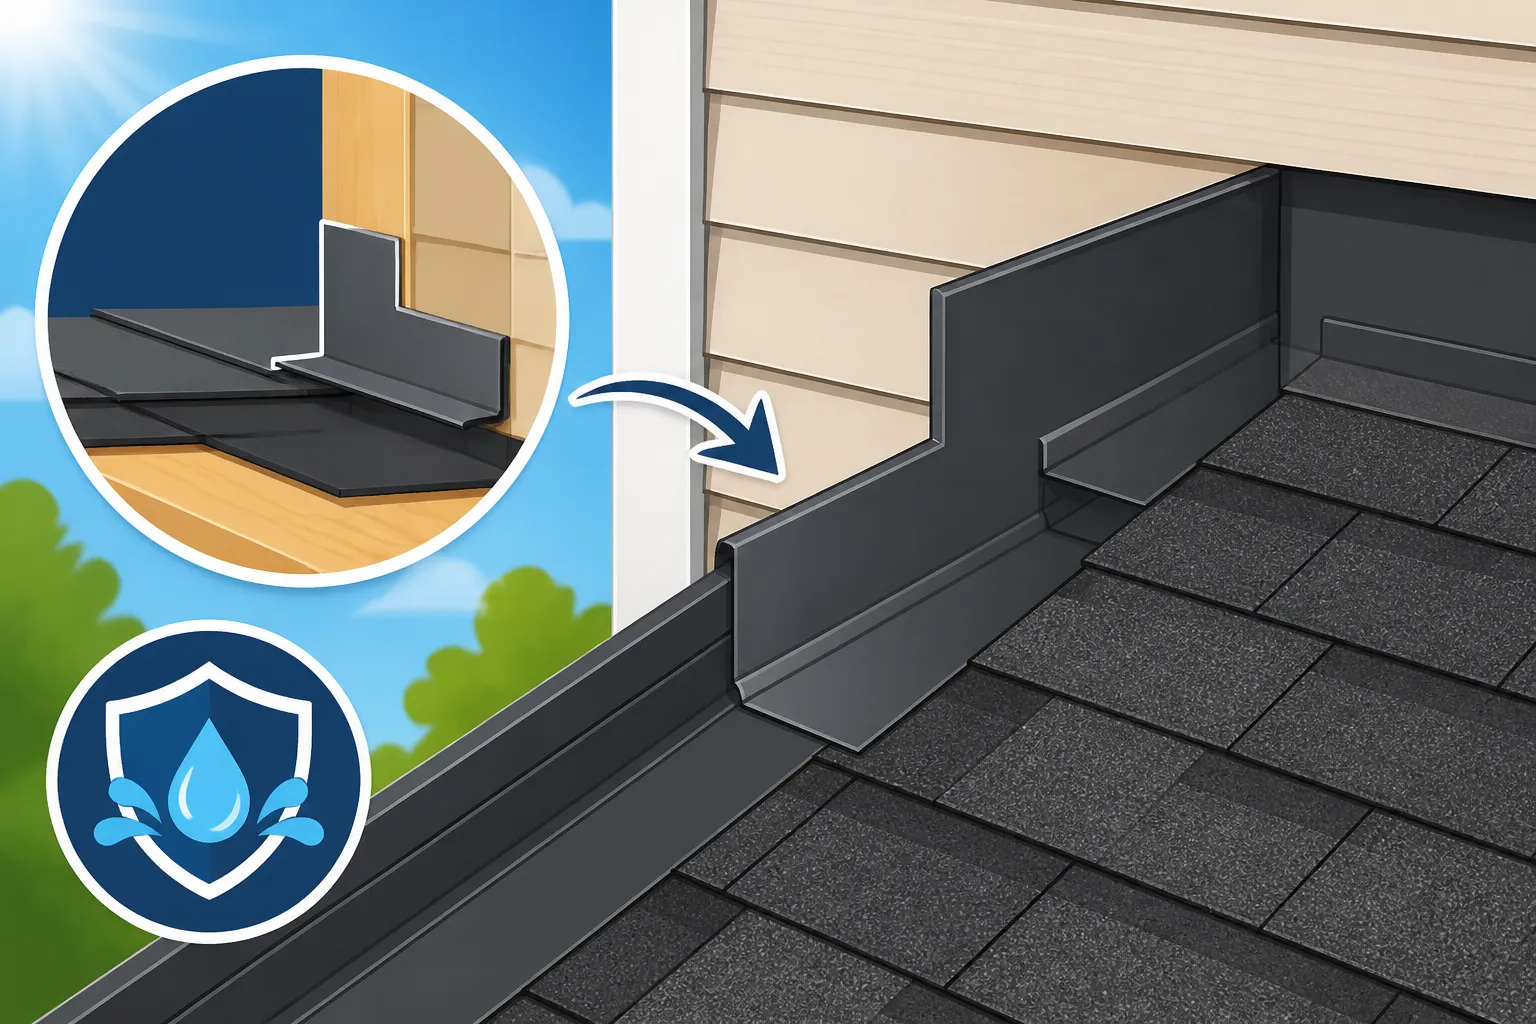
How a Roof Transition Is Flashed
It’s a scenario every homeowner dreads: you’ve just noticed a damp spot on your ceiling, or maybe even a drip, and your heart sinks. Often, the culprit isn’t just a random hole in a shingle, but a failure at one of your roof’s most vulnerable points – a transition. These are the tricky areas where different roof planes, or a roof meets a vertical wall, come together. Flashing these spots correctly is absolutely crucial to keeping your home dry, and this guide will walk you through the ins and outs of how these critical areas are protected.
Understanding the Dynamics of a Roof Transition
Before we dive into the nitty-gritty of flashing, let’s get a clear picture of what a roof transition actually is and why these areas are such a big deal. Imagine your roof not as one giant, flat surface, but a collection of interconnected planes, each with its own slope and direction. Where these planes meet, or where the roof intersects with other parts of your home, like a wall or a chimney, you have a transition.
These points are inherently complex because they disrupt the continuous, overlapping protection that your shingles provide. Water, being the relentless force it is, will always find the path of least resistance. Without meticulous attention and proper installation of specialized materials, these transitions become prime entry points for leaks, leading to potential water damage, rot, and mold issues within your home’s structure.
What Makes Transitions Vulnerable
Think about it this way: shingles are designed to shed water downwards, one over the other, like scales on a fish. This system works beautifully on a consistent slope. But when that slope changes, or when the roof abruptly ends at a vertical surface, the continuous flow is interrupted. This creates corners, angles, and gaps that are impossible to seal with just shingles alone.
The sheer forces of nature also play a significant role. Wind-driven rain can push water horizontally or even upwards under shingles, making these intersections even more susceptible. Snow and ice accumulation, especially in colder climates, can create ice dams that force water back up and under roofing materials, wreaking havoc on poorly flashed transitions. Temperature fluctuations cause materials to expand and contract, which can stress and crack sealants or loosen components over time. This is why understanding Roof Anatomy: Parts of an Asphalt Shingle Roof is so important; knowing what you're looking at helps identify weak points.
Common Types of Roof Transitions
While every home has its unique architectural flair, there are a few common roof transitions that every homeowner should be aware of. Each presents its own set of challenges and requires specific flashing techniques to ensure watertight integrity:
- Roof-to-Wall Transitions: This is perhaps the most common, where a sloped roof meets a vertical wall, such as a dormer wall or an exterior house wall that extends above the roofline. These require meticulous "step flashing" and counter-flashing.
- Valleys: These are the internal angles where two sloped roof planes meet and drain water towards the gutter. They funnel a significant amount of water and need robust flashing. You can learn more about How Valleys Are Flashed in another one of our detailed guides.
- Changes in Roof Pitch: Sometimes, a roof might transition from a steeper slope to a shallower one, or vice-versa, especially on additions or complex designs. These transitions can create an area where water might slow down, increasing the risk of pooling if not properly flashed.
- Around Obstructions: While not strictly "transitions" in the same way, areas around chimneys, skylights, and vent pipes function similarly as they interrupt the continuous roof surface and require specific flashing methods.
Each of these points needs not just a simple sealant, but a strategic system of metal, underlayment, and often sealants working together.
The Absolute Necessity of Proper Flashing
Flashing is the unsung hero of your roofing system. It’s the thin material, usually metal, installed at vulnerable points on your roof to prevent water penetration. Without it, even the best shingles won't stand a chance against persistent moisture. Thinking about replacing your roof? Make sure your contractor has a solid plan for all flashing components. A good understanding of How a Roof Replacement Works: The Full Process will serve you well when discussing these details.
What Exactly Is Flashing and Why It Matters
Flashing is essentially a waterproof barrier that directs water away from seams, joints, and penetrations on your roof. It acts as a secondary defense system, specifically designed for those awkward spots where shingles alone can't provide full protection. Most commonly, flashing is made from durable metals like aluminum, galvanized steel, copper, or lead, chosen for their longevity and ability to be bent and shaped to fit specific architectural contours.
The importance of flashing cannot be overstated. Consider a scenario: A homeowner in Atlanta, Georgia, decided to save a few dollars on their roof installation, opting for a contractor who cut corners on flashing around their dormer windows. After a particularly heavy summer thunderstorm, they discovered significant water stains inside their bedroom. The problem? The step flashing wasn't properly integrated, allowing water to wick behind the siding and into the wall cavity. This seemingly small oversight led to costly interior repairs, demonstrating that compromising on flashing is never a good idea.
Types of Flashing Materials and Their Applications
The material chosen for flashing often depends on the type of transition, the climate, and the homeowner’s budget.
| Flashing Material | Common Application | Pros | Cons |
|---|---|---|---|
| Aluminum | Step flashing, counter-flashing, valleys, drip edge | Lightweight, corrosion-resistant, affordable, easy to work with | Can be dented, not as durable as copper, prone to galvanic corrosion if mixed with certain other metals |
| Galvanized Steel | Step flashing, valleys, drip edge | Strong, durable, cost-effective, readily available | Heavier, prone to rust if coating is compromised, less flexible than aluminum |
| Copper | High-end homes, aesthetic purposes, custom work | Extremely durable, long lifespan, attractive patina, excellent corrosion resistance | Expensive, specialized installation required, can react with other metals |
| Lead | Chimney saddles, complex shapes, custom work | Highly malleable, conforms well to irregular surfaces, very durable | Expensive, heavy, toxic (handling precautions needed), aesthetic might not suit all homes |
| Rubber/EPDM | Pipe boots, vent collars, flat roof transitions | Flexible, good for sealing penetrations, cost-effective | Less durable in UV exposure over long term, typically for smaller applications |
Beyond the material, the design of the flashing is critical. For instance, Drip Edge: What It Does might seem minor, but it's an essential flashing component that protects the roof edges and fascia board from water intrusion. Similarly, a proper Ice and Water Shield Explained points out the critical self-adhering membrane that provides an extra layer of protection in vulnerable areas and colder climates. These elements, working in concert, form a robust defense against water.
Flashing Techniques for Different Roof Transitions
Now, let's get into the specifics of how flashing is actually installed at various critical points on your roof. This isn't a DIY guide, mind you, but knowing the process helps you ask the right questions when getting estimates and inspecting a job, particularly when you’re evaluating contractors through platforms like Modernize.
Roof-to-Wall Transitions: The Step Flashing Dance
When a roof plane meets a vertical wall, like on a side dormer or an addition that ties into an existing wall, "step flashing" is the go-to method. It’s called "step" flashing because it consists of individual L-shaped pieces of metal, each overlapping the one below it, much like steps on a staircase.
Here’s the breakdown:
- Underlayment First: Before any flashing goes down, the roof decking is covered with underlayment, often a synthetic material or felt, to provide a basic moisture barrier. In areas prone to ice dams, an ice and water shield will be applied directly to the decking along the eaves and in valleys.
- Shingle and Flash in Alternating Layers: This is the critical part. A shingle course is laid, and then an L-shaped piece of flashing is installed over the top edge of that shingle, extending up the wall. The next shingle course is laid over the horizontal part of that flashing piece. Then, another piece of L-shaped flashing is installed, again overlapping the shingle below it. This continues up the entire length of the wall, creating a shingled, waterproof barrier. Each piece of flashing should ideally be nailed only into the roof deck, not through the shingle below it, to allow for expansion and contraction and prevent leaks. This is why proper How Asphalt Shingles Are Installed: Step by Step practices are so important for flashing longevity.
- Counter-Flashing (or Cap Flashing): Step flashing alone isn't enough. Water running down the wall would simply get behind it. That's where counter-flashing comes in. This is a separate, longer piece of metal installed into the wall (often cut into the mortar joint of brick or slipped behind siding) and then bent down to overlap the step flashing. It acts as a "cap" to prevent water from entering behind the step flashing. The goal is to have the water flow over the counter-flashing, then over the step flashing, and finally over the shingles. It's an intricate dance of layers, and if one step is missed or done improperly, you’re looking at a future leak. This layering technique is also detailed in our guide on Step Flashing Around Walls.
Valleys: A Critical Water Channel
Valleys are where two sloped roof sections meet, forming an inward angle. These areas channel a significant amount of water and often debris, so they demand robust flashing. There are two main methods for flashing valleys: open valleys and closed valleys.
- Open Valleys: This is a common and highly effective method. After the ice and water shield is applied to the valley, a continuous, pre-formed piece of metal flashing (often galvanized steel or aluminum) is laid directly into the valley. The shingles are then cut and installed so they stop a few inches short of the valley center, leaving the metal exposed. This creates a clear, unobstructed channel for water to flow quickly off the roof. The edges of the metal flashing are often hemmed or crimped to create a small standing seam that prevents water from flowing sideways under the shingles. This method is generally preferred by many contractors because it’s highly durable and visible, making inspections easier.
- Closed Valleys: In this method, the shingles themselves extend across the valley. There are two variations:
- Cut Valley: Shingles from one roof plane extend straight across the valley, and shingles from the other plane are cut to meet and overlap them in the valley.
- Woven Valley: Shingles from both roof planes are interwoven and laid continuously across the valley.
While visually appealing, closed valleys can be more prone to issues if not installed perfectly. The shingles in the valley take more abuse from water, debris, and foot traffic. A crucial underlayment of ice and water shield is even more vital here to ensure no water gets through.
Regardless of the method, proper installation is paramount. A valley flashing done poorly is an invitation for a serious roof leak, sometimes even leading to the need for costly Roof Decking Replacement Cost down the line.
Changes in Pitch and Around Obstructions
Other transitions also require specialized flashing:
- Changes in Roof Pitch: When a roof transitions from a steep slope to a shallower one, particularly at a point where water might slow down, a continuous piece of metal flashing, often bent to match the new angle, is installed. This metal piece is integrated with the underlayment and shingles to ensure water is shed effectively, preventing it from backing up or seeping into the seam. It's often treated similarly to a mini-valley or a specialized edge.
- Chimneys: Chimneys are complex and often require a multi-part flashing system. This typically includes a base flashing (apron flashing) on the lower side, step flashing on the sides (integrated with shingles and counter-flashing), and a head flashing on the upper side. A "cricket" or "saddle" — a small, peaked diversion roof — is often built behind larger chimneys on the uphill side to shed water around them, rather than letting it pool.
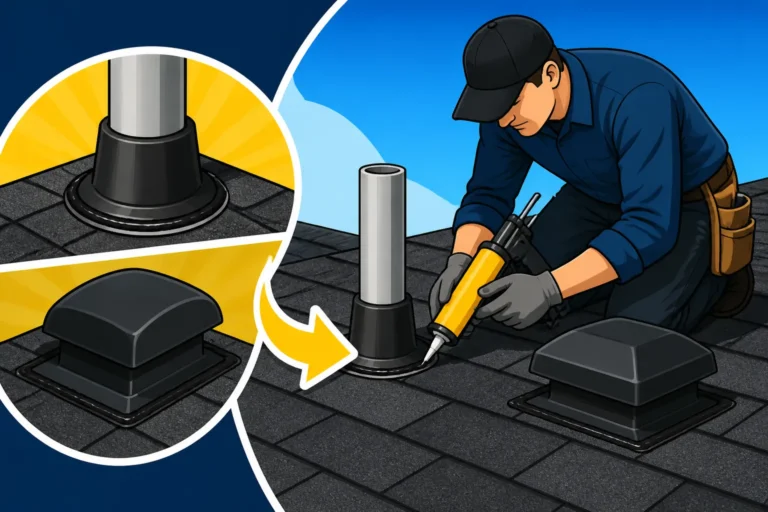
- Skylights and Vent Pipes: Skylights usually come with their own integrated flashing kits that tie into the roof system. For vent pipes, specialized "pipe boots" (often made of rubber or a flexible metal base with a rubber collar) are used. These fit over the pipe and are integrated with the shingle courses, with the shingle above covering the top flange of the boot to prevent water entry.
The key takeaway is that every point where the roof surface is interrupted, whether by a change in direction or an obstruction, needs a custom-fitted, layered flashing solution to guide water safely off the roof. This kind of detailed work highlights why choosing the right professional is so important. When you’re looking for a roofer, always ask about their specific flashing techniques for these areas. You can use platforms like Modernize to find experienced roofers who understand these nuances.
Red Flags in Flashing and How to Avoid Costly Mistakes
Even with the best materials, poor installation can render flashing useless, leading to premature roof failure and expensive repairs. It's vital for homeowners to know what to look for, both during the installation process and in the years that follow.
Signs of Improperly Flashed Transitions
When a roofing contractor does a shoddy job on flashing, the consequences can be disastrous. Here are some common red flags:
- Visible Gaps or Missing Flashing: This is the most obvious sign. If you can see gaps between the flashing and the roof surface, or between different pieces of flashing, water will find its way in. Similarly, if there's no visible metal flashing at critical junctures like roof-to-wall intersections or around chimneys, that's a massive red flag.
- Tar or Sealant Overuse: While some roofing sealant is necessary, especially around smaller penetrations or to secure certain flashing components, a professional job won't rely on copious amounts of caulk or tar to seal large areas. If you see excessive caulk smeared over flashing, it's often a sign that the underlying metal flashing wasn't properly cut, bent, or layered, and the contractor is attempting a quick, temporary fix that will likely fail.
- Rust or Corrosion: If your flashing is rusting or corroding prematurely, it indicates either a poor-quality material was used, or incompatible metals were installed next to each other (causing galvanic corrosion). This weakens the flashing and creates potential entry points for water. You might want to review our guide on the Cost of New Flashing and Drip Edge if you're facing this issue.
- Wrinkled or Buckled Flashing: Flashing should lie flat and smoothly against the surfaces. If it's wrinkled, buckled, or creased, it can impede water flow, create areas for debris collection, or even crack over time.
- Water Stains or Damage Indoors: This is the ultimate, undeniable sign that something is terribly wrong. Water stains on ceilings, walls, or in the attic near roof transitions point directly to a flashing failure. Don't ignore these! The longer you wait, the more extensive and costly the damage will become. Understanding How Long Asphalt Shingles Last means knowing that flashing should last just as long, if not longer.
Ensuring Your Flashing is Done Right
The best defense against flashing failures is to be proactive when hiring a roofing contractor.
- Ask Detailed Questions: Don't be afraid to grill potential roofers about their flashing techniques. Ask how they handle step flashing, valleys, and chimney flashing. Do they use separate counter-flashing? What materials do they use? A reputable contractor will be happy to explain their process in detail.
- Check References and Reviews: This is where resources like Modernize shine. You can find pre-vetted contractors and read reviews from other homeowners in your area who have had similar work done. Look for comments specifically mentioning the quality of workmanship and attention to detail.
- Insist on a Comprehensive Contract: Your roofing contract should clearly outline all flashing components, materials, and installation methods. Don't settle for vague language.
- On-Site Supervision (If Possible): While you shouldn't hover, occasional checks during installation can ensure that critical steps, like the layering of step flashing with shingles, are being followed correctly. If you spot something that looks off, don't hesitate to ask your project manager for clarification.
- Post-Installation Inspection: After the job is complete, do a thorough visual inspection from the ground (or with binoculars for higher areas). Look for the signs of improper flashing mentioned above. If anything concerns you, bring it to the contractor's attention immediately. A final walkthrough with the contractor is also an excellent time to get answers to any lingering questions you might have.
Properly installed flashing is an investment in the long-term health and integrity of your home. It’s not an area to cut corners, and by understanding how a roof transition is flashed, you empower yourself to make informed decisions and ensure your roof provides the protection it’s designed for.
Disclaimer
Please note that this guide provides general information about roof flashing and should not be considered professional advice. Roofing work can be dangerous and complex. Always consult with a qualified and licensed roofing contractor for specific recommendations, inspections, and installations tailored to your home's unique needs and local building codes.