How Valley Metal Is Installed
When you look at your roof, certain areas work harder than others to keep your home dry. The valleys, where two roof planes meet, are essentially your roof's superhighways for water runoff. If they’re not installed perfectly, you're not just looking at a minor leak; you could be facing significant water damage inside your home. This guide will take a deep dive into how valley metal is installed, giving you the insider knowledge to ensure this critical part of your roofing system is done right.
Understanding the Importance of Valley Flashing
Let's be real: no one wants a leaky roof. And often, the first place trouble starts isn't a random shingle, but those vulnerable valleys. They're like the Achilles' heel of an asphalt shingle roof, constantly battling the elements.
Why Valleys Are Vulnerable
Imagine a heavy rainstorm. All that water rushing down two intersecting roof planes converges into the valley, creating a concentrated stream. It's not just rain, either. Think about leaves, twigs, and pine needles accumulating there, especially if you have mature trees nearby. In winter, snow and ice dams can build up, putting immense pressure on these areas. This constant barrage of water, debris, and temperature fluctuations makes valleys high-stress zones.
If a valley isn't properly protected, the consequences can be severe. Water can seep underneath compromised flashing, leading to rotten roof decking, damaged rafters, and eventually, stained ceilings and walls in your living space. It's not just an unsightly drip; it can compromise the structural integrity of your home over time. This isn't just about making your roof look nice; it's about safeguarding your entire home from water intrusion. Getting your head around the full spectrum of your roof's components, like understanding the various parts of an asphalt shingle roof, can help you appreciate the importance of each piece.
The Role of Metal in Valley Protection
For decades, roofers used different methods to protect valleys, including "closed-cut" or "woven" shingle valleys. While these methods can work, they often don't offer the same level of long-term protection and durability as an "open metal" valley. Metal provides a smooth, unobstructed path for water to flow freely off the roof. This means less pooling, less debris accumulation, and significantly reduced risk of water infiltration.
Different types of metal are used for valley flashing, each with its own characteristics. Galvanized steel is a common and cost-effective choice, offering good corrosion resistance. For a more premium and extremely durable option, many homeowners opt for copper or aluminum. Copper not only lasts for decades but also develops a beautiful patina over time, adding to your home's curb appeal. Aluminum is lightweight and highly resistant to rust. Regardless of the material, the key benefit of metal is its inherent ability to shed water efficiently and withstand harsh weather, outperforming shingle-only valleys in longevity and performance.
Preparing the Valley for Metal Installation
Before any metal goes down, the preparatory steps are absolutely critical. Think of it as laying the groundwork for a solid foundation. Skipping steps here is like trying to build a house on quicksand – it just won't hold up.
Proper Decking and Underlayment Installation
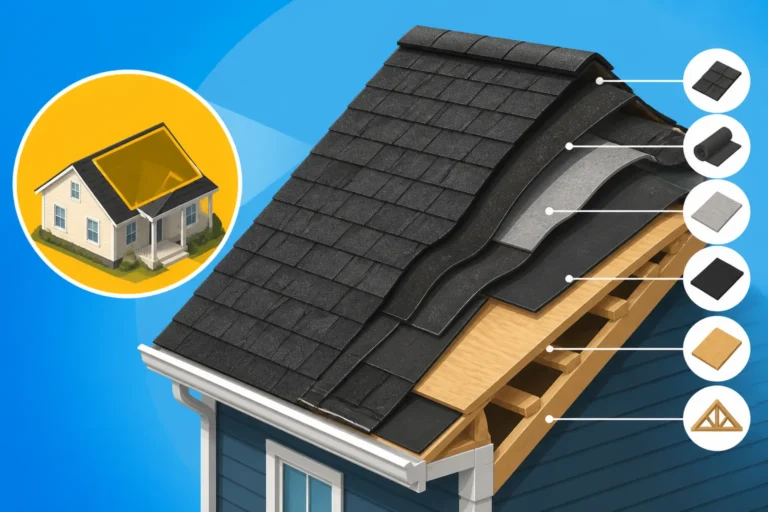
A strong roof starts with strong roof decking. Any rotten or damaged sections of plywood or OSB should be replaced before anything else happens. Once the decking is sound and securely fastened, the next crucial step is applying underlayment. In a valley, this isn't just standard felt paper; it’s almost always an ice and water shield. This self-adhering membrane is a game-changer for high-risk areas like valleys.
The ice and water shield should be installed directly onto the clean, dry roof decking, spanning the entire length of the valley. Typically, it’s applied in two pieces, with each piece extending a minimum of 18 to 36 inches up each intersecting roof plane from the center of the valley, and then overlapping in the middle. This creates a double layer of waterproofing that acts as an impenetrable barrier, even if water somehow gets past the shingles and metal. This crucial step is often overlooked by less scrupulous contractors, but it's vital for a durable roof. If you're wondering how this fits into the bigger picture, it's an essential part of how underlayment is installed correctly.
Measuring and Cutting the Valley Metal
Once the ice and water shield is in place, it's time to measure and cut the valley metal. This isn't a "measure once, cut once" kind of job; precision is paramount. The metal flashing needs to extend the full length of the valley, from the ridge down to the eaves. It's important to ensure there's enough overhang at the bottom edge (the eave line) to direct water directly into the gutters, preventing it from running behind them.
For longer valleys, you might need to use more than one piece of metal. If this is the case, the upper piece should always overlap the lower piece by at least 6 inches, ensuring that water flows smoothly over the seam, not into it. When cutting, remember that many valley metals come in a "W" or "V" shape. The "W" style, with its raised center crimp, is particularly effective as it helps prevent water from one roof plane from washing over onto the other, which can be a problem with "V" style valleys during heavy downpours. The metal needs to be straight and free of bends or kinks that could impede water flow.
Step-by-Step Installation of Valley Metal
Now we're getting to the core of it: actually putting that metal in place. This stage requires careful execution and an eye for detail, as small errors here can lead to big headaches down the road.
Securing the Metal Flashing
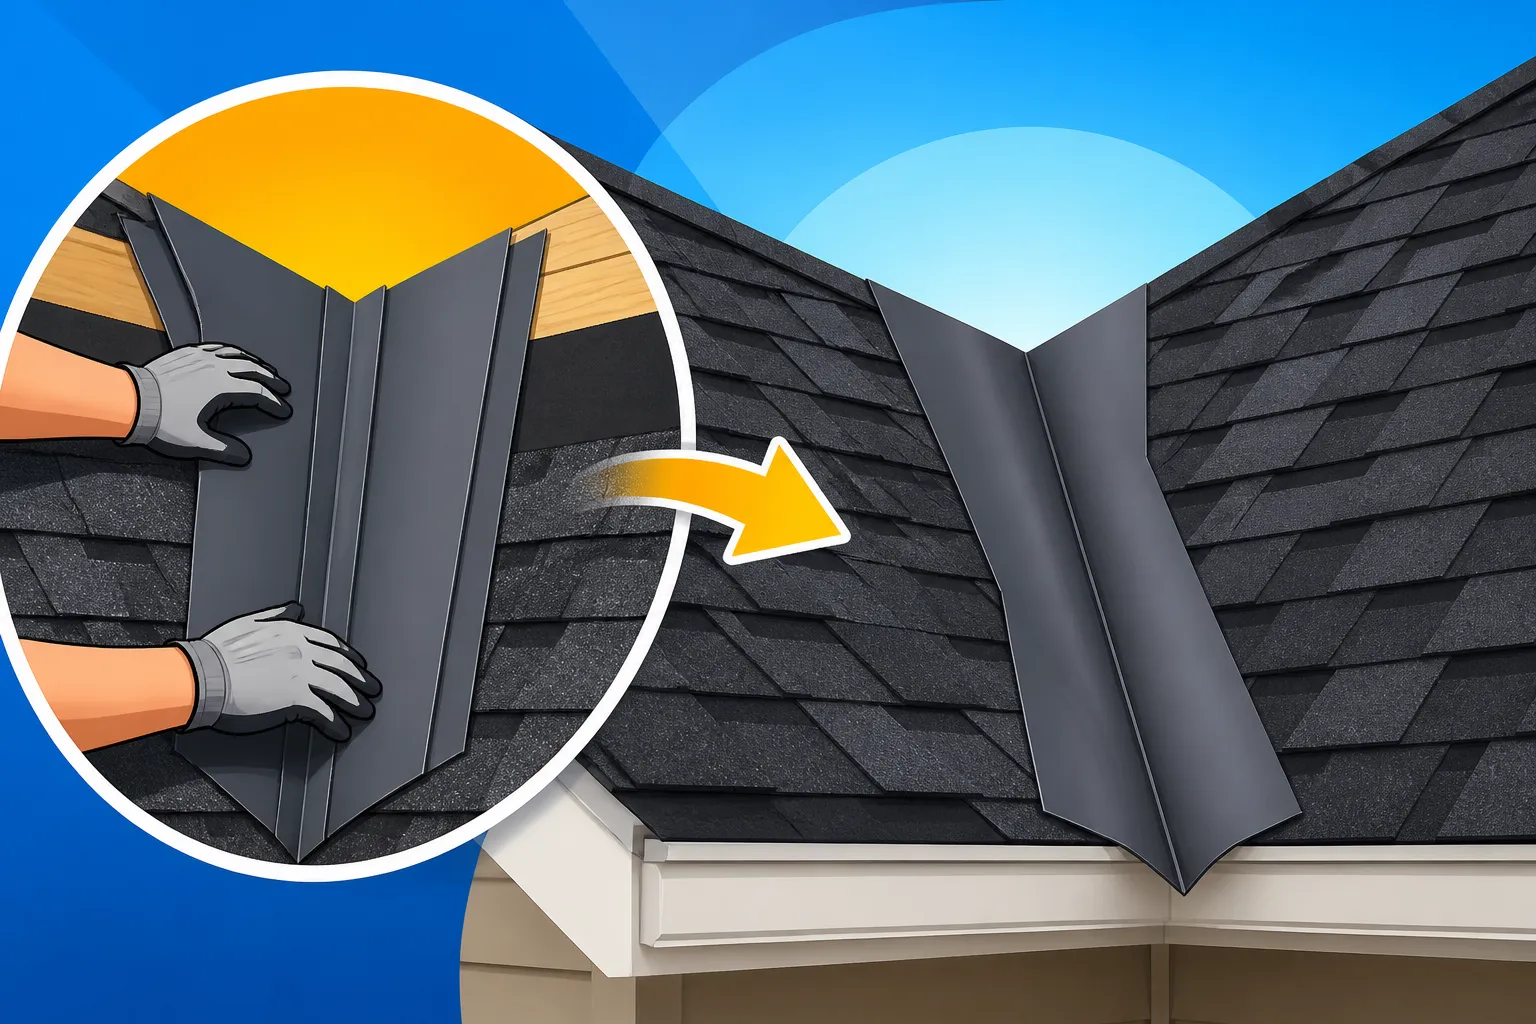
With the ice and water shield meticulously applied, the pre-cut valley metal is carefully laid into position. It needs to be perfectly centered in the valley and lie flat against the underlayment. No bumps, no twists, just a smooth, uniform channel.
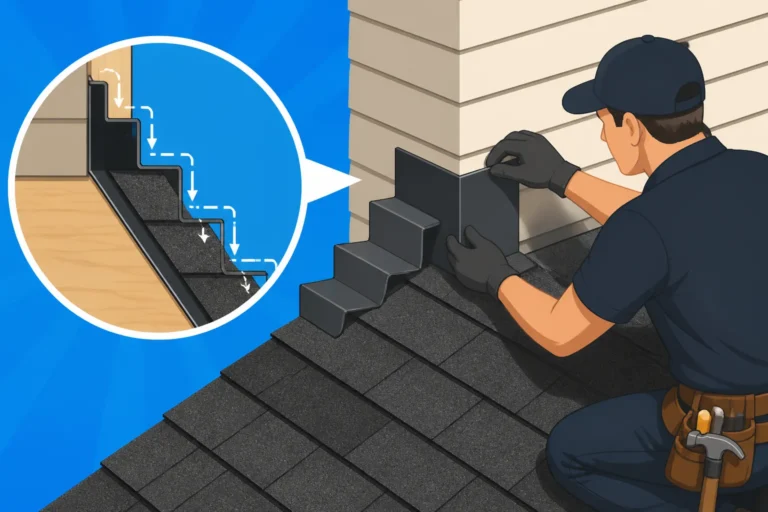
Once it's positioned correctly, the metal is secured with roofing nails. And here's where attention to detail really matters: you don't nail directly through the center where the water flows. Instead, nails are strategically placed along the outer edges of the metal, typically about 1 inch in from the edge and spaced every 6-8 inches. This ensures the metal is held firmly in place without creating potential leak points in the main water channel. Some roofers also use dabs of roofing cement or an appropriate sealant under the edges of the metal for an extra layer of adhesion and protection, particularly in areas prone to high winds or severe weather. This additional sealing is a testament to the comprehensive approach needed for proper roof flashing.
Shingle Integration with Valley Metal
This is arguably the most crucial step for a watertight valley. The asphalt shingles from each adjoining roof plane need to be carefully trimmed to meet the valley metal, creating a neat, straight line that’s parallel to the valley’s center. Typically, a chalk line is snapped about 2-3 inches out from the center of the valley on each side. This creates a visible metal strip – known as an "open valley" – which allows water to flow unimpeded.
When trimming the shingles, it’s critical to snip off the top corner of each shingle that will rest against the valley flashing. This little trick, called "clipping the corner," prevents water from wicking up underneath the shingle where it could eventually find a way into your home. After the shingles are laid and trimmed, a thin bead of roofing cement is often applied underneath the cut edge of the shingles where they meet the metal. This acts as a final seal, preventing wind-driven rain from lifting the shingle edges and forcing water underneath. Remember, understanding how asphalt shingles are installed isn't just about laying them flat; it's about making sure every component works together seamlessly.
Common Pitfalls and Best Practices
Even with the best intentions, mistakes can happen. Knowing what to watch out for and understanding best practices can save you a lot of grief (and money) in the long run.
Avoiding Installation Mistakes
One of the biggest blunders is skipping the ice and water shield in the valley. Some contractors try to cut corners, thinking that just the metal will be enough. Big mistake. The ice and water shield is your critical secondary defense, especially during ice dams or wind-driven rain. Another common error is improper nailing – either nailing too close to the center of the valley or using too many nails. Each nail is a potential entry point for water if not sealed correctly.
Incorrect shingle trimming is another frequent culprit. If the shingles aren't cut back far enough from the valley center, debris can get trapped, leading to standing water and premature shingle deterioration. Conversely, cutting them back too far can make the valley metal overly exposed and vulnerable to damage. Using metal that is too narrow for the valley's pitch or length can also lead to issues, as it won't effectively handle the water volume. A properly installed valley needs adequate width to effectively manage water flow without splashing over. These seemingly small errors accumulate, leading to premature leaks and the dreaded need for repairs. To avoid these issues, it's wise to get multiple opinions and compare roofing estimates thoroughly.
Choosing the Right Materials and Contractors
When it comes to materials, while galvanized steel is a solid, economical choice, consider the climate you live in. In areas with heavy rainfall or corrosive salt air (like coastal regions), upgrading to a thicker gauge galvanized steel, or even copper or aluminum, can offer superior longevity and performance. Copper, for instance, can literally last a century with proper care. You want materials that match the expected lifespan of your new roof, so you don't have to worry about the valley failing before the shingles do.
Perhaps more important than the material itself is the expertise of the people installing it. This isn't a DIY job for the faint of heart. Hiring experienced, reputable roofing contractors is paramount. They understand the nuances of roof pitch, local building codes, and manufacturer specifications, which are all vital for a proper, warrantied installation. A great resource like Modernize can help homeowners connect with local, vetted roofers who specialize in quality installations. These professionals will know how to properly apply ice and water shield, correctly cut and secure the valley metal, and integrate the shingles for maximum protection. They’ll also ensure you receive the proper documentation for your roofing warranty: workmanship vs manufacturer. Don't be afraid to ask about their experience with open metal valleys specifically – a good contractor will be proud to detail their process.
| Valley Installation Method | Description | Pros | Cons | Ideal For |
|---|---|---|---|---|
| Open Metal Valley | A strip of metal flashing is installed in the valley, with shingles cut back a few inches on each side, leaving the metal exposed. | Excellent water shedding, highly durable, less debris accumulation, easier inspection, often mandated by building codes. | Visible metal line may not appeal to all aesthetics; requires precise shingle cutting. | Most asphalt shingle roofs, high-rainfall areas, long-term durability. |
| Closed Cut Valley | Shingles from one side extend across the valley and are trimmed to a line. Shingles from the other side are cut to meet this line. | Clean aesthetic, less visible valley line. | Water and debris can get trapped; potential for shingle damage over time; less effective water shedding than metal. | Aesthetics-driven projects, areas with light rainfall. |
| Woven Valley | Shingles from both roof planes are interwoven across the valley, creating a continuous shingle surface. | No visible valley line, continuous shingle pattern, can be quicker to install. | Traps significant debris, prone to ice dam formation, vulnerable to cracking/splitting due to flexing, harder to repair. | Older homes, specific aesthetic preferences (less common today). |
Final Thoughts on Protecting Your Roof Valleys
Ensuring your roof valleys are properly installed with metal flashing isn't just a technical detail; it's a critical investment in the longevity and safety of your home. It prevents those gut-wrenching moments when you discover a leak during a heavy storm. By understanding the meticulous steps involved – from the initial application of ice and water shield to the precise cutting and sealing of shingles around the metal – you're better equipped to oversee your roofing project and hold contractors to the highest standards. Remember, the valley is one of the hardest-working parts of your roof. Give it the protection it deserves, and it will, in turn, protect your most valuable asset.
Disclaimer
Please note that this guide provides general information on valley metal installation for asphalt roofing. Specific building codes, material requirements, and best practices can vary significantly by region and individual project. Always consult with a qualified, licensed roofing professional and your local building department for advice tailored to your specific situation.