Full Roofing System Explained
Walking outside and looking up at your roof, it's easy to see just the shingles. But beneath that visible layer lies a complex, interconnected system, each part working tirelessly to protect your home from the elements. Many homeowners feel a bit lost trying to understand all the different components a roofer talks about, from underlayment to flashing to vents, and it can make getting a new roof feel incredibly overwhelming. This guide is here to demystify the full asphalt roofing system, breaking down every crucial element so you can feel confident and informed about your home's most vital shield.
Understanding the Core Structure: The Foundation of Your Roof
When you think about a roof, your mind probably jumps straight to the shingles. But long before those shingles ever see the light of day, a robust foundation must be in place. This isn't just about structural integrity; it's about creating a smooth, stable surface that allows the subsequent layers to perform their job effectively and ensures your entire roof system works as intended. Ignoring these foundational elements is like building a house on sand – it simply won't last.
The Indispensable Roof Decking
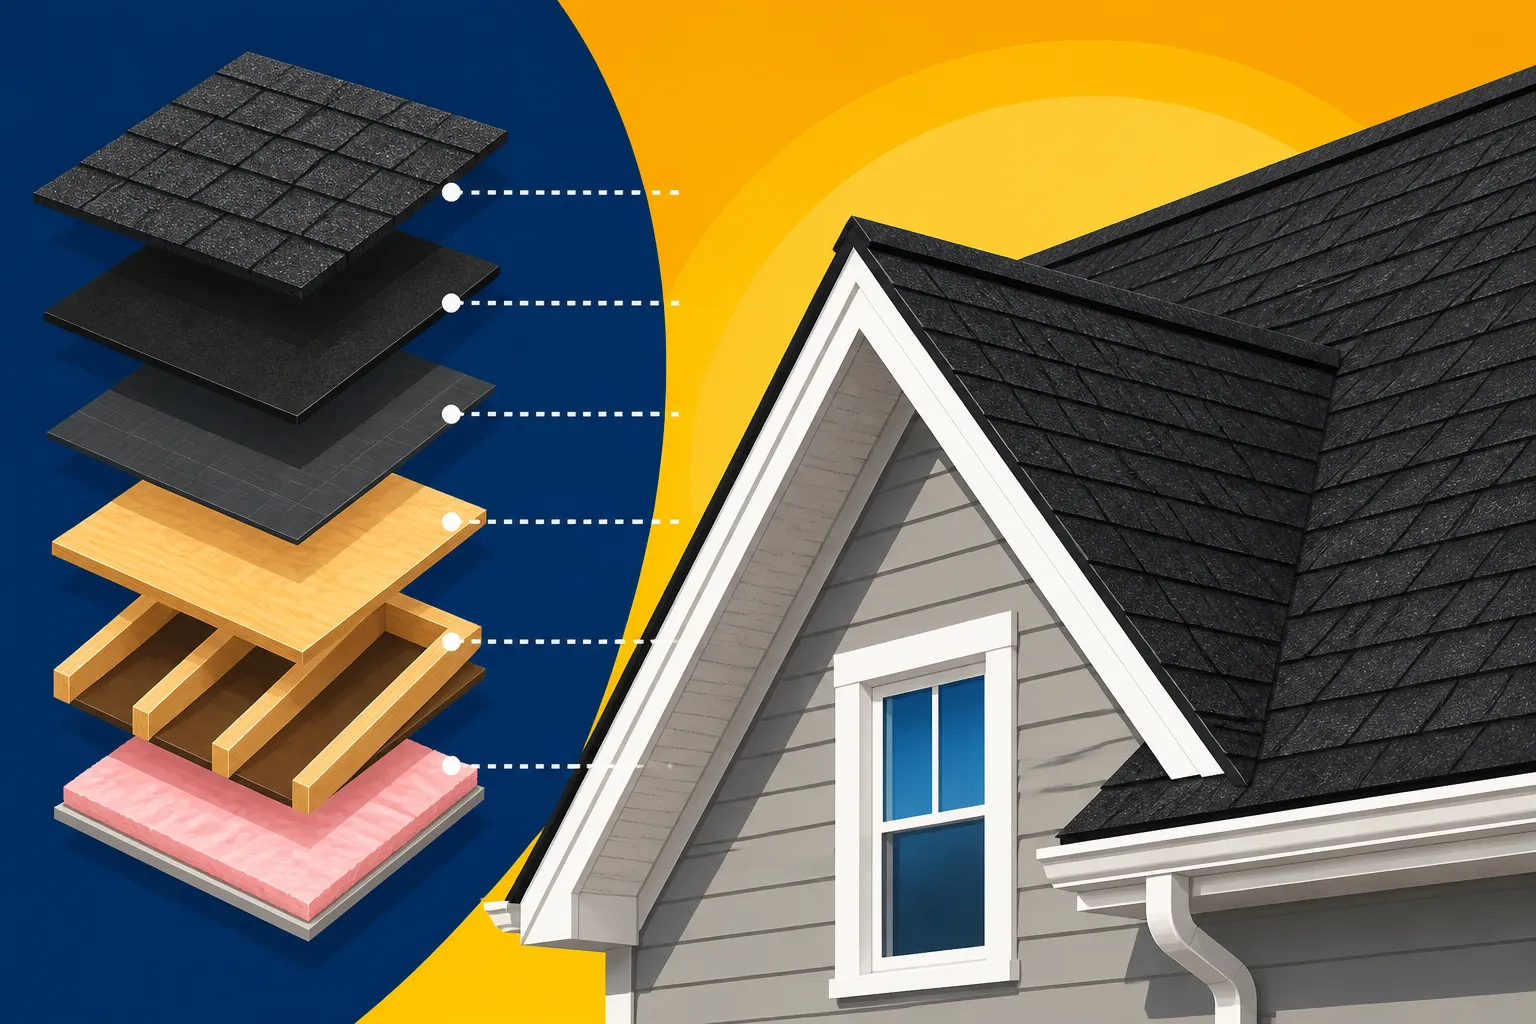
Every asphalt shingle roof starts with the roof decking, which is essentially the wooden sheathing nailed directly to your home's rafters or trusses. This is the structural base that holds everything together. Typically, you'll find either Oriented Strand Board (OSB) or plywood used for roof decking. OSB is made from compressed wood strands and is often more affordable, while plywood consists of thin wood veneers glued together in alternating directions, offering excellent strength and stability.
Regardless of the material, the decking must be in excellent condition. Any soft spots, water damage, or rot in your existing decking from a previous leak means it must be replaced before new roofing materials go on. Failing to do so can compromise the nailing of your new shingles, leading to wind blow-offs, and it certainly won't support the weight and integrity of your new roof system. It's an often-overlooked cost during a roof replacement, but one that is absolutely non-negotiable for a lasting roof. You can learn more about this crucial element by exploring the details of Roof Decking Replacement Cost.
More Than Just Tar Paper: The Underlayment
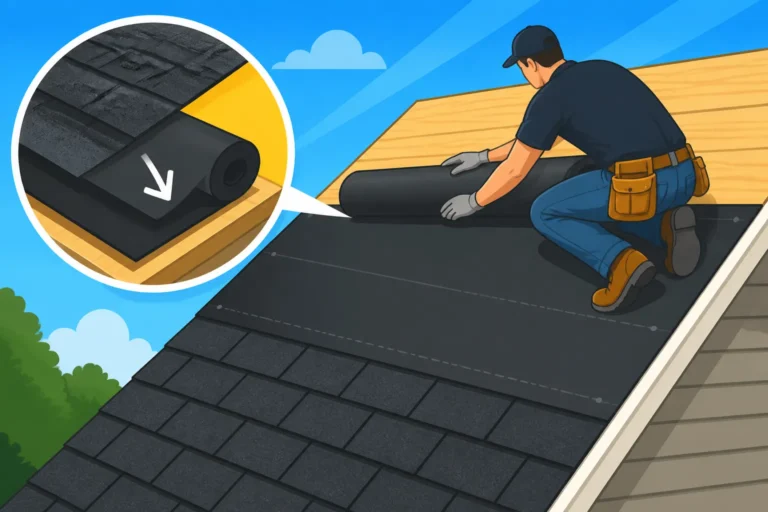
Once the decking is solid, the next crucial layer is the underlayment. For decades, roofers relied on asphalt-saturated felt paper, often called "tar paper," which provided a basic layer of water resistance. While still used, modern roofing often opts for synthetic underlayments, which are lightweight, tear-resistant, and offer superior protection against moisture. This layer acts as a secondary barrier, protecting your roof deck from water penetration should any moisture manage to get past the shingles.
But beyond the general underlayment, a specialized product called ice and water shield is strategically placed in critical areas. This self-adhering, waterproof membrane is typically installed along eaves, valleys, around chimneys, and other roof penetrations. In colder climates, it's absolutely essential to prevent damage from ice dams, which form when melting snow refreezes at the eaves, causing water to back up under shingles. Understanding the nuances of these materials is key, and you can dive deeper into Underlayment Explained: Synthetic vs Felt to see which option is best for your home.
The Visible Guardians: Shingles and Their Varieties
The shingles are what most people envision when they think of a roof. They are the primary line of defense, designed not only to shed water effectively but also to withstand harsh weather conditions, including UV radiation, wind, and hail. Beyond their protective function, shingles also contribute significantly to your home's curb appeal, coming in a vast array of colors, styles, and textures. Choosing the right shingle isn't just about aesthetics; it's about balancing durability, longevity, and cost.
The Different Faces of Asphalt Shingles
Asphalt shingles come in several distinct types, each offering different aesthetics, durability, and price points. The most basic is the 3-tab shingle, characterized by its flat, uniform appearance with three distinct tabs per shingle strip. While budget-friendly, they offer less wind resistance and a shorter lifespan than other options. Architectural shingles, also known as dimensional shingles, are a significant upgrade. They are thicker, multi-layered, and designed to mimic the appearance of wood shakes or natural slate, providing a much more robust and aesthetically pleasing roof with superior wind resistance.
For those seeking the ultimate in style and performance, designer or luxury shingles are the way to go. These are even thicker and heavier than architectural shingles, often designed to replicate natural slate or cedar shakes with remarkable realism. They offer exceptional durability and protection, often with enhanced warranties. When you're trying to decide between these options, it's helpful to explore comparisons like 3-Tab vs Architectural Shingles Explained to understand the pros and cons of each. Many homeowners rely on services like Modernize to connect with local roofing professionals who can walk them through these choices and provide estimates tailored to their specific needs.
How Shingles are Laid and Sealed
The installation process for shingles is a precise craft that directly impacts the roof's performance and longevity. It begins with starter shingles, which are installed along the eaves to create a sealed edge and provide a proper base for the first course of main shingles. From there, the shingles are laid in overlapping courses, meticulously aligned and fastened with roofing nails. The nailing pattern is crucial; improperly nailed shingles are highly susceptible to wind damage and can void manufacturer warranties.
Each asphalt shingle also contains a thermal sealant strip on its underside. As the sun warms the roof, this strip activates, bonding the shingles together into a monolithic layer. This creates a powerful wind resistance barrier, preventing individual shingles from lifting and blowing off in high winds. This sealing process is a critical step in making the roof watertight and durable. A properly installed asphalt roof system, detailed in guides like How Asphalt Shingles Are Installed: Step by Step, ensures every shingle works together to protect your home.
Sealing the Vulnerabilities: Flashing and Penetration Protection
While shingles cover the vast majority of your roof, there are certain areas that pose unique challenges to water resistance. These are points where the roof changes direction, meets a wall, or has an opening for a chimney or vent pipe. These are inherently vulnerable spots, and if not properly sealed, they become prime locations for leaks. This is where flashing comes into play – thin, impervious materials specifically designed to direct water away from these susceptible areas.
The Unsung Heroes of Watertightness: Flashing Types
Flashing is typically made of metal, such as aluminum, steel, or copper, chosen for its durability and resistance to corrosion. Different types of flashing are used for different architectural features. Valley flashing, for instance, protects the V-shaped channels where two roof planes meet, channeling a high volume of water safely down the roof. Step flashing is a series of individual L-shaped pieces woven in with shingle courses where a roof meets a vertical wall, like a dormer or a chimney, ensuring water flows over and away from the wall.
These details might seem minor, but they are absolutely critical to your roof's long-term performance. Poorly installed or damaged flashing is one of the most common causes of roof leaks. Getting these elements right is paramount, and it's why understanding the Cost of New Flashing and Drip Edge is important for any roof replacement budget. Skimping on flashing is a surefire way to invite water damage into your home, potentially leading to costly interior repairs.
Sealing Around Pipes, Vents, and Chimneys
Beyond valleys and wall junctions, your roof has various penetrations for plumbing vent pipes, exhaust vents, and chimneys. Each of these openings creates a potential weak point. Lead, rubber, or metal pipe flashing (also known as a pipe boot or vent collar) is used around vent pipes, forming a watertight seal. For chimneys, a multi-component flashing system is typically used, including step flashing, base flashing, and counter-flashing, which is cut into the chimney mortar joints to prevent water from running behind the base flashing.
Even skylights, while letting in beautiful natural light, represent another significant penetration that requires meticulous flashing. The edges of a skylight need to be fully integrated into the roofing system with specialized flashing kits to ensure a watertight seal that can withstand years of rain, snow, and temperature fluctuations. These are complex areas that require skilled craftsmanship and attention to detail. Any shortcut here will inevitably lead to a future leak.
Breathing Room for Your Home: The Ventilation System
Many homeowners overlook the critical role of a properly functioning attic ventilation system, yet it's as essential to your roof's health as the shingles themselves. An unventilated or poorly ventilated attic can trap hot, humid air in the summer and moist, stagnant air in the winter, leading to a host of problems that can prematurely age your roof and impact your home's energy efficiency.
Why Your Attic Needs to Breathe
In the summer, extreme heat can build up in an unventilated attic, sometimes reaching temperatures over 150°F. This superheated air bakes your shingles from underneath, accelerating their aging process, causing them to curl, crack, and lose granules much faster than they should. Beyond shingle damage, this heat transfers into your living space, forcing your air conditioner to work harder and driving up your energy bills. In winter, warm, moist air from your living space can rise into the attic, condense, and lead to mildew, rot in the roof deck, and even contribute to ice dam formation.
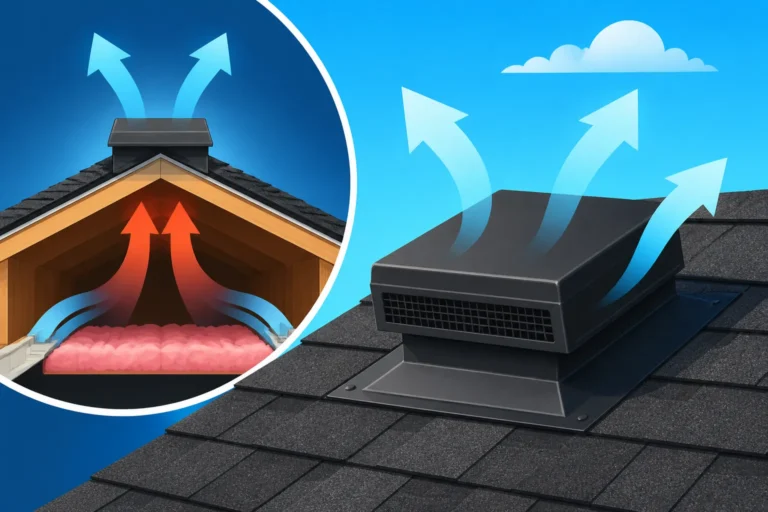
Proper attic ventilation creates a continuous airflow, drawing fresh, cooler air in and expelling hot, moist air out. This helps equalize the temperature and humidity levels inside the attic with the outside environment, safeguarding your roof's longevity, protecting your home's structure, and improving energy efficiency. It's a fundamental component often misunderstood but utterly vital. For a more complete picture, take a look at How Roof Ventilation Works.
Key Ventilation Components
A balanced attic ventilation system typically involves a combination of intake and exhaust vents. Intake vents are usually located low on the roof, often in the soffit (the underside of the eaves), allowing cooler air to enter the attic. Exhaust vents, on the other hand, are placed high on the roof to allow hot, stale air to escape. The most common and effective exhaust vent for asphalt roofs is a ridge vent. This continuous vent runs along the peak of the roof, providing an uninterrupted escape path for hot air.
Other types of exhaust vents include box vents (static vents) and turbine vents (which spin with the wind to create suction). However, ridge vents, when paired with adequate soffit intake, create a highly efficient natural convection system. Ensuring these components are properly sized and installed is paramount. Many contractors, like those found through Modernize, understand that a robust ventilation plan is not an add-on, but an integral part of a complete roofing system. To understand the costs associated with these components, check out Cost of Ridge Vent Installation.
The Edges of Protection: Drip Edge, Fascia, and Soffit
The perimeter of your roof, where it meets the exterior walls of your home, requires its own set of protective elements. These components work in concert to ensure water drains properly, protect vulnerable wooden elements, and contribute to the overall aesthetics of your home. Often overlooked, these edge details are crucial for preventing water damage to your home's exterior and foundation.
The Crucial Role of Drip Edge
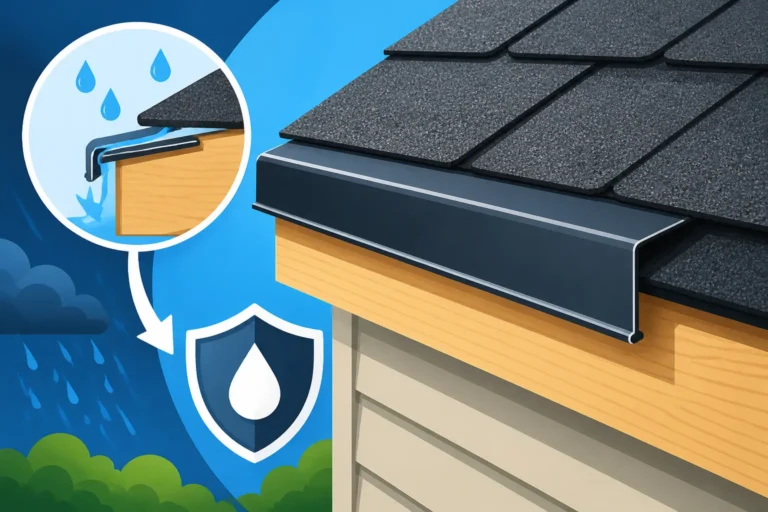
Drip edge is a metal flashing installed along the edges of your roof, specifically at the eaves and rakes (the slanted edges). Its primary purpose is simple yet vital: to direct water away from the fascia board and into the gutters. Without drip edge, water tends to cling to the underside of the shingles and run directly down the fascia, leading to rot, premature paint peeling, and potential water infiltration into the eaves. It creates a clean, uniform edge for the roof, enhancing its finished look while providing critical protection.
Think of it as the final guard in the water shedding process, ensuring that the water your shingles have directed downwards doesn't sneak back in where it can do damage. Many building codes now require drip edge installation, recognizing its importance in preventing costly moisture damage to the underlying structure. You can dive deeper into its function with Drip Edge: What It Does.
Fascia and Soffit: Beyond Just Aesthetics
The fascia board is the long, straight board that runs along the lower edge of the roof, directly behind the gutters. It's what the gutters are usually attached to. The fascia not only provides a finished look to the roofline but also protects the ends of your rafters from weather damage. Without sound fascia, the structural components of your roof system would be exposed to rain, sun, and potential pest intrusion.
The soffit, on the other hand, is the material that forms the underside of the eave, bridging the gap between the exterior wall and the fascia board. Soffits often contain vents, which are the intake points for your attic ventilation system. A properly installed soffit protects your attic from pests and moisture while allowing essential airflow. Together, the drip edge, fascia, and soffit create a tidy, protected perimeter for your entire roofing system, preventing water from getting into places it shouldn't.
Bringing it All Together: Fasteners, Adhesives, and Warranties
It’s easy to focus on the big pieces like shingles and decking, but the smaller, seemingly less significant components are just as crucial. From the nails that hold everything in place to the sealants that bond against leaks, these details are the glue (sometimes literally) that makes the entire system effective. And once all that hard work is done, you'll want to protect your investment with a solid warranty, ensuring peace of mind for years to come.
The Unseen Bonds: Fasteners and Sealants
The quality and proper application of fasteners are absolutely critical. Roofing nails, specifically designed for shingles, must be driven to the correct depth – not too deep to cut through the shingle, and not too shallow to allow blow-offs. The number of nails per shingle and their placement are usually specified by the manufacturer and local building codes, especially in high-wind zones. High-wind nailing, for instance, might require six nails per shingle instead of the standard four, significantly improving resistance to extreme weather.
Beyond nails, various sealants and adhesives play a vital role. The thermal sealant strips on the shingles themselves are a prime example, bonding them together. Additionally, roofing cement or specialized sealants are used to seal around small penetrations, apply cap sheets, or address specific vulnerable areas that require extra water resistance. Without these "unseen bonds," the system wouldn't have the integrity to withstand years of weather abuse. A truly skilled contractor pays attention to every nail and bead of sealant, ensuring everything adheres to manufacturer specifications and best practices.
Protecting Your Investment: Understanding Warranties
A new roof is a significant investment, and understanding its warranty protection is essential. You'll typically encounter two main types: the manufacturer's warranty, which covers the materials (the shingles, underlayment, etc.), and the contractor's workmanship warranty, which covers the installation itself. Manufacturer warranties can vary widely, from basic limited warranties to more comprehensive system warranties that cover all components when installed together by a certified contractor.
For example, leading brands like GAF, Owens Corning, and CertainTeed offer enhanced warranties when an entire "roofing system" (shingles, underlayment, ventilation, and flashing from the same manufacturer) is installed by their Manufacturer-Certified Roofers Explained. These extended warranties often provide longer periods of non-prorated coverage and sometimes even cover workmanship for a certain number of years. It's crucial to read the fine print, understand what's covered (and what isn't), and ensure your contractor is certified to offer the best possible warranty for your new roof. Taking the time to compare your options, even by getting multiple quotes through platforms like Modernize, and understanding How Shingle Warranties Work will save you headaches down the road.
Key Components of an Asphalt Roofing System
Understanding each part of your roof helps you make informed decisions when it's time for maintenance or a full replacement. Here’s a quick overview of the main components:
| Component | Primary Function | Material/Type | Key Benefit |
|---|---|---|---|
| Roof Decking | Structural base; attachment for other layers | OSB, Plywood | Provides solid, stable foundation |
| Underlayment | Secondary water barrier, protects deck | Felt paper, Synthetic | Added protection against moisture |
| Ice & Water Shield | Self-sealing waterproof membrane | Modified bitumen, Rubberized asphalt | Critical protection in vulnerable areas |
| Shingles | Primary weather protection, aesthetics | 3-tab, Architectural, Designer/Luxury asphalt | Sheds water, resists elements, enhances curb appeal |
| Starter Shingles | Initial sealed edge at eaves | Asphalt shingles | Prevents shingle lift-off at edges |
| Flashing | Directs water away from penetrations/junctions | Aluminum, Copper, Steel | Prevents leaks around chimneys, vents, valleys |
| Ridge Vent | Exhaust point for attic heat/moisture | Plastic, Metal | Improves attic airflow and roof longevity |
| Soffit Vents | Intake point for attic airflow | Perforated vinyl, Aluminum | Allows cool air into attic |
| Drip Edge | Guides water off roof into gutters | Aluminum, Steel | Protects fascia board from water damage |
| Fascia Board | Covers rafter ends, supports gutters | Wood (often covered with aluminum/vinyl) | Protects structural components, supports gutters |
| Soffit Panel | Underside of eaves, conceals rafter tails | Vinyl, Aluminum, Wood | Protects attic from pests, supports ventilation |
| Fasteners | Secure components (shingles, underlayment) | Roofing nails | Holds entire system in place securely |
| Sealants | Fills gaps, creates waterproof bonds | Roofing cement, Caulk | Ensures watertight integrity, prevents leaks |
When you realize just how many pieces, big and small, go into creating that protective shield over your head, it becomes clear why choosing a knowledgeable and experienced roofing contractor is so important. Each component relies on the proper installation of the others, creating a truly integrated system designed to protect your most valuable asset: your home.
Disclaimer
Please remember that this article provides general information about asphalt roofing systems. Building codes, material availability, and best practices can vary significantly by region and specific project requirements. Always consult with a qualified, local roofing professional for advice tailored to your specific home and local regulations.