How Asphalt Shingles Are Installed: Step by Step
Oh, the thought of getting a new roof can feel like staring up at a giant, mysterious puzzle, can't it? You know your home needs protection from the elements, but understanding how those asphalt shingles actually get onto your roof, piece by painstaking piece, often feels completely out of reach. This comprehensive guide will pull back the curtain, walking you through every critical step of how asphalt shingles are installed, demystifying the entire process so you can feel confident and truly informed when it’s time for your next roof project.
The Essential First Steps: Preparation and Tear-Off
Before a single new shingle can grace your rooftop, there's a whole lot of crucial work that happens on the ground and up top. This isn't just about ripping off old materials; it's about setting the stage for a smooth, safe, and efficient installation that protects your most valuable asset.
Protecting Your Property and People
The very first thing any professional roofing crew should do is take extensive measures to protect your home and yard. Think of it as preparing for surgery – you wouldn't want stray tools or debris damaging your landscaping, right? This means placing tarps around the entire perimeter of your house, often extending several feet out from the foundation. These aren't just flimsy plastic sheets; reputable contractors use heavy-duty tarps designed to catch everything from tiny shingle granules to large pieces of old wood. They'll also safeguard any vulnerable areas like gardens, bushes, decorative items, and even outdoor furniture. You might see them covering your air conditioning unit or carefully tying back rose bushes.
Beyond property protection, safety is paramount. The crew itself needs to adhere to strict safety protocols, including wearing appropriate personal protective equipment (PPE) like hard hats, safety glasses, and fall arrest systems. They’ll also set up clear pathways for material delivery and debris removal, ensuring no one, especially not curious children or pets, wanders into a hazardous zone. Communication is key here, so a good crew will keep you informed about their daily schedule and any specific safety precautions you should observe. If you're looking for a reliable contractor who prioritizes safety and professionalism, resources like Modernize can help connect you with vetted professionals in your area.
Removing the Old Roof Layers
Once the perimeter is secured, the real work begins up on the roof: the tear-off. This is exactly what it sounds like – systematically removing all the old roofing materials down to the structural decking. Typically, this involves stripping off the old asphalt shingles, the underlayment, and any other components that were part of the previous system. It’s a messy job, often accompanied by quite a bit of noise, as specialized tools are used to lift and remove layers efficiently.
As the old materials are stripped away, they're tossed into a large dumpster placed strategically near your home, preventing piles of debris from accumulating on your lawn. This step is critical because it allows the roofing professionals to inspect the underlying roof deck directly. Skipping this step, known as a "re-roof" or "overlay," can hide structural issues and often voids new shingle warranties. It’s a false economy to roof over existing shingles, as any hidden rot or damage in the decking beneath could compromise the integrity and longevity of your new roof. Understanding the full scope of this process is crucial for homeowners, and a clear breakdown of Cost of Roof Tear-Off and Disposal can help you budget accurately.
Laying the Foundation: Decking, Underlayment, and Drip Edge
With the old roof gone, the canvas is clear for the new installation. But before a single shingle goes down, several layers of protection are installed. These foundational elements are often overlooked by homeowners but are absolutely crucial for your roof's long-term performance and ability to shed water effectively.
Inspecting and Repairing Roof Decking
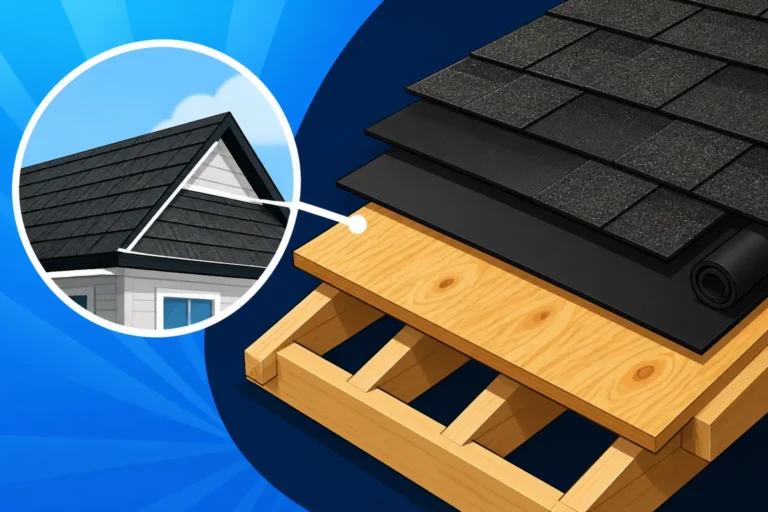
The roof deck is the backbone of your entire roofing system. It's the wooden sheathing—typically plywood or OSB (oriented strand board)—that’s nailed directly to your home's rafters or trusses. During the tear-off, every square foot of this decking is exposed and thoroughly inspected. Roofers are looking for any signs of damage: rot, mold, water stains, soft spots, or delamination (where layers of plywood separate). They'll also check for proper fastening to ensure the decking is securely attached to the framing.
Finding damaged decking isn't uncommon, especially on older homes or roofs that have experienced leaks. If compromised sections are found, they must be cut out and replaced with new, structurally sound material. This step is non-negotiable, as even a small area of weakened decking can lead to sagging, poor shingle adhesion, and eventually, leaks. Repairing or replacing decking ensures your new shingles have a firm, stable surface to be nailed into, which is vital for their wind resistance and overall lifespan. Keep in mind that Roof Decking Replacement Cost can be an unexpected line item in your roofing budget, but it's an investment in your home's structural integrity.
Installing the Underlayment and Ice & Water Shield
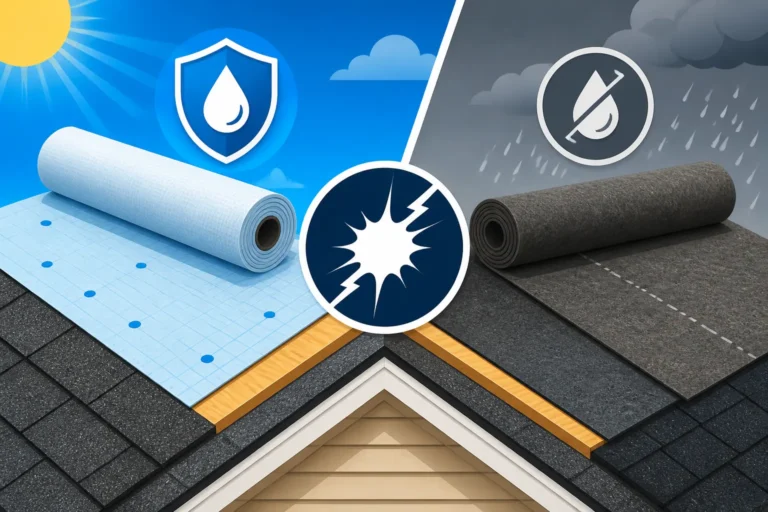
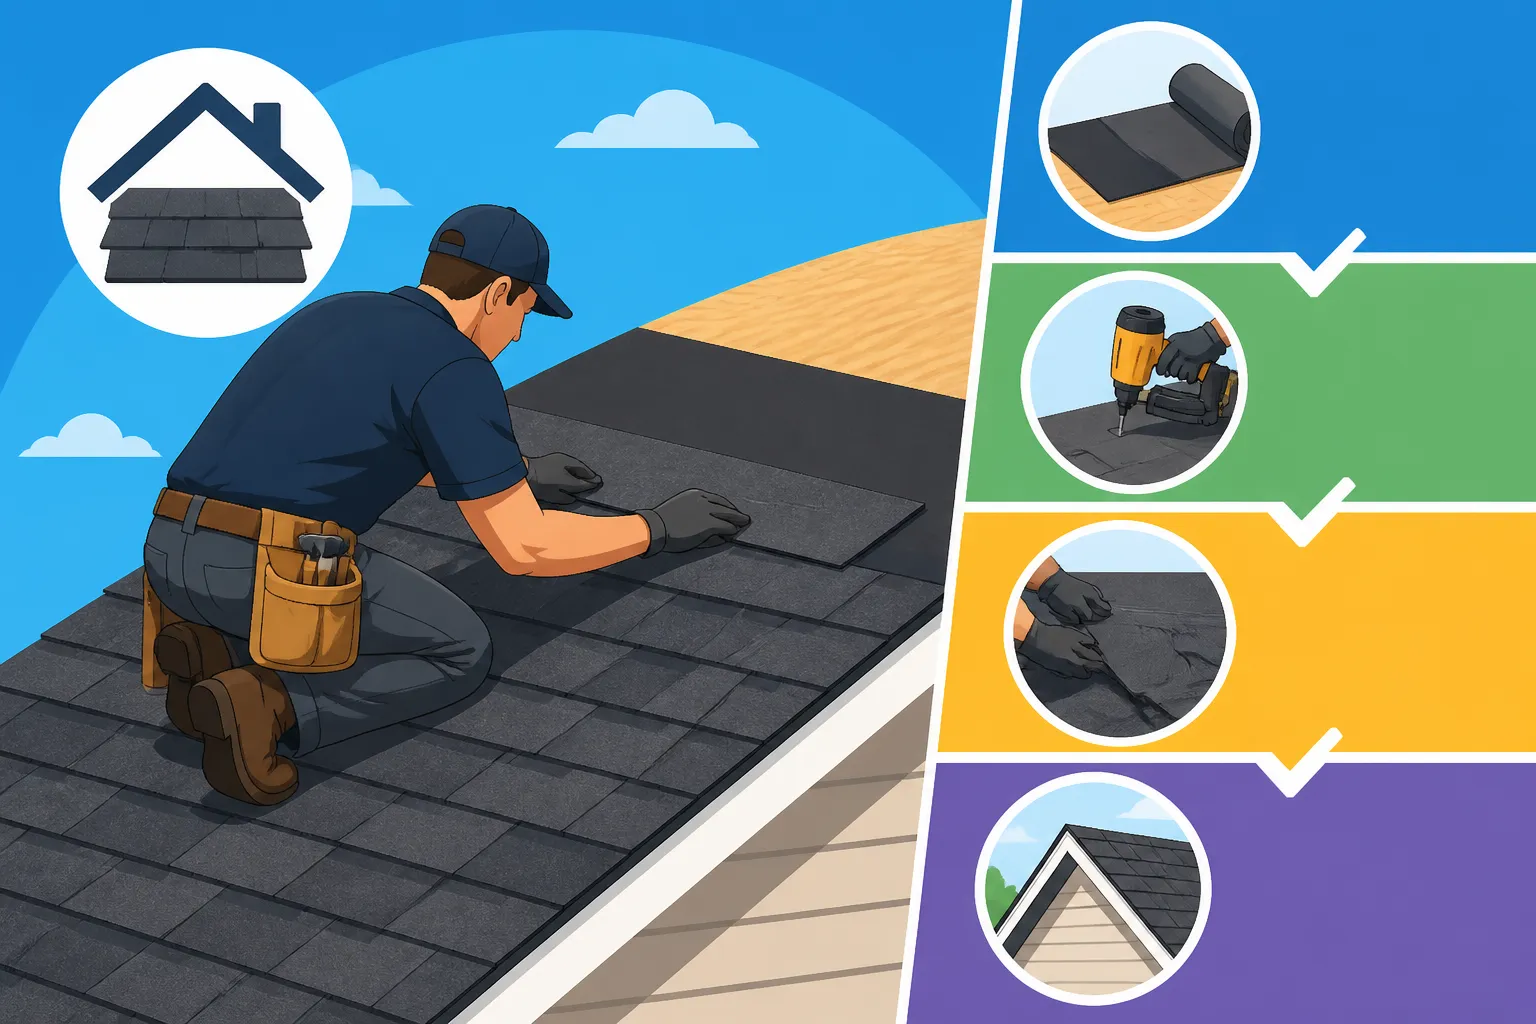
Once the decking is sound, the next layer of defense goes down: the underlayment. Think of underlayment as a secondary waterproof barrier, a crucial backup to your shingles. Traditionally, this was asphalt-saturated felt paper, often called "tar paper." However, modern synthetic underlayments are now very popular. They're more durable, lighter, often tear-resistant, and provide superior water resistance. This layer is rolled out and fastened to the roof deck, overlapping to prevent water intrusion. It serves as a last line of defense against wind-driven rain or water that might get past your shingles. To learn more about your options, check out Underlayment Explained: Synthetic vs Felt.
In addition to the general underlayment, an even more robust material called ice and water shield is installed in specific vulnerable areas. This self-adhering, rubberized asphalt membrane is designed to create an impenetrable barrier against water penetration, particularly from ice dams or extreme weather. It’s typically applied along eaves, in valleys, around chimneys, and other roof penetrations where water tends to collect or back up. In colder climates, building codes often mandate its installation along the eaves to protect against ice dam formation. This crucial component, thoroughly explained in Ice and Water Shield Explained, is vital for preventing major headaches down the line.
Adding Drip Edge for Water Protection
After the underlayment and ice & water shield are in place, the drip edge is installed. This might seem like a small detail, but it plays a significant role in protecting your home from water damage. Drip edge is a metal flashing (usually aluminum or galvanized steel) that’s installed along the edges of your roof, specifically at the eaves (the lower edges) and rakes (the sloped edges). At the eaves, it’s installed under the underlayment to direct water off the roof and into the gutters, preventing it from running back under the roofing materials and rotting the fascia board or decking.
At the rakes, the drip edge is typically installed over the underlayment. This helps protect the edge of the roof deck and prevents wind from lifting shingles at the rake edges. It creates a neat, finished edge for the roof, but its primary function is water management and protecting the underlying components from moisture intrusion. Over time, water damage to the fascia can be extremely costly to repair, making the relatively inexpensive drip edge a wise investment. You can dive deeper into its purpose and benefits in Drip Edge: What It Does.
Flashing Critical Areas: The Leak Defenders
Think of flashing as the specialized armor for the most vulnerable parts of your roof. These are the areas where the roof meets other structures or where different roof planes intersect, creating natural channels for water. Without proper flashing, these areas would be prime targets for leaks, no matter how perfectly your shingles are installed.
Protecting Valleys and Chimneys
Valleys are perhaps the most critical areas on a roof when it comes to water management. They are the V-shaped channels where two sloped roof sections meet. These channels collect and direct a massive amount of rainwater and snowmelt, making them highly susceptible to leaks if not properly waterproofed. There are generally two main methods for flashing valleys with asphalt shingles: open valleys and closed valleys.
In an open valley, a pre-formed metal flashing (usually painted aluminum or galvanized steel) is installed over the underlayment and ice & water shield in the valley. The shingles are then cut neatly a few inches back from the center of the metal valley, leaving an "open" metal channel for water to flow down. This method provides a clear, unobstructed path for water, debris, and ice, which can be beneficial in areas with heavy rain or snow. For a comprehensive guide on this vital component, check out How Valleys Are Flashed.
In a closed valley, the shingles extend across the valley and are woven together or cut at the centerline. While providing a seamless aesthetic, closed valleys can sometimes be more prone to issues if not installed perfectly, as water flow can be less direct, potentially allowing debris to accumulate. Regardless of the method, proper installation with adequate underlayment protection is non-negotiable.
Chimneys are another notorious spot for leaks. They create a large, rectangular penetration in the roof, and the transition from flat chimney surface to sloped roof requires meticulous flashing. This typically involves a combination of step flashing, counter flashing, and apron flashing. Step flashing consists of individual L-shaped pieces of metal, woven in with each course of shingles along the sides of the chimney. Counter flashing is then installed into the mortar joints of the chimney brick, overlapping the step flashing to create a watertight seal. Apron flashing is used at the front (upslope) of the chimney, and a cricket (a small, tent-like structure) is often built on the back (downslope) of larger chimneys to divert water and debris around them. All these components work in concert to shed water away from the chimney. Proper Chimney Flashing Explained is an art form, and a skilled roofer takes immense pride in this intricate work.
Flashing Around Vents and Skylights
Beyond valleys and chimneys, your roof has numerous other penetrations that require careful flashing. These include plumbing vent pipes, exhaust vents for bathrooms or kitchens, and of course, skylights. Each of these openings creates a potential weak point where water can enter your home if not properly sealed.
For vent pipes, pre-formed rubber or metal collars, often called "pipe boots" or "vent flashing," are slipped over the pipe and then sealed to the roof deck and integrated with the shingles. The base of the collar is nailed and sealed, and the shingles are laid over its edges, ensuring that water flows around and past the pipe without seeping underneath. For exhaust vents, metal flashing often integrates directly into the vent housing, creating a continuous barrier that's then shingled around.
Skylights, being larger and more complex, require a multi-piece flashing system, often provided by the skylight manufacturer themselves (such as Velux or Fakro). This system usually includes apron flashing, step flashing, and head flashing, all designed to integrate seamlessly with the roof plane and direct water away from the window opening. The installation needs to be incredibly precise, often involving sealants and careful shingle cuts, to ensure a watertight seal that will last for decades. A deep dive into How Skylights Are Flashed will show just how complex and vital this step is. Any misstep here could lead to chronic leaks and significant interior damage.
Shingle Installation: The Heart of the Roof
Now we get to the part everyone pictures when they think of a new roof: the actual laying of the shingles. This is where the roof starts to take on its finished appearance, but it’s far more than just aesthetics; precise shingle placement and nailing are essential for weather resistance and longevity.
Starting Strong: Starter Shingles and First Rows
Every great roof starts with a solid foundation, and when it comes to shingles, that begins with starter strips. These specialized shingles, often adhesive-backed, are installed along the eaves (the bottom edge of the roof) and sometimes the rake edges. Their primary purpose is to protect the roof edge and ensure that the first course of regular shingles has a properly sealed and overlapping surface. Without starter shingles, water could get underneath the bottom edge of the first full course, or wind could easily lift the eaves. You can read more about their importance in Starter Shingles Explained.
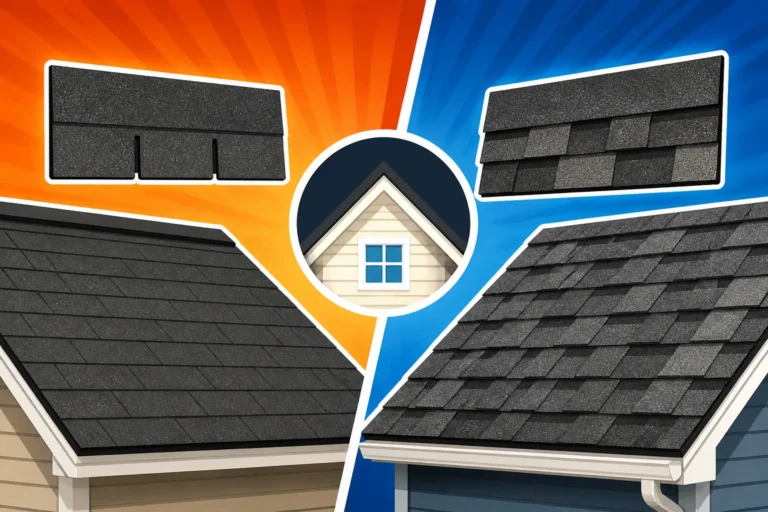
After the starter course, the first full course of shingles is laid, extending over the starter course with a small overhang (typically about 1/4 to 3/4 inch) over the drip edge. This overhang is critical for directing water cleanly into the gutters. The subsequent rows of shingles are carefully aligned and offset from each other, creating a staggered pattern. This staggering is not just for looks; it prevents water from seeping through vertical joints and significantly enhances the roof's wind resistance. The exact offset depends on the shingle type (e.g., three-tab vs. architectural), but consistency is key.
Laying Field Shingles with Precision
The vast majority of your roof will be covered by "field shingles" – the main body of asphalt shingles that cover the expansive roof planes. Installing these requires precision in alignment and, crucially, proper nailing. Each shingle has a designated "nailing strip" or "common bond" area where fasteners should be placed. Too high or too low, and the shingle might not hold properly or could be prone to wind uplift. Most manufacturers, like GAF, Owens Corning, and CertainTeed, specify a four-nail pattern for standard installation, though in high-wind zones, a six-nail pattern is often required by code and for enhanced warranty coverage. Learn more about this critical detail in How Shingles Are Nailed and Sealed.
Roofers use pneumatic nail guns for speed and efficiency, but a skilled installer ensures each nail is driven flush with the shingle surface – not underdriven (leaving the shingle loose) and certainly not overdriven (tearing through the shingle). Shingles are always laid from the bottom up, overlapping each course to ensure that water sheds effectively down the roof. Cutting shingles to fit along valleys, hips, and rakes requires skill and a keen eye for detail, ensuring clean lines and proper water diversion. This process involves repetitive, painstaking work, but the consistency and accuracy directly impact your roof's performance.
Working with Different Roof Pitches and Complexities
Not all roofs are flat, simple rectangles. Many homes feature complex designs with varying pitches, multiple valleys, dormers, and gables. Each of these elements adds layers of complexity to the shingle installation process, often requiring specialized techniques and more labor.
A steeply pitched roof, for instance, is inherently more challenging and dangerous to work on. It requires additional safety equipment, more scaffolding, and slower, more deliberate work, which often translates to a Steep Roof Cost Premium. Shingles need to be secured with greater care to prevent sliding during installation and to ensure maximum adherence over time. Similarly, roofs with multiple dormers, skylights, or intricate angles mean more cutting, more flashing, and more careful integration of shingles around these features. Imagine trying to perfectly blend shingles around a decorative bay window dormer – it requires immense skill and patience. Getting a deeper understanding of How Roofers Handle Chimneys and Dormers and other complex structures reveals the artistry and expertise involved. Each architectural feature, while beautiful, adds time and specific considerations to the installation process.
Ridge and Ventilation: The Finishing Touches
Once the main field shingles are down, the job isn't quite finished. The peak of the roof and the overall health of your attic depend on these final critical components. Getting these right not only provides a finished aesthetic but also ensures your roof breathes properly and lasts as long as it should.
Installing Ridge Vents for Airflow
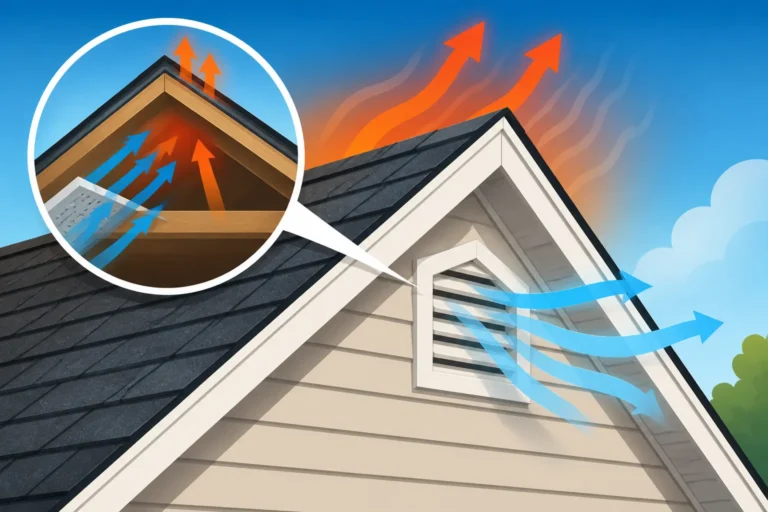
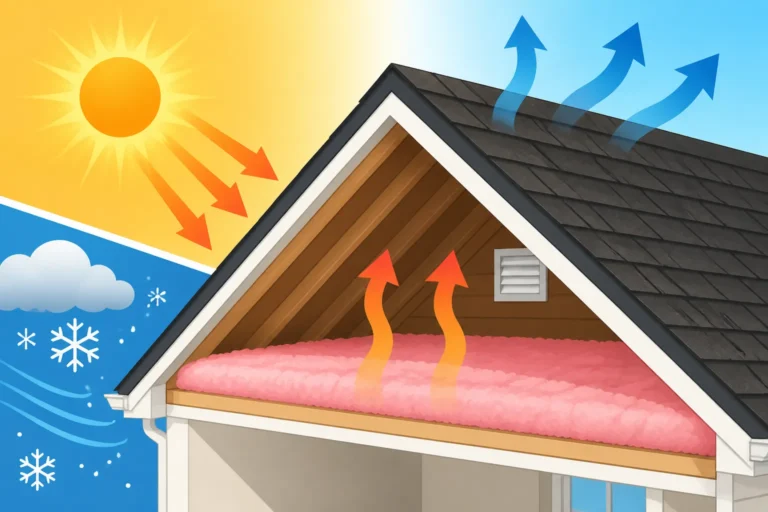
Proper attic ventilation is one of the unsung heroes of a long-lasting roof. Without it, heat and moisture can build up in your attic, leading to a host of problems: premature shingle aging, warped decking, mold growth, and higher energy bills. Ridge vents are a highly effective form of passive ventilation. They are installed along the very peak (ridge) of your roof, creating a continuous, nearly invisible exhaust vent.
Before the ridge vent material goes down, the roofing crew cuts a slot along the entire length of the ridge in the roof decking. This opening allows warm, moist air to escape from the attic. The ridge vent material itself, often a plastic or fiberglass mesh, is then installed over this opening, allowing air to flow out while preventing rain and snow from entering. The final step is to cover the ridge vent with specific "ridge cap" shingles for a finished, weather-tight appearance. Understanding the different types, such as Ridge Vent vs Box Vent vs Turbine, can help you appreciate the importance of selecting the right ventilation system. While ridge vents are a common choice, the overall ventilation strategy should be tailored to your home's specific design and climate, and there’s a distinct Cost of Ridge Vent Installation to consider.
Capping the Ridge and Hips
Once the ridge vent is in place (if applicable), or simply after the main field shingles are installed, the final step in weatherproofing and aesthetics is installing the ridge and hip cap shingles. These are specially manufactured or cut shingles that are folded over the peaks (ridges) and the angled intersections (hips) of your roof. They provide a vital layer of protection over these vulnerable areas where roof planes meet.
Ridge cap shingles are thicker, more durable, and designed to flex over the roof's highest points. They are typically installed from each end of the ridge, meeting in the middle, or from one end to the other, overlapping to shed water efficiently. Proper nailing and sealing are paramount, as these are often the most exposed parts of the roof to wind and weather. Beyond their functional role in preventing leaks, ridge and hip caps significantly contribute to the overall finished look of your roof. They provide a clean, defined line that enhances the curb appeal of your home, turning the functional peak into a visually appealing architectural feature. Many shingle manufacturers offer matching ridge cap shingles designed to complement their main field shingles, ensuring a cohesive and attractive appearance.
The Final Walk-Through and Clean-Up
The installation process isn’t truly complete until the job site is meticulously cleaned and the new roof receives a thorough inspection. These final steps ensure your satisfaction, protect your property, and confirm the quality of the work performed.
Inspecting the Completed Roof
Once all the shingles, flashing, and ventilation components are in place, a reputable contractor will conduct a final inspection. This isn't just a quick glance; it's a systematic review of the entire roof. They’ll check for consistent shingle alignment, proper nailing (looking for any exposed nails, overdriven or underdriven fasteners), and secure adhesion of all components. They’ll scrutinize all flashing around chimneys, vents, and skylights to ensure watertight seals. They'll also verify that all new components, like ridge vents and drip edge, are correctly installed.
As a homeowner, you should also do your own visual inspection from the ground. Look for any noticeable irregularities, loose shingles, or areas that look unfinished. If you have any concerns, don't hesitate to ask your contractor to address them. A good roofer will welcome your questions and take the time to walk you through their findings. It’s also wise to educate yourself on potential issues to look for, as detailed in articles like Signs of a Bad Roofing Job, which can help you identify anything amiss. This final check is your opportunity to ensure everything meets your expectations and the contractor's standards.
Thorough Site Clean-Up
A professional roofing job isn't done until the entire property is as clean, or even cleaner, than it was before the project started. This is often an overlooked aspect, but it speaks volumes about a contractor's professionalism and respect for your home. The clean-up process involves several key steps. First, all discarded old roofing materials, debris, and packaging from the new materials are collected and hauled away, typically in a large dumpster. Any tarps used to protect landscaping are carefully removed and folded.
Then comes the meticulous work of scanning the property for smaller debris. Roofers will often use powerful magnetic sweepers to scour your yard, driveway, and surrounding areas for loose nails. Even with tarps, some nails inevitably escape, and you certainly don't want them ending up in your tires or a child's foot. They’ll also check gutters to ensure they are free of debris, sweep patios and walkways, and generally tidy up the work area. A truly professional crew will leave your property spotless, demonstrating their commitment to not only a great roof but also a pleasant customer experience. If you’re working with a contractor found through a service like Modernize, you can typically expect this level of thoroughness as part of their vetted service.
Beyond Installation: What Comes Next
Getting a new roof is a significant investment, and like any major home improvement, its longevity and performance depend on understanding its warranty and committing to regular, simple maintenance. The installation is just the beginning of your roof's life cycle.
Understanding Your Roofing Warranty
Once your new asphalt shingle roof is installed, understanding its warranty is paramount. You'll typically encounter two main types: the manufacturer's warranty and the contractor's (or workmanship) warranty. The manufacturer's warranty covers defects in the shingles and other roofing components themselves. Leading brands like GAF, Owens Corning, and CertainTeed offer robust warranties, often ranging from 25 years to a "lifetime" (which usually means 50 years for the original homeowner). However, these warranties often have specific registration requirements and might only cover material defects, not installation errors. Many offer enhanced warranties if a full system (shingles, underlayment, vents, etc.) is installed by a manufacturer-certified contractor.
The workmanship warranty, provided by your roofing contractor, covers the quality of the installation itself. Even the best shingles won't perform if they're installed incorrectly. A reliable contractor will offer a warranty on their labor, typically for 5 to 10 years, sometimes longer. It's crucial to get this in writing and understand what it covers and for how long. Knowing the ins and outs of both types of coverage, as detailed in Roofing Warranties: Manufacturer vs Workmanship, will protect your investment. Make sure you register your manufacturer's warranty as instructed by your contractor or the manufacturer directly, as failure to do so can sometimes void coverage.
Regular Maintenance for Longevity
A new asphalt shingle roof, even with a fantastic warranty, isn't truly maintenance-free. While generally low-maintenance, a little proactive care can significantly extend its lifespan and prevent small issues from becoming big, expensive problems. The most important step is regular visual inspections.
At least once a year, and especially after severe storms, take a walk around your home and look up at your roof (from the ground, or with binoculars, for safety). What should you be looking for? Keep an eye out for missing, cracked, or curling shingles. Note any excessive granule loss in your gutters, which can indicate shingles nearing the end of their life. Check for moss, algae, or lichen growth, which can trap moisture and accelerate shingle deterioration. Ensure your gutters are clear of debris so water can flow freely away from your home. Also, observe your flashing around chimneys and vents – is it still securely in place and free of damage? If you spot any concerns, address them promptly. Often, a small repair, like resealing a loose shingle or clearing a clogged downspout, can prevent costly future damage. For more tips on prolonging your roof's life, dive into How to Extend the Life of an Asphalt Roof. Simple, consistent care is truly the best defense for your new roof.
| Installation Step | Key Purpose | Why It's Critical | Potential Issues If Skipped/Done Wrong |
|---|---|---|---|
| Property Protection | Safeguard landscaping, exterior, and residents. | Prevents costly damage to property and ensures safety. | Damage to plants, broken windows, personal injury. |
| Old Roof Tear-Off | Remove old materials; expose deck for inspection. | Allows for thorough deck inspection and ensures proper shingle adhesion. | Hidden rot, mold, uneven shingle installation. |
| Decking Inspection/Repair | Provide a sound, stable base for new roof system. | Ensures structural integrity and proper nailing of all layers. | Sagging roof, shingle blow-offs, compromised safety. |
| Underlayment Installation | Secondary waterproof barrier; protects deck. | Crucial backup against wind-driven rain or water intrusion. | Leaks, especially in heavy rains; premature deck rot. |
| Ice & Water Shield | Extreme waterproofing in vulnerable areas. | Prevents leaks from ice dams and heavy water flow in valleys, eaves. | Interior water damage, ice dam formation. |
| Drip Edge Installation | Directs water off roof into gutters; protects edges. | Prevents water from seeping under roofing and rotting fascia/deck. | Rotted fascia boards, water stains on siding. |
| Flashing (Valleys, Chimneys) | Waterproofing critical roof penetrations and junctions. | Prevents leaks where roof planes meet or where structures protrude. | Major leaks around chimneys, vents, and valleys. |
| Starter Shingles | Protects eaves/rakes; seals first course of shingles. | Prevents wind uplift at edges and water penetration under first shingle row. | Wind damage, water intrusion along eaves. |
| Field Shingle Installation | Main weather barrier for the roof plane. | Proper nailing, alignment, and staggering ensure complete weather protection. | Leaks, shingle blow-offs, reduced lifespan. |
| Ridge Vent & Cap Shingles | Provides attic ventilation; seals roof peak. | Prevents heat/moisture buildup in attic; completes roof's watertight seal. | Premature shingle aging, mold, higher energy bills. |
Disclaimer
Please remember that this guide provides general information about asphalt shingle installation. Roofing projects are complex and safety-intensive. Always consult with qualified, licensed, and insured roofing professionals for specific advice, accurate estimates, and safe, compliant installation for your home. Building codes and requirements vary by location, and a professional contractor will ensure your project adheres to all local regulations.