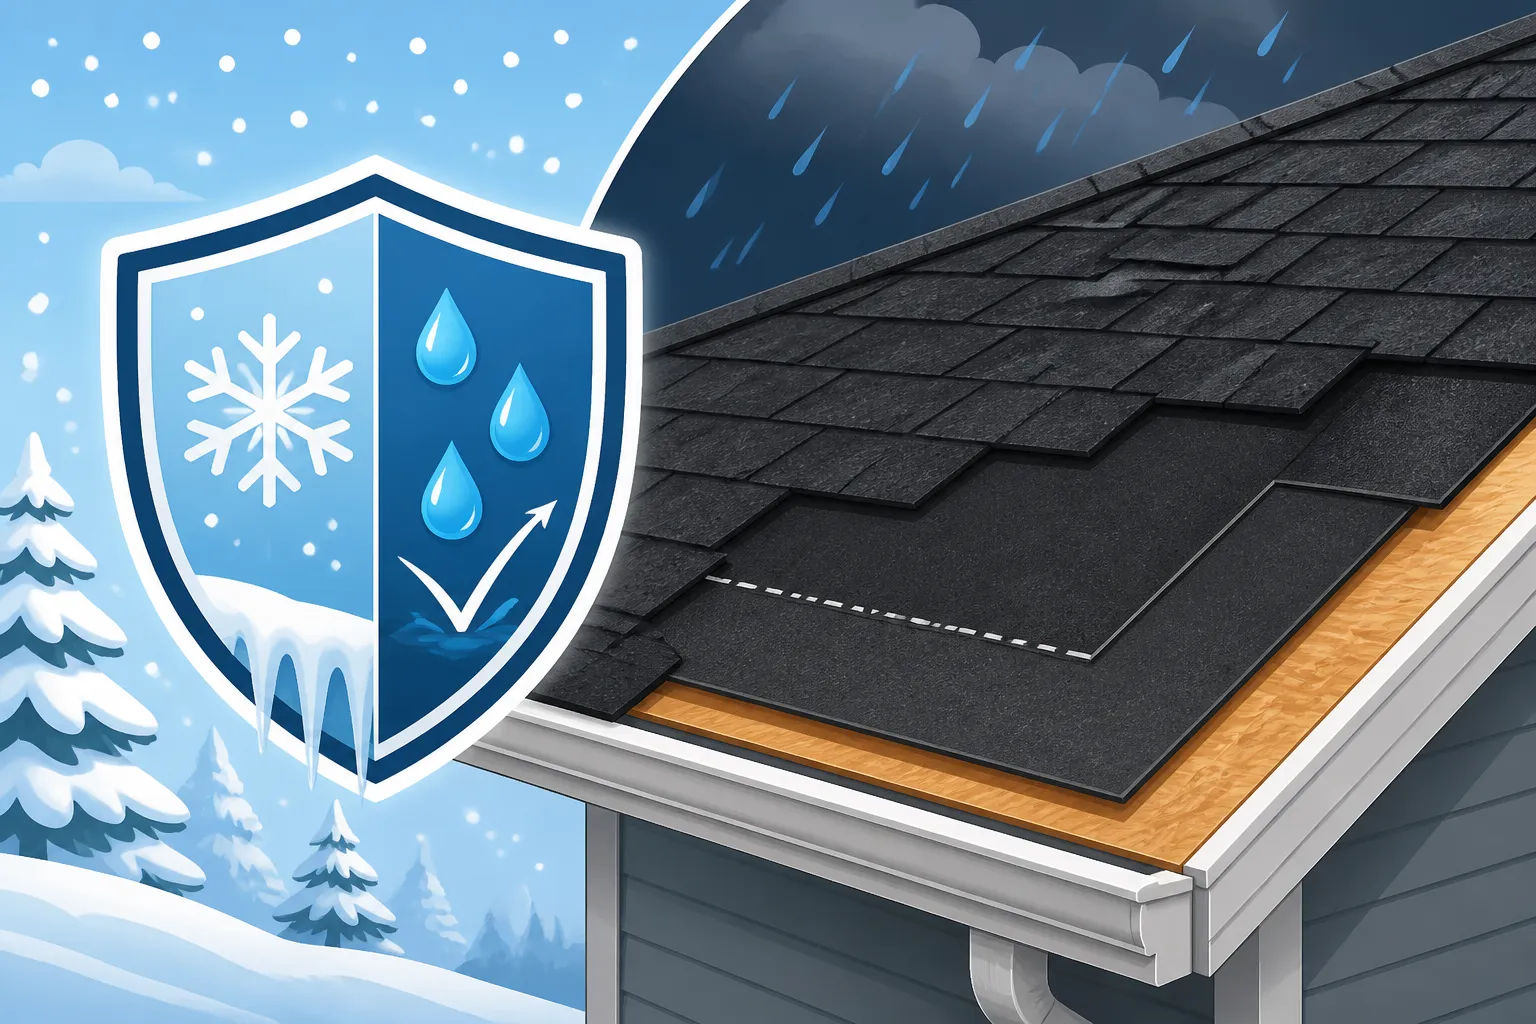
What Is Ice And Water Shield and Why It Matters
One of the most insidious threats to your home, especially during harsh weather, isn't always obvious from the ground: moisture intrusion from ice dams and wind-driven rain. Many homeowners don't realize their roof's primary line of defense, the shingles, needs backup. This guide will dive deep into what ice and water shield is, why it's an absolutely critical component of a robust roofing system, and how it protects your biggest investment from costly water damage.
Understanding the Basics of Ice and Water Shield
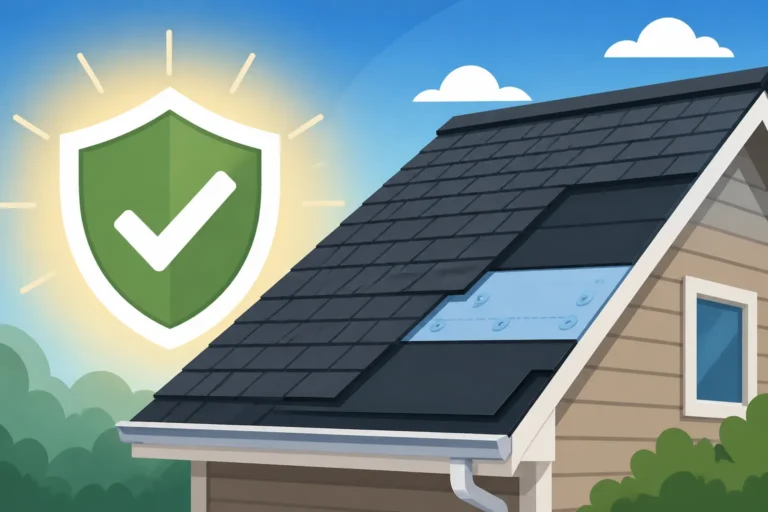
Let's face it, when you think about a new roof, your mind probably jumps straight to those beautiful shingles you'll pick out, right? You're envisioning the color, the style, how it'll boost your home's curb appeal. But what most folks don't realize is that the real heroes often work behind the scenes, unseen, quietly doing the heavy lifting. One of those unsung heroes is the ice and water shield. It's not just another layer; it’s a specialized, self-adhering membrane that provides an unparalleled level of defense against water infiltration, particularly in areas prone to ice and heavy moisture.
What is Ice and Water Shield Made Of?
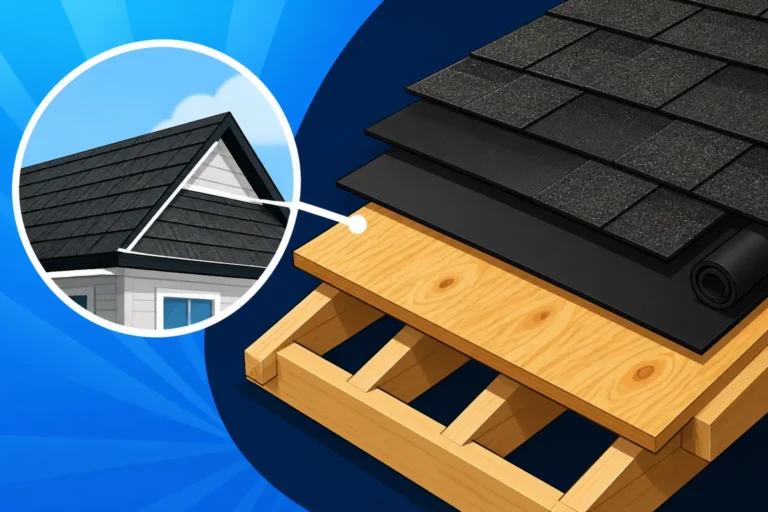
Unlike traditional roofing felt or synthetic underlayments, which are mechanically fastened (nailed down), ice and water shield is a thick, rubberized asphalt membrane with a peel-and-stick backing. Think of it like a giant, super-sticky bandage for your roof deck. This self-adhesive quality is key. When it's applied, it adheres directly to the roof decking, creating a watertight seal. If a nail penetrates it during shingle installation, the rubberized asphalt material actually seals around the nail, preventing water from seeping through. It's a truly remarkable barrier.
Typically, it’s composed of a modified bitumen (asphalt) adhesive layer laminated to a high-strength, tear-resistant polyethylene film. This film provides the durable surface, while the sticky underside is what creates the waterproof seal. Some premium versions might even have a granular surface to improve walkability for installers and provide extra adhesion for the shingles applied on top. This composition makes it incredibly resilient, designed to withstand extreme temperatures and resist tearing, flexing, and shrinking over time, which can plague less robust underlayments.
How it Differs from Standard Underlayment
It's easy to get confused between ice and water shield and your standard roofing underlayment, like felt or synthetic options. Both go under your shingles, but their roles are quite distinct. Standard underlayment acts as a secondary barrier, protecting the roof deck from incidental moisture during installation and offering some temporary protection if a shingle gets damaged. It’s also crucial for protecting the roof deck from the resins in asphalt shingles. You can learn more about how it all works in our guide to Underlayment Explained: Synthetic vs Felt and What Is Underlayment and Why It Matters.
However, standard underlayments, while good, aren't designed to be completely watertight in the same way an ice and water shield is. They’re often perforated or merely provide a water-shedding layer, not a completely impermeable one. Ice and water shield, on the other hand, is engineered to prevent water from penetrating at all, especially when water pools or is driven by high winds. Its self-sealing nature around fasteners is what truly sets it apart, creating a monolithic seal that water simply cannot breach. This distinction is vital for understanding why it's not an optional luxury but a fundamental necessity in many climates.
Why Ice and Water Shield is a Roofing Essential
Let’s be honest, nobody wants to deal with a leaky roof. The stained ceilings, the frantic bucket placement, the worry about structural damage—it’s a homeowner’s nightmare. This is precisely why ice and water shield isn't just a nice-to-have; it's a critical component for safeguarding your home, especially if you live where winter brings snow and ice, or where heavy rains are common. It tackles specific, common roofing vulnerabilities that traditional shingles and underlayment alone can't always overcome.
Preventing Destructive Ice Dams
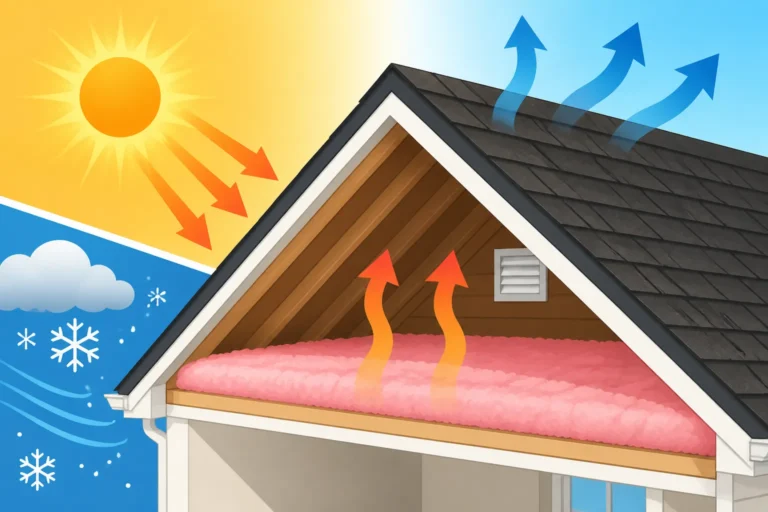
One of the biggest culprits of winter roof damage is the dreaded ice dam. This happens when heat from your home escapes into the attic, warming the roof deck and melting snow. As this melted water runs down the roof, it refreezes when it hits the colder eaves that extend beyond the exterior walls. This refrozen ice then creates a "dam," preventing subsequent meltwater from draining off the roof. The water backs up behind the ice dam, often pooling under the shingles and eventually seeping into your attic, walls, and ceilings. It’s a messy, damaging, and expensive problem. We have a detailed article on What Causes Ice Dams on a Roof and Ice Dam Damage: Repair Options if you want to dive deeper into this frustrating issue.
Ice and water shield prevents this scenario from becoming a costly leak. Because it's self-adhering and completely waterproof, even if water backs up under your shingles due to an ice dam, it simply cannot penetrate the ice and water shield layer beneath. It acts as an impenetrable barrier, keeping your roof deck, attic, and home's interior dry. This protection is particularly important in colder climates like those in Minnesota, Michigan, or the Northeast, where freeze-thaw cycles are common. Without it, you’re basically leaving a critical part of your home vulnerable to repeated water assault, which can lead to mold, rot, and severe structural damage.
Protecting Against Wind-Driven Rain
It’s not just ice and snow that pose a threat; wind-driven rain can be just as insidious, if not more so, in many regions. Imagine a fierce thunderstorm or a tropical storm churning through, with rain coming down sideways at 60 miles per hour. Standard shingles are designed to shed water, but extreme wind can lift shingle tabs, allowing rain to be blown underneath them. Once water gets under the shingles, traditional felt paper might offer some resistance, but it’s not a completely watertight barrier, especially if there are nail penetrations or seams.
This is where the self-sealing, impermeable nature of ice and water shield shines. Even if shingles lift or get damaged by severe winds, the underlying ice and water shield remains steadfastly adhered to the roof deck, forming a robust, secondary waterproof barrier. It seals around every fastener, ensuring that wind-driven rain, no matter how forceful, cannot find a path to your home's interior. For homeowners in coastal areas or regions prone to high winds and heavy downpours, this is not merely a recommendation; it’s a non-negotiable insurance policy against significant water damage. When considering a roof replacement, it's a good idea to think about other safeguards, too, like how a High-Wind Nailing Cost Premium might be factored into your quote for added security.
Meeting Building Codes and Manufacturer Warranties
It's not just about protecting your home; in many areas, installing ice and water shield is a legal requirement. Most local building codes, especially in colder climates, mandate its installation in specific areas of the roof, primarily along the eaves, valleys, and around penetrations. These code requirements are designed to protect homeowners from common and costly water damage issues. For instance, the International Residential Code (IRC) often specifies ice barrier requirements for areas with historical data of ice damming. Before any roofing project begins, it’s crucial to understand your local Roofing Building Codes: What to Know and specifically your Ice Barrier Code Requirements. Failing to meet these codes can lead to permit issues and even problems when selling your home.
Furthermore, many shingle manufacturers specify the use of ice and water shield as part of their comprehensive roofing system, and its proper installation is often a prerequisite for activating and maintaining their highest-tier warranties. Brands like GAF, Owens Corning, and CertainTeed offer enhanced warranties when their complete system, which includes ice and water shield, is installed by a certified contractor. This ensures that all components work together seamlessly to provide maximum protection and longevity. If you're investing in a new roof, you want that warranty to be solid, and often, that means including this critical component. Skipping it could inadvertently void parts of your warranty, leaving you exposed should issues arise.
Where and How Ice and Water Shield is Installed
Knowing what ice and water shield is and why it's important is one thing, but understanding its strategic placement and proper installation is another entirely. This isn't a product you just slap anywhere; its effectiveness relies heavily on being installed in the most vulnerable areas of your roof. Proper installation by experienced professionals is paramount to ensure it performs its job flawlessly for decades to come.
Critical Placement Areas on Your Roof
Ice and water shield isn't typically installed over the entire roof deck (though some homeowners in extreme climates opt for this for maximum protection). Instead, it's strategically placed in areas most susceptible to water backup and penetration. These critical zones include:
- Eaves: This is the most common area for ice dam formation. Building codes usually require ice and water shield to extend from the edge of the eaves inward, covering a specified distance (often 24 inches beyond the interior wall line, but check local codes). This ensures that any water backing up from an ice dam or wind-driven rain has a waterproof barrier to contend with.
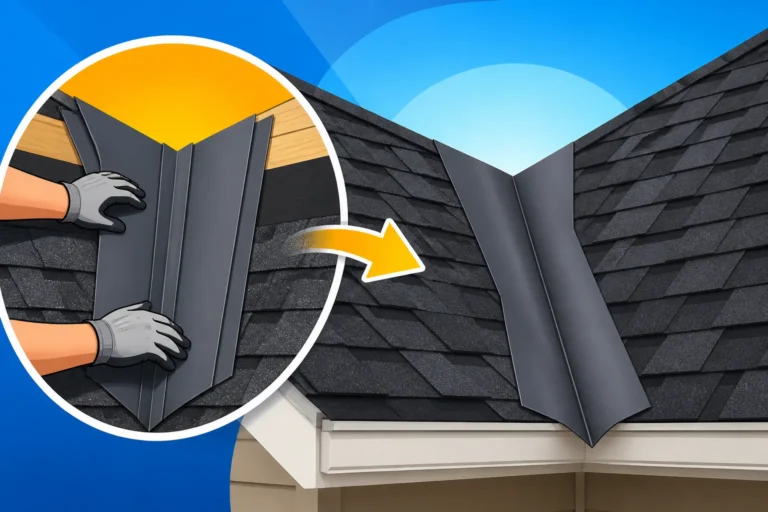
- Valleys: Roof valleys are natural channels where two roof slopes meet, concentrating a large volume of water and debris. They are highly prone to leaks. Installing ice and water shield in valleys provides a robust, self-sealing base beneath the metal flashing or woven shingles, offering superior protection where water flow is heaviest.
- Around Penetrations: Any opening in your roof is a potential weak point for leaks. This includes skylights, chimneys, vent pipes, and dormers. The ice and water shield is carefully cut and applied around these elements, creating a watertight seal before any flashing or shingles are installed. This multi-layered approach dramatically reduces the risk of leaks around these complex areas.
- Low-Slope Areas: While asphalt shingles are generally designed for roofs with a minimum pitch, some roofs have sections with a lower slope. These areas drain slower and are more susceptible to water pooling. In such cases, applying ice and water shield across the entire low-slope section can provide critical extra protection.
Understanding these key areas gives you a better grasp of your roof’s anatomy and why a complete roofing system is designed the way it is. You can also review our guide on Roof Anatomy: Parts of an Asphalt Shingle Roof for a full breakdown.
The Installation Process Explained
Installing ice and water shield is a precise process that requires attention to detail. First, the roof deck must be clean, dry, and free of debris. Any old roofing materials, including previous underlayment, must be completely removed during a What Happens During a Roof Tear-Off. This ensures proper adhesion.
The rolls of ice and water shield are then unrolled, cut to size, and the release liner is peeled back as the material is pressed firmly onto the roof deck. It's applied in an overlapping manner, with subsequent layers overlapping the previous one to ensure a continuous seal. In areas like valleys, it's usually laid down first, centered in the valley, before any metal flashing. Around chimneys or vents, it's carefully cut and shaped to conform to the contours, creating a snug, watertight fit. The self-sealing nature means that even if a nail from subsequent shingle layers pierces it, the material effectively closes around the shank, maintaining the waterproof barrier.
While it might seem straightforward, proper installation techniques are crucial. Wrinkles, bubbles, or inadequate overlaps can compromise the shield's effectiveness. That’s why it’s always recommended to trust this job to experienced, reputable roofers. They understand the nuances of proper application, local building codes, and manufacturer specifications, ensuring your investment truly pays off. When you're searching for a contractor, resources like Modernize can help connect you with vetted professionals who know how to correctly install these critical components for a durable and compliant roof.
The Long-Term Benefits and Cost Considerations
When you're budgeting for a new roof, it's easy to look at every line item and wonder where you can save a few bucks. The cost of ice and water shield might seem like an extra expense, but when you weigh it against the long-term benefits and potential costs of not having it, it quickly becomes clear that it's an investment that pays dividends for the life of your roof.
Enhanced Roof Longevity and Home Value
A roof system fortified with ice and water shield is simply more durable and resilient. By preventing water intrusion from ice dams and wind-driven rain, it protects the underlying roof deck from rot and mold. A dry roof deck is a strong roof deck, which means your entire roofing structure will last longer. This translates directly to a longer lifespan for your asphalt shingles, potentially pushing them closer to the higher end of their expected durability range. Preventing common causes of roof failure not only extends the life of the roof but also preserves your home's structural integrity.
Moreover, a well-maintained, leak-free roof with proper protection adds significant value to your home. When it comes time to sell, a home inspector will note the presence of an ice and water shield, signaling a high-quality, code-compliant installation. This can be a major selling point, giving potential buyers peace of mind and affirming the overall value of your property. Think about it: no one wants to buy a house and immediately worry about a leaky roof. A robust roofing system with ice and water shield helps assure buyers that they’re getting a solid, protected home.
Cost-Effectiveness and Return on Investment
Let's talk numbers. The cost of ice and water shield can add anywhere from $1 to $3 per square foot to the overall roofing project, depending on the brand, thickness, and how much of your roof requires it. For a typical 2,000 square foot roof, this might mean an additional $500 to $1,500. While this isn't insignificant, compare it to the potential cost of repairing extensive water damage from a severe ice dam or windstorm. A single significant leak can cause thousands of dollars in repairs, including drywall replacement, insulation remediation, mold removal, and even structural wood replacement. When you consider the average Cost to Replace a Roof by House Size, the added cost of ice and water shield is a small fraction of the total, but it prevents the largest potential headaches.
The return on investment (ROI) for ice and water shield is undeniable. It's a preventive measure that can save you exponentially more money in future repairs and insurance claims. Some insurance companies even offer discounts or more favorable terms for homes that have ice and water shield installed, especially in regions prone to specific weather hazards. It’s always worth checking with your insurance provider. Think of it as purchasing insurance for your insurance policy. When you're comparing bids for a new roof, don't just look at the bottom line. Look at the comprehensive value being offered. A slightly higher quote that includes proper ice and water shield installation is almost always the smarter long-term investment. Organizations like Modernize often stress the importance of understanding the full scope of your roofing project, including these crucial protective layers, rather than simply opting for the cheapest upfront price.
Potential Drawbacks or Considerations
While the benefits heavily outweigh the drawbacks, it’s worth noting a few considerations. The initial material and labor cost is higher than traditional felt paper, but as discussed, this is usually offset by long-term savings. Installation requires meticulous attention, as improper application can lead to trapped moisture or adhesion issues, although this is rare with experienced contractors. The material itself is heavier than felt, which slightly adds to the roof's load, but this is well within structural tolerances.
Also, ice and water shield can sometimes be more challenging to remove during a future roof replacement, as it adheres so strongly. However, this is a minor inconvenience decades down the line when weighed against the immediate and ongoing protection it provides. Ultimately, for most homeowners in any climate prone to significant weather, the protective advantages far outweigh these minor considerations. It's a foundational element of a truly resilient and long-lasting asphalt roof.
| Feature | Standard Underlayment (Felt/Synthetic) | Ice and Water Shield (Peel-and-Stick) |
|---|---|---|
| Primary Function | Secondary water barrier, temporary protection, shingle separator | Primary watertight barrier, self-sealing |
| Composition | Asphalt-saturated felt or woven polypropylene/polyester | Rubberized asphalt, polyethylene film |
| Adhesion | Mechanically fastened (nails/staples) | Self-adhering (peel-and-stick) |
| Waterproofing | Water-shedding (some resistance), not fully impermeable | Fully impermeable, seals around fasteners |
| Protection Against | Incidental moisture, shingle resins | Ice dams, wind-driven rain, pooling water |
| Cost (per sq ft installed) | $0.20 – $0.50 | $1.00 – $3.00 (in critical areas) |
| Code Requirement | Generally required | Required in specific vulnerable areas (eaves, valleys) in many regions |
| Warranty Impact | Standard; sometimes required for basic warranty | Often required for enhanced manufacturer warranties |
| Durability | Good, but can tear; does not self-seal | Excellent, highly resilient, self-sealing |
Choosing to include ice and water shield is an intelligent decision for any homeowner looking to maximize the protection, longevity, and value of their roof.
Disclaimer
Please remember that roofing is a complex field. While this guide provides comprehensive information, it is not a substitute for professional advice. Always consult with a qualified and licensed roofing contractor for specific recommendations and estimates for your home. Local building codes and climate conditions can significantly impact the best approach for your roofing project.