What Is Drip Edge and Why It Matters
It’s easy to get overwhelmed by all the components that make up a roof, especially when terms like "drip edge" get thrown around. You might hear it mentioned in a roofing estimate or during a conversation with a contractor, and it’s natural to wonder if it's truly essential or just another add-on. Trust me, many homeowners feel this confusion. This comprehensive guide will demystify drip edge, explain its critical role in protecting your home, and why understanding it really does matter.
What Exactly Is Drip Edge?
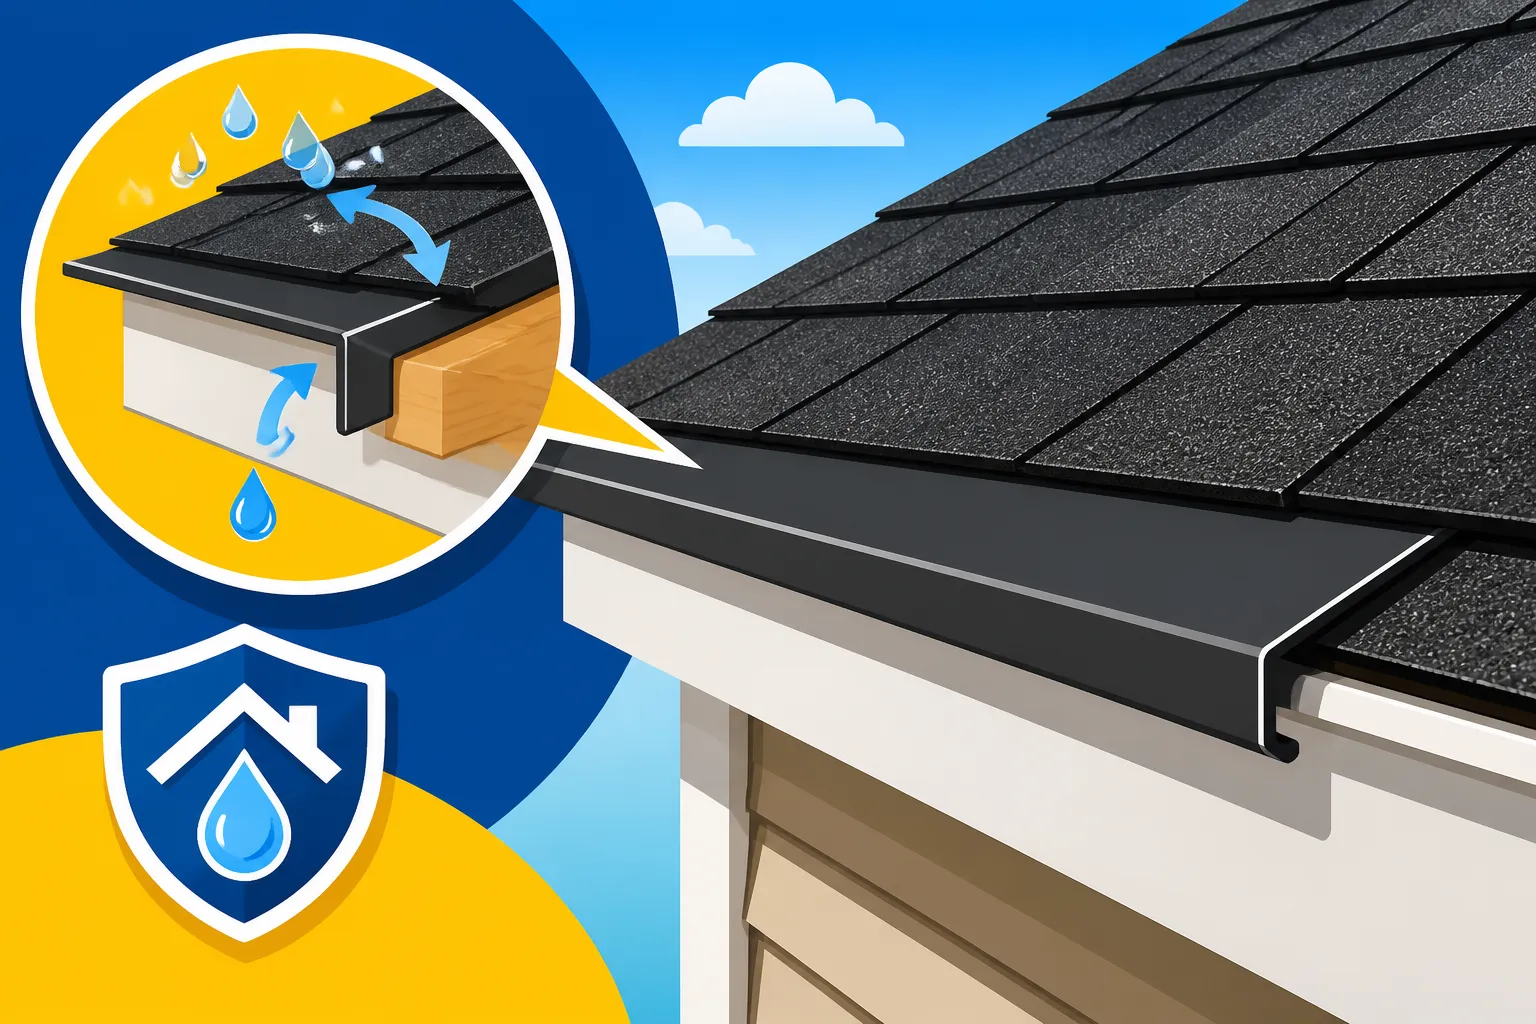
Think of your roof as a giant umbrella protecting your home. While the shingles are the main canopy, drip edge is like the perfectly tailored hem that ensures rainwater flows exactly where it should, rather than seeping back under the edges. It’s a non-corrosive metal flashing installed along the eaves (the edges of your roof that overhang the walls) and gables (the sloped sides of the roof). It’s designed to extend past the roof decking and into the gutter, or simply away from your fascia if you don't have gutters. Without it, water has a nasty habit of finding its way into places it shouldn't.
The Core Function of Drip Edge
At its heart, drip edge has one primary job: to control the flow of water. When rain hits your roof, it runs down the shingles. Without drip edge, that water would reach the very edge of your roof decking and often cling to the underside, defying gravity just long enough to wick back horizontally. This capillary action can draw moisture directly onto your fascia board, the wooden board that runs horizontally under your roof edge, and even into your attic or wall cavities.
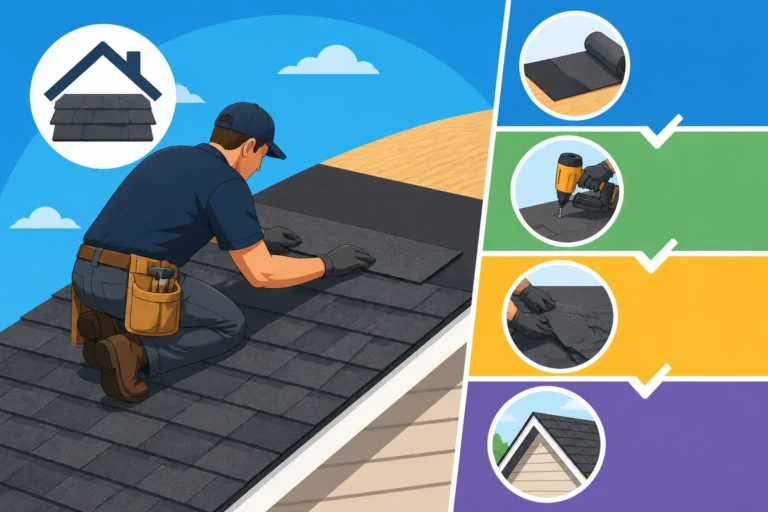
Drip edge provides a clean, protruding lip that forces water to drip directly off the roof and into the gutters, or at least a safe distance from your home's exterior walls and foundation. It acts as a barrier, effectively breaking the surface tension that would otherwise allow water to curl back. This might seem like a small detail, but in the grand scheme of your home's structural integrity, it’s a massive player. It's often installed early in the roofing process, even before the underlayment, to create a seamless barrier. Understanding this component is key to grasping the full scope of your roof's protective layers, much like learning about the overall process of how asphalt shingles are installed: step by step.
Different Types of Drip Edge
While the concept of drip edge is straightforward, there isn’t a one-size-fits-all product. Drip edge comes in various profiles and materials, each designed to address specific roofing needs and aesthetic preferences. Knowing these differences can help you have a more informed conversation with your roofing contractor.
The most common profiles you’ll encounter include:
- Type C (L-Style): This is the most basic and common type. It has a flat flange that sits on the roof deck and a 90-degree bend that extends down over the fascia. It's simple, effective for many applications, and often the most budget-friendly option.
- Type D (T-Style or Hemmed Drip Edge): This profile features a longer flange that extends further onto the roof deck and a more pronounced "kick out" at the bottom. The extra kick-out provides a larger overhang, which is particularly effective at directing water away from the fascia and into wider gutters. It also adds a bit more rigidity.
- Type F (Extended Drip Edge or Gutter Apron): Similar to Type D, Type F usually has a slightly larger vertical leg that fits into the gutter, often extending further down inside. This design is excellent for ensuring that all water makes it into the gutter, minimizing splash-back or overflow, especially during heavy rain.
Beyond profiles, the material choices are also important:
- Aluminum: Lightweight, rust-proof, and available in many colors, aluminum is a popular choice. It's durable and suitable for most climates, especially those with high humidity or rainfall.
- Galvanized Steel: This is steel coated with zinc to prevent rust. It's stronger and more rigid than aluminum, making it a good option in areas prone to high winds. However, if the coating is scratched, it can eventually rust.
- Copper: While significantly more expensive, copper drip edge offers unparalleled longevity and a distinct aesthetic appeal that can enhance historic homes or high-end properties. It develops a beautiful patina over time.
- Vinyl: Less common for the main roof structure, vinyl drip edge might be seen on sheds or smaller outbuildings due to its lower cost and ease of installation. However, it's generally less durable and less resistant to extreme weather than metal options.
The choice of material and profile often depends on your local climate, your home's specific roof anatomy, and your budget. Reputable contractors, sometimes found through services like Modernize, will guide you through these options, ensuring the chosen drip edge aligns with local building codes and provides maximum protection.
Why Drip Edge Isn't Just "Nice to Have" – It's Essential
It’s easy to dismiss a small metal strip at the edge of your roof as a minor detail. But in the world of roofing, tiny components often play colossal roles in preventing huge problems. Drip edge is precisely one of those unsung heroes. Ignoring it or installing it improperly can lead to a cascade of issues that affect not just your roof, but your entire home.
Protecting Your Fascia and Eaves
One of the most immediate and visible benefits of drip edge is the protection it offers to your fascia and eaves. The fascia board is that flat, vertical strip of wood (or sometimes composite) that runs along the edge of your roof, right where the gutters attach. The eaves are the part of the roof that overhangs your house walls.
Without drip edge, rainwater that runs off your roof often doesn't fall cleanly into the gutters or away from the house. Instead, it can trickle down the fascia, constantly wetting the wood. Over time, this constant moisture exposure leads to:
- Rot and Decay: Wood, especially untreated wood, is highly susceptible to rot when consistently wet. This can compromise the structural integrity of your fascia and even spread to the roof decking or rafters.
- Peeling Paint: The paint on your fascia is your first line of defense, but persistent moisture will cause it to blister, peel, and flake, leaving the wood exposed and accelerating decay.
- Pest Infestations: Rotting wood becomes an inviting target for carpenter ants, termites, and other pests seeking moisture and shelter. They can then make their way into your attic and home.
Drip edge forms a crucial barrier, preventing water from ever touching the fascia by extending beyond it and into the gutter. This small detail saves you from costly repairs down the line, preserving both the aesthetics and the structural health of your home's exterior.
Directing Water Away from Your Home's Foundation
Beyond protecting the immediate roof structure, drip edge plays a vital role in safeguarding your home's foundation. Water is the single greatest enemy of a home's foundation, and improperly managed rainwater can lead to severe and expensive problems.
When water drips directly down from the eaves without proper redirection, it tends to pool around the foundation of your house. This can lead to:
- Foundation Damage: Consistent saturation of the soil around your foundation can cause it to swell and contract, putting immense pressure on your foundation walls. Over time, this can lead to cracks, shifting, and structural instability, often resulting in costly foundation repairs.
- Basement or Crawl Space Leaks: If water accumulates at the foundation level, it will inevitably find its way into your basement or crawl space, leading to dampness, mold growth, and potential flooding. This can ruin belongings, create unhealthy living conditions, and require extensive remediation.
- Landscape Erosion: Even if your foundation isn't immediately threatened, constant runoff can erode your landscaping, washing away soil, mulch, and even damaging plants near your home.
By ensuring that water flows directly into your gutters or at least a few inches away from your home's perimeter, drip edge minimizes these risks. It's a proactive measure that works in concert with your gutters to prevent long-term water damage, keeping your property dry and secure. It's an often-overlooked but integral part of a complete roofing system, just like understanding the function of your gutters. When you're considering the overall project, it helps to understand the full scope, including what you'll pay for the cost of new flashing and drip edge.
Enhancing the Longevity of Your Entire Roofing System
Drip edge doesn't just protect the edges; it contributes to the overall health and lifespan of your entire roofing system. Its benefits extend beyond simple water redirection, touching upon the performance of your shingles, underlayment, and even preventing winter woes.
Consider how drip edge works with your other roofing components:
- Underlayment Integration: Drip edge is typically installed before the roofing underlayment (the protective layer beneath your shingles). The underlayment then overlaps the top flange of the drip edge along the eaves, creating a continuous waterproof seal that channels any wind-driven rain or melted ice over the drip edge and away. On the rake (gable) edges, the drip edge is usually installed over the underlayment, preventing wind from getting underneath and lifting it. This careful layering is part of how a roof is made watertight.
- Preventing Ice Dams: In colder climates, ice dams are a notorious problem. These occur when heat from your attic melts snow on the upper roof, and the water then refreezes at the colder eaves, forming a barrier that traps melting snow behind it. This pooled water can then back up under your shingles and into your home. While proper insulation and ventilation are key, drip edge helps by extending the roof's edge, creating a cleaner run-off path and preventing water from getting behind your fascia, which is a common starting point for ice dam formation. It's one of many components like ice and water shield explained that work together to prevent ice damage.
- Shingle Security: The drip edge helps support the starter course of shingles, providing a firm, straight edge for them to adhere to. This prevents shingles from curling over the edge, which can lead to granule loss and premature deterioration. It also offers a clean, finished appearance.
In essence, drip edge acts as a foundational element that ensures every other component of your roof can perform its job optimally. By safeguarding the vulnerable edges and facilitating proper water runoff, it significantly extends the functional life of your asphalt shingles and the structural components underneath. This investment in a seemingly small item pays dividends in the long-term durability and performance of your most crucial home protection. When you receive a detailed estimate, ensure you ask to understand all the different elements, including drip edge, so you know exactly what you’re paying for.
Installation Insights and Common Questions
The installation of drip edge might seem minor, but it’s a precise job that requires adherence to specific guidelines and local building codes. Getting it right is crucial for its effectiveness, and knowing what to look for can empower you as a homeowner.
Proper Placement and Overlap
Correct installation is paramount for drip edge to function as intended. It’s not simply nailing a piece of metal to the edge of your roof; there’s a specific order and technique involved.
- Eaves First: Along the eaves (the horizontal bottom edges), drip edge is installed first, directly onto the roof decking, before the underlayment. The top flange of the drip edge should sit flat on the deck, and the bottom lip should extend past the fascia board, typically 1/2 inch to 3/4 inch, ensuring water drips clear. The roofing underlayment is then laid over the top flange of the drip edge. This creates an overlapping seal that prevents any water that gets under the shingles from reaching the wood decking or fascia. It's a key part of how underlayment is installed.
- Rake Edges Second: Along the rake (the angled gable edges), drip edge is installed after the underlayment. Here, the drip edge sits on top of the underlayment. This placement protects the edge of the underlayment from wind uplift and creates a smooth, finished edge for the starter shingles. This also helps seal off the exposed edge of the roof sheathing.
- Overlapping Sections: When multiple pieces of drip edge are used, they should overlap by at least a few inches to ensure continuous protection. The upper piece should always overlap the lower piece to prevent water from seeping between the joints.
- Nailing: Drip edge should be secured with roofing nails, spaced appropriately (typically every 8-12 inches) to prevent it from rattling in the wind or becoming dislodged. The nails should be flush but not over-driven, which could warp the metal.
Understanding this sequence and attention to detail helps illustrate that roof installation is a complex, multi-step process, not just about laying down shingles. For specific insights into this, you might explore detailed articles on how drip edge is installed.
What to Look for During an Inspection
As a homeowner, you're not expected to be a roofing expert, but knowing the signs of a properly installed or failing drip edge can save you headaches. During a routine roof inspection or if you're concerned about leaks, a good contractor will pay close attention to this component.
Here’s what you or an inspector should look for:
- Proper Extension: The most crucial element is that the drip edge extends far enough to direct water away from the fascia. If you see water stains or peeling paint on your fascia directly below the roof edge, it’s a strong indicator that the drip edge is either missing, improperly installed, or damaged.
- Secure Attachment: Drip edge should be firmly attached. Loose sections can flap in the wind, creating noise, damaging adjacent shingles, and eventually tearing free. Look for bent or deformed sections that indicate poor installation or storm damage.
- Rust or Corrosion: While most modern drip edge is made from rust-resistant materials like aluminum or galvanized steel, damage to these coatings can lead to corrosion. Rust spots are a red flag, indicating the material is failing and may no longer provide adequate protection.
- Damage from Ice or Debris: Heavy ice dams can bend or tear drip edge. Similarly, falling branches or other debris can dent or dislodge it. Any visible damage warrants attention.
- Compatibility with Gutters: If you have gutters, the drip edge should ideally direct water cleanly into them without gaps where water could escape. Sometimes, if drip edge is too short or gutters are too wide, water can miss the gutter entirely.
If you're unsure about the condition of your drip edge, especially after a major storm, it's always best to consult with a professional. They can conduct a thorough roof inspection: what they check goes far beyond just the shingles. Services like Modernize can connect you with experienced roofers who understand these nuances.
Drip Edge and Building Codes
This might surprise some, but drip edge isn't just a suggestion; in many regions, it's a mandatory building code requirement. The International Residential Code (IRC), which many states and local jurisdictions adopt and modify, often stipulates the need for drip edge.
For instance, the IRC Section R905.2.8.5, relating to asphalt shingles, states that "a drip edge shall be provided at eaves and rake edges of asphalt shingle roofs." The code often specifies the minimum width of the top flange, the extension over the fascia, and the overlap requirements for multiple pieces.
Why the strict rules? Because building codes are designed to ensure public safety and the long-term structural integrity of homes. The problems that arise from missing or improperly installed drip edge—fascia rot, foundation damage, pest intrusion, and premature roof failure—are serious enough that municipalities want to prevent them proactively. Ignoring these requirements can lead to:
- Failed Inspections: If your roof replacement doesn't include drip edge where mandated, it will fail its final inspection, meaning delays and additional costs to bring it up to code. Understanding roofing permits explained and what they entail is a critical step for any homeowner undertaking a roofing project.
- Voided Warranties: Many shingle manufacturers and roofing contractors will require proper installation, including adherence to building codes, for their warranties to remain valid. If you skimp on drip edge, you could void your precious warranty, leaving you unprotected if future issues arise.
- Insurance Issues: In some cases, a home insurance policy might have specific stipulations regarding roof components, especially in areas prone to severe weather. Non-compliance could affect future claims.
Always confirm your local roofing building codes: what to know directly with your municipality or a trusted local contractor. They should be well-versed in the specific drip edge code requirements for your area, ensuring your new roof is not only beautiful but also compliant and fully protected.
| Drip Edge Type | Description | Common Materials | Key Benefit | Considerations |
|---|---|---|---|---|
| Type C (L-Style) | Basic L-shape, flat on deck, 90° bend over fascia | Aluminum, Galvanized Steel, Copper | Cost-effective, simple water diversion | Less robust for wide overhangs, basic aesthetics |
| Type D (T-Style/Hemmed) | T-shape, longer deck flange, pronounced "kick out" | Aluminum, Galvanized Steel, Copper | Superior water diversion, added rigidity | Slightly more expensive, may require wider gutters |
| Type F (Extended/Gutter Apron) | Similar to Type D, with longer vertical leg for gutters | Aluminum, Galvanized Steel, Copper | Ensures water goes into gutters, minimizes splash | Best used with gutters, specific gutter fit |
| Vinyl Drip Edge | Plastic construction, L-style or T-style profiles | Vinyl/PVC | Low cost, corrosion-proof, easy to cut | Less durable, can crack in extreme temps, limited colors |
Disclaimer
Please remember that the information provided in this article is for general guidance and informational purposes only. Roofing projects can be complex and are subject to local building codes, weather conditions, and property-specific requirements. Always consult with a qualified, licensed, and insured roofing professional for specific advice tailored to your situation. Never attempt roofing work that is beyond your skill level, as it can be dangerous and lead to serious injury or property damage.