High-Wind Nailing Explained
There are few feelings worse than looking up at your roof during a fierce storm and wondering if it's going to hold. The relentless howling wind, the torrential rain – it makes you question every single shingle up there. You might have heard about "high-wind nailing" as a crucial defense against Mother Nature's fury, but what does that really mean for your home? This guide will demystify high-wind nailing, explaining why it's so vital, how it works, and what you need to know to ensure your asphalt shingle roof can stand up to the gales.
What Exactly is High-Wind Nailing?
When we talk about high-wind nailing, we're not just adding a couple more nails randomly; we're talking about a very specific, enhanced fastening method designed to make your asphalt shingles far more resistant to the forces of strong winds. It's a critical upgrade from standard installation practices, often mandated in regions prone to hurricanes, tornadoes, or severe thunderstorms. Think of it as giving your roof an extra-strong grip, ensuring each shingle stays put when everything else around it is being tossed about. This isn't just a "nice-to-have"; in many areas, it's a non-negotiable requirement to protect homes and families.
Beyond the Standard Four-Nail Pattern
The typical installation for asphalt shingles involves using four nails per shingle. This has been the industry standard for decades, and it works perfectly fine for homes in areas that rarely experience significant wind events. However, in places where the wind frequently whips up to 70, 80, or even over 100 miles per hour, those four nails just aren't enough to prevent uplift and detachment. It’s like trying to hold down a tarp in a gale with only four small stakes; eventually, something's going to give.
High-wind nailing goes beyond this basic setup, usually requiring six nails per shingle. Sometimes, depending on the shingle type, manufacturer specifications, or extreme local building codes, even more dense patterns might be recommended or required. For example, a house along the Gulf Coast of Florida will likely have much stricter nailing requirements than a similar house nestled in a quiet, protected valley in inland Pennsylvania. This increased nail count distributes the stress of wind uplift over a greater area, making it significantly harder for individual shingles, or even entire sections of your roof, to come loose.
This isn't just about putting more nails in; it's about putting them in the right place. These enhanced patterns are meticulously designed to maximize the shingle's grip on the roof deck and on the shingle beneath it. Ignoring these specific patterns, even with more nails, could inadvertently weaken the roof's resistance. A reputable contractor understands these nuances and knows that blindly adding nails without precision isn't effective.
Strategic Nailing Zones for Maximum Grip
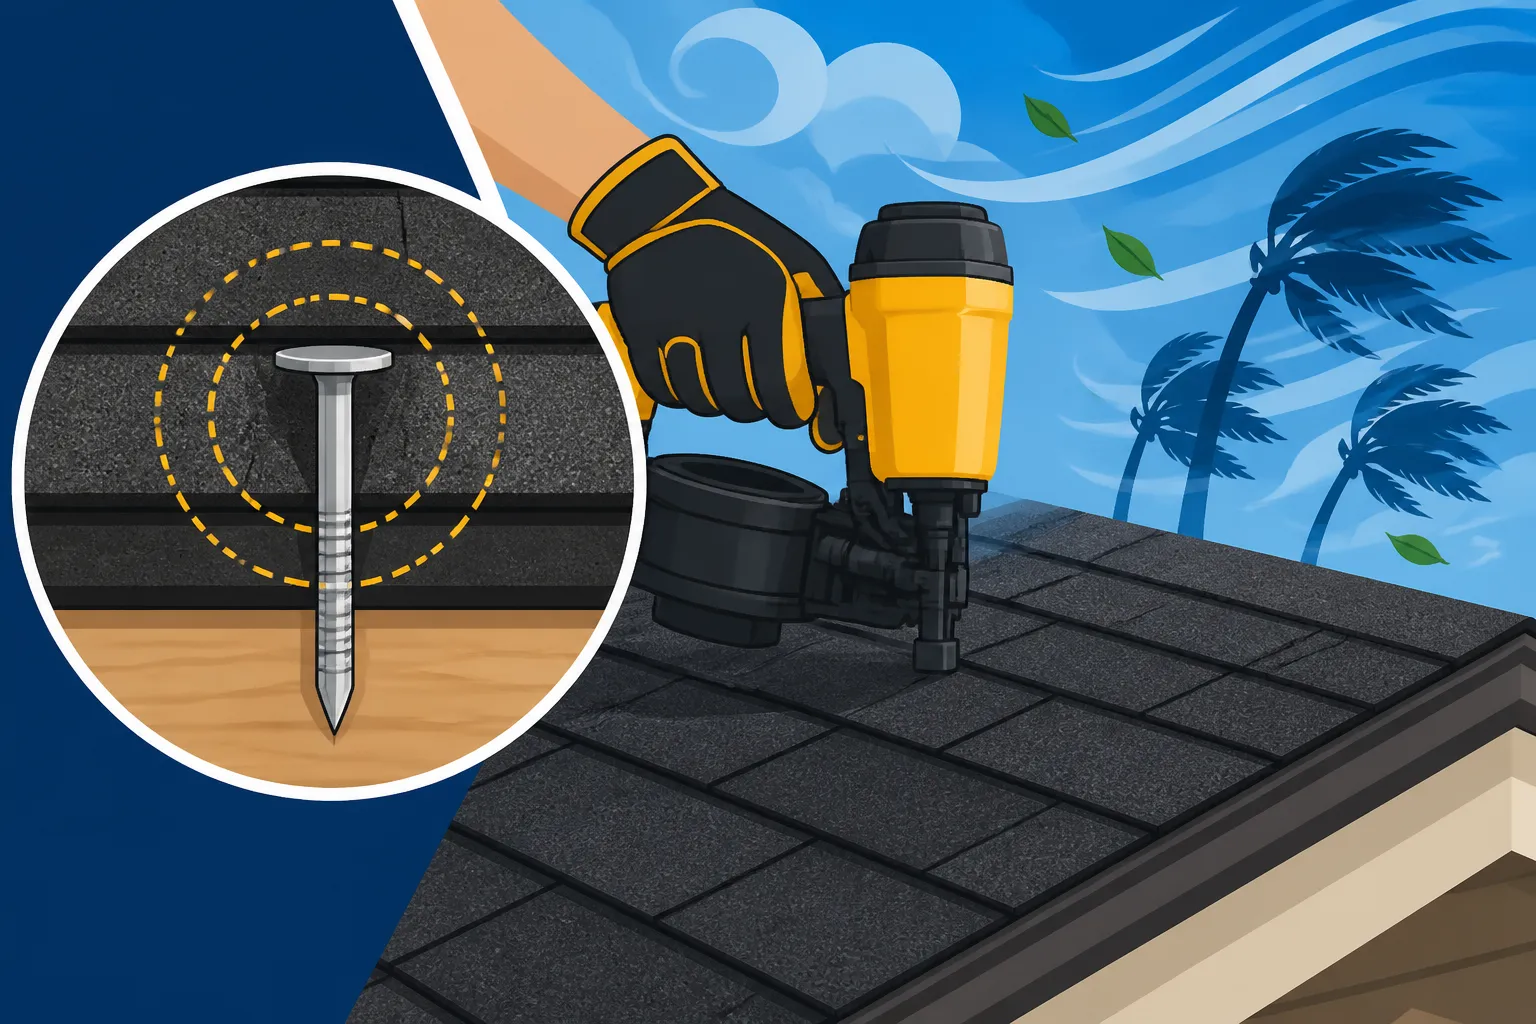
The placement of each nail is just as crucial as the number of nails used. Every asphalt shingle has a designated "common bond" or "nail line" – a specific strip where the nails are meant to go. This area is engineered to ensure that when a nail is driven, it penetrates through the shingle being installed and catches the top edge of the shingle directly underneath it. This creates a secure, overlapping bond that effectively locks two layers of shingles to the roof deck with each nail.
Improper placement can severely compromise the roof's wind resistance, even with six nails. If a nail is placed too high, above the common bond, it might miss the underlying shingle entirely. This leaves the shingle below only partially secured, and the shingle being installed vulnerable to tearing or lifting in the wind. Conversely, if a nail is placed too low, near the exposure edge of the shingle, it can be exposed to the elements, leading to "nail-through" or cracking as the shingle flexes, which can create pathways for water and weaken the shingle's overall integrity. The goal is to hit that sweet spot, the target zone, with every single fastener.
Beyond the specific line, the lateral placement (from side to side) of the nails is also important. Manufacturers provide diagrams showing exactly where these six nails should be located across the width of the shingle, typically equidistant or in specific groupings to best withstand wind forces. Achieving this precision requires skill, the right tools, and careful attention to detail by the roofing crew. A pneumatic nail gun, for instance, needs to be properly calibrated for air pressure to ensure nails are driven flush – not overdriven (which can cut through the shingle) or underdriven (leaving the shingle loose). Proper installation, including precise nail placement, is truly the backbone of a durable, wind-resistant roof.
Why is High-Wind Nailing So Crucial for Asphalt Shingles?
Your roof is the first line of defense against the elements, and in areas prone to high winds, its integrity is constantly tested. High-wind nailing is not an optional add-on but a fundamental necessity for asphalt shingles to truly perform their protective function. Without it, even the highest quality shingles can become vulnerable, leading to expensive damage and significant stress for homeowners. It’s about building resilience into your home from the top down.
The Battle Against Uplift and Delamination
Wind doesn't just push down on your roof; it creates a complex interplay of forces. As wind flows over your roof, particularly over the edges, hips, and ridges, it creates a powerful suction effect known as uplift. This uplift tries to literally pull your shingles off the roof deck. At the same time, direct wind pressure can get underneath loose shingle edges, trying to peel them back like pages in a book. This is where the sheer mechanical fastening provided by proper nailing becomes paramount.
When shingles are only secured with four nails, or if those nails are improperly placed, the uplift and direct pressure of strong gusts can easily get underneath the shingle. Once the wind breaches that seal, it starts to work its way further in, causing the shingle to flap, lift, and eventually tear away. This can also lead to delamination, where the granular surface of the shingle separates from its asphalt base, further weakening its structure. Even the most advanced shingle adhesive strips, which are designed to bond shingles together when exposed to heat, can fail if the mechanical fastening isn't robust enough to withstand the initial forces of extreme wind.
Consider a scenario where a Category 1 hurricane with sustained winds of 74-95 mph passes through. If your roof was installed with standard four-nail patterns in an area where six nails are recommended or required, you're essentially gambling with your home's protection. The difference between a few loose shingles and widespread damage often comes down to this crucial installation detail. The wind ratings for shingles are often based on proper installation techniques, including enhanced nailing. You can learn more about how these ratings are determined by reading our guide on How Wind Ratings Work for Shingles.
Protecting Your Home from Costly Storm Damage
The most immediate and obvious benefit of high-wind nailing is preventing costly storm damage. A roof that loses shingles in a major storm is not just an aesthetic problem; it's a gaping vulnerability. Missing shingles expose the underlying roof deck, underlayment, and even your attic to direct water intrusion. This can quickly lead to extensive interior damage, including ruined drywall, insulation, flooring, and even structural issues if water penetrates deep enough. The cost to repair such damage far exceeds the marginal extra expense of proper high-wind nailing during the initial installation.
Beyond the physical damage, there are significant financial implications. Insurance claims for roof damage can be a frustrating and lengthy process. If your roof was not installed according to local building codes or manufacturer specifications – which often include high-wind nailing requirements – your insurance provider might deny or reduce your claim payout. This leaves you, the homeowner, on the hook for potentially tens of thousands of dollars in repairs. For instance, in hurricane-prone states like Florida or Texas, building codes specifically address high-wind resistance, and ignoring these codes during installation is a serious oversight. You might find detailed information on these specific regulations in our article about High-Wind Roofing Code Requirements.
Furthermore, investing in high-wind nailing complements other protective measures, such as installing Class 4 impact-resistant shingles or using an ice and water shield. While Class 4 shingles are designed to resist hail, and ice and water shield protects against water backup, robust nailing ensures the entire system stays intact to offer comprehensive protection. It’s about holistic resilience, creating a roof that can withstand multiple threats. Protecting your biggest asset from catastrophic damage provides immense peace of mind, knowing that your roof is truly built to last through whatever weather comes its way.
Common High-Wind Nailing Requirements and Best Practices
Understanding the specific requirements and best practices for high-wind nailing is essential for any homeowner undertaking a roof replacement. It's not enough to simply ask if your contractor does "high-wind nailing"; you need to know what that entails in terms of local regulations and manufacturer guidelines. The interplay between these two sets of rules often dictates the final installation method, and being informed allows you to ensure your contractor is performing the job correctly and to the highest standards.
Manufacturer Specifications and Building Codes
The first rule of roofing is to always follow both the shingle manufacturer's installation instructions and local building codes, adhering to whichever is more stringent. Shingle manufacturers like GAF, Owens Corning, and CertainTeed spend significant resources engineering their products to perform optimally under various conditions. Their installation guides explicitly detail nailing patterns, nail types, and other critical steps, often including specific instructions for high-wind applications. For example, a manufacturer might specify a 6-nail pattern for all installations in coastal areas, even if the local code only broadly recommends enhanced fastening.
Certified contractor programs, such as GAF Master Elite Contractors or Owens Corning Platinum Preferred Contractors, often have even stricter requirements. These certifications aren't just badges; they signify that a contractor has undergone specialized training and adheres to enhanced installation protocols that exceed minimum standards, including robust nailing techniques. This often unlocks extended manufacturer warranties, like the GAF Golden Pledge warranty, which covers both material defects and workmanship. Without proper installation, including correct nailing, these warranties can be voided. You can explore this further in our guide on Manufacturer-Certified Roofers Explained.
Local building codes, established by cities or counties, are designed to ensure public safety and property protection based on regional climate and risk factors. In areas prone to high winds, these codes will often explicitly mandate six nails per shingle for asphalt installations. They might also specify requirements for the type of underlayment, drip edge, and even the type of fasteners. It’s always crucial for your contractor to pull the necessary permits and schedule inspections to ensure compliance with these codes. A comprehensive understanding of Roofing Building Codes: What to Know can help homeowners navigate these requirements.
Nail Type, Length, and Fastening Technique
Beyond the number and placement of nails, the type of nail itself, its length, and the way it's driven are equally critical for high-wind performance. Using the wrong fasteners can render even the best nailing pattern ineffective.
Firstly, roofing nails must be corrosion-resistant. This typically means hot-dipped galvanized steel, stainless steel, or sometimes aluminum nails, depending on the shingle type and local climate. Standard bright steel nails will rust over time, weakening their grip and potentially staining your shingles. The nail head should also be sufficiently wide (at least 3/8 inch) to provide adequate holding power without cutting through the shingle.
Secondly, nail length is non-negotiable. Nails must be long enough to penetrate through the shingle and the roof deck by at least ¾ of an inch. For standard plywood or OSB decking, this usually means using 1-inch to 1.25-inch nails. If your roof deck is thicker or made of planks, longer nails may be necessary. Insufficient penetration means the nail isn't securely anchoring the shingle to the structural elements of your roof, making it prone to pull-out in high winds. You can find more specific details about these requirements in our article on the Roof Deck Nailing Code.
Finally, the fastening technique is paramount. Nails should be driven flush with the shingle surface – not overdriven (where the nail head breaks the shingle fibers) or underdriven (where the nail head is proud of the surface). An overdriven nail creates a weak point where water can penetrate and the shingle can tear. An underdriven nail can prevent the shingle above it from lying flat and sealing properly, creating a wind entry point. Professional roofers use pneumatic nail guns set to the correct pressure to achieve this consistent, flush drive. They also employ the "one-third rule," ensuring nails are placed roughly one-third of the way in from the shingle edges to maximize holding power and avoid exposure or tearing.
Here's a quick comparison of standard vs. high-wind nailing practices:
| Feature | Standard Nailing | High-Wind Nailing |
|---|---|---|
| Nails Per Shingle | 4 nails | 6 nails (or more) |
| Nail Placement | Centered on common bond | Precisely spaced on common bond |
| Primary Goal | Basic shingle adhesion and fastening | Maximum mechanical resistance to uplift |
| Regions | Low-to-moderate wind areas | High-wind zones, coastal areas, hurricane-prone regions |
| Code Impact | Meets minimum code in calm areas | Often legally mandated by stricter codes |
| Warranty Impact | Standard manufacturer warranty coverage | Often required for enhanced manufacturer warranties |
What to Ask Your Roofer About High-Wind Nailing
When you're getting ready for a roof replacement, it's easy to feel overwhelmed by all the choices and technical jargon. But don't let that deter you from asking smart, pointed questions about critical installation details like high-wind nailing. A transparent and knowledgeable contractor will welcome your questions and provide clear answers, giving you confidence in their work. Your involvement is key to ensuring your investment is protected. For instance, before even getting started, you'll want to review how to get a low roofing quote from contractors.
Verifying Compliance and Warranty
One of the most important discussions you'll have with a potential roofing contractor revolves around their installation practices, especially concerning high-wind nailing. Don't be shy; explicitly ask them about their standard nailing pattern for your shingle choice and your specific location. Inquire if they adhere to a 6-nail pattern or more, and why. A good contractor will proactively explain their methods, linking them directly to local building codes and manufacturer specifications. They should be able to show you sections of the code or manufacturer guidelines that dictate their approach.
It's also crucial to understand how their nailing practices impact your roof's warranty. Many premium shingle warranties, particularly those that offer coverage for high winds up to 130 mph, require specific installation techniques, including enhanced nailing. If the contractor doesn't follow these guidelines, your expensive warranty could be rendered void from day one. Ask them to confirm, in writing, that their installation methods, including nailing, will qualify your roof for the full manufacturer warranty coverage. This conversation can be part of a broader discussion about Roofing Warranty: Workmanship vs Manufacturer. A comprehensive list of Questions to Ask a Roofing Contractor Before Hiring can help you cover all your bases.
Don't settle for vague assurances like "we always do it right." Ask for specifics. In high-wind areas, proper nailing isn't just about good practice; it's often a legal requirement. Knowing that your contractor is diligent about these details ensures your home is not only protected but also that your investment is covered should any issues arise down the line.
The Importance of a Detailed Roofing Contract
The best way to ensure that high-wind nailing and all other critical installation details are handled correctly is to have them clearly spelled out in your roofing contract. A vague contract is an open invitation for misunderstandings and shortcuts. Your contract should explicitly state the nailing pattern to be used (e.g., "shingles to be fastened with six nails per shingle according to manufacturer specifications and local building code requirements"), the type and length of nails, and any other high-wind specific elements, like enhanced starter strips or increased ice and water shield coverage.
If the initial estimate or contract you receive lacks these specifics, don't hesitate to ask for clarification and request that they be added. This is your home and your significant investment. A reliable roofing company will understand your desire for detail and transparency. When you're comparing roofing bids, look for this level of detail. A lower bid might cut corners on these essential protective measures, ultimately costing you more in the long run if your roof fails during a storm. Our guide on What a Roofing Estimate Should Include can provide a checklist for what to look for.
If you're struggling to find contractors who offer this level of detail or want to ensure you're connecting with vetted professionals, services like Modernize can be incredibly helpful. They can help you connect with local roofing contractors who are experienced, licensed, and understand the importance of high-wind nailing and other critical building code requirements specific to your area. Having clear, concise terms in your contract gives you legal recourse if the work isn't performed as agreed, and more importantly, it gives you peace of mind knowing your roof is truly built to withstand the elements. This proactive approach to your roofing contract is a smart step in protecting your home for years to come.
Disclaimer
Please note that this article is intended for informational purposes only and does not constitute professional advice. Roofing requirements, building codes, and manufacturer specifications can vary significantly by location and product. Always consult with a qualified, licensed, and insured roofing contractor and your local building authority to ensure compliance with all applicable codes and to determine the best solution for your specific property.