How to Temporarily Cover Wind Damage
There’s nothing quite like the stomach-dropping feeling of discovering your roof has been damaged by a recent storm, especially when strong winds have torn off shingles or created gaping holes. The immediate worry isn't just about the aesthetics; it's about preventing further, more catastrophic damage from rain and moisture infiltrating your home. This guide is here to walk you through the essential steps and practical advice for temporarily covering wind damage, giving you peace of mind until professional repairs can be made.
Understanding Wind Damage on Asphalt Roofs
Wind damage can manifest in various sneaky ways on an asphalt roof, and it's not always obvious from the ground. Many homeowners find themselves staring up at their roof after a particularly nasty gust, wondering what exactly they're looking for. The truth is, wind doesn't always rip off entire sections; sometimes, it's a more subtle assault that compromises the integrity of your roofing system.
Common Types of Wind Damage
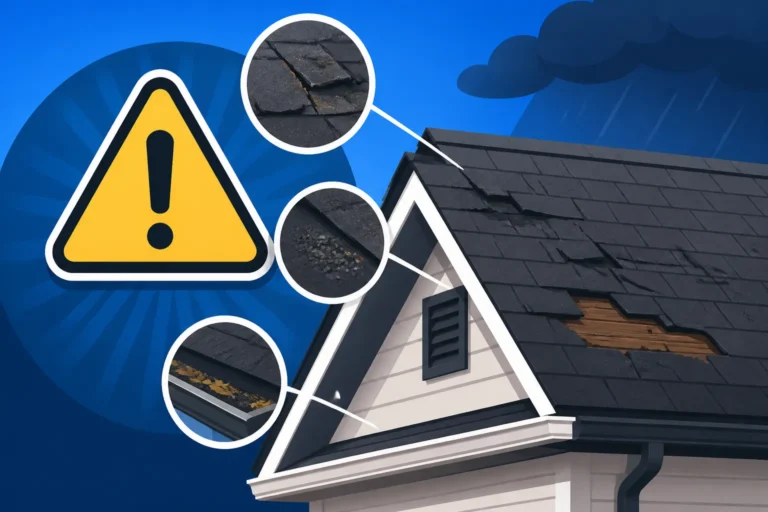
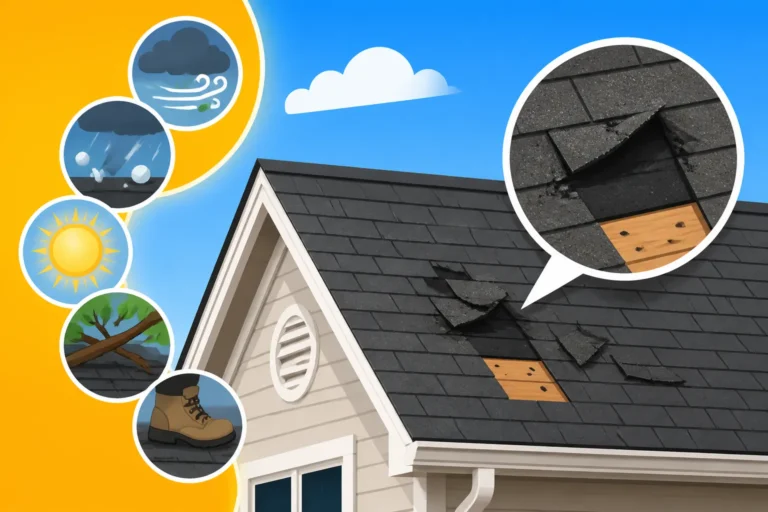
When those strong winds sweep through, they can cause a surprising amount of havoc. It's not just about missing shingles, though that's certainly a common sight. High winds create uplift pressure, trying to peel the shingles right off your roof deck. This can lead to a few different types of damage that all demand your attention.
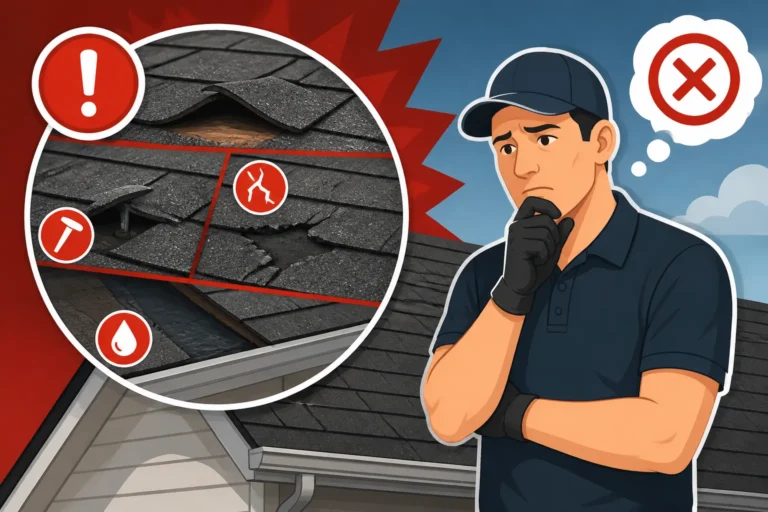
First, you might notice lifted or creased shingles. These aren't completely gone, but the wind has bent them upwards, breaking the sealant strip that holds them firmly to the shingles below. Imagine a strong gust catching the edge of a shingle, flapping it violently. Over time, or with enough force, this can crease the shingle, leaving a permanent bend or a crack that exposes the underlayment. Even if they lie flat again after the wind dies down, that crucial seal is often broken, making them vulnerable to future winds and, more importantly, allowing water to seep underneath. You might see this near the eaves, ridges, or around protrusions like chimneys and vents.
Then there's the unmistakable sign of missing shingles. This is perhaps the most alarming and visually obvious form of wind damage. A shingle or a whole section of shingles might be completely gone, scattered in your yard, or worse, someone else's yard. When shingles are ripped away, they leave the roofing felt or, even worse, the raw roof decking exposed to the elements. This is a direct pathway for water to enter your home, leading to leaks, attic damage, and potential mold growth. The age of your roof often plays a role here; older shingles with diminished adhesion are more susceptible to being blown off. If your roof is nearing its expected lifespan, which is typically around 20-25 years for asphalt shingles, even moderate winds can cause significant shingle loss. You can learn more about how to assess the lifespan of your roof by reading our guide on How Long Does an Asphalt Roof Last.
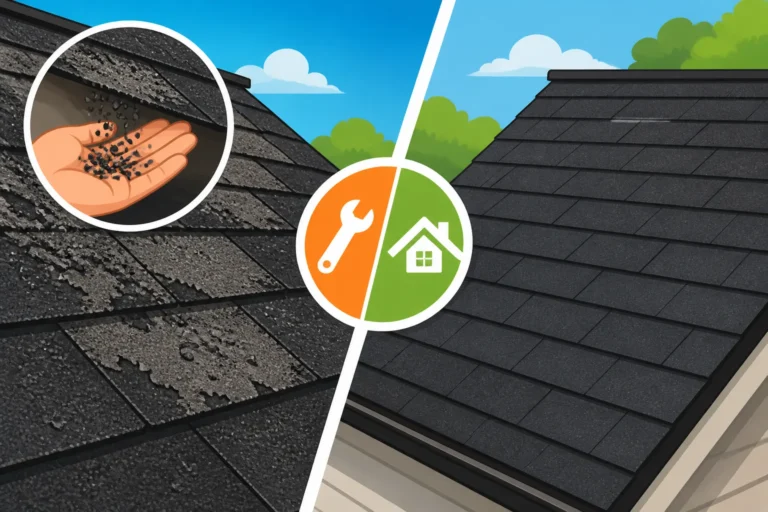
Finally, a less obvious but equally damaging sign is granule loss. Asphalt shingles are coated with ceramic granules that protect the asphalt layer from UV rays, making them durable and long-lasting. High winds, especially those carrying debris, can scour these granules off the shingles. While some granule loss is normal over time, excessive amounts accumulating in your gutters or downspouts after a storm are a red flag. This exposes the asphalt to direct sunlight, accelerating its degradation and shortening your roof's life. Even if your shingles appear intact, significant granule loss means they've lost a crucial layer of protection. These are all definitive Signs of Roof Wind Damage that you should look out for.
Why Immediate Temporary Cover is Crucial
Finding wind damage on your roof can feel overwhelming, but procrastinating on a temporary fix is a gamble you really don't want to take. The urgency here isn't just about aesthetics; it's about safeguarding your entire home from what could quickly become a far more expensive nightmare.
Leaving wind-damaged areas exposed, even for a day or two, invites a host of severe problems. The most immediate and apparent risk is water intrusion. A missing shingle, a lifted edge, or a creased crack acts like an open invitation for rain, snow, or even heavy dew to seep directly into your roof's underlayment, and eventually, into your attic and living spaces. We've all seen those sudden, unexpected downpours. Even if the forecast looks clear, weather can change in a flash, and without protection, your attic insulation can become soaked, ceilings can stain or collapse, and electrical wiring can be compromised. Just imagine the damage if a significant leak happens while you're away at work or on vacation.
Beyond immediate leaks, exposed decking or underlayment can lead to further damage to your roofing system. That small section of missing shingles might expand if more wind rolls through, tearing away adjacent shingles that were already weakened. The exposed wood decking can absorb moisture, leading to rot and weakening of the structural components of your roof. This kind of deterioration significantly complicates and increases the cost of the eventual permanent repair. What might have been a simple shingle replacement could turn into a full Roof Decking Replacement Cost if left untreated.
Moreover, allowing moisture into your home creates a breeding ground for mold and mildew. These aren't just unsightly; they can pose serious health risks to your family, trigger allergies, and create unpleasant odors throughout your house. Mold remediation is a costly and disruptive process, often far more expensive than addressing the initial roof damage.
Finally, an exposed roof is a liability. It might not only lead to structural problems but can also cause issues with your homeowners' insurance claim. Most policies require you to take reasonable steps to prevent further damage after an incident. Documenting the damage and then promptly making temporary repairs shows your insurer that you're being proactive, which can be crucial when it comes time to file your claim. Ignoring it can sometimes lead to complications or even a partial denial of your claim for "avoidable" secondary damage. You don't want to get caught in that situation, so a quick, temporary cover is truly your best line of defense.
Essential Supplies for Temporary Roof Repair
When wind has done a number on your roof, the first instinct might be panic. But a calm, prepared approach with the right tools and materials can make all the difference. You're not aiming for a perfect, permanent fix here, but rather a robust temporary shield to protect your home.
Gathering Your Materials
Before you even think about climbing a ladder, take a moment to collect everything you'll need. This saves you multiple trips up and down and ensures you have the right components for a secure temporary repair.
The absolute hero of temporary roof repair is a sturdy tarp. Don't skimp here; look for a heavy-duty, reinforced tarp, often labeled as "weather-resistant" or "waterproof." A cheap, thin tarp will likely tear in the next strong gust, defeating the whole purpose. The size of your tarp is critical too – it needs to extend well beyond the damaged area on all sides to create an effective overhang and seal. For smaller, more contained damage, you might consider plywood sheets. Half-inch or three-quarter-inch exterior-grade plywood offers a solid, rigid barrier that's excellent for covering holes or larger sections where shingles are completely missing and the roof deck is exposed.
Next, you'll need fastening materials. For tarps, you'll want some sturdy lengths of lumber, typically 2x4s, that are long enough to extend beyond the tarp edges. These will be used to sandwich and secure the tarp. You'll also need roofing nails or screws (preferably with washers for better grip) that are long enough to penetrate the 2x4s and into the roof decking, but not so long they poke through your attic ceiling. For securing plywood, galvanized roofing nails or exterior-grade screws are essential.
Don't forget sealants. A tube of roofing cement or caulk can be invaluable for sealing minor lifts or cracks, or for reinforcing the edges of your temporary patch. Make sure it's rated for exterior, all-weather use. Finally, and this is perhaps the most important "material," is safety gear.
Prioritizing Safety First
I cannot stress this enough: your safety is paramount. A damaged roof, especially one compromised by wind, is an inherently dangerous place. Add in the potential for continued wind, rain, or an unfamiliar work environment, and the risks multiply. Never compromise on safety.
First and foremost, assess the weather conditions. Do not, under any circumstances, attempt to work on your roof during ongoing wind, rain, snow, or icy conditions. A wet or windy roof is incredibly slippery and dangerous. Wait until the weather clears and conditions are calm and dry. If the damage is extensive or the weather doesn't permit safe work, your safest bet is to call an emergency service provider for temporary tarping, or a local reputable contractor. Modernize can connect you with pre-vetted local roofers who can handle emergency tarping quickly and safely.
When you do venture onto the roof, ensure you have a stable ladder. Position it on solid, level ground and extend it at least three feet above the eave line. Have someone steady the ladder for you, if possible. Wear non-slip shoes with good traction – work boots are far better than sneakers. Gloves will protect your hands from splinters, sharp edges, and sealant. For any work at height, especially on a damaged or steep roof, a safety harness is highly recommended. These might seem like overkill for a temporary fix, but a fall from a roof can result in life-altering injuries or worse.
Lastly, don't go it alone if you're uncomfortable or unsure. If you have a two-story home, a particularly steep roof, or extensive damage that makes you feel uneasy, it's always better to call in a professional. They have the equipment, training, and experience to safely address the situation. Your local fire department might even offer temporary tarping services for immediate emergencies in some areas. Remember, a temporary fix is only effective if you're around to enjoy its protection, not recover from an injury.
Step-by-Step Guide to Temporarily Covering Wind Damage
Once you've safely gathered your supplies and prioritized your safety, it's time to tackle the temporary repair. This isn't rocket science, but it does require careful execution to ensure it holds up against the elements.
Assessing the Damage Safely
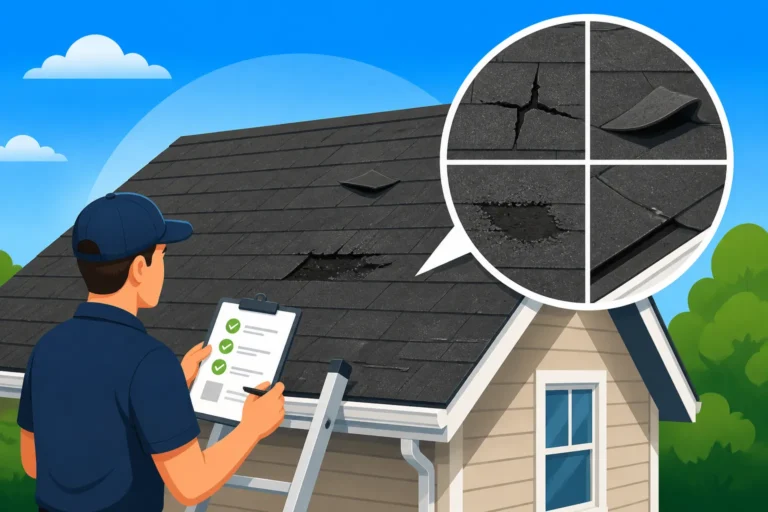
Before you can cover the damage, you need to understand its extent. Remember, safety first! Do this from the ground with binoculars if possible, or from a securely braced ladder. Avoid walking directly on damaged areas, as the decking underneath might be compromised.
Start by looking for obvious signs: missing shingles, exposed underlayment, or even visible holes in the roof deck. Pay close attention to areas where different roof planes meet, around chimneys, skylights, and vent pipes, as these are common areas for wind to exploit weaknesses. Look for any areas where shingles are lifted, creased, or torn, even if they haven't completely blown off. You're trying to identify the perimeter of the damage to determine how large your temporary patch needs to be.
If you can safely access your attic, now is a good time to shine a flashlight around. Look for any signs of water stains, drips, or daylight peeking through. This will give you a clearer picture of where the water has already penetrated and help you pinpoint the exact source of the leak from the inside. Knowing the full scope helps you plan your tarp placement effectively. For instance, a small area of missing shingles might only need a targeted patch, while extensive damage across a larger section will definitely call for a bigger tarp. Understanding the specific nature of the damage also helps your roofer later when they come out to give you an estimate for the permanent repair.
Securing a Tarp Over the Affected Area
This is the most common and effective temporary fix for larger areas of wind damage. The goal is to create a waterproof barrier that sheds water away from your home.
- Clean the Area: Carefully remove any loose debris, broken shingles, or branches from the damaged section. Be gentle to avoid causing further damage. You want a relatively clean surface for the tarp to lie flat.
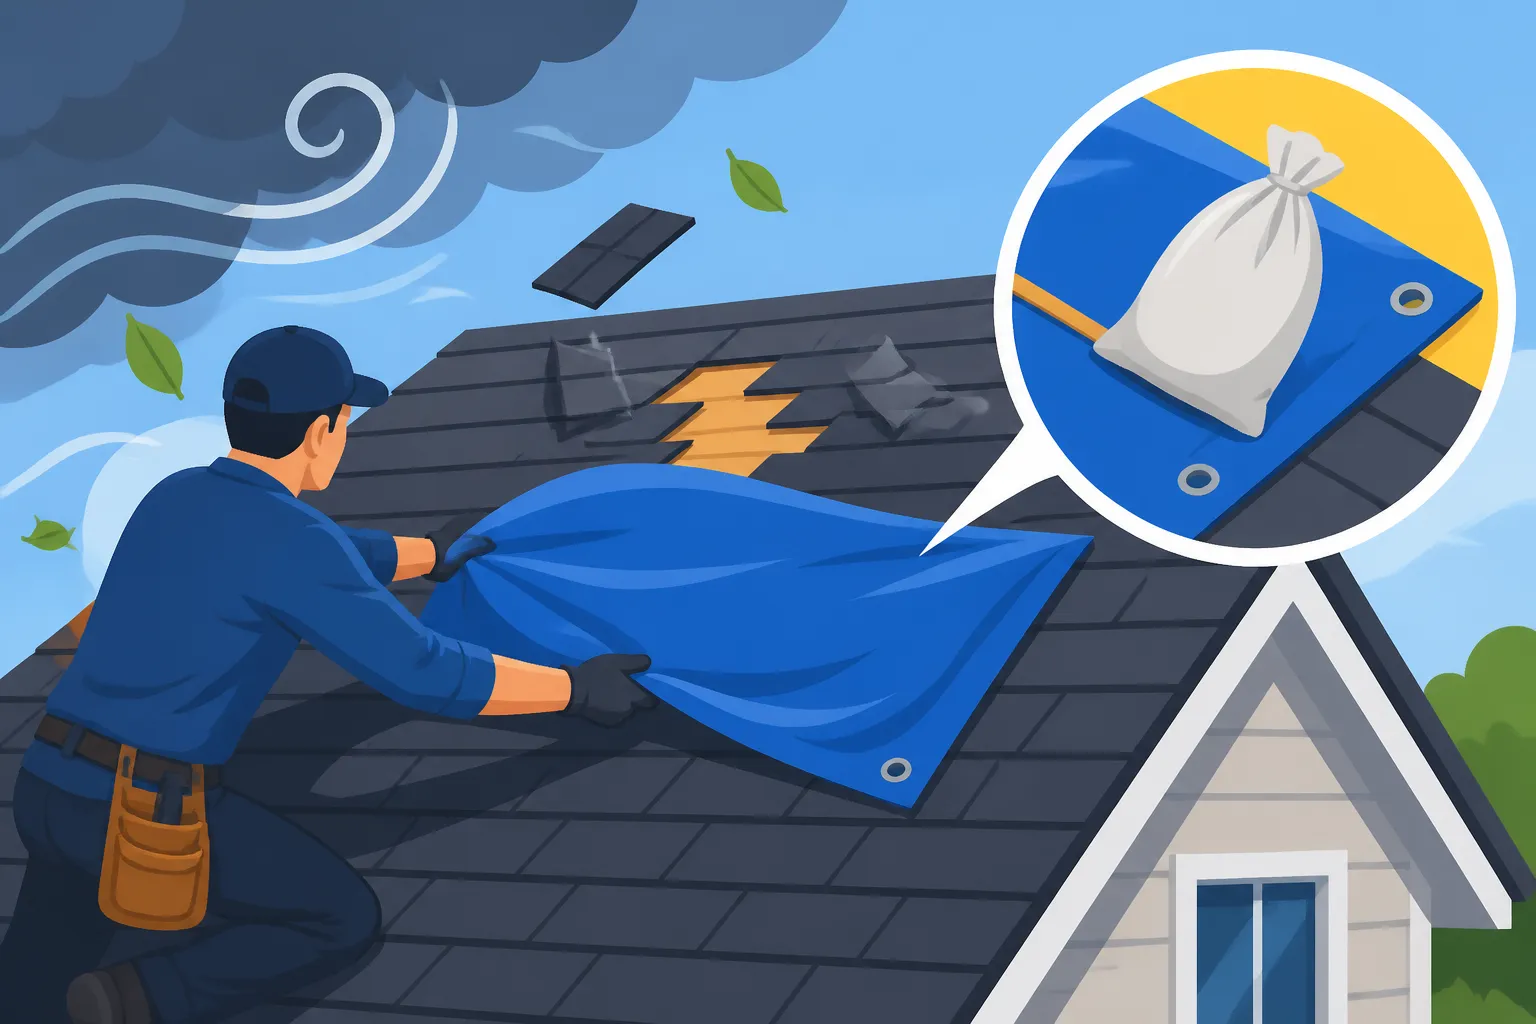
- Position the Tarp: Unfold your heavy-duty tarp and center it over the damaged area. Crucially, the tarp needs to extend well beyond the damaged section on all sides. Aim for at least 3 to 4 feet past the damage at the top (ridge side) and on the sides, and ideally extending down past the eaves at the bottom. This ensures water runs off the tarp and away from your house, rather than seeping underneath. The top edge of the tarp should be tucked under any intact shingles above the damage if possible, creating an uphill overlap.
- Create Batten Boards (Sandwich Technique): This is the most secure way to hold a tarp. Lay a 2×4 piece of lumber (or several pieces joined together for longer runs) horizontally along the top edge of the tarp. Roll the top edge of the tarp around the 2×4, effectively "sandwiching" the tarp material between two pieces of wood. This creates a strong, rolled edge that prevents the tarp from tearing around individual fasteners.
- Fasten the Top Batten: Secure this batten board (with the tarp rolled around it) to the roof decking using roofing screws or nails. Drive fasteners through the 2×4 and the sandwiched tarp into the solid roof deck. Space your fasteners every 12-18 inches. Never nail directly through the main body of the tarp, as this creates holes that will leak.
- Secure the Sides and Bottom: Now, smooth the tarp down over the damaged area, ensuring it’s taut but not overly stretched. Along the side edges, you can also use batten boards, sandwiching the tarp as you did at the top, and then securing these 2x4s to the roof. For the bottom edge, if it extends past the eave, you can let it hang freely or secure it with another batten board to the fascia or securely to the roof just above the gutter, ensuring it allows water to drain into the gutters. Alternatively, for less severe conditions, you can use additional 2x4s laid on top of the tarp along the edges, extending them down the slope, and then nailing these "weights" through the 2x4s into the roof deck. This method still avoids directly piercing the tarp with fasteners.
- Check for Security: Once secured, give the tarp a gentle tug to ensure it’s firmly attached. It should not flap or billow in a light breeze. The more securely it's fastened, the better it will withstand subsequent winds and rain. This method, while labor-intensive, provides the best temporary protection.
Creating a Plywood Patch for Smaller Areas
For more localized damage, such as a single large hole, a puncture from falling debris, or a small section of decking completely exposed, a plywood patch can be a highly effective temporary solution.
- Clear and Trim the Damage: Just like with tarping, remove all loose debris and damaged shingle fragments from around the area. If there's a ragged hole in the roof deck, you might need to use a utility knife or saw to trim it into a cleaner, more manageable square or rectangle. This provides a solid edge for your patch.
- Measure and Cut Plywood: Measure the dimensions of the damaged area precisely. You'll want your plywood patch to overlap the intact roofing material by at least 6-12 inches on all sides. This overlap is crucial for creating a proper seal and providing sufficient fastening points. Cut your exterior-grade plywood to these dimensions.
- Apply Roofing Cement: Before placing the plywood, apply a generous bead of roofing cement or an appropriate waterproof sealant around the perimeter of the underside of your plywood patch. You can also apply a bead directly to the clean, intact shingles surrounding the hole. This creates an initial watertight seal.
- Position and Fasten the Plywood: Carefully lower the plywood patch over the damaged area, ensuring it's centered and the sealant makes good contact with the surrounding roof surface. Use galvanized roofing nails or exterior-grade screws to secure the plywood. Drive the fasteners through the plywood and into the existing roof deck, spacing them about every 6-8 inches around the perimeter. Make sure to catch solid wood beneath the shingles.
- Seal Edges: Once the plywood is securely fastened, apply another generous bead of roofing cement or caulk along all four edges of the plywood patch where it meets the existing shingles. Use a trowel or your finger (with a glove!) to smooth it down and ensure a continuous, watertight seal. This is your final defense against water creeping under the patch. This method is sturdier than just a tarp for direct punctures and can last longer if done correctly, but it is typically used for smaller, more defined areas of damage.
Temporary Sealants and Adhesives
Sometimes, the wind damage isn't a gaping hole but rather a series of lifted shingle tabs or minor cracks. In these cases, a full tarp or plywood patch might be overkill, and temporary sealants can offer a quick, albeit less robust, solution.
Roofing cement, often called "plastic cement" or "flashing cement," is your go-to product here. It's a thick, asphalt-based compound that comes in a caulk tube or a small tub. For lifted shingle tabs, carefully lift the shingle enough to apply a small amount of roofing cement underneath the tab, especially near the old, broken sealant strip. Press the shingle down firmly, ensuring good contact with the cement. The cement acts as a temporary adhesive and seal. Don't use too much, as excessive cement can create a bulge or prevent the shingle from breathing.
For small cracks in shingles, you can carefully apply a thin bead of roofing cement directly into the crack and smooth it over. This fills the void and provides a temporary waterproof barrier. Similarly, if you notice minor damage to flashing around a chimney or vent that has caused it to lift slightly, a bead of roofing cement can temporarily seal it back down.
It's absolutely crucial to remember that these sealants are temporary solutions. They are not designed to be a permanent fix, nor can they withstand the long-term forces of weather like a proper shingle or flashing repair. They are meant to buy you time – a few days or weeks – until a professional roofer can perform a durable repair or even a full replacement. Think of them as a band-aid, not a cure. They're best used for isolated, minor issues and as part of a larger temporary tarping strategy, especially when weather conditions make a more extensive temporary repair unsafe or impossible in the immediate aftermath of a storm.
| Temporary Covering Method | Best Use Case | Pros | Cons | Longevity (Temporary) |
|---|---|---|---|---|
| Tarp & Batten Boards | Large areas of missing shingles, exposed deck | Very waterproof, covers broad damage | Requires careful installation, visible, less aesthetically pleasing | Weeks to a few months |
| Plywood Patch | Localized holes, punctures, small exposed deck | Sturdy, rigid, good for direct punctures | Only for small, defined areas; cutting required | Weeks to months |
| Roofing Cement/Caulk | Lifted shingle tabs, minor cracks, flashing | Quick, easy for small fixes, less invasive | Not suitable for large damage, minimal structural repair | Days to weeks |
What to Do After the Temporary Fix
Congratulations, you've successfully bought yourself some precious time! But the temporary fix is just that – temporary. Now it's time to shift your focus to getting a permanent, professional repair and navigating the next steps.
Documenting the Damage for Insurance
The moment you discover wind damage, and especially after you've applied your temporary cover, documentation becomes your best friend. This step is absolutely critical for a smooth insurance claim process.
Grab your phone or camera and take a comprehensive set of photos and videos. Get wide shots of your house, showing the general condition, and then zoom in on every single area of damage. Take pictures from multiple angles. Document lifted shingles, missing shingles, granule loss, any visible holes, and even any interior damage like water stains on your ceiling or walls. Be sure to capture the date and time, if your camera allows.
Why is this so important? Because your insurance company needs undeniable proof of the damage before permanent repairs begin. This documentation serves as crucial evidence of the extent of the wind damage, which directly influences your claim. Without it, you might find yourself in a dispute with your insurer about what was damaged by the wind versus what might have been pre-existing wear and tear. Our guide on How to Document Roof Damage for Insurance provides even more detailed tips. Once you have your evidence, contact your insurance provider immediately to open a claim. Most policies have a time limit for reporting damage, so don't delay. Understanding if Is Wind Damage Covered by Insurance is a critical first step.
Contacting a Professional Roofing Contractor
With your home temporarily protected and your insurance claim initiated, the next immediate step is to find a reputable, qualified roofing contractor to assess the damage and provide an estimate for permanent repairs. This isn't a DIY job for long-term peace of mind.
Finding the right contractor can feel like a daunting task, especially when you're under stress from roof damage. Look for local roofers with strong reputations, good reviews, and proper licensing and insurance. Services like Modernize can be incredibly helpful here, as they connect homeowners with pre-vetted local professionals, streamlining the search and giving you confidence in your choice. When speaking with potential contractors, ask for proof of liability insurance and worker's compensation, and inquire about their experience with wind damage repairs specific to asphalt shingle roofs. You can find more advice in our article on How to Choose a Roofing Contractor.
It's always a good idea to get multiple estimates – at least three – to compare prices, scope of work, and timelines. A thorough contractor will conduct a detailed inspection, not just of the obvious damage but of the entire roof system, including the attic, to identify any hidden issues. They should provide you with a written estimate that clearly outlines all costs, materials, and the scope of work. They can also often assist you with the insurance claim process, making sure all necessary documentation is submitted correctly. A reputable contractor will also be able to explain the difference between a repair and a full roof replacement, helping you make the most informed decision for your home.
Preparing for Permanent Repairs
Once you've chosen a contractor and your insurance claim is progressing, it's time to prepare for the actual repair or replacement process. This involves a bit of planning to ensure everything goes smoothly.
First, thoroughly review the contractor's estimate. Make sure it aligns with the damage you've observed and that you understand every line item. Don't hesitate to ask questions about anything unclear. Our guide on How to Read and Compare Roofing Estimates can walk you through what to look for. The estimate should detail everything from the cost of materials (like new shingles, underlayment, flashing) to labor costs, permit fees, and disposal of old materials. Confirm that your contractor will handle necessary permits; typically, it's the contractor who pulls the permits, not the homeowner.
Next, you'll need to coordinate with your contractor and insurance company on the repair schedule. If a full roof replacement is needed, understand that the process involves several steps, from tear-off to installation. Read our article on How a Roof Replacement Works: The Full Process to get a full overview. Your contractor should also explain how they will protect your landscaping and property during the work. You might need to move vehicles, patio furniture, and other valuables away from the house to create a safe work zone for the crew and prevent damage from falling debris. Make sure to discuss payment schedules and warranty information – both for the workmanship and the manufacturer's warranty on the new shingles. A comprehensive understanding of these details will help alleviate stress and ensure a positive outcome for your roofing project.
Disclaimer
Please remember, the information provided in this guide is intended for educational and informational purposes only and does not constitute professional advice. Working on a roof can be dangerous. Always prioritize your safety and consult with a qualified, licensed, and insured roofing professional for proper assessment, repair, and installation. Do not attempt any repairs that you are not comfortable or capable of performing safely.