Roof Replacement After Hail: Timeline
Dealing with hail damage to your roof can feel like a punch to the gut. One minute your home is secure, the next you're staring at dimples on your shingles, wondering how bad it really is and what on earth you're supposed to do next. The uncertainty, the insurance claims, finding a reliable contractor – it’s a lot. This guide is here to walk you through the entire roof replacement timeline after hail, from those first anxious moments to enjoying your brand-new, storm-ready roof.
Immediately After a Hailstorm: First Steps
When a hailstorm passes through, the immediate aftermath can be a mix of relief that everyone is safe and dread about potential property damage. Your roof, being the first line of defense, often takes the brunt of it. It’s crucial to act quickly but also safely, to protect your home and your eventual insurance claim.
Safety First and Initial Damage Assessment
First and foremost, prioritize safety. After a significant hailstorm, especially one that brought high winds or other severe weather, there might be fallen trees, downed power lines, or structural damage that isn't immediately obvious. Steer clear of any obvious hazards. Once the immediate danger has passed, you can begin a preliminary, ground-level assessment of your roof. Do not climb onto a hail-damaged roof yourself unless you are a trained professional with proper safety gear. Hail can make surfaces incredibly slick, and damaged shingles can be brittle and unsafe to walk on.
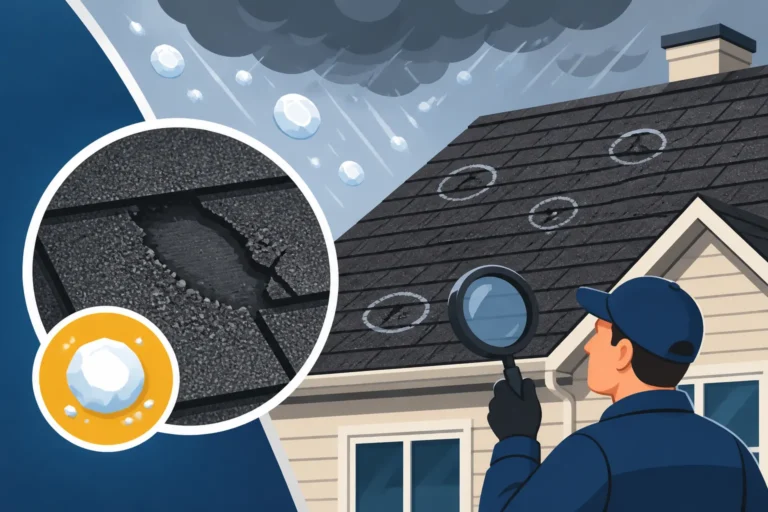
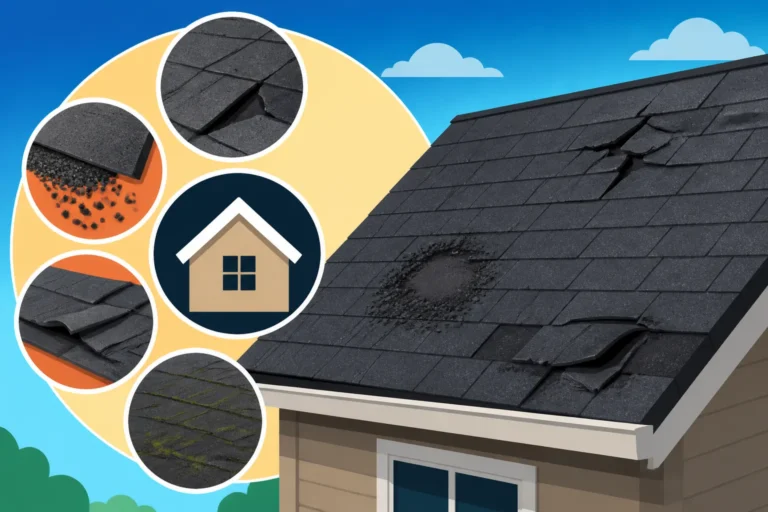
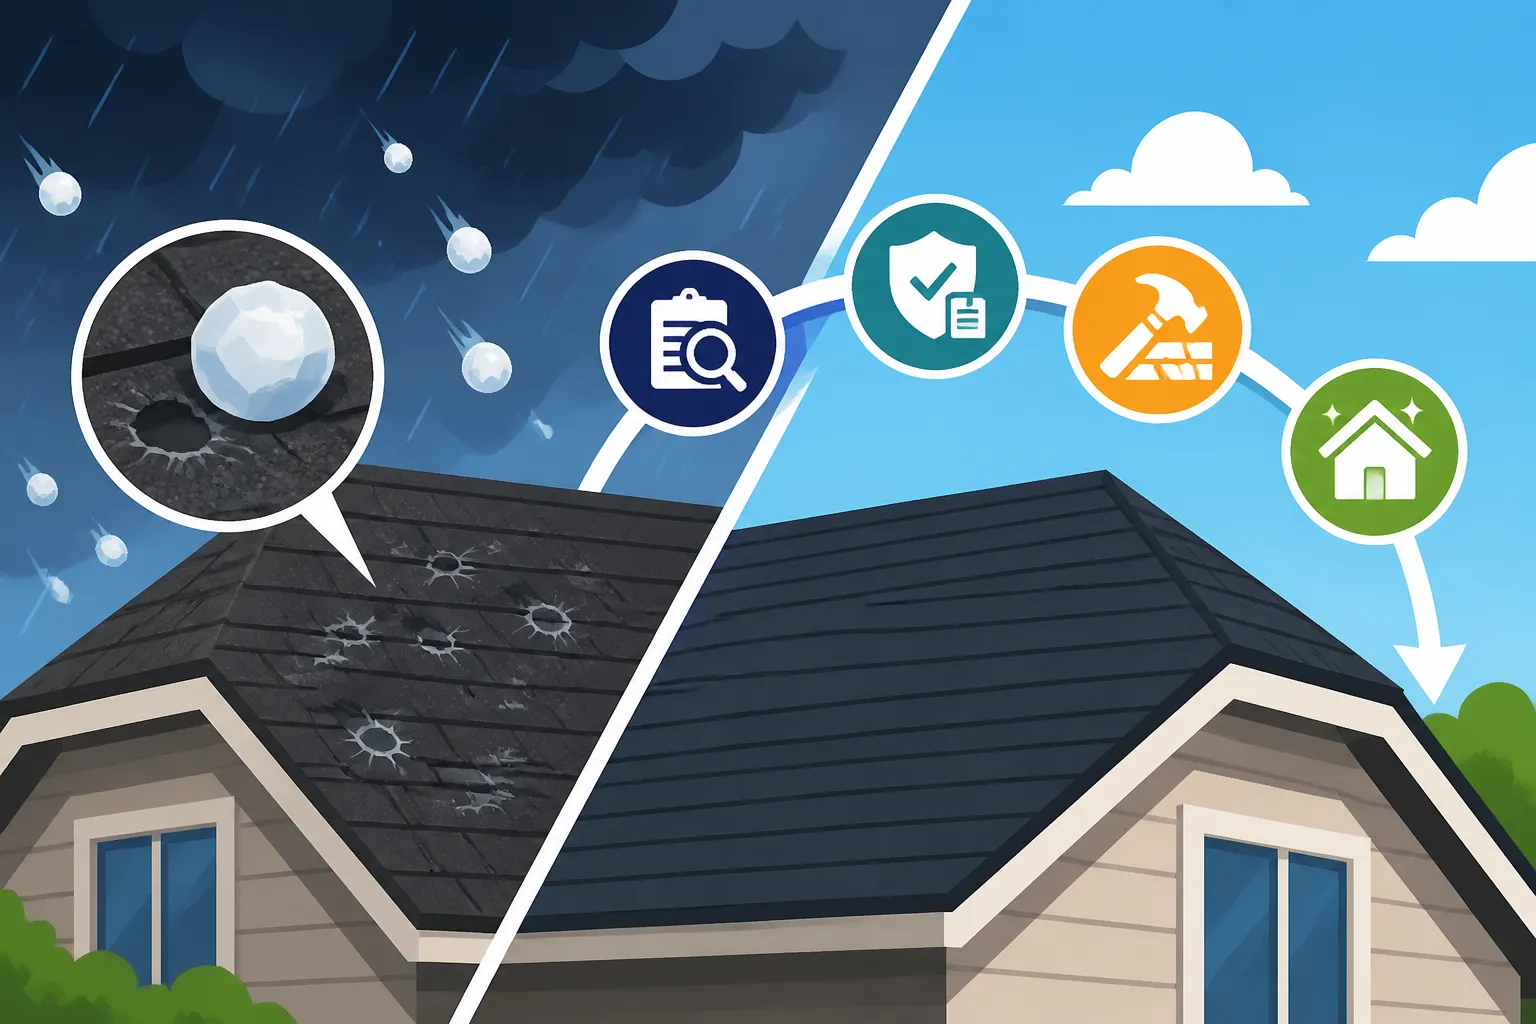
From the ground, walk around your home and look for visible signs of damage. Are there missing shingles? Are there dents on your gutters, downspouts, or even your siding? Check your outdoor light fixtures, air conditioning units, and even your car, as these can show clear indications of hail impact, which often correlates with roof damage. Even seemingly small dents on metal components can be a strong indicator that your roof has also suffered significant, albeit less obvious, damage. Remember, hail damage can be subtle, sometimes appearing as small, circular bruises on asphalt shingles, often losing their protective granules. These seemingly minor impacts can lead to long-term leaks and premature roof failure, so don't dismiss them.
Documenting the Damage for Insurance
This step is absolutely critical for a smooth insurance claim process. As soon as it's safe, start documenting everything. Grab your smartphone or a good camera and take clear, well-lit photos and videos of all visible damage. Don't just focus on the roof; capture damage to siding, windows, decks, outdoor furniture, and anything else impacted. The more evidence you have, the better. Take wide shots to show the overall condition and close-up shots to detail specific hail marks. For example, if you see dents on a metal vent cap, snap a photo of the cap itself, and then step back to show its location on the roof.
It’s also wise to note the date and approximate time of the hailstorm. If possible, gather any local news reports or weather advisories that confirm the severity of the storm in your area. This timestamped evidence can be invaluable when you file your claim. Think of this as building your case; you want to present your insurance company with undeniable proof of loss. You can learn more about to make sure you capture all the necessary details.
Contacting Your Insurance Company
Once you've safely assessed and documented the damage, it's time to contact your homeowner's insurance provider. Do this as soon as possible. Most policies have a clause requiring you to report damage promptly. Delays can sometimes complicate your claim, though generally, you have a reasonable amount of time. When you call, be prepared to provide them with the date of the storm and a general description of the damage you've observed. They will open a claim and explain the next steps, which almost always involve an insurance adjuster coming out to inspect the damage.
Before the adjuster arrives, try to locate your insurance policy and review your coverage, particularly regarding deductibles and whether your policy covers actual cash value (ACV) or replacement cost value (RCV) for your roof. This knowledge will empower you during discussions with your adjuster and help you understand your potential payout. Many homeowners feel overwhelmed by this step, but being proactive helps immensely.
Navigating the Insurance Claim Process
The insurance claim process can feel like a labyrinth, especially when you're already stressed about a damaged roof. Understanding each phase can help alleviate some of that anxiety and ensure you get a fair settlement.
The Adjuster's Visit and Your Role
After you file your claim, your insurance company will dispatch an adjuster to inspect your property. This person's job is to evaluate the damage and determine if it meets the criteria for coverage under your policy. It's highly recommended that you be present during this inspection. This isn't just a formality; it's your opportunity to point out specific areas of concern that you documented earlier. Walk with the adjuster, show them your photos, and make sure they see all the areas you identified. Don't be afraid to ask questions about their findings.
Adjusters are busy people, and sometimes things can be missed. Having a trusted roofing contractor present during this visit can also be incredibly beneficial. An experienced roofer, especially one specializing in storm damage, can speak the same language as the adjuster, highlight subtle damage that a homeowner might miss, and ensure nothing gets overlooked. They can also advocate on your behalf, explaining how certain types of damage compromise the roof's integrity. Sometimes, a general adjuster might not be as familiar with the nuances of hail damage as a roofing expert, which is why a second pair of expert eyes is so valuable.
Understanding Your Insurance Payout
Once the adjuster completes their inspection, they will submit their report to the insurance company, which will then determine your payout. This can come in two forms: Actual Cash Value (ACV) or Replacement Cost Value (RCV). If your policy pays ACV, they'll factor in depreciation based on your roof's age and condition, so you'll receive less than the cost of a brand-new roof. With RCV, they'll typically issue an initial payment for the ACV and then a second payment, the depreciation holdback, once the work is completed and proof of expenses is submitted. This final payment brings you closer to the full cost of a new roof.
It's crucial to understand these terms. If you have an RCV policy, you'll need to submit invoices from your contractor to get that second check. Don't be surprised if the initial check doesn't cover the full replacement cost; that's often how RCV policies are structured. Make sure you read through your insurance company's estimate carefully. Compare it against estimates you receive from local roofing contractors. If there are discrepancies, you'll need to address them. Knowing can help you understand the financial implications.
Dealing with Denied or Lowball Claims
It's frustrating, but sometimes insurance claims for hail damage get denied, or the initial offer is far too low to cover a proper replacement. If this happens, don't give up immediately. First, ask for a detailed explanation in writing as to why the claim was denied or why the offer is so low. Understanding their reasoning is the first step to appealing it. Often, a second inspection by an experienced, independent roofing contractor can uncover damage the original adjuster missed.
With your contractor's assessment in hand, you can then present a rebuttal to your insurance company. This might involve supplementary reports, additional photos, or even a re-inspection with both your contractor and the insurance adjuster present. Sometimes, the issue is simply a disagreement on the scope of work or the cost of materials. In some cases, homeowners might consider hiring a public adjuster, who works for you (not the insurance company) to negotiate the claim. This step might add time to your , but it can be worth it to get the proper coverage. Remember, it's your home, and you deserve a fair settlement to restore it to its pre-storm condition.
Finding the Right Roofing Contractor and Scheduling
Once you have a handle on your insurance claim, the next big step is finding a reliable contractor. This is where many homeowners feel overwhelmed, especially after a major storm when everyone seems to be a "roofing expert."
Choosing a Reputable Hail Damage Specialist
After a hailstorm, you'll likely see a lot of "storm chasers" — out-of-state contractors who follow severe weather events. While not all are bad, it's wise to be cautious. Your best bet is to choose a local, established roofing company with a proven track record in your community. They'll be familiar with local building codes, have relationships with local suppliers, and will be around to honor their workmanship warranty long after the storm chasers have left.
Look for contractors who specialize in storm damage and are experienced with insurance claims. They should be licensed and insured (always verify this!), have positive reviews, and be able to provide local references. Ask them how long they've been in business and if they have manufacturer certifications, like a GAF Master Elite or Owens Corning Platinum Preferred contractor status. These certifications often mean they can offer enhanced warranties. You can use platforms like Modernize to connect with pre-vetted local roofing professionals who understand the nuances of hail damage repair. A reliable contractor will also be transparent about their process and able to clearly answer all your questions. Choosing a contractor is a big decision, so take your time and do your homework. This article, , can offer further guidance.
Getting and Comparing Estimates
Don't settle for the first estimate you receive. It’s highly recommended to get at least three detailed estimates from different reputable contractors. This allows you to compare not just the price, but also the scope of work, materials proposed, and warranty offerings. A good estimate should break down all costs, including labor, materials (shingles, underlayment, flashing, vents, etc.), permit fees, and disposal of old materials.
When comparing, ensure each estimate is for comparable materials and services. Some contractors might try to upsell you on premium options, which might be great, but make sure you understand the differences and costs. Pay close attention to the details. Does it include new drip edge, flashing, and ridge vents? Is the cleanup process clearly outlined? An estimate that is significantly lower than others might indicate corners are being cut, while an unusually high one might be overpriced. Use your insurance adjuster's report as a baseline, but understand that a contractor's estimate might be more thorough and accurate. Don't be afraid to ask questions about anything you don't understand. Read more about to ensure you're getting a fair deal.
Permitting and Scheduling the Work
Once you've chosen your contractor and signed a contract, the next step is often securing the necessary permits. In most municipalities, a roof replacement requires a building permit to ensure the work adheres to local building codes and safety standards. A reputable contractor will handle this process for you, including pulling the permit and scheduling any required inspections. This is a crucial step that you should never skip, as doing so can lead to fines, difficulties selling your home, or even voiding your insurance or warranty. For example, in many Texas cities like Dallas or Fort Worth, permits are mandatory and inspections are required before, during, and after the roofing work.
After the permit is secured, your contractor will work with you to schedule the actual roof replacement. The timeline for this can vary significantly depending on the contractor's current workload, material availability, and even the weather. Peak roofing season (late spring through fall) can mean longer wait times. Your contractor should provide you with an estimated start date and how long they expect the project to take. Be prepared for some flexibility, as unforeseen weather events can always push dates around. Knowing can help you understand this often-overlooked but vital step.
The Actual Roof Replacement: What to Expect
The day your new roof goes on can be a flurry of activity. Knowing what to expect can help you prepare and minimize disruptions.
Preparation and Tear-Off Day
Before the crew arrives, your contractor should provide instructions on how to prepare your property. This usually involves moving vehicles, outdoor furniture, grills, and anything else away from the house to protect them from falling debris. It's also a good idea to cover anything delicate in your attic or garage with plastic sheeting, as the tear-off process can create dust and vibrations. On the first day, the roofing crew will arrive, often early, and begin setting up. This includes placing tarps around your home to catch debris and protect your landscaping, and positioning dumpsters or trailers for waste removal.
The tear-off is typically the loudest and messiest part of the job. The crew will remove all existing layers of shingles, along with the old underlayment, flashing, and possibly even old drip edge. This process is essential for inspecting the roof deck for any damage (like rot or weak spots from the hail impacts) and ensuring a clean, solid surface for the new roofing system. Expect nails, debris, and dust. Most tear-offs are completed within a day or two, depending on the size and complexity of your roof. For a deeper dive, check out what .
Installation of the New Roof System
Once the old roof is torn off and any necessary repairs to the roof decking are made, the installation of your new roofing system begins. This isn't just about nailing down shingles; it's a multi-layered process designed to protect your home. First, new drip edge is installed along the eaves and rake edges, followed by ice and water shield in vulnerable areas like valleys and around chimneys and vents, especially in colder climates. Then, a synthetic or felt underlayment is laid over the entire roof deck, providing an additional layer of moisture protection.
Next, starter shingles are installed along the eaves, followed by the main field shingles. The crew will work systematically, ensuring proper overlap, nailing patterns, and alignment. New flashing will be installed around chimneys, skylights, and vent pipes, crucial areas for preventing leaks. Finally, hip and ridge caps are installed along the roof's peaks and hips, often utilizing ridge vents for proper attic ventilation. This comprehensive approach, following manufacturer specifications and local codes, is key to a durable, long-lasting roof. Understanding shows just how intricate this process is.
Post-Installation Cleanup and Final Inspection
After the last shingle is nailed and the new roof is complete, the crew will undertake a thorough cleanup. This is more than just picking up large pieces of debris; it involves meticulously sweeping the perimeter with magnetic rollers to pick up stray nails, which can be a hazard to tires and feet. They should also clear gutters, clean up any debris from landscaping, and leave your property as tidy as they found it.
Once the cleanup is done, your contractor should conduct a final walk-through with you. This is your chance to inspect the finished product, ensure everything is to your satisfaction, and ask any remaining questions. Check the aesthetics, confirm all debris is removed, and make sure any repairs to ancillary items like gutters or vents were completed. If your municipality requires a final permit inspection, your contractor will arrange that. After approval, you'll receive your final invoice, warranty documentation, and perhaps information on how to register your manufacturer's warranty. This final step seals the deal, giving you peace of mind that your home is once again well-protected.
Factors Influencing Your Timeline
While the steps are generally the same, the actual time it takes from hail strike to a new roof can fluctuate. Several elements play a significant role in extending or shortening this timeline.
Scope of Damage and Material Availability
Naturally, the extent of the hail damage has a huge impact. A few minor dimples might be addressed with a repair, but widespread granule loss, bruising, or punctures will necessitate a full replacement. The larger and more complex your roof, the longer the replacement will take. Furthermore, after a major hailstorm hits a region, there's often a surge in demand for roofing materials. This can lead to backorders, price increases, and delays in getting the specific shingles or components you want.
Contractors often have to wait for supplies, especially if you've chosen a less common color or type of shingle. This factor is often overlooked but can add weeks or even months to the overall timeline. For instance, a Class 4 impact-resistant shingle, which might be required in certain hail-prone areas like Colorado, could have a different availability than a standard architectural shingle, impacting your waiting period. Recent global supply chain issues have only exacerbated these potential delays. Learn more about and how it can affect your project.
Insurance Company Responsiveness
The speed and efficiency of your insurance company can be one of the biggest variables in the entire process. Some insurers are quick to dispatch adjusters, approve claims, and issue payments. Others can be notoriously slow, with adjusters taking weeks to arrive, and claims processing stretching into months. This can be incredibly frustrating, as you can't move forward with booking a contractor or ordering materials until you have a clear understanding of your coverage and payout.
Communication is key here. Follow up regularly with your insurance adjuster and claims department. Keep detailed records of every phone call, email, and interaction. If you feel your claim is moving too slowly, don't hesitate to escalate it within the company or seek advice from your chosen roofing contractor, who often has experience navigating these situations. Sometimes, a well-placed phone call from a contractor can spur an insurance company into action.
Contractor Availability and Weather
Finding a reputable contractor immediately after a widespread hailstorm can be a challenge. Good contractors get booked up quickly. If your storm hit during peak roofing season (typically spring and fall), you might face longer wait times for a qualified team. It’s always better to get on a reputable contractor's schedule sooner rather than later, even if your insurance claim isn't fully settled, as they can often pencil you in with the understanding that the start date is contingent on claim approval.
Finally, the weather plays a huge role. Roofing is outdoor work, and it can't be done effectively or safely in heavy rain, high winds, or extreme cold. Unpredictable weather, common in many parts of the country prone to hail, can cause delays and push back project completion dates. For example, a sudden cold snap in the Midwest might delay shingle adhesion. Your contractor will factor this into their scheduling, but Mother Nature always has the final say. A typical for a standard residential home is 1-3 days, but weather delays can easily extend that.
| Stage of Roof Replacement | Estimated Timeline | Key Actions for Homeowner | Potential Delays |
|---|---|---|---|
| Initial Assessment & Documentation | Immediate (1-2 days) | Safety check, take photos/videos, note storm details. | Personal injury, lack of proper documentation. |
| Contacting Insurance | Immediate (1 day) | File claim, get claim number. | Waiting on hold, policy review. |
| Adjuster's Inspection | 1-3 weeks post-claim | Be present, point out damage, ask questions. | Adjuster backlog, scheduling conflicts. |
| Insurance Claim Approval/Payout | 2-6 weeks post-inspection | Understand ACV/RCV, review estimate. | Denied claim, lowball offer, slow processing. |
| Contractor Selection & Estimate Comparison | 1-3 weeks | Get multiple bids, verify credentials, check references. | High demand for contractors, difficulty comparing bids. |
| Permit Acquisition | 1-4 weeks | Contractor pulls permit, homeowner provides necessary info. | Local government backlog, incomplete paperwork. |
| Material Ordering & Delivery | 1-8 weeks | Contractor orders materials. | Supply chain issues, specific material availability. |
| Roof Replacement Work | 1-5 days | Prepare property, stay informed during installation. | Inclement weather, unforeseen structural issues. |
| Final Inspection & Cleanup | 1-2 days | Walk-through with contractor, magnetic sweep for nails. | Issues found during inspection, extensive cleanup. |
| Final Insurance Payment (RCV only) | 2-4 weeks post-completion | Submit final invoices to insurance. | Slow processing, further documentation requests. |
Disclaimer
Please note that this content is intended for informational purposes only and does not constitute professional advice. Always consult with a qualified roofing contractor and your insurance provider for specific guidance tailored to your situation. Building codes, insurance policies, and contractor availability can vary significantly by location and specific circumstances.