Roof Leak Around a Chimney: Fixes
There's nothing quite like the heart-sinking dread of discovering a water stain on your ceiling, especially when it points directly toward your chimney. That stubborn stack cutting through your roofline is a notorious culprit for leaks, often leaving homeowners feeling frustrated and unsure where to even begin. This comprehensive guide will walk you through the common reasons why your chimney might be leaking, how to accurately diagnose the problem, and the most effective fixes to finally seal things up and protect your home.
Understanding Why Chimneys Leak
Chimneys, while robust structures, have several vulnerable points where they interact with the roof system. Over time, these areas can degrade, leading to water infiltration. It's not always the obvious crack you might be looking for; sometimes the issues are subtle and require a bit of detective work.
Flashing Failure
The flashing around your chimney is arguably the most critical component in preventing leaks. It's essentially a system of metal pieces, often aluminum or copper, that creates a watertight seal where the chimney meets the roof deck. But it's also subjected to constant stress from weather, temperature fluctuations, and house movement.
The Intricacies of Step and Counter Flashing
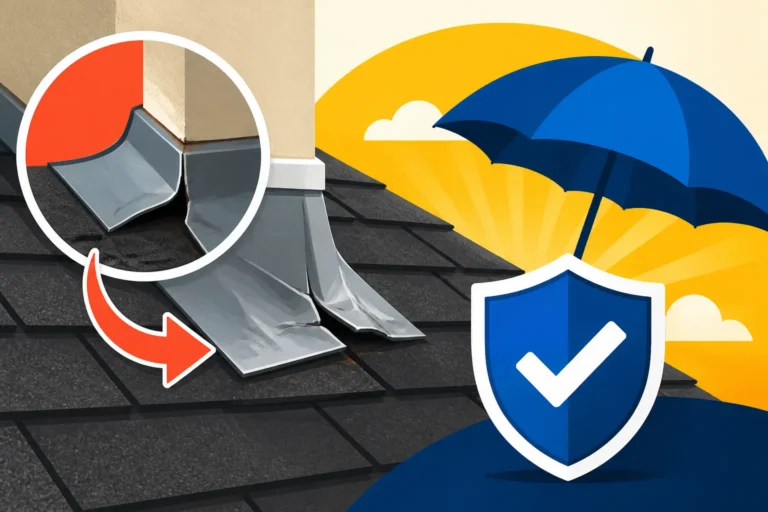
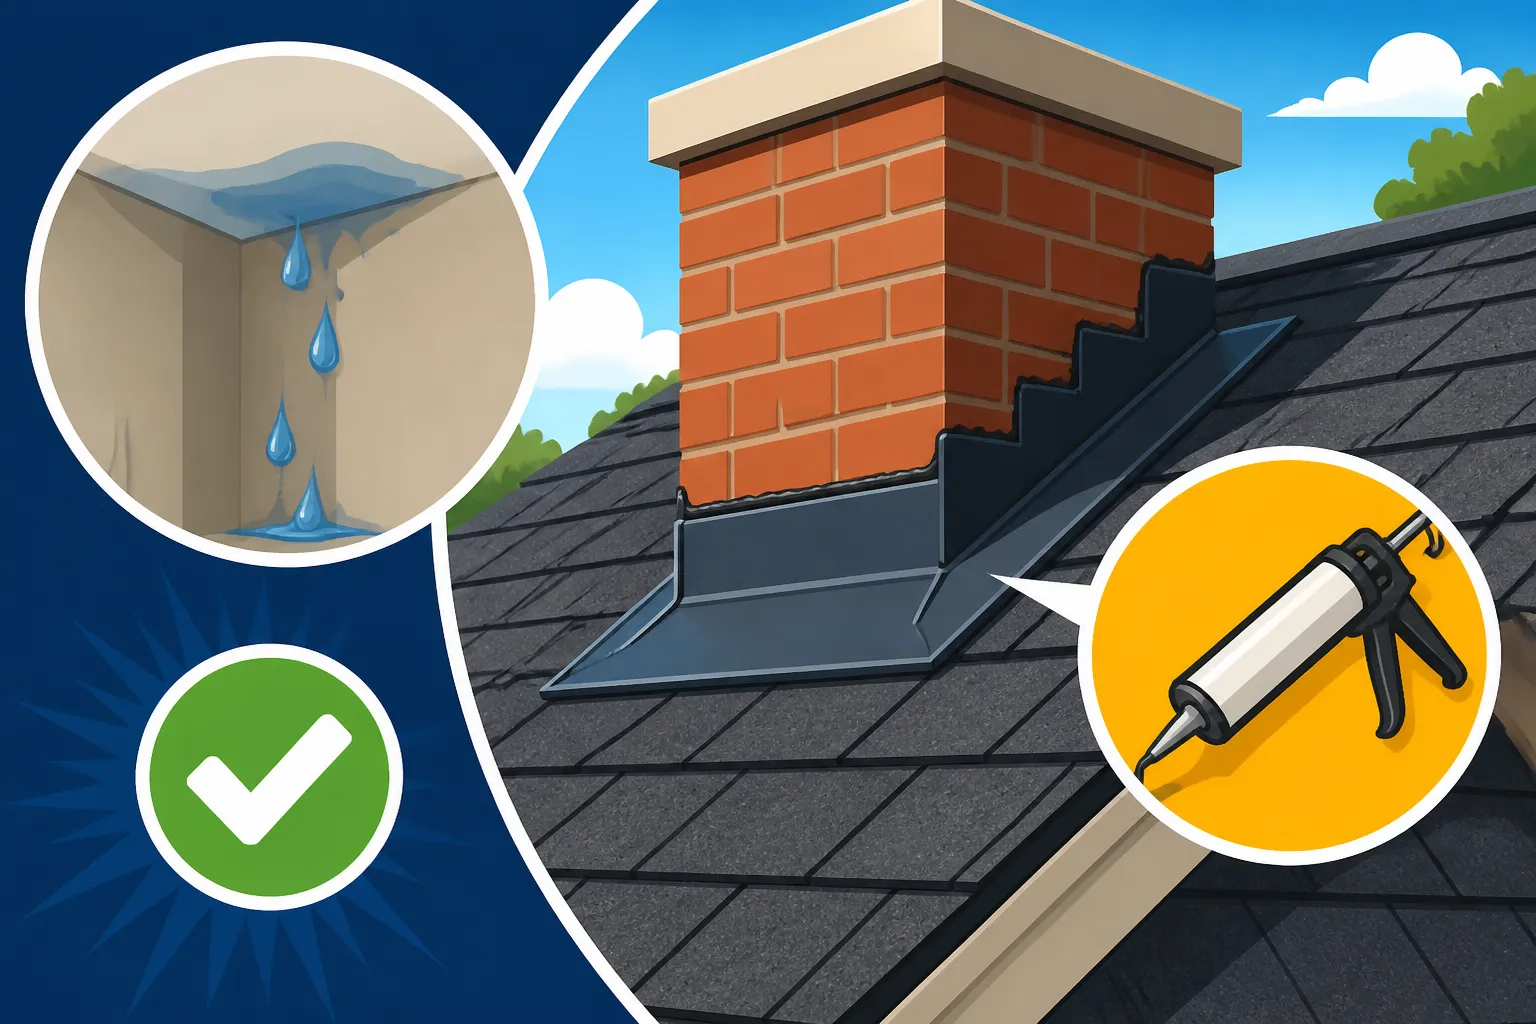
Most chimneys utilize a two-part flashing system: step flashing and counter flashing. The step flashing consists of individual L-shaped pieces woven in with each course of shingles, bending up the side of the chimney. This allows for some movement between the roof and the chimney without breaking the seal. Above this, the counter flashing (also called cap flashing) is embedded into the mortar joints of the chimney itself, then bent downwards to overlap the step flashing. This layered approach is brilliant when installed correctly because it allows each part to do its job: the step flashing directs water down the roof, and the counter flashing protects the vulnerable top edge of the step flashing.
However, issues arise when these pieces are damaged or improperly installed. Rust, corrosion, or even small punctures from falling debris can compromise the metal. Sometimes, the sealant used to secure the counter flashing to the chimney's mortar joints dries out, cracks, and peels away, creating tiny channels for water to seep behind the flashing. When a roofer cuts corners, they might use caulk as a primary seal instead of proper flashing, which is a temporary fix that will inevitably fail. Understanding how Roof Flashing Explained can help homeowners grasp the importance of correct installation.
Wear and Tear on Sealants and Metal
Even perfectly installed flashing won't last forever. The constant expansion and contraction of the roof and chimney due to temperature changes can stress the metal, leading to fatigue and tiny cracks. The caulk or sealant used at the top edge of the counter flashing, where it meets the brick, is particularly susceptible to UV degradation and extreme weather. It can dry out, become brittle, and crack, creating entry points for water.
Imagine a scorching summer day followed by a sudden, freezing rain in winter – that's a lot of movement for metal and caulk to handle year after year. Critters might also attempt to pry open small gaps to nest, further exacerbating the problem. A thorough inspection often reveals these subtle but critical points of failure.
Mortar Joint Degradation
Beyond the flashing, the brick and mortar of the chimney itself can be a source of leaks. Just like any exterior masonry, chimneys are constantly bombarded by rain, wind, and sun, which takes a toll on the mortar joints over time.
The Impact of Weather on Mortar
Mortar, the cement-like material binding the bricks, is designed to be permeable to a degree, but excessive water absorption can lead to problems. Over years of exposure, rainwater and moisture can erode the mortar, creating small holes, cracks, or wash out entire sections. This process, known as spalling or efflorescence, weakens the mortar and allows water to penetrate the chimney's structure.
Once water gets into these compromised joints, it can travel downwards, finding its way into your attic or living space. In colder climates, repeated freeze-thaw cycles are particularly damaging. Water seeps into a crack, freezes, expands, and then thaws, widening the crack a little more each time. This cycle can quickly deteriorate mortar joints, turning small hairline cracks into significant pathways for leaks.
Cracks in the Chimney Stack Itself
While less common, the chimney bricks themselves can crack, or larger structural cracks can appear in the entire chimney stack. This might be due to foundation issues, seismic activity, or even lightning strikes. These cracks can be subtle or quite pronounced, extending from the top of the chimney down through multiple courses of brick.
Even small cracks allow water to enter, and this water can then travel internally through the brickwork, appearing in your attic far from the actual crack. It's a tricky situation because the entry point might be high up on the chimney, but the drip appears much lower or inside the home. This highlights why a thorough Roof Damage Assessment: A Homeowner's Guide is so crucial, looking beyond just the immediate leak spot.
Chimney Cap and Crown Issues
At the very top of your chimney, two crucial components work together to keep water out: the chimney cap and the chimney crown. Often overlooked, issues with these can be direct culprits for leaks.
Damaged Chimney Crowns
The chimney crown is the concrete slab that sits on top of the chimney masonry, usually sloped slightly to direct water away from the flue opening and down the sides of the chimney. It acts like a mini-roof for the chimney. Over time, due to weather exposure and settlement, these crowns can develop cracks. These cracks might be hairline at first but will inevitably widen, allowing water to seep down into the brickwork below the crown.
A poorly constructed crown, one that is too thin, made with the wrong mix, or doesn't have a proper overhang (drip edge), is even more prone to failure. Without that overhang, water runs straight down the brickwork, saturating the mortar joints and accelerating their deterioration.
Missing or Damaged Chimney Caps
The chimney cap, usually made of metal, sits on top of the flue(s) and prevents rain, snow, debris (like leaves and branches), and animals from entering the chimney flue itself. If your chimney lacks a cap or the existing one is damaged, bent, or rusted, water can pour directly down the flue.
While this doesn't always lead to a leak into your living space, it can cause significant issues within the chimney, leading to rust in the firebox, damage to the flue liner, and eventually, saturation of the brickwork that can then manifest as an interior leak. Moreover, animal nests and debris can obstruct the flue, creating a fire hazard.
Diagnosing the Leak: Beyond the Obvious
Finding the source of a chimney leak isn't always straightforward. Water has a sneaky way of traveling along rafters, pipes, and other structural elements before finally showing itself, often quite a distance from the actual entry point. You might see a stain in your living room, but the leak could be originating at the top of the chimney.
Interior Leak Tracing
When you spot a water stain on your ceiling or wall near the chimney, that's your starting point. But remember, where you see the water isn't necessarily where it's getting in.
Following the Water Trail
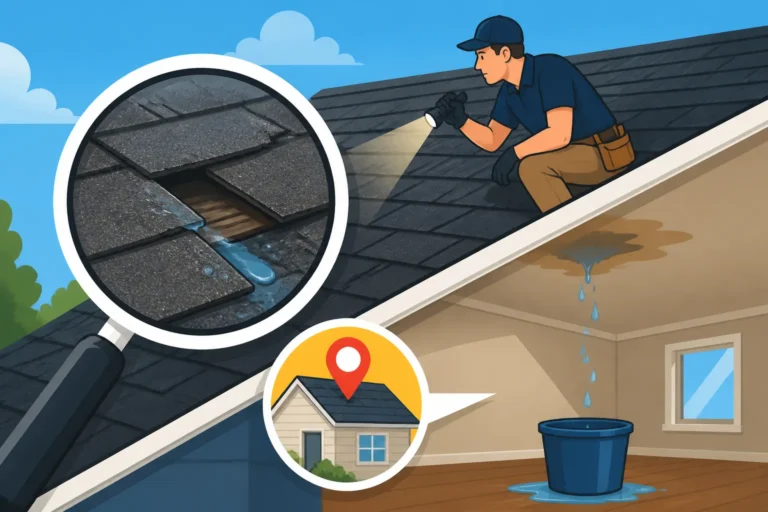
The first step is to head up into your attic (if accessible) with a strong flashlight. Look for water stains on the underside of the roof deck, on rafters, insulation, and the chimney chase itself. Water often flows downwards and then horizontally along the path of least resistance. You might find a trail of discoloration leading you closer to the actual source. Pay close attention to any discoloration on the framing timbers or the interior of the chimney structure.
If the stain is directly below the chimney, it narrows the possibilities considerably, but don't assume the leak is right above it. Water can wick along wooden beams for several feet. This detective work can be messy, especially if insulation is saturated. Carefully move insulation aside to check the roof decking and framing directly around the chimney penetration. This is often where you'll find the most concentrated evidence of water intrusion. For more general guidance, check out How to Spot a Roof Leak.
Checking for Attic Ventilation Issues
Sometimes, what appears to be a leak is actually condensation. If your attic isn't properly ventilated, warm, moist air from your home can rise into the cold attic space, condense on cold surfaces like the underside of the roof deck or metal flashing, and then drip, mimicking a leak. This is more common in winter.
To differentiate, look for widespread dampness or mold in the attic, rather than a single concentrated stain. If the "leak" only appears during cold weather, condensation is a strong possibility. However, if it happens during rain, it’s a leak. It’s also possible to have both issues simultaneously, where poor ventilation makes a small leak seem worse or causes other moisture problems.
Exterior Inspection Tips
Once you've done what you can inside, it's time to tackle the exterior. This often means getting on your roof, so safety is paramount. If you're not comfortable on a ladder or a steep roof, this step should be delegated to a professional.
Safe Ladder and Roof Access Practices
Before you even think about climbing, make sure you have a sturdy ladder, preferably an extension ladder that extends at least three feet above the roofline. Secure the ladder firmly at the base and have someone spot you if possible. Wear appropriate footwear with good grip. Never attempt to inspect your roof in wet, icy, or windy conditions. If your roof has a steep pitch or is very high, it’s always best to call a professional for a safe and thorough inspection.
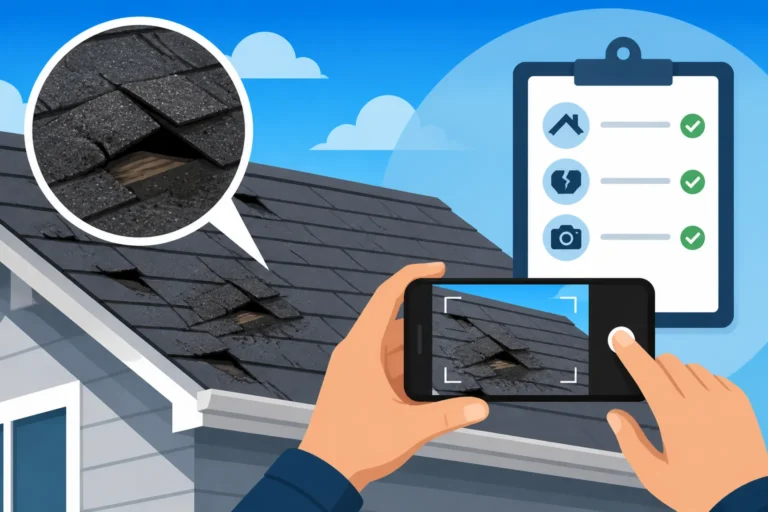
Once on the roof, walk cautiously and pay attention to your footing. Avoid stepping directly on the chimney crown or flashing if possible, as you could cause further damage or slip. Carry a camera or phone to take pictures of anything suspicious.
What to Look For Around the Chimney
Systematically examine every part of the chimney's exterior. Start by looking at the flashing. Are there any visible cracks, rust spots, or bent pieces? Is the sealant around the counter flashing dried out, cracked, or missing? Can you easily lift any part of the flashing? This is where proper Chimney Flashing Explained becomes important; knowing what it should look like helps you spot deficiencies.
Next, inspect the mortar joints. Look for crumbling mortar, missing pieces, or horizontal and vertical cracks. Check the bricks for signs of spalling (flaking or crumbling surfaces). Finally, look at the chimney crown for cracks, especially around the flue liner. Is the cap intact and securely fastened? Are there any debris blockages? Sometimes, an issue with the chimney crown and cap is the easiest to spot and the most direct cause of a leak.
Water Test Techniques
If the source of the leak isn't obvious after visual inspection, a controlled water test can help pinpoint the entry point. This requires a garden hose and usually a helper.
The Controlled Hose Test
The idea is to simulate rainfall in a controlled manner, starting from the lowest possible point of the chimney-roof intersection and working your way up. Have one person inside the attic or house, watching for water, while the other applies water to the roof. Start by soaking just the shingles below the chimney for 5-10 minutes. If no leak appears inside, move to the side flashing, then the front (uphill) flashing, and finally the chimney stack itself.
Apply water to one section at a time, waiting several minutes between each section. This methodical approach helps isolate the problem area. For example, if the leak appears when you spray the counter flashing but not the step flashing below it, you know the issue is likely with the counter flashing or the mortar joint it's embedded in. If water only appears when you spray the very top of the chimney, then the cap or crown is the likely culprit.
What to Watch For
The person inside needs to be patient and observant. Water can take time to travel, so don't rush the process. Listen for dripping sounds and look for any new wet spots or darkening on existing stains. It's often helpful to mark the area with chalk or a marker once water appears, so you can easily show the roofer.
Keep in mind that a significant structural defect might allow water to penetrate even under light hose pressure. However, a hairline crack or a compromised seal might only show itself under sustained pressure. If you perform this test, make sure your interior space is protected from potential water damage. Move furniture, cover floors with tarps, and have buckets ready.
Common Fixes for Chimney Leaks
Once you've diagnosed the source of the leak, it's time to explore the appropriate fixes. Some minor repairs might be within the realm of a confident DIYer, but many chimney-related issues are best left to experienced professionals due to safety and complexity.
Flashing Repair and Replacement
Compromised flashing is one of the most common reasons for chimney leaks, and thankfully, it’s often a fixable problem. The solution depends on the extent of the damage.
Resealing and Minor Patching
If the flashing metal itself is still in good condition but the sealant around the counter flashing has cracked or pulled away, a thorough cleaning and re-sealing might do the trick. Use a high-quality, exterior-grade, flexible sealant designed for roofing and masonry, such as a polyurethane caulk. Ensure the surface is clean, dry, and free of old, loose caulk before applying the new bead. This is a temporary solution for minor failures and should not be seen as a substitute for proper flashing installation.
For small holes or rust spots on the flashing, a patch can sometimes work. This involves cleaning the area thoroughly, applying a roofing cement or mastic, and then adhering a piece of flashing membrane or metal patch over the damaged spot. While these patches can extend the life of existing flashing, they are rarely a permanent solution, especially if the underlying metal is extensively corroded or fatigued. For more specific repair techniques, refer to guides like Flashing Leak Repair.
Full Flashing Replacement
When flashing is severely rusted, bent, torn, or improperly installed from the start, a full replacement is often the only long-term solution. This involves carefully removing the old shingles around the chimney, detaching the old flashing, and installing new step and counter flashing pieces. The new counter flashing should be properly cut and bent to fit, then embedded into the mortar joints (cut a groove, insert the metal, and seal with mortar or sealant).
A proper flashing replacement, which involves Step Flashing Around Walls as well as the front and back of the chimney, is labor-intensive and requires significant skill to ensure it's watertight and durable. Using high-quality materials, like copper or heavy-gauge aluminum, will ensure longevity. If your old flashing was caulked rather than embedded into the mortar, a proper replacement will involve cutting new reglet cuts (grooves) into the chimney mortar joints for the new counter flashing.
Repointing Mortar Joints
If your chimney’s mortar joints are crumbling, cracked, or missing, the process of "repointing" or "tuckpointing" is necessary to restore the masonry's integrity and prevent water intrusion.
The Repointing Process
Repointing involves carefully grinding out the old, deteriorated mortar from between the bricks to a consistent depth (typically about 1/2 to 1 inch). This is a dust-intensive process that requires specialized tools like an angle grinder with a diamond blade. Once the old mortar is removed, the joints are thoroughly cleaned of dust and debris.
New mortar, specifically formulated for repointing and matched as closely as possible in color and composition to the original, is then carefully packed into the joints. This is done in layers, ensuring a dense, void-free fill. The new mortar is then tooled (shaped) to match the existing joint style, which helps with water shedding and aesthetic consistency. Proper curing is essential for the new mortar to achieve its full strength and weather resistance.
When Repointing is Necessary
Repointing isn't just for aesthetics; it's crucial for the structural integrity and waterproofing of your chimney. If you see visible gaps, crumbling sections, or moss growing within the mortar joints, it's a clear sign that water is getting in. Ignoring these issues can lead to more significant problems, including water damage inside your home, accelerated deterioration of the bricks, and even structural instability of the chimney.
A good rule of thumb is that if more than 20-30% of your chimney's mortar joints show significant deterioration, repointing the entire chimney might be more cost-effective and beneficial than spot repairs. Repointing done by an experienced mason can significantly extend the life of your chimney and prevent costly leaks.
Chimney Crown and Cap Repair
Addressing issues with the chimney cap and crown can often be a straightforward fix, but like other chimney repairs, it's critical to do it right.
Repairing or Replacing the Chimney Crown
For minor cracks in a concrete chimney crown, a specialized patching compound or a flexible crown sealant designed for masonry can be applied after thoroughly cleaning and priming the surface. These products create a waterproof membrane over the existing crown, sealing minor cracks and preventing further water penetration.
However, if the crown is severely cracked, crumbling, or improperly constructed (e.g., too flat, no drip edge), a full replacement is recommended. This involves removing the old crown, preparing the top of the masonry, and pouring a new, properly sloped concrete crown with an adequate overhang. This ensures water drips clear of the brickwork below, protecting the chimney from saturation. Installing a new crown correctly is a skilled job, often performed by masons or specialized chimney repair technicians.
Installing or Repairing Chimney Caps
If your chimney is missing a cap, installing one is a relatively simple and highly effective preventative measure. Chimney caps come in various materials (stainless steel, copper, galvanized steel) and styles, often with mesh sides to keep out animals and debris while allowing smoke to escape. They typically attach to the flue liner or the crown with screws or clamps.
For an existing cap that is rusted, bent, or has mesh missing, repair options might include wire brushing and painting with rust-inhibiting paint for minor surface rust, or patching mesh with hardware cloth. However, if the damage is significant, replacement is usually the best course of action. A new, well-fitting cap will protect your flue and prevent a direct source of water entry, potentially saving you from future headaches and expensive repairs.
Preventing Future Chimney Leaks
An ounce of prevention is worth a pound of cure, especially when it comes to your roof and chimney. Proactive measures can save you thousands in costly repairs and give you peace of mind during heavy rains.
Regular Maintenance and Inspections
Don't wait until you see a leak to think about your chimney. Regular, proactive maintenance and inspections are key to identifying small problems before they become big, expensive ones.
Annual Visual Checks
At least once a year, preferably in the spring after winter’s freeze-thaw cycles or in the fall before the rainy season, perform a visual check of your chimney from the ground. Use binoculars to look for obvious signs of trouble:
- Flashing: Is it lifting, bent, or rusted? Do you see any cracks in the caulk line around the counter flashing?
- Mortar: Are there any visible cracks, crumbling areas, or missing chunks?
- Crown: Does the concrete crown have hairline cracks or larger fissures? Is the drip edge intact?
- Cap: Is it securely in place? Is it bent, rusted, or is the mesh damaged?
- Debris: Are there any branches, leaves, or bird nests obstructing the cap or stuck on the crown?
This quick check can alert you to emerging issues that a professional can then address more thoroughly. Regular roof inspections, as detailed in How Often to Inspect Your Roof, should always include a close look at the chimney.
Professional Chimney and Roof Inspections
Beyond your visual checks, it’s highly recommended to have a professional chimney sweep or a qualified roofing contractor inspect your chimney and the surrounding roof area every 1-3 years. These professionals have the experience and tools to spot subtle issues you might miss. They can safely access the roof, perform a thorough inspection of all components, and provide recommendations for necessary repairs or maintenance.
A professional inspection often includes:
- A comprehensive look at the flashing, including checking for proper embedment and sealing.
- Detailed assessment of mortar joints and brickwork.
- Evaluation of the chimney crown's integrity and drip edge.
- Inspection of the chimney cap and flue liner.
- Assessment of any potential water penetration points on the roof near the chimney.
Catching and fixing minor issues like a cracked caulk line or a small mortar void early can prevent a major leak and extensive water damage inside your home.
Upgrading Materials and Installation Techniques
Sometimes, prevention means investing in better materials and proper installation from the outset. If you're undertaking a full roof replacement or significant chimney repairs, consider upgrades that enhance durability and leak resistance.
Choosing Durable Flashing Materials
If you're replacing flashing, opt for higher-quality materials like copper or heavy-gauge painted aluminum (often 24-gauge). These materials are more resistant to corrosion and mechanical damage than thinner, cheaper alternatives. Proper Chimney Flashing Explained often highlights the longevity and superior performance of these materials. The installation method is just as important: ensuring the counter flashing is properly cut into the mortar joints (reglet cut) rather than just surface-mounted and caulked will provide a far more durable and watertight seal.
Consider innovative flashing products like lead flashing, which is extremely malleable and durable, or specialized flexible flashing tapes that offer additional layers of protection in vulnerable areas. Discussing these options with your roofer can lead to a more resilient chimney-to-roof connection.
Water Repellent Treatments
For brick and mortar, applying a breathable, clear water repellent sealant specifically designed for masonry can add an extra layer of protection. These treatments penetrate the masonry to create a hydrophobic barrier that causes water to bead up and run off, rather than soak into the brick and mortar. This helps prevent efflorescence, spalling, and deterioration caused by freeze-thaw cycles.
It’s important to choose a breathable sealant to allow any trapped moisture within the chimney to escape, preventing internal damage. Always test the product on an inconspicuous area first to ensure it doesn't change the appearance of your brickwork. This kind of treatment can be particularly beneficial for older chimneys with more porous masonry.
Professional Assistance for Longevity
When it comes to your roof and chimney, attempting complex repairs yourself can sometimes do more harm than good. Professional expertise ensures the job is done correctly and safely, providing lasting protection.
The Value of Certified Professionals
Hiring a certified and experienced roofing contractor or chimney professional is crucial for comprehensive leak prevention and repair. They have the knowledge of proper building codes, manufacturer specifications, and best practices for flashing, masonry, and overall roof system integration. They also carry the necessary insurance and licenses, protecting you from liability in case of accidents.
A reputable professional will not only fix the immediate leak but also identify underlying issues that might lead to future problems. For instance, they might notice that your roof's pitch around the chimney is prone to ice damming, and suggest additional ice and water shield during a re-flash. They can also offer extended warranties on their workmanship, giving you added peace of mind. Platforms like Modernize can connect you with pre-vetted contractors in your area, making it easier to find reliable help.
Long-Term Maintenance Plans
Many reputable roofing and chimney companies offer annual or biannual maintenance plans. These plans often include routine inspections, minor repairs like re-caulking, and chimney cleanings. Investing in such a plan can extend the life of your chimney and roof components, prevent leaks, and ensure your chimney operates safely and efficiently.
Consider this as an investment in your home's health. Just as you service your car, your roof and chimney benefit from professional check-ups. A well-maintained chimney is less likely to leak, requires fewer emergency repairs, and ultimately saves you money in the long run.
When to Call a Professional Roofer
While some minor chimney issues can be tackled by a skilled DIYer, there's a clear line where professional help becomes not just advisable, but essential. Your roof is a complex system, and a leaky chimney can indicate deeper problems.
Recognizing Beyond DIY Repairs
Homeowners can often handle simple tasks like cleaning gutters or inspecting shingles from the ground. However, when it comes to the intricate work around a chimney, the risks and complexity increase significantly.
Safety Concerns
The most important factor is safety. Working on a ladder, especially on a roof, carries inherent dangers. Falls are a leading cause of injury for homeowners attempting DIY projects. The unique angles and surfaces around a chimney can make footing precarious. Professionals have specialized safety equipment, training, and experience to work safely at heights.
Furthermore, dealing with masonry requires specific tools and techniques. Incorrectly grinding out mortar or applying new mortar can weaken the chimney structure or create new pathways for water. Electrical safety is also a concern if you're using power tools like grinders on the roof. When you recognize that the repair is beyond simply applying caulk from a tube, it’s time to call in the experts.
The Importance of Expertise for Complex Problems
Many chimney leaks stem from a combination of factors: deteriorated flashing, compromised mortar, and a faulty crown. Diagnosing and fixing these issues correctly requires a deep understanding of roofing principles, masonry, and waterproofing techniques. An untrained eye might miss a critical detail, leading to a recurring leak or even causing further damage.
For instance, if your chimney has a complex design or a particularly steep roof pitch, the installation of proper Chimney Flashing Explained is a job for someone who does it every day. A professional roofer can differentiate between a surface crack and a structural issue, or between simple granule loss and widespread shingle failure caused by moisture. Trying to patch a significant flashing issue yourself might only redirect water to a less visible, more damaging location.
The Value of Certified Professionals
Choosing the right professional can feel daunting, but it's a critical step in ensuring a lasting repair. Look for specific certifications and ask the right questions.
What to Look for in a Roofing Contractor
When seeking a professional for a chimney leak, prioritize licensed and insured roofing contractors who have specific experience with chimney flashing and masonry work. Ask for proof of liability insurance and worker's compensation. This protects you in case of accidents or damage during the job.
Look for contractors with manufacturer certifications, such as GAF Master Elite or Owens Corning Platinum Preferred, as these demonstrate a commitment to quality and adherence to strict installation standards. A certified contractor is often able to offer enhanced manufacturer warranties on materials and workmanship, which can be invaluable. Don't hesitate to ask Questions to Ask a Roofing Contractor Before Hiring to vet them thoroughly. You can also explore platforms like Modernize to find reputable professionals who specialize in chimney and roofing repairs.
Getting Multiple Estimates and Comparing Them
Never settle for the first estimate you receive. Contact at least three different reputable contractors to get competitive bids. A detailed estimate should itemize materials, labor, and a clear scope of work, including tear-off, repair, and disposal. Don't just compare the bottom line; compare what each contractor proposes to do to fix the leak.
One contractor might suggest a simple re-seal, while another might recommend a full flashing replacement and mortar repointing. The latter might be more expensive upfront but could be the only long-term solution. Ask for references and check online reviews. Understanding How to Get Multiple Roofing Estimates Fast can help you gather the information you need quickly and make an informed decision, leading to a permanent solution for your chimney leak.
| Leak Symptom | Common Causes (Likely Source) | Recommended Action | DIY Feasibility |
|---|---|---|---|
| Ceiling stain near chimney during rain | Flashing failure, mortar cracks, crown cracks | Exterior inspection, water test | Low/Medium |
| Water dripping directly into fireplace | Missing/damaged chimney cap, crown cracks | Inspect cap/crown, replace if needed | Medium |
| Wet insulation in attic around chimney | Flashing failure, mortar erosion, crown/cap issues | Thorough attic/exterior inspection, water test | Low |
| Damp bricks on outside of chimney | Porous bricks, failed water repellent, mortar cracks | Professional masonry inspection, sealant application | Low |
| Frost/ice in attic near chimney in winter | Condensation due to poor ventilation | Improve attic ventilation, check for true leaks | Medium |
Disclaimer
Please remember that the information provided in this article is intended for general guidance and informational purposes only. While we strive to offer accurate and helpful advice, every roof and chimney situation is unique. We strongly recommend consulting with a qualified, licensed, and insured roofing professional or chimney technician for any specific concerns or before undertaking any repairs on your home. Attempting complex roof or chimney repairs yourself can be dangerous and may lead to further damage, void warranties, or result in personal injury. Always prioritize safety and professional expertise when dealing with your home's structural integrity.