Starter Shingles Explained
It’s a common scenario: you’re thinking about a new roof, and you’re bombarded with terms like shingles, underlayment, flashing, and then, almost as an afterthought, "starter shingles." Many homeowners mistakenly believe these are just the first row of regular shingles, or perhaps an unnecessary upsell. But trust me, overlooking the crucial role of starter shingles is a mistake that can haunt your home for years to come. This comprehensive guide will pull back the curtain on these unsung heroes, explaining exactly what they are, why they're indispensable, and how they contribute to the longevity and integrity of your entire asphalt roofing system.
What Exactly Are Starter Shingles?
When you look at a beautifully finished asphalt roof, you see the rows of shingles overlapping, creating that classic protective barrier. What you don't usually see, tucked away beneath that first visible row, is something specifically designed to kick off the whole system: the starter shingle. These aren't just any shingle; they are a fundamental component engineered to provide initial protection and create a watertight seal right where your roof is most vulnerable.
More Than Just the First Row: The Critical Role They Play
Think of starter shingles as the foundation for your roof's entire shingle layout. They are the very first layer of asphalt protection applied along the eaves and rake edges of your roof, before any of your main field shingles go down. Their primary job is to ensure that the bottom and side edges of your roof, which are constantly exposed to the elements, are sealed against wind and water penetration right from the start. Without them, you’d have exposed cutouts and gaps along these edges, leaving your home susceptible to leaks and shingle blow-offs. This isn't just about aesthetics; it's about creating a robust, weather-tight envelope for your entire home. They are a critical part of how asphalt shingles are installed: step by step to ensure maximum protection.
The Hidden Heroes Beneath Your Roof's Edge
While they may be out of sight, starter shingles are working overtime to protect your investment. Each starter shingle typically has a factory-applied adhesive strip that bonds to the first course of regular shingles. This bond is what prevents wind from getting underneath the edge of your roof and lifting the shingles. Imagine a strong gust of wind hitting the eaves of your house. If there's no securely sealed starter shingle, that wind can easily pry up the bottom edge of the first shingle, leading to a cascade of damage across the entire roof slope. They essentially "lock down" the critical perimeter, forming a robust defense against nature's fury and creating the foundational layer that ensures your roof's long-term performance.
Why Your Roof Absolutely Needs Starter Shingles
It's easy to wonder if every single component of a roof replacement is truly necessary, especially when you're looking at a detailed roofing estimate. But when it comes to starter shingles, there's no cutting corners. These specialized shingles address specific vulnerabilities that traditional shingles alone cannot, providing layers of protection where it matters most.
Guarding Against Wind Uplift and Blow-Offs
One of the most common and frustrating types of roof damage homeowners face is missing shingles after a storm. It’s not just an unsightly problem; it exposes your home to immediate water damage. Starter shingles are specifically engineered to combat this. They feature an asphalt adhesive strip, often called a "sealant strip," that, once warmed by the sun, creates a strong bond with the first course of main shingles laid directly over them. This bond acts like a continuous strip of glue, adhering the leading edge of your roof shingles to the deck below.
Consider a scenario in a place like coastal Florida during hurricane season. High winds can exert incredible uplift forces on a roof. Without starter shingles, the first row of regular shingles would have nothing to seal down onto, leaving their bottom edges vulnerable to being caught and peeled back by strong winds. The starter shingle essentially provides that initial, reinforced anchor point. It’s a vital layer in how wind ratings work for shingles, contributing significantly to the roof's overall wind resistance and helping you avoid costly repairs after a severe weather event. This is why reputable contractors will always include them, prioritizing the longevity of your roof over perceived cost savings.
Preventing Water Infiltration at the Eaves and Rakes
Beyond wind protection, starter shingles are also your first line of defense against water infiltration, particularly at the most critical edges of your roof: the eaves (the horizontal edges) and the rake edges (the sloped edges). Normal shingles are designed to overlap each other, creating a shingle shadow line, but at the very bottom and sides, there's an inherent gap where the cutouts of the first course of shingles could align directly with the edge of the roof deck. This creates a potential pathway for water.
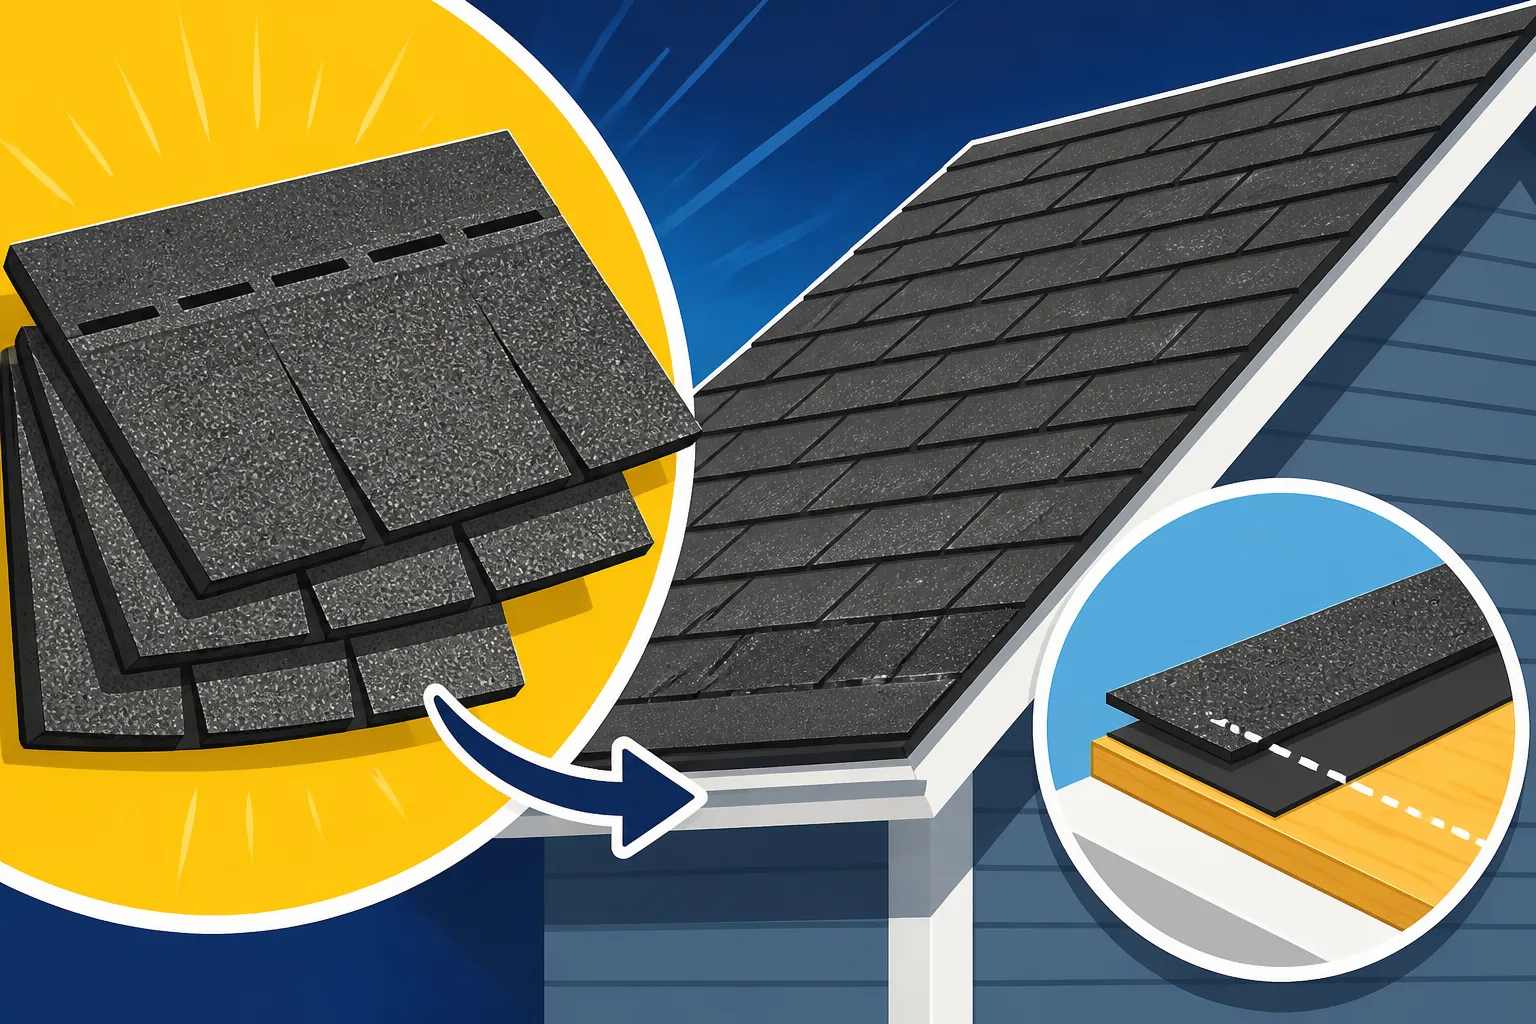
Starter shingles are designed as a solid strip, without the cutouts seen in traditional shingles. When installed, they provide a continuous, solid layer of asphalt coverage directly under the cutouts and seams of the first full course of shingles. This effectively closes off any direct channels that wind-driven rain could exploit to get under your roof. Think of it as a continuous water barrier around the perimeter. Paired with a properly installed drip edge, which directs water away from the fascia and into the gutters, and robust underlayment explained: synthetic vs felt, these elements form a formidable defense, making sure that water flows over your roof and not into it.
Contributing to a Smooth, Watertight Foundation
A roof is only as good as its foundation, and starter shingles play a significant role in creating a smooth, even, and watertight base for the entire shingle system. They ensure proper shingle alignment and prevent potential irregularities. When the first course of regular shingles is installed, it needs a solid, consistent surface to adhere to and butt against. Starter shingles provide this uniform edge, making it easier for roofers to maintain straight lines and consistent overlaps throughout the installation process.
Without this stable foundation, the first visible course of shingles might sit unevenly, creating an aesthetic issue and, more importantly, compromising the seal. Any irregularities at the bottom edge could translate upwards through subsequent rows, creating weak points or areas where water might pool. Ultimately, starter shingles are an investment in the overall integrity and performance of your roof, ensuring that every shingle from the eave to the ridge has the best possible start. It truly shows how a roof replacement works: the full process is about meticulous attention to detail from the first layer up.
The Anatomy and Types of Starter Shingles
While the basic function of starter shingles remains constant, there are variations in their form and how they're sourced. Understanding these differences can help you appreciate why your roofing contractor chooses a particular type and how it affects your roof's performance and warranty.
Factory-Made vs. Field-Cut: Understanding the Differences
Historically, and sometimes even today for certain applications or budget constraints, roofers might create "starter shingles" by cutting regular three-tab shingles in half or inverting them. This is what we call field-cut starter shingles. The idea is to use the solid, un-cut portion of a regular shingle as the starter. While this can provide a base layer, it often lacks the dedicated adhesive strip and precise dimensions of a purpose-built product. The problem? Those field-cut strips might not have the same sealing power, or they might not line up perfectly with the granular surface of the overlying shingles for optimal adhesion.
On the other hand, factory-made starter shingles are specifically manufactured for this one job. These are typically long strips, sometimes perforated for easy separation, and crucially, they come with a continuous, factory-applied adhesive strip. Brands like GAF, Owens Corning, and CertainTeed all produce their own lines of specialized starter shingles designed to integrate perfectly with their main shingle lines. These are preferred by most reputable contractors and are often a requirement for qualifying for enhanced manufacturer warranties. Using these purpose-built products ensures consistency, superior sealing properties, and often, better wind resistance ratings. For a project managed by a service like Modernize, they would connect you with contractors who prioritize these high-quality, factory-made solutions.
Here's a quick comparison:
| Feature | Field-Cut Starter Shingles (Often 3-Tab) | Factory-Made Starter Shingles |
|---|---|---|
| Source | Regular shingles cut on-site | Manufactured specifically for starter function |
| Adhesive Strip | May or may not have an effective one (depends on cut) | Dedicated, continuous sealant strip |
| Consistency | Varies with cutting precision | Uniform size and shape |
| Performance | Lower wind resistance, potential for uneven seal | Superior wind resistance, consistent seal |
| Warranty Impact | May void or limit manufacturer warranties | Often required for full manufacturer warranties |
| Cost | Perceived lower material cost (but higher labor) | Higher material cost, efficient installation |
| Ease of Install | Requires more labor for cutting | Ready to install, saves labor time |
The Adhesive Strip: The Unsung Sealing Mechanism
The adhesive strip is arguably the most critical feature of a starter shingle. It's usually a thermoplastic asphalt cement that runs along the bottom edge of the starter shingle. When the first course of regular shingles is laid over the starter, this strip is positioned directly underneath the butt end of the main shingle. As the sun warms the roof, the adhesive strip softens and then creates a powerful, tenacious bond with the shingle above it.
This "thermal activation" is what essentially fuses the bottom edge of your roof's shingles together, creating a continuous, monolithic seal. This seal is the primary defense against wind-driven rain and wind uplift. Without it, the bottom edges of your roof would be flapping in the breeze, vulnerable to being torn off entirely. Understanding the importance of this strip illuminates why using any old piece of shingle as a starter simply won't cut it. It’s a key part of how shingles are nailed and sealed, but also how they secure themselves with heat.
Specific Design for Optimal Performance
Factory-made starter shingles aren't just about the adhesive strip; their overall design is optimized for their specific role. They are typically wider than the exposed portion of a regular shingle, ensuring sufficient overlap for the first course. They lack the aesthetic cutouts of architectural or 3-tab shingles because their purpose is functional – to provide a solid, sealed base, not visual appeal.
Some advanced starter shingles might also incorporate granulated surfaces on their exposed edges for added UV protection, even though much of them are covered. The weight and composition are also carefully balanced to provide durability and a stable platform. This specific design ensures maximum adhesion, continuous water shedding, and an uncompromised barrier against the elements, ultimately extending the life of your entire roof system.
Installation: How Starter Shingles Are Laid Down
The installation of starter shingles is more than just throwing down the first strip; it's a precise process that sets the stage for the entire roof's performance. Proper installation is critical, and a skilled roofer understands that cutting corners here can lead to headaches down the line.
Preparing the Deck and Eaves for the First Layer
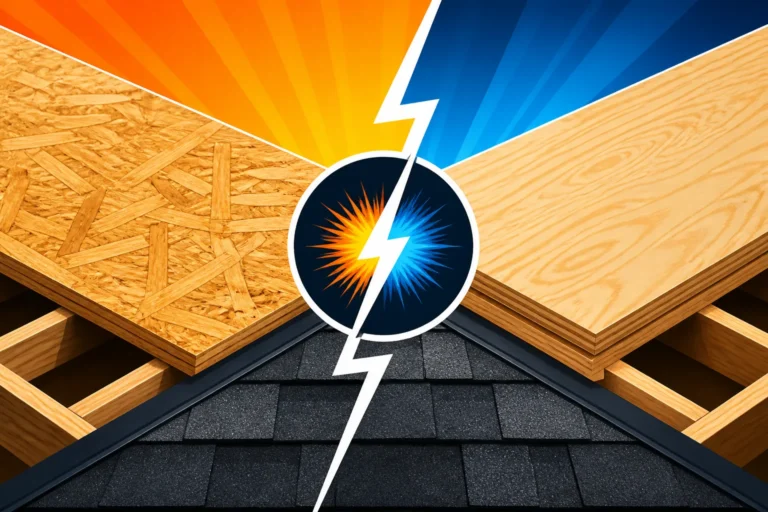
Before even thinking about laying down starter shingles, the roof deck needs to be meticulously prepared. This means ensuring the roof decking itself is sound, free from rot, and properly nailed. Any damaged or rotted plywood or OSB needs to be replaced, as a weak deck can compromise the integrity of the entire roof. This is also the stage where vital components like drip edge and underlayment are installed.
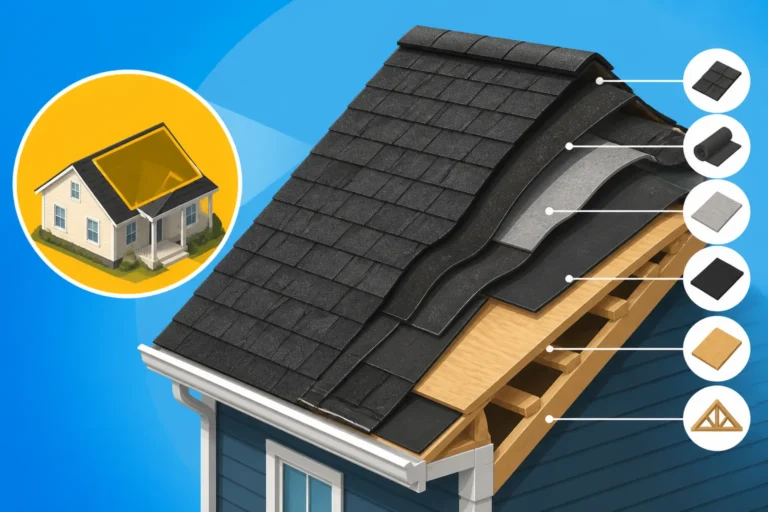
The drip edge, which we discussed earlier, is installed first along the eaves, extending slightly past the roof deck to direct water into the gutters. Then, a roofing underlayment, whether synthetic or felt, is rolled out and fastened, covering the entire roof deck. This underlayment acts as a secondary water barrier, protecting your home even if water somehow breaches the shingles. Critically, an ice and water shield is often installed along the eaves in colder climates, providing superior protection against ice dams. Once these layers are in place, the stage is set for the starter shingles, which will be installed directly over the underlayment and drip edge along the perimeter. Without this careful preparation, even the best starter shingles can't do their job effectively.
Precise Placement and Nailing for Maximum Effectiveness
The precise placement of starter shingles is paramount. They are installed flush with the outside edge of the drip edge along the eaves, creating a perfectly aligned edge for the subsequent courses of shingles. Along the rake edges, they are typically installed to overlap the drip edge by a small margin, providing continuous protection. The key is to ensure they are perfectly straight and properly oriented.
Nailing is another critical step. Starter shingles are typically fastened with roofing nails, just like regular shingles, but the placement of these nails is crucial. They need to be positioned high enough on the starter shingle so that they will be covered by the first course of regular shingles, but low enough to securely hold the starter in place. The number of nails and their specific location will also adhere to manufacturer specifications and local building codes, ensuring the shingle is firmly attached to the roof deck. This secure fastening, combined with the adhesive strip, is what gives your roof its initial wind resistance.
Overlapping and Sealing: A Step-by-Step Look
The installation process for starter shingles is a systematic one, designed to create a continuous, protective band around the roof's perimeter.
- Start at the Eave: The roofer will typically begin at one end of the eave, installing the first starter shingle. They'll ensure it's flush with the drip edge and square with the corner of the roof.
- Apply Successive Shingles: Subsequent starter shingles are then laid in a continuous line along the eave, overlapping each other according to manufacturer guidelines. This overlap creates a seamless layer that prevents water from seeping through joints.
- Secure with Nails: Each starter shingle is nailed into the roof deck. The nail placement is important; it needs to be where the next course of shingles will cover it, preventing exposed fasteners.
- Rake Edge Application: Once the eave line is complete, the process is repeated along the rake edges. This creates a fully protected perimeter.
- First Course of Main Shingles: Only after all starter shingles are installed and secured does the roofer begin laying the first full course of regular asphalt shingles. This first course is installed directly over the starter shingles, with its bottom edge sitting just above the adhesive strip of the starter.
- Thermal Sealing: Over the next few days or weeks, as the sun warms the roof, the adhesive strip on the starter shingle will activate, bonding firmly to the underside of the first course of regular shingles. This chemical bond creates the robust, wind-resistant seal that makes starter shingles so effective.
This meticulous, step-by-step approach ensures that the entire roofing system starts with the strongest possible foundation, maximizing its performance and longevity. If you're comparing roofing quotes, ensure that starter shingles are explicitly included and that the contractor details their installation method. A contractor that rushes through or skips this step is a major red flag when you're looking for quality installation.
Common Issues and Misconceptions About Starter Shingles
Despite their critical role, starter shingles are often misunderstood, leading to mistakes that can compromise an entire roof. As a homeowner, being aware of these common pitfalls can save you a lot of grief and money down the road.
The Dangers of Skipping or Improper Installation
One of the most dangerous misconceptions is that starter shingles are optional or that "any old shingle will do." This couldn't be further from the truth. Skipping starter shingles altogether means that the bottom edge of your first course of main shingles has no underlying protection or adhesive bond. This leaves the exposed cutouts of the underlying shingle tabs along your roof's eaves and rake edges directly open to the elements.
Imagine heavy rain coupled with strong winds. Without that continuous, sealed layer provided by the starter shingle, wind-driven rain can easily funnel right into those gaps, leading to leaks, rot in your fascia and soffit, and potentially extensive damage to your attic and interior ceilings. Furthermore, the lack of an adhesive strip means the first row of shingles has no resistance to wind uplift. It becomes the easiest part of your roof for strong gusts to catch, lift, and tear away. This isn't just a hypothetical problem; it's one of the leading causes of roof damage reported after storms. An improperly installed starter shingle – for example, if it's not flush with the drip edge or if the nails are exposed – is just as bad, creating weak points that can fail prematurely. This is why when you're preparing for a new roof, you must ask how to choose a roofing contractor who prioritizes every detail.
Not Just a "Waste of Material": The Long-Term Value
Some homeowners, and even less scrupulous contractors, might view starter shingles as an added cost or an unnecessary "extra." The argument might be that they are hidden, so why bother? This perspective completely misses the immense long-term value they provide. While they add a small percentage to the overall material cost, the protection they offer against wind damage and water infiltration saves exponentially more in potential repair costs down the line.
Think about it this way: repairing a roof leak, especially one that has led to water damage in your attic or living spaces, can be incredibly expensive. Factor in mold remediation, drywall replacement, and painting, and suddenly, the few hundred dollars spent on proper starter shingles seems like an incredibly wise investment. They extend the life of your entire roof system by preventing premature failure at its most vulnerable points. In fact, many manufacturer warranties, especially the enhanced ones, explicitly require the use of their proprietary starter shingles for the warranty to be valid. So, far from being a waste, they are a fundamental component that secures your roof’s performance and often, its warranty coverage.
When to Inspect and What to Look For
Since starter shingles are mostly concealed, you might wonder how you can inspect them. While you can't see the entire strip, there are indirect signs that can indicate a problem.
- Missing or Lifted Shingles at the Eaves/Rakes: This is the most obvious sign. If the first row of shingles along your roof’s edges is missing, lifted, or appears loose, it's a strong indicator that the starter shingles, or their adhesive strip, have failed.
- Water Stains on Fascia or Soffit: Persistent water staining on the wood trim around your roof's edges (fascia and soffit) can suggest that water is getting underneath the shingles at the eave, potentially due to a compromised starter shingle or drip edge.
- Signs of Water in the Attic: If you notice water stains on your attic ceiling directly above the eaves, or a musty smell, it's a clear sign of water infiltration. While it could be other issues like flashing leaks, a failing starter shingle at the perimeter is a common culprit.
- During a Professional Inspection: The best way to assess the condition of your starter shingles is during a professional roof inspection. A skilled inspector can often lift the edge of the first course of shingles carefully to check for the presence and adhesion of the starter strip, especially on older roofs.
When you receive a roof inspection report or if you suspect issues, don't hesitate to ask your contractor about the condition of the starter shingles. This hidden component is too important to overlook and plays a significant role in your roof's overall health. A good contractor will detail all parts of your roof anatomy: parts of an asphalt shingle roof, including the less visible elements.
How Starter Shingles Integrate with Your Full Roofing System
A roof isn't just a collection of individual parts; it's a complex, interconnected system where each component relies on the others to perform optimally. Starter shingles are no exception, forming crucial connections that impact both the immediate protection and the long-term guarantees of your roof.
A Key Component in Your Roof's Overall Warranty
Many homeowners are primarily concerned with the main shingles they choose, like architectural shingles from CertainTeed or Owens Corning, or GAF Timberline HDZ. While the main shingles are undoubtedly important, it's critical to understand that a manufacturer's warranty often covers the entire roofing system, not just the shingles themselves. This means that using approved components, including specific starter shingles, underlayment, and ridge caps, is frequently a prerequisite for activating and maintaining those robust, long-term warranties.
For example, if you opt for an enhanced warranty, such as a GAF Golden Pledge warranty, the installation requires adherence to GAF's specific system, which includes their starter shingles (like GAF StarterStrip™). If a contractor deviates from these specifications by using generic starter shingles or field-cutting them, it can significantly limit or even void the manufacturer's warranty on the entire roof system. This is a huge risk, especially when you're investing thousands into a new roof. Always confirm with your contractor that all components, including starter shingles, are manufacturer-compatible and will ensure your roof qualifies for the best available warranty coverage. This falls under the realm of roofing warranty: workmanship vs manufacturer, where adherence to manufacturer guidelines is paramount for their warranty portion.
Synergizing with Drip Edge and Underlayment for Superior Protection
Starter shingles don't work in isolation; they are part of a team, and their effectiveness is greatly amplified when properly installed in conjunction with other crucial components like the drip edge and underlayment. Think of it as a multi-layered defense system, where each layer backs up the next.
- Drip Edge First: The drip edge is installed first, extending over the fascia board and into the gutters. Its job is to ensure that water running off the roof clears the eaves and doesn't get behind the fascia. Without a drip edge, water can wick back, causing rot and damage to your home's exterior trim.
- Underlayment Next: The underlayment (synthetic or felt) is then laid over the roof deck, overlapping the drip edge. This provides the primary waterproofing layer for the entire deck, acting as a secondary barrier in case shingles are compromised.
- Starter Shingles Overlap: Then come the starter shingles, laid over both the underlayment and the drip edge along the eaves. This configuration means the starter shingle is the first line of asphaltic protection that is integrated with the other crucial water-shedding components. It creates a seamless transition, preventing any gaps where water or wind could infiltrate.
This layered approach is designed for maximum resilience. The drip edge directs water, the underlayment provides a continuous barrier, and the starter shingles lock down the first course of main shingles, preventing wind and water penetration at the most vulnerable edges. If any one of these components is missing or improperly installed, the entire system is weakened. When you're looking at the cost of new flashing and drip edge, remember these elements work hand-in-hand with starter shingles to create a truly watertight and wind-resistant roof. Asking a contractor to explain their complete roofing system installation, including these interdependent layers, can give you a lot of insight into their quality and attention to detail.
Disclaimer
Please remember that this article provides general information and guidance on asphalt roofing. While we strive for accuracy, roofing best practices, building codes, and product specifications can vary by location and change over time. Always consult with a qualified, licensed, and insured local roofing contractor for specific advice, inspections, and project estimates tailored to your home's unique needs. Do not attempt complex roofing work without professional expertise.