How a Roof Deck Is Inspected
That moment you realize your roof might be in trouble is a truly unsettling feeling. You see a few missing shingles, maybe some granule loss, and your mind immediately jumps to the worst-case scenario: a massive, costly replacement. But what many homeowners don't realize is that beneath those visible shingles, there's a critical component that often holds the whole system together—or lets it all fall apart: the roof deck. This guide is dedicated to pulling back the curtain on this vital part of your home and explaining exactly how a roof deck is inspected, so you can understand what pros are looking for and why it matters.
What Exactly is a Roof Deck and Why It's So Crucial?
Before we dive into the nitty-gritty of inspections, let's get on the same page about what we're even talking about. The roof deck is often overlooked because it's usually hidden, but it's fundamentally the backbone of your entire roofing system. Think of it as the canvas on which your roof is built.
The Foundation Beneath Your Shingles
At its core, a roof deck is the structural layer of material that is fastened directly to your home's rafters or trusses. In most modern residential homes, this means sheets of plywood or Oriented Strand Board (OSB). These panels are typically 4×8 feet and come in various thicknesses, with half-inch (15/32" or 7/16") being common.
The primary role of this deck is twofold: first, it provides the rigid, continuous surface needed to support the weight of all your roofing materials—shingles, underlayment, and even snow or ice. Without a solid deck, your roof would literally cave in. Second, and equally important for asphalt shingles, it provides the firm, stable surface that your shingles are nailed into. Those nails need something substantial to grab onto to ensure your shingles stay put, especially when high winds come calling. A compromised deck means those nails won't hold, leading to shingles lifting, detaching, and ultimately, exposing your home to the elements.
The Hidden Hero of Your Roof
It's easy to focus on the flashy top layer—the beautiful architectural shingles or the sleek designer ones—but the real unsung hero is the roof deck. When it's healthy, it performs its job silently, reliably supporting your home for decades. But when it starts to fail, it can create a cascade of problems that are expensive and frustrating to fix.
Imagine this: you've just invested in a gorgeous new roof. But if the contractor didn't properly inspect or replace damaged sections of the deck underneath, you might find yourself with problems much sooner than expected. Shingles could sag in certain areas, creating unsightly waves, or even worse, they might not seal correctly, leading to leaks. A soft, rotted spot on the deck means that water has found its way in, and without addressing the source and repairing the deck, the problem will only worsen, potentially leading to mold growth in your attic, damage to your insulation, and even structural compromise. That's why a thorough inspection of the roof deck is absolutely non-negotiable for the long-term health and performance of your asphalt roof.
When Does a Roof Deck Need an Inspection?
Knowing what a roof deck is makes it clear why it's important. But when should you actually be thinking about getting it inspected? It’s not just about waiting for a problem to appear; proactive checks can save you a world of headaches and expense down the line.
Before a New Roof Installation
This is, without a doubt, the most critical time for a comprehensive roof deck inspection. When you're planning a full roof replacement, the old shingles must be torn off completely. This process, known as a full tear-off, exposes the entire roof deck, giving your roofing contractor an unobstructed view of its condition. Any reputable roofer will tell you that installing new shingles over a damaged, soft, or rotted deck is akin to building a house on a sinking foundation—it simply won't last.
During this stage, the contractor will walk every inch of the exposed decking, looking, feeling, and sometimes even bouncing a little on it to check for soft spots. They’re checking for structural integrity, signs of water damage, delamination of plywood or OSB layers, and proper fastening. If they find issues, they’ll recommend repairs or replacements for those sections before any new underlayment or shingles go down. Skipping this vital step, or allowing a contractor to cut corners, can not only lead to premature failure of your beautiful new roof but can also potentially void your manufacturer's warranty. You can learn more about the complete process in our guide on How a Roof Replacement Works: The Full Process.
After Severe Weather Events
Mother Nature can be brutal on our homes, and our roofs often bear the brunt of it. After a significant weather event like a major hailstorm, powerful windstorm, or even prolonged periods of heavy rain, it’s wise to consider a roof deck inspection. While you might see obvious signs of shingle damage from the ground, such as missing shingles or visible hail dents, less obvious damage to the deck can occur without immediate external signs.
For instance, extremely high winds might have lifted and flexed the roof deck, even if the shingles stayed mostly intact. This flexing can stress the fasteners holding the deck to the rafters, or even cause minor cracks in the decking itself. Hail impact severe enough to bruise shingles could also weaken the underlying deck in those spots. And sustained heavy rain, especially after initial damage to the shingle layer, can seep through and begin to compromise the deck. If you notice any sagging in your roofline, especially after a storm, that’s a red flag screaming for a deck inspection. For more information on what to look for, check out our article on Storm Damage: Repair or Replace.
During Routine Maintenance or Home Inspections
It’s easy to forget about your roof until a problem arises, but just like your car, your roof benefits from regular check-ups. A professional roof inspection, ideally performed every few years or annually after your roof reaches a certain age, isn't just about looking at shingles. A good inspector will also assess the roof deck’s condition as much as possible without a full tear-off.
From the exterior, they'll look for subtle signs like uneven shingle lines, slight dips, or areas where shingles seem unusually soft when walked upon. From the interior, they'll make their way into your attic. This internal assessment is crucial because it allows them to see the underside of the roof deck directly. They'll look for water stains, mold growth, signs of leaks, sagging between rafters, and any light penetration. Even if you don't suspect a problem, catching minor deck issues early can prevent them from escalating into major structural damage. You can find more tips on proactive checks in our guide on How Often to Inspect Your Roof.
The Step-by-Step Process of a Thorough Roof Deck Inspection
When a professional undertakes a roof deck inspection, they don't just glance up and call it a day. It's a methodical process involving both interior and exterior assessments to get a full picture of the hidden structure. Let's walk through what a diligent inspector will do.
Interior Attic Assessment
The first place a thorough inspection often begins is surprisingly, inside your home: the attic. This is a critical vantage point because it allows the inspector to see the underside of the roof deck directly. What are they looking for up there?
They’ll start by carefully navigating the attic space, paying close attention to the areas directly beneath the roofline. Key indicators of potential deck problems include:
- Water Stains and Discoloration: Any dark streaks or patches on the wood sheathing or rafters are tell-tale signs of past or present leaks. Even if the stains are dry, they indicate a breach in the roofing system that likely affected the deck.
- Mold and Mildew Growth: This is a clear indicator of moisture problems, often stemming from leaks or poor attic ventilation, which can lead to wood rot over time.
- Sagging or Bowing Decking: The inspector will look for any areas where the roof deck visibly dips between the rafters. This could indicate structural weakness due to water damage or simply inadequate decking support.
- Visible Light: If sunlight is peeking through cracks or holes in the roof deck, it's an undeniable sign of a significant compromise, indicating open pathways for water and pests.
- Compromised Fasteners: While harder to spot from the underside, an experienced eye might notice nails pushing through the deck or signs of rust around nail penetration points, which could point to problems with the decking itself or its installation.
Always ensure the attic is well-lit and that the inspector uses proper safety precautions, as attics can have uneven flooring and sharp objects. Seeing these issues from the attic often means the problem on the deck's surface is already significant. For more on what these internal signs mean, check out our guide on Signs of Water Damage in the Attic.
Exterior Visual and Hands-On Examination Post-Tear-Off
While the attic offers clues, the most definitive inspection of the roof deck happens after the old shingles have been removed during a full roof replacement. This is when the deck is completely exposed, allowing for a comprehensive, hands-on evaluation.
The process typically involves:
- Full Tear-Off: First, every shingle, along with the underlayment, is carefully stripped away. This is a messy but crucial step that reveals the naked roof deck. Our article on What Happens During a Roof Tear-Off delves into this process in detail.
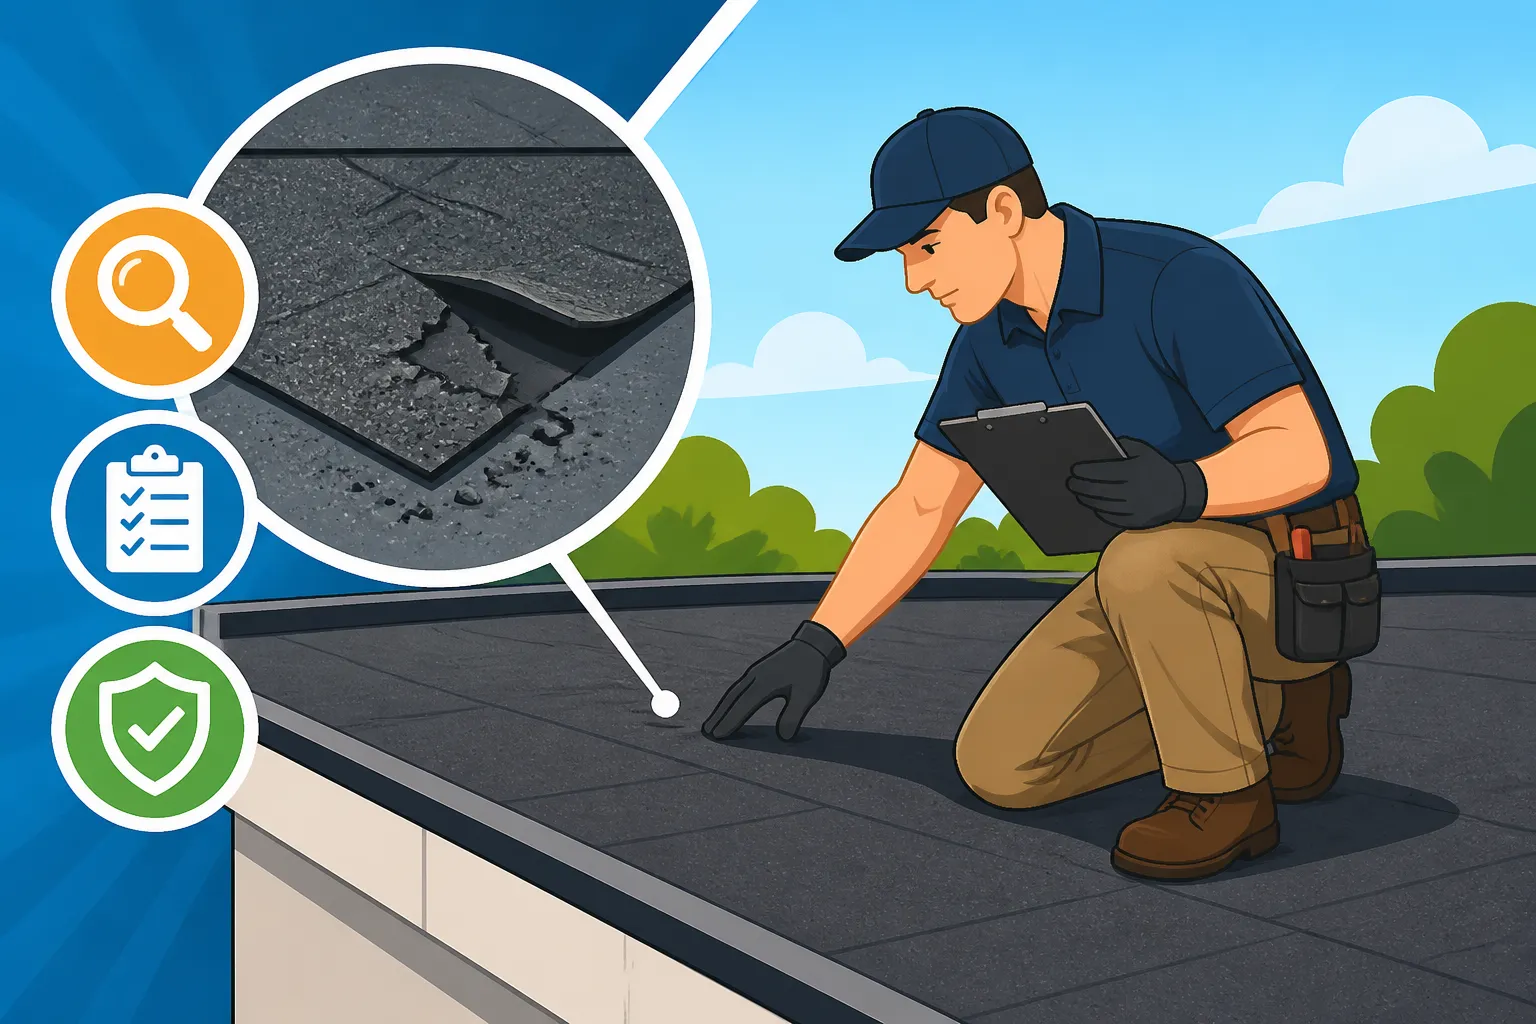
- Visual Inspection: With the deck exposed, the contractor will methodically examine every panel. They're looking for obvious signs of damage such as:
- Rot and Decay: Darkened, soft, or crumbly wood.
- Delamination: For plywood or OSB, this means the layers are separating, often bubbling or swelling.
- Cracks or Holes: These could be from impact, age, or improper installation.
- Warping or Cupping: Where panels are no longer flat.
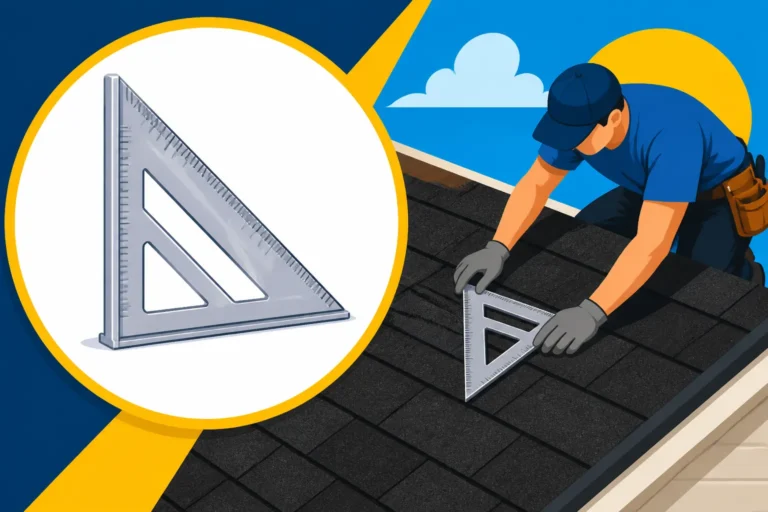
- Physical Probing: The inspector will walk the deck, feeling for soft or spongy spots underfoot. They might use a small tool to gently probe areas that look suspicious to assess the wood's integrity.
- Fastening Check: They'll also check the existing fasteners—the nails or staples holding the deck panels to the rafters. Are they securely in place? Are there too few? Are they rusting?
- Panel Spacing and Thickness: A professional will ensure that the deck panels have proper spacing (typically 1/8 inch) between them to allow for expansion and contraction. They'll also confirm that the decking material meets local building codes for thickness, often 7/16" or 15/32" for residential roofs.
This hands-on, post-tear-off inspection is the only way to truly guarantee the deck is sound before installing new materials. It prevents hidden problems from being covered up, only to resurface later with costly consequences.
Identifying Different Types of Damage
During the exterior examination, inspectors are trained to differentiate between various types of deck damage, each with its own implications for repair and replacement. Knowing these can help you understand your contractor’s recommendations.
- Water Damage and Rot: This is arguably the most common and serious type of deck damage. It typically appears as darkened, discolored wood that feels soft or spongy to the touch. In advanced stages, the wood might even crumble. Rot is almost always a result of persistent moisture intrusion, either from a leak in the roof above or from excessive condensation/humidity within the attic due to poor ventilation. Once wood starts to rot, its structural integrity is severely compromised, making replacement of the affected sections essential.
- Delamination (Plywood/OSB): For engineered wood products like plywood and OSB, delamination means the layers of wood veneer (plywood) or wood strands (OSB) separate. This often looks like bubbling, swelling, or peeling. Delamination is usually caused by prolonged exposure to moisture, which breaks down the adhesives holding the layers together. Just like rot, delaminated decking loses its strength and can no longer provide a solid nailing surface for new shingles.
- Cracked or Broken Panels: Deck panels can crack or break due to several factors: impacts (like a falling tree branch), stress from an improperly supported roof, or even from improper installation if panels were nailed too tightly without expansion gaps. Cracks compromise the continuous surface of the deck and can be entry points for water, while larger breaks clearly indicate a need for replacement.
- Nail Pops: While nail pops usually refer to nails pushing up from the shingles, they can also signify issues with the deck itself. If the nails holding the deck to the rafters are improperly set, or if the deck wood expands and contracts excessively due to moisture or temperature fluctuations, these fasteners can become loose or protrude. This weakens the deck’s attachment and can also cause visible bumps under your new shingles.
When a professional inspects your roof deck, they're looking for these specific indicators. If you're working with a reputable contractor, perhaps one you found through services like Modernize, they'll be diligent in spotting these issues and explaining them clearly to you. Their expertise ensures that the foundation of your new roof is as solid as the shingles themselves.
Common Issues Discovered During Deck Inspection and Their Implications
It’s one thing to identify damage; it’s another to understand what that damage means for your roof and your home. During a deck inspection, several common issues can emerge, each carrying specific implications for the repair process, cost, and the long-term health of your roofing system.
Rotted or Delaminated Sheathing
This is arguably the most frequently encountered and concerning issue during a roof deck inspection. When an inspector finds areas of rot or delamination, it tells a story of moisture intrusion that has been silently working its destructive magic.
- Why it happens: Rotted sheathing is almost always a direct result of chronic leaks in the roof above, or insufficient attic ventilation leading to condensation buildup. Water seeps in, saturates the wood, and over time, fungi and decay set in. Delamination in plywood or OSB occurs for similar reasons; moisture breaks down the resins that bind the wood layers or strands together, causing them to swell, bubble, and separate.
- The necessity of replacement: Simply put, rotted or delaminated sheathing must be replaced. There's no effective way to "repair" structurally compromised, decayed wood. Attempting to nail new shingles into rotted wood is futile; the nails won't hold, making the new roof vulnerable to wind uplift and leaks from the moment it's installed.
- Impact on new roof installation and warranties: A new roof installed over a rotted deck will likely fail prematurely, no matter how good the shingles are. More importantly, nearly all shingle manufacturers, like GAF, Owens Corning, and CertainTeed, require a sound, structurally integral deck for their warranties to be valid. If your new roof starts showing problems because of an unaddressed deck issue, your warranty could be voided. This is why addressing Roof Decking Replacement Cost upfront is a wise investment rather than a hidden expense.
Inadequate Fastening or Spacing
While perhaps less dramatic than a gaping hole from rot, issues with how the roof deck itself is fastened or its panels are spaced can have significant long-term consequences.
- The importance of proper nailing patterns and expansion gaps: Decking panels, whether plywood or OSB, need to be securely fastened to the rafters with the correct type and number of nails (or screws). Building codes typically specify minimum fastening schedules. Equally important is leaving small gaps (usually 1/8 inch) between the edges of adjacent panels. These "expansion gaps" allow the wood to expand and contract with changes in temperature and humidity without buckling or warping.
- How incorrect fastening leads to problems: If deck panels aren't nailed sufficiently, or if they're nailed improperly (e.g., using staples where nails are required, or nails that are too short), the deck can move or flex excessively. This movement can stress the fasteners holding your shingles, leading to nail pops, shingles detaching, and an overall reduction in the roof's wind resistance. If there are no expansion gaps, the panels can buckle or "telegraph" through the shingles, creating unsightly ridges and stressing the shingles themselves, leading to cracking.
- Building codes and manufacturer specifications: Most local Roofing Building Codes: What to Know dictate minimum requirements for roof deck installation, including fastener types, spacing, and panel thickness. Adhering to these codes, as well as manufacturer-specific installation guidelines, is crucial not only for the roof's performance but also for upholding any warranties on the decking material or the shingles.
Underlying Structural Concerns
Sometimes, what appears to be a simple deck issue can be a symptom of a much larger, more serious structural problem affecting your home. A keen-eyed inspector will recognize when to look beyond the immediate deck.
- When deck issues point to deeper problems: If an inspector finds severe, widespread sagging of the roof deck, it could indicate that the underlying rafters or trusses are compromised. This might be due to long-term water damage that has spread beyond the deck, pest infestation (like termites or carpenter ants), or even structural defects from the original construction. Similarly, unusual patterns of cracking or breaking in the deck could suggest excessive load or settling of the house frame.
- Uncovering catastrophic issues: A thorough roof deck inspection during a replacement offers a rare opportunity to assess the entire roof structure. Catching issues with rafters or trusses before a new roof is installed can prevent a catastrophic failure down the road. Addressing these deeper structural problems early might be more expensive upfront, but it’s an essential investment in the safety and longevity of your entire home.
- Expertise in spotting underlying issues: This is where the experience and training of a professional contractor, particularly one from a reputable firm like those you might find through Modernize, truly shine. They possess the knowledge to distinguish between a localized deck repair and a call for a structural engineer. Their comprehensive assessment ensures that your roof is not just cosmetically sound, but structurally robust from the ground up.
What Happens After a Problematic Deck Inspection?
So, the inspection is done, and it turns out your roof deck has some issues. Don't panic! This is precisely why inspections are so important – to catch problems before they lead to bigger headaches. The next steps involve making informed decisions about repairs and ensuring everything is done by the book.
Repairing or Replacing Damaged Sections
Once damage is identified, the conversation shifts to how to address it. This isn't always a one-size-fits-all solution; it depends on the extent and type of damage.
- Full replacement versus spot repairs: If the damage is extensive, widespread, or indicative of systemic issues (like severe rot across multiple panels), a full roof deck replacement might be necessary. This means removing all the old decking and installing new sheets of plywood or OSB. However, if the damage is localized to a few small areas – perhaps a couple of rotted sections around a leaky vent or a single delaminated panel – then spot repairs are usually sufficient. In these cases, the contractor will carefully cut out the damaged section and replace it with new, appropriately sized wood.
- Materials used for replacement: The most common materials for roof decking replacement are new sheets of plywood (typically CDX grade) or OSB (Oriented Strand Board). Both are widely used and perform well when installed correctly. The choice often comes down to regional availability, cost, and contractor preference, but both are acceptable for asphalt shingle roofs. The key is ensuring the new material matches the thickness of the existing decking for a consistent, level surface.
- Cost implications of deck repair/replacement: This is where many homeowners get nervous. Deck replacement isn't usually included in the initial "roof replacement cost" estimate because its condition can't be fully assessed until the old shingles are removed. Contractors typically charge per sheet of plywood or OSB replaced, which covers the material and labor. While it's an added expense, addressing deck damage is a non-negotiable part of a proper roof replacement. Skipping it means you're building a new roof on a failing foundation, potentially nullifying your investment and warranty. You can anticipate these potential costs by understanding factors like Cost of Roof Tear-Off and Disposal, which might influence the overall project.
Ensuring Code Compliance and Manufacturer Warranty
This phase is all about adhering to rules and protecting your investment. It’s not just about slapping new wood down; it’s about doing it right.
- Adherence to local building codes: Every city and county has specific building codes that govern roof construction, including the type and installation of roof decking. These codes are in place to ensure public safety and the structural integrity of homes. When replacing or repairing deck sections, your contractor must ensure that the new installation meets or exceeds these local standards. This includes factors like decking thickness, fastening patterns, and expansion gaps. A knowledgeable contractor will obtain the necessary permits and schedule inspections by local building officials to verify compliance. This process is crucial to avoid future issues, especially if you ever decide to sell your home.
- Vital for valid shingle warranties: This point cannot be stressed enough. Leading shingle manufacturers, such as GAF, Owens Corning, and CertainTeed, design their products to perform optimally on a sound, properly installed roof deck. Their comprehensive warranties, which protect your investment against manufacturing defects, are contingent upon correct installation on a suitable substrate. If your roof deck is improperly repaired or not up to standard, and a shingle issue arises, the manufacturer could deny your warranty claim. This is a huge risk to take for the sake of saving a little money on deck repairs. Understanding the intricacies of Roofing Warranties: Manufacturer vs Workmanship can help clarify these points.
- Reputable contractors ensure compliance: A reputable roofing contractor will not only be well-versed in local building codes but will also prioritize manufacturer specifications. They understand that their workmanship, combined with quality materials, forms the basis for a lasting roof system and a happy customer. This is why connecting with certified and experienced professionals, perhaps through a platform like Modernize, is so beneficial. They’ll guide you through the process, explain the reasons for any deck repairs, and ensure that all work is completed to the highest standards, safeguarding your home and your warranty for years to come.
Common Roof Deck Issues and Solutions
To help you visualize some of these common problems and their solutions, here's a quick reference table.
| Issue Discovered | Signs on Inspection | Typical Cause | Recommended Solution | Why it Matters |
|---|---|---|---|---|
| Rotted Wood Sheathing | Dark, discolored, soft, spongy, or crumbling wood. | Persistent water leaks from roof, poor attic ventilation leading to condensation, age. | Remove and replace affected sections with new plywood or OSB, ensuring proper fastening and ventilation. | Compromises structural integrity, provides no secure nailing surface for shingles, can lead to mold and further leaks. New shingles will fail prematurely. |
| Delaminated Plywood/OSB | Swelling, bubbling, peeling, or separation of wood layers. | Moisture exposure (leaks, high humidity), failure of internal adhesives. | Remove and replace affected panels with new, appropriately sized plywood or OSB sheets. | Weakens the deck, creates an uneven surface that "telegraphs" through shingles, and makes shingle adhesion and nailing unreliable. |
| Cracked/Broken Panels | Visible cracks, holes, or splintered sections in the decking. | Impact damage (e.g., falling branches), excessive stress/load, improper installation without expansion gaps. | Cut out and replace damaged sections. Ensure surrounding areas are stable. For large cracks, replacement of the entire panel may be needed. | Reduces structural strength, creates entry points for water and pests, provides an unstable surface for shingles, and can lead to shingle cracking above the damaged area. |
| Inadequate Fastening | Loose panels, nail pops (nails pushing up), panels moving underfoot. | Insufficient number of fasteners, wrong type/length of nails, improper nailing pattern, wood expansion/contraction. | Re-fasten existing panels with appropriate nails/screws, adhering to local building codes and manufacturer specs. Replace panels if wood around fasteners is damaged. | Weakens the entire roof's resistance to wind uplift, can cause shingles to detach prematurely, and leads to an uneven surface. Critical for High-Wind Nailing Cost Premium scenarios. |
| No/Improper Expansion Gaps | Buckling, warping, or "ridges" appearing in the roof deck, often visible through old shingles. | Decking panels installed too tightly against each other, preventing natural wood expansion. | Replace affected panels, ensuring 1/8-inch gaps are left between new panels. If severe, may require full deck replacement. | Creates buckling that transmits through shingles, leading to stress, cracking, and premature failure of the new roofing materials. Can also cause unevenness in the roofline. |
| Incorrect Deck Thickness | Panels appear too thin for span, noticeable flex or bounce. | Original construction used undersized decking, or non-code-compliant repair. | Replace with decking of appropriate thickness as per local building codes (e.g., 7/16" or 15/32" for typical residential spans). | Lack of rigidity makes the roof susceptible to sagging, improper support for shingles, and potential structural failure, especially under heavy loads like snow. It can also void warranties. |
| Pest Damage | Tunnels, galleries, frass (wood dust), visible insects. | Termite, carpenter ant, or other wood-boring insect infestations. | Remove and replace damaged sections. Address the pest problem with an exterminator before re-roofing to prevent recurrence. | Destroys the structural integrity of the wood, compromising the entire roof's stability and creating entry points for water. The infestation can spread to other parts of the home. |
Final Thoughts on Your Roof Deck
It’s easy to focus on what you can see – the shingles, the gutters, the overall curb appeal. But as we've explored, the hidden components of your roof, especially the deck, are just as, if not more, vital to its long-term performance and the protection of your entire home. A professional roof deck inspection, particularly as part of a planned roof replacement, isn't an optional add-on; it's a fundamental step that ensures the money you invest in a new roof is truly well-spent.
Understanding how a roof deck is inspected empowers you to have more informed conversations with contractors, ask the right questions, and ultimately make the best decisions for your home. Don't underestimate the power of a solid foundation, especially when it comes to the roof over your head.
Disclaimer
Please remember that this article provides general information and guidance. Roofing work, especially concerning structural components like the roof deck, can be complex and potentially dangerous. Always consult with qualified and licensed roofing professionals for specific assessments, recommendations, and execution of any roof repairs or replacements on your property. Local building codes and regulations vary, and a professional contractor will ensure all work complies with the necessary standards.