Damaged Flashing: Repair or Replace
There's nothing quite as unsettling for a homeowner as seeing a water stain on the ceiling or a drip during a heavy rain, and often, the culprit isn't a mysterious hole in the middle of your roof, but rather damaged flashing. This often-overlooked component is absolutely critical to keeping your home dry, and knowing when to pursue a repair versus a full replacement can save you a world of headaches and a significant amount of money. This guide will walk you through everything you need to know about assessing and addressing damaged roof flashing.
Understanding the Role of Flashing in Your Roof's Defense
Imagine your roof as a giant umbrella, but with lots of seams and penetrations where water could potentially sneak in. That's where flashing comes in. It's the unsung hero, the protective seal that ensures these vulnerable areas remain watertight, protecting the structural integrity of your home from insidious water damage.
What Flashing Actually Does and Why It's So Crucial
At its core, flashing is a weatherproofing material, typically made of metal, that's installed at critical junctures on your roof. Think about anywhere two planes of your roof meet, where a chimney or skylight penetrates the roofline, or along the edges where the roof meets a wall. These areas are inherently susceptible to water infiltration because shingles can't form a perfect, continuous seal around complex shapes or abrupt changes in slope. Flashing acts as a bridge, diverting water away from these weak points and down the roof, preventing it from seeping into your attic, walls, or ceiling.
Without properly installed and maintained flashing, even a brand-new roof is fundamentally compromised. A small crack or bend in a piece of flashing can lead to significant water damage over time, rotting roof decking, compromising insulation, and fostering mold growth. It's truly a foundational element of any robust asphalt roofing system. Understanding what flashing is and why it matters is the first step in appreciating its crucial role.
Common Types of Flashing and Where You'll Find Them
Flashing isn't a one-size-fits-all component; different areas of your roof require specialized types. Knowing what to look for can help you identify potential problem spots.
- Step Flashing: This is probably the most common type you'll encounter, used where a roof slope meets a vertical wall, like a dormer or a chimney. It consists of multiple L-shaped pieces of metal, installed in a stepped pattern with each shingle. Each piece overlaps the one below it, directing water away from the wall. Proper installation involves weaving the flashing with the shingles, not just laying it over them.
- Valley Flashing: Valleys are those V-shaped channels formed where two roof planes meet. They collect a significant amount of rainwater and snowmelt, making them high-risk areas. Valley flashing is usually a long, continuous strip of metal, often bent down the center, installed beneath the shingles in the valley to create a smooth, water-shedding path. An improperly installed or damaged valley can lead to substantial leaks.
- Chimney Flashing: Chimneys are notorious for leaks because they create a large penetration in the roof. Chimney flashing is a multi-part system that typically includes base flashing (around the bottom of the chimney), step flashing (along the sides, integrated with shingles), and counter flashing (embedded in the chimney mortar joints and bent down over the step flashing to prevent water from running behind it). The top piece, often called the head flashing, seals the top where the chimney meets the roof.
- Skylight Flashing: Similar to chimneys, skylights also require a specialized flashing kit provided by the skylight manufacturer. This kit typically includes head, sill, and side flashing pieces that integrate with the shingles to create a watertight seal around the glass unit.
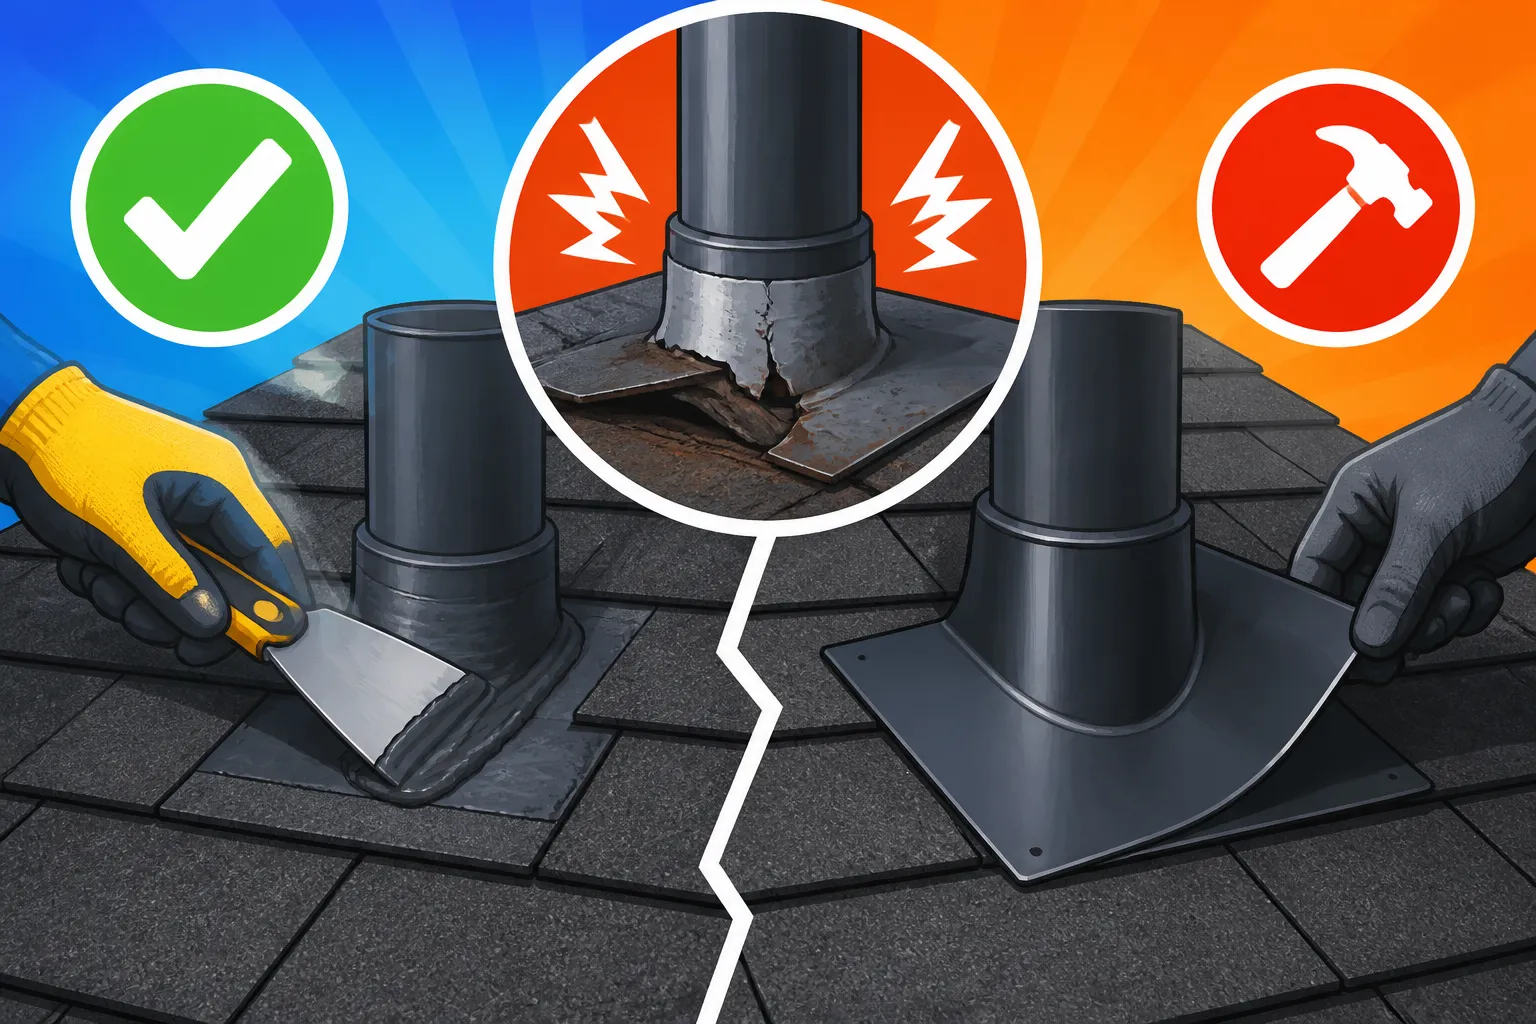
- Vent Pipe Flashing (Boots): These are usually rubber or neoprene boots with a lead or aluminum base, designed to slide over vent pipes that penetrate the roof, like those for your plumbing system. The base is then shingled over to create a seal. The rubber or neoprene can degrade over time due to UV exposure, leading to cracks and leaks.
- Drip Edge: While technically a type of flashing, drip edge is specifically installed along the eaves and rake edges of your roof. Its purpose is to direct water off the roof and into the gutters, protecting the fascia board and preventing water from wicking back underneath the shingles. It's an essential part of any effective roofing system, often required by building codes.
Each of these types of flashing plays a unique role in safeguarding your home, and each can be a source of trouble if it becomes damaged or wears out. Knowing how flashing is installed correctly is key to understanding potential failure points.
Recognizing the Signs of Damaged Flashing
The insidious thing about flashing damage is that it often isn't immediately obvious from the ground. By the time you spot an issue, water might have been making its way into your home for quite a while. However, with a keen eye and knowing what to look for, you can catch problems early.
Visible Clues from the Exterior
A good, safe visual inspection from the ground with binoculars, or better yet, a drone, can reveal many common flashing issues. Never attempt to climb onto your roof yourself if you're not comfortable or don't have the proper safety equipment.
- Bent or Kinked Flashing: Metal flashing, especially around chimneys or dormers, can get bent, dented, or kicked out of place by strong winds, falling debris, or even clumsy workers walking on the roof. Even a slight bend can create a channel for water to enter. You might see a piece of step flashing sticking out at an odd angle, or a valley flashing that looks uneven.
- Rust or Corrosion: Older metal flashing, particularly galvanized steel or tin, can eventually rust through. Rust spots, discoloration, or even small holes can indicate that the flashing's protective coating has failed and water is beginning to compromise the metal itself. This is particularly common in areas with frequent moisture or where dissimilar metals have reacted (galvanic corrosion).
- Missing Sealant or Caulk: While flashing primarily relies on its design and overlap to shed water, sealants are often used to complement the flashing, especially around protrusions. Over time, caulk can dry out, crack, or peel away, leaving gaps where water can penetrate. This is a tell-tale sign of deterioration.
- Cracked or Deteriorated Vent Boots: The rubber or neoprene collars on vent pipe flashing are constantly exposed to harsh UV rays and extreme temperatures. Look for visible cracks, tears, or a general degraded appearance in the rubber. If the boot looks brittle or has large chunks missing, it's almost certainly failing.
- Loose or Missing Flashing: High winds can sometimes lift and loosen pieces of flashing, especially if they weren't adequately secured during installation. You might see sections of step flashing that have pulled away from the wall, or valley flashing that has buckled or come undone.
- Granule Loss or Damage on Shingles Near Flashing: If the shingles immediately adjacent to the flashing are showing excessive granule loss, cracking, or other signs of wear, it could be an indication that water is pooling or moving incorrectly in that area, or that the flashing itself is causing damage through friction or improper fit. This can sometimes point to a larger issue of general roof wear, which might prompt a discussion of a full roof replacement down the line.
Interior Red Flags Indicating a Flashing Problem
Often, the first sign of damaged flashing manifests inside your home. These interior clues are critical and should never be ignored.
- Water Stains on Ceilings or Walls: This is the most obvious and alarming sign. If you see water stains on your ceiling, especially around the fireplace, near an exterior wall, or beneath a skylight, flashing is a prime suspect. The water might travel along rafters or joists before dripping, so the stain might not be directly below the leak source, but it will be in the vicinity of a roof penetration.
- Dripping Water: A more immediate and severe sign is actual dripping water during a rainstorm. Pay attention to where the drips are occurring – is it from a light fixture, a ceiling fan, or directly from the ceiling? Pinpointing the location can help a professional trace the source back to specific flashing areas.
- Mold or Mildew Growth: Persistent moisture in an attic or wall cavity, even if it's not enough to cause visible dripping, can lead to mold or mildew growth. A musty odor in your attic or a dark patch on an interior wall could be a silent indicator of a long-standing flashing leak.
- Peeling Paint or Wallpaper: Water seeping into walls can cause paint to peel, blister, or wallpaper to loosen and bubble. This is another symptom of chronic moisture exposure and suggests an ongoing leak that needs immediate attention.
- Rotting Wood: In severe cases, prolonged water exposure due to compromised flashing can lead to rotting wood in your attic rafters, ceiling joists, or wall studs. This is a structural concern and requires urgent intervention. If you can access your attic, look for darkened, soft, or crumbly wood around areas beneath flashing. Signs you need a new roof might also include a general softening of your roof deck, but flashing issues can cause localized rot.
Repairing Damaged Flashing: When It's a Viable Option
Once you've identified damaged flashing, the next big question is: can it be repaired, or does it need to be fully replaced? The answer largely depends on the extent and nature of the damage.
Scenarios Where Repair Makes Sense
For minor issues, a targeted repair can be an effective and cost-efficient solution, extending the life of your roof without the expense of a full replacement.
- Minor Rust Spots: If the rust is superficial and hasn't compromised the integrity of the metal, a repair might be possible. This usually involves thoroughly cleaning the rusted area, applying a rust-inhibiting primer, and then sealing it with a high-quality, durable roof sealant or coating specifically designed for metal. This is often a good option for older galvanized flashing that still has structural integrity but is showing early signs of corrosion.
- Small Cracks or Separations in Sealant: If the primary issue is dried, cracked, or missing caulk around a vent boot or chimney, resealing can often resolve the problem. The old, degraded sealant needs to be carefully removed, the area cleaned, and then new, flexible, UV-resistant roofing sealant applied. Ensure the sealant is compatible with the flashing and roofing materials.
- Slightly Bent or Loose Flashing: If a piece of metal flashing has simply come loose or is slightly bent but not torn or significantly corroded, it can often be resecured or reshaped. This might involve carefully flattening the metal, cleaning the area, and then reattaching it with appropriate roofing nails (often sealed) or a strong adhesive, ensuring proper overlap and drainage.
- Minor Damage to a Single Vent Boot: If only one vent boot is cracked or deteriorated, and the surrounding shingles and roof structure are in good shape, replacing just that single boot is a common and straightforward repair. This involves carefully removing the old boot and the surrounding shingles, installing a new boot, and then re-shingling around it.
It's important to remember that these repairs are best performed by experienced roofing professionals. They have the right tools, materials, and expertise to ensure the repair is done correctly and will last. Many homeowners attempt DIY repairs with caulk, only to find the leak returns, highlighting the importance of professional Flashing Leak Repair.
The Repair Process for Minor Flashing Issues
When a professional undertakes a flashing repair, they follow a systematic approach to ensure longevity and effectiveness.
- Thorough Inspection and Cleaning: First, the roofer will meticulously inspect the damaged area, often going beyond the immediate visible problem to check for secondary issues or related damage. The area will then be thoroughly cleaned, removing any debris, old sealant, dirt, or loose materials to ensure proper adhesion for new materials.
- Addressing the Metal Itself: If the flashing is bent, it will be carefully reshaped to its original position, restoring its ability to shed water. If there are minor holes or severe rust, the roofer might patch the area with a piece of metal flashing, bonding it securely with roofing cement and screws, or in some cases, using specialized soldering techniques for lead or copper flashing.
- Application of Sealants and Adhesives: For cracks, seams, or around vent boots, a high-quality, flexible, UV-resistant roofing sealant will be applied. This isn't just regular caulk; it's a specialized product designed to withstand extreme temperatures and constant exposure to the elements. For re-securing loose flashing, professional-grade roofing cement or approved fasteners will be used.
- Integration with Shingles: A critical part of any flashing repair, especially for step or valley flashing, is ensuring it integrates properly with the surrounding asphalt shingles. This often involves carefully lifting, repositioning, or replacing a few surrounding shingles to ensure the flashing is correctly overlapped and watertight. The process requires a delicate touch to avoid damaging healthy shingles.
A skilled roofer understands that a flashing repair isn't just about stopping a leak; it's about restoring the entire system's ability to protect the home.
When Full Replacement Becomes the Only Solution
While repairs can be a good short-term fix, there are many situations where damaged flashing is simply beyond repair, making a full replacement the more economical and safer long-term choice.
Indicators of Extensive Flashing Damage
Sometimes, the damage is so severe or widespread that patching it up would be a wasted effort, leading to recurring leaks and headaches.
- Widespread Corrosion or Pitting: If the flashing is extensively rusted, corroded, or pitted with multiple holes, a repair might be akin to putting a band-aid on a sieve. The metal has lost its structural integrity, and it's only a matter of time before new leaks emerge in other areas of the same flashing component. This is particularly true for older, less durable flashing materials.
- Severely Damaged or Torn Flashing: Flashing that has been severely bent, torn, or ripped off by high winds or falling tree limbs usually cannot be effectively repaired. The damage is too great to simply reshape or patch, and its ability to shed water has been fundamentally compromised.
- Improperly Installed Flashing: Believe it or not, many flashing problems stem from improper installation in the first place. If the flashing was never correctly integrated with the shingles, or if the wrong type of flashing was used for a particular area, it will continue to leak despite repairs. In such cases, removing the faulty installation and replacing it with code-compliant, properly installed flashing is the only permanent solution. For instance, sometimes a builder might "face nail" flashing to a chimney instead of using proper counter-flashing, which almost guarantees future problems.
- Damage to Adjacent Roofing Components: If the flashing damage has led to significant rot in the underlying roof decking, fascia, or rafters, simply repairing the flashing isn't enough. The rotten wood needs to be replaced, which often necessitates removing and reinstalling the flashing in that area anyway. This becomes part of a larger structural repair that goes beyond just the flashing itself. You might also need to consider your overall Roof Replacement Cost by Pitch if the damage is extensive.
- Matching Age of the Roof: If your asphalt roof is nearing the end of its lifespan (typically 20-30 years for architectural shingles), and the flashing is showing signs of wear, it often makes more sense to replace the flashing as part of a complete roof replacement. It's inefficient and ultimately more expensive to replace flashing only to have the entire roof replaced a few years later. This is a common scenario where homeowners realize the roof and flashing have aged out together.
The Comprehensive Flashing Replacement Process
Replacing flashing is a more involved process than a simple repair, but when done correctly, it provides a long-lasting, watertight solution.
- Safe Removal of Old Materials: The first step is carefully and safely removing the old, damaged flashing along with any surrounding shingles or roofing components that are in the way. This requires a precise touch to avoid damaging the underlying roof deck or other parts of the roof system. For chimney flashing, this often means cutting out old mortar joints to remove counter flashing.
- Inspection and Repair of Substrates: Once the old flashing is removed, the roofer will thoroughly inspect the underlying roof deck, rafters, and any adjacent wall sheathing for water damage, rot, or mold. Any compromised wood must be replaced before new flashing is installed to ensure a solid foundation.
- Installation of New Underlayment and Flashing: New ice and water shield or roofing felt is installed as needed to provide an extra layer of protection. Then, the new flashing is meticulously installed. This involves cutting and shaping new metal pieces to fit the specific contours of the roof penetration or valley. For example, step flashing will be woven into the shingle courses. For vent boots, the new rubber boot will be properly sealed and shingled over. The attention to detail here is paramount, as proper overlap and secure fastening are what make the flashing effective. This is where understanding how flashing is installed correctly is critical.
- Integration with New Shingles (or existing, if appropriate): After the flashing is in place, the roofing shingles are then installed or reinstalled, overlapping the flashing correctly to create a seamless, watertight barrier. This often includes using starter shingles and specific nailing patterns to ensure maximum wind resistance and protection.
- Final Sealing and Inspection: Once all components are installed, appropriate roofing sealants are used to seal any exposed fasteners or seams, providing an additional layer of protection. A thorough final inspection ensures that all flashing is correctly installed, all components are sealed, and the area is completely watertight.
The Financial Considerations of Flashing Repair vs. Replacement
Cost is always a significant factor for homeowners. When faced with damaged flashing, you'll need to weigh the immediate cost of a repair against the long-term investment of a replacement, considering factors like material, labor, and potential future issues.
Breaking Down Repair Costs
Flashing repair costs can vary quite a bit depending on the type of flashing, the extent of the damage, and the complexity of the job.
- Minor Sealant Repair: This is usually the cheapest fix. You might pay anywhere from $150 to $400 for a roofer to clean and re-caulk a few areas around a vent pipe or a small section of chimney flashing. It's often bundled with a general roof inspection or minor tune-up.
- Vent Boot Replacement: Replacing a single vent boot typically costs between $200 and $500. This involves removing a small section of shingles, replacing the boot, and then re-shingling. The cost reflects labor, the new boot, and sealants.
- Step or Head Flashing Repair (Small Section): For repairing a few pieces of step flashing along a dormer or a small section of chimney flashing, you could expect to pay $300 to $800. This often involves more intricate work, including bending new metal or carefully re-securing existing pieces.
- Valley Repair: Because valleys are critical and involve a larger section of material and more complex integration with shingles, even a repair can be pricier. A small valley repair might run $400 to $1,000, depending on the length and pitch.
Keep in mind that these are estimates. Factors like your location (labor rates vary significantly by state), the accessibility of the area, and the specific materials needed will influence the final price. Always get a detailed estimate that clearly outlines the scope of work. When getting quotes, make sure to ask How to Read and Compare Roofing Estimates carefully.
Understanding Replacement Costs and Long-Term Value
A full flashing replacement, especially around a major penetration like a chimney or skylight, will naturally cost more upfront than a repair, but it often provides better long-term value and peace of mind.
- Chimney Flashing Replacement: This is one of the most common and complex flashing replacement jobs. Costs can range from $500 to $2,000 or more, depending on the size of the chimney, the type of metal used (e.g., galvanized steel, copper, lead), and whether masonry work (tuckpointing new counter flashing into mortar joints) is required.
- Skylight Flashing Replacement: If a skylight is still in good condition but its flashing is failing, replacing the flashing kit can cost $400 to $1,200. This typically involves removing shingles, installing the new manufacturer-specific flashing, and re-shingling.
- Valley Flashing Replacement: A complete valley flashing replacement, including removing shingles from both intersecting roof planes, replacing the underlying felt or ice and water shield, and installing new metal, could cost $500 to $1,500+ per valley, depending on its length and complexity.
- Full Perimeter Flashing (Drip Edge): If you're replacing drip edge around the entire perimeter of a standard home, this could add $500 to $1,500 to a project, depending on the linear footage and material.
While these costs might seem high, consider the alternative: recurring leaks, escalating interior damage, and the constant stress of worrying about the next storm. Investing in proper flashing replacement ensures that vulnerable areas are protected for decades. It's often the smartest move if your existing flashing is extensively damaged, improperly installed, or simply at the end of its useful life alongside an aging roof. It contributes significantly to the overall lifespan of your roof, which you can learn more about in How Long Does an Asphalt Roof Last. Furthermore, depending on the cause of the damage, sometimes Is Leak Covered by Insurance can help offset these costs.
Finding the Right Professional for Your Flashing Needs
Flashing work isn't a DIY job for most homeowners. It requires specialized skills, an understanding of roofing mechanics, and adherence to safety protocols. Choosing the right professional is paramount to a lasting solution.
Why Expertise Matters for Flashing Work
Flashing is far more intricate than simply slapping some metal down. A true roofing expert understands the nuances of water flow, material compatibility, and local building codes.
- Knowledge of Water Diversion Principles: A skilled roofer knows how water moves across a roof and how to design and install flashing to effectively divert it. This isn't just about covering a gap; it's about creating a series of overlapping planes that force water downwards and away from penetrations. A novice might install flashing that looks right but inadvertently traps water or directs it incorrectly.
- Proper Material Selection: Different types of flashing materials (galvanized steel, aluminum, copper, lead) have different properties, lifespans, and costs. An expert can recommend the best material for your specific application and climate. They also understand how to prevent galvanic corrosion, which occurs when dissimilar metals react, causing premature failure.
- Adherence to Building Codes: Local building codes often dictate specific requirements for flashing installation, including material gauges, overlap distances, and fastening methods. A reputable contractor will be well-versed in these codes and ensure your flashing is installed to meet or exceed them, which is crucial for passing inspections and maintaining insurance validity. Understanding Roofing Building Codes: What to Know is vital for any professional.
- Seamless Integration with Roofing System: Flashing isn't a standalone component; it works in conjunction with the underlayment, shingles, and other roof accessories. An expert understands how to seamlessly integrate new or repaired flashing into your existing asphalt roofing system without compromising other elements or creating new weak points. They know the proper order in which roofers install components in to ensure a watertight seal.
- Safety and Efficiency: Roofing work, especially around steep pitches or chimneys, is inherently dangerous. Professionals have the necessary safety equipment, training, and insurance to perform the work safely and efficiently, minimizing risks to themselves and your property.
Tips for Vetting a Reliable Roofing Contractor
Finding a reputable roofer can feel overwhelming, but a systematic approach can help you choose wisely. Many homeowners turn to platforms like Modernize to find local contractors who are vetted and experienced in these types of intricate repairs.
- Check for Licensing and Insurance: This is non-negotiable. Always verify that a contractor is properly licensed in your state or locality and carries both general liability insurance and workers' compensation insurance. Ask for proof, and don't just take their word for it. This protects you from liability if an accident occurs on your property. This also speaks to why Licensed and Insured Roofers: Why It Matters.
- Ask for References and Review Past Work: A good contractor will be happy to provide references from previous clients. Call those references and ask about their experience, particularly regarding communication, timeliness, and the quality of the work. Look for online reviews on platforms like Google, Yelp, and the Better Business Bureau.
- Get Multiple Detailed Estimates: Don't settle for the first quote. Obtain at least three detailed estimates that clearly outline the scope of work, materials to be used, labor costs, and payment schedule. Compare these carefully; the cheapest bid isn't always the best, especially for critical components like flashing. Pay attention to What a Roofing Estimate Should Include.
- Inquire About Warranties: Ask about both the manufacturer's warranty on the flashing materials and the contractor's workmanship warranty. A solid workmanship warranty (typically 5-10 years) shows confidence in their installation quality.
- Verify Manufacturer Certifications: For major brands like GAF, Owens Corning, or CertainTeed, certified contractors often offer enhanced warranties. While not strictly necessary for flashing, it indicates a commitment to manufacturer-approved installation practices.
- Avoid High-Pressure Tactics: Be wary of contractors who pressure you into signing a contract immediately, demand full payment upfront, or show up unsolicited after a storm. These are common roofing contractor red flags to avoid.
By taking the time to properly vet your contractor, you're not just investing in a flashing repair or replacement; you're investing in the long-term protection and peace of mind for your home.
Disclaimer
Please remember that the information provided in this article is intended for general guidance and informational purposes only. Every roof and home is unique, and roofing work can be complex and dangerous. We strongly recommend consulting with a qualified, licensed, and insured roofing professional for a thorough inspection and personalized recommendations regarding your specific situation. Do not attempt complex roofing repairs yourself without proper training and safety equipment.