How Soffit Is Installed
Installing new soffit can feel like a daunting task, another mysterious piece of the roofing puzzle that homeowners often only think about when something goes wrong. You might be seeing peeling paint, notice critters nesting in your eaves, or simply realize your attic feels like an oven in the summer, all pointing to a potential soffit issue. This comprehensive guide is here to demystify the process, walking you through exactly how soffit is installed, what components you need, and why it's such a crucial element of your home's overall health and your roof's longevity.
Understanding What Soffit Is and Why It Matters for Your Roof
Before you even think about cutting a single piece, it's really helpful to understand what soffit is and, more importantly, why it's there. Many homeowners just see it as part of the decorative trim, but it plays a vital role in protecting your home.
More Than Just Decoration: The Critical Role of Soffit
Soffit is essentially the finished underside of your roof's eaves – that part that hangs out over your home's exterior walls. Think of it as the skin covering the bones of your rafters. While it certainly contributes to your home's aesthetic, providing a clean, finished look, its primary function is far more practical: ventilation. A properly installed soffit, especially one with vents, allows cooler, fresh air to enter your attic space. This might sound counterintuitive, especially in winter, but this airflow is absolutely critical.
Without adequate soffit ventilation, your attic can become a breeding ground for problems. In the summer, trapped hot air builds up, baking your roof deck and literally cooking your asphalt shingles from the inside out. This intense heat can significantly shorten the lifespan of your roof, causing shingles to crack, curl, and degrade prematurely. It also forces your air conditioner to work overtime, leading to much higher energy bills. In colder months, poor ventilation can lead to moisture buildup from household activities (like showering or cooking) that rises into the attic. This moisture, combined with heat escaping from your living space, can condense on cold surfaces, leading to mold growth, rotten wood, and even damaging ice dams along your eaves. That's why understanding how roof ventilation works is so important, and soffit is the entry point for that essential airflow.
Types of Soffit Materials and Their Considerations
When you're planning a soffit installation, you'll quickly realize there are several material options, each with its own set of pros, cons, and even slight installation nuances. The right choice for your home often comes down to budget, maintenance preferences, and the overall aesthetic you're aiming for.
Vinyl soffit is arguably the most popular choice these days, and for good reason. It's affordable, lightweight, requires very little maintenance (no painting ever!), and comes in a wide array of colors and styles, including smooth, perforated (vented), and embossed wood grain. Installation is generally straightforward, as panels interlock, making it a favorite for many contractors. However, vinyl can become brittle in extreme cold and may warp slightly in intense heat if not installed correctly.
Aluminum soffit is another excellent option, offering superior durability compared to vinyl. It's resistant to rot, rust, and pests, and holds up well in various climates. Like vinyl, it’s low maintenance and available in vented and unvented options. Aluminum can be a bit more expensive than vinyl, and while it doesn't rot, it can dent or scratch, and if the finish is compromised, it could show oxidation over time.
For a more traditional or specific architectural look, wood soffit can be a beautiful choice. It provides a classic aesthetic but requires regular maintenance, including painting or staining, to protect it from moisture and pests. The upfront and ongoing costs are typically higher, and installation can be more labor-intensive due to cutting and finishing. Fiber cement soffit, like products from James Hardie, offers the look of wood with much less maintenance. It's incredibly durable, fire-resistant, and impervious to pests and rot, but it's heavier and more challenging to cut and install, requiring specialized tools and often professional expertise. No matter the material, ensure it allows for proper airflow; remember, a critical aspect of your roof system explained is effective attic ventilation.
| Soffit Material | Pros | Cons | Maintenance | Typical Cost (per linear foot) |
|---|---|---|---|---|
| Vinyl | Affordable, low maintenance, many colors | Can become brittle in cold, may warp in heat | Low | $2 – $7 |
| Aluminum | Durable, rot/rust/pest-resistant | Can dent/scratch, slightly higher cost | Low | $3 – $9 |
| Wood | Classic aesthetic, natural look | High maintenance, susceptible to rot/pests | High | $4 – $12 |
| Fiber Cement | Durable, fire/pest/rot-resistant, low maintenance | Heavy, harder to cut/install, higher upfront | Low | $5 – $15 |
Preparing for Soffit Installation: Laying the Groundwork
Proper preparation is the unsung hero of any home improvement project, and soffit installation is no exception. Skimping on this stage can lead to frustrating issues down the line, compromising both the appearance and function of your new soffit.
Essential Tools and Materials You'll Need
Before you dive in, gather all your necessary tools and materials. Nothing slows a project down faster than having to stop and run to the hardware store mid-task. Here's a list of what you'll typically need:
- Measuring Tape: For precise measurements, naturally.
- Utility Knife / Tin Snips / Circular Saw / Miter Saw: Depending on your soffit material. A utility knife and straight edge work for vinyl. Tin snips are great for aluminum. A circular saw or miter saw with a fine-tooth blade is best for wood or fiber cement.
- Drill/Driver: For pilot holes and driving fasteners.
- Level: Essential for ensuring your channels are straight.
- Chalk Line: To mark long, straight lines.
- Hammer: For nailing, if using nails.
- Ladder or Scaffolding: Safety first! Ensure it’s stable and rated for your weight plus materials.
- Personal Protective Equipment (PPE): Safety glasses, gloves, and a dust mask (especially for fiber cement).
- Soffit Panels: Of your chosen material and style (vented and non-vented).
- F-channel or J-channel: These are the trim pieces that hold the soffit panels. The F-channel typically attaches to the house wall, and the J-channel (or sometimes another F-channel) attaches to the fascia board.
- Fascia Board (if replacing): The flat board that runs along the ends of your rafters.
- Fasteners: Rust-resistant nails or screws, appropriate for your soffit material and framing. Generally, galvanized or stainless steel roofing nails work well.
Having these on hand will make the entire process smoother and more efficient. And if you're feeling overwhelmed by the sheer number of parts involved, remember that a good contractor can make the process easy. Companies like Modernize can help connect you with experienced professionals in your area who specialize in roofing and siding, ensuring you have the right team for the job.
Assessing Existing Conditions and Making Necessary Repairs
Before any new soffit goes up, it’s crucial to inspect the existing structure. This means getting up close and personal with your eaves, fascia, and even a peek into the attic if possible. You’re looking for any issues that could compromise the new installation or indicate deeper problems.
Start by inspecting the existing fascia board. Is it solid, or do you see signs of rot, especially at the bottom edge? Is it warped, cracked, or showing water damage? The fascia board is what your new soffit channels will attach to, so it needs to be sound. If it’s damaged, it’s always best to replace it first. This is also a good time to check the sub-fascia (the board directly behind the fascia) and the ends of the rafters. Any rotten wood needs to be cut out and replaced before you proceed. Remember, even if you’re only looking at a soffit installation, it’s part of the bigger picture, like learning about what happens during a roof tear-off. You need a solid foundation.
Also, look for signs of pest infestation. Squirrels, birds, and insects love to make homes in unprotected eaves. You’ll want to ensure any existing nests or entry points are sealed up and treated before installing new soffit, which will provide a robust barrier. Taking the time to address these underlying issues now will save you headaches, expensive repairs, and potential structural damage down the road. It ensures your new soffit isn't just a pretty face but a functional, protective component of your home for years to come.
Step-by-Step Guide to Installing Soffit Like a Pro
Alright, with all your tools ready and any necessary repairs completed, it’s time for the main event: installing the soffit itself. This process might vary slightly depending on your home's construction and the specific soffit product you choose, but the general principles remain the same.
Installing the Receiving Channels: F-Channel and J-Channel
The first crucial step is to install the channels that will hold your soffit panels. These channels provide a secure, level track for the soffit to rest in and expand or contract with temperature changes.
Typically, you'll start by marking a level line along the house wall where the soffit will meet. This line should be at the desired height of the soffit. Use a level and a chalk line to create a perfectly straight guide. Along this line, install your F-channel or J-channel. The "F" shape of the F-channel is designed to accept the soffit panel, creating a clean finish against the wall, while a J-channel has a single leg that holds the panel. When installing, ensure the channel is perfectly level and securely fastened into the wall studs or blocking. Space fasteners every 12 to 16 inches. Make sure the open slot of the channel faces down, ready to receive the soffit panels.
Next, you'll install a similar channel along the underside of the fascia board. This will typically be a J-channel or sometimes another F-channel, depending on the soffit system. Again, use a level to ensure this channel runs perfectly parallel to the channel on the wall. Fasten it securely to the bottom edge of the fascia board. For corners, you'll miter-cut the channels at 45-degree angles to create a clean, seamless look. This precision is vital because any unevenness in these channels will be immediately noticeable in the finished soffit. For a strong, professional finish, consider the insights from experts about Drip Edge: What It Does, as proper edge work is key to a long-lasting roof system.
Cutting and Securing Soffit Panels
With your channels firmly in place, it's time to measure, cut, and install the soffit panels. This is where the magic really starts to happen!
Begin by measuring the distance from the inside groove of the F-channel (on the wall) to the inside groove of the J-channel (on the fascia). You'll want to subtract about 1/4 to 1/2 inch from this measurement to allow for thermal expansion and contraction of the panels. This is incredibly important, especially with vinyl and aluminum soffit, which can expand and shrink quite a bit with temperature changes. If you cut them too long, they will buckle and warp.
Now, take your measured length and carefully cut your soffit panels. For vinyl, you can often score it with a utility knife and snap it along a straight edge. For aluminum, tin snips are your best friend. For fiber cement or wood, use the appropriate saw with a fine-tooth blade, always wearing safety glasses and a dust mask.
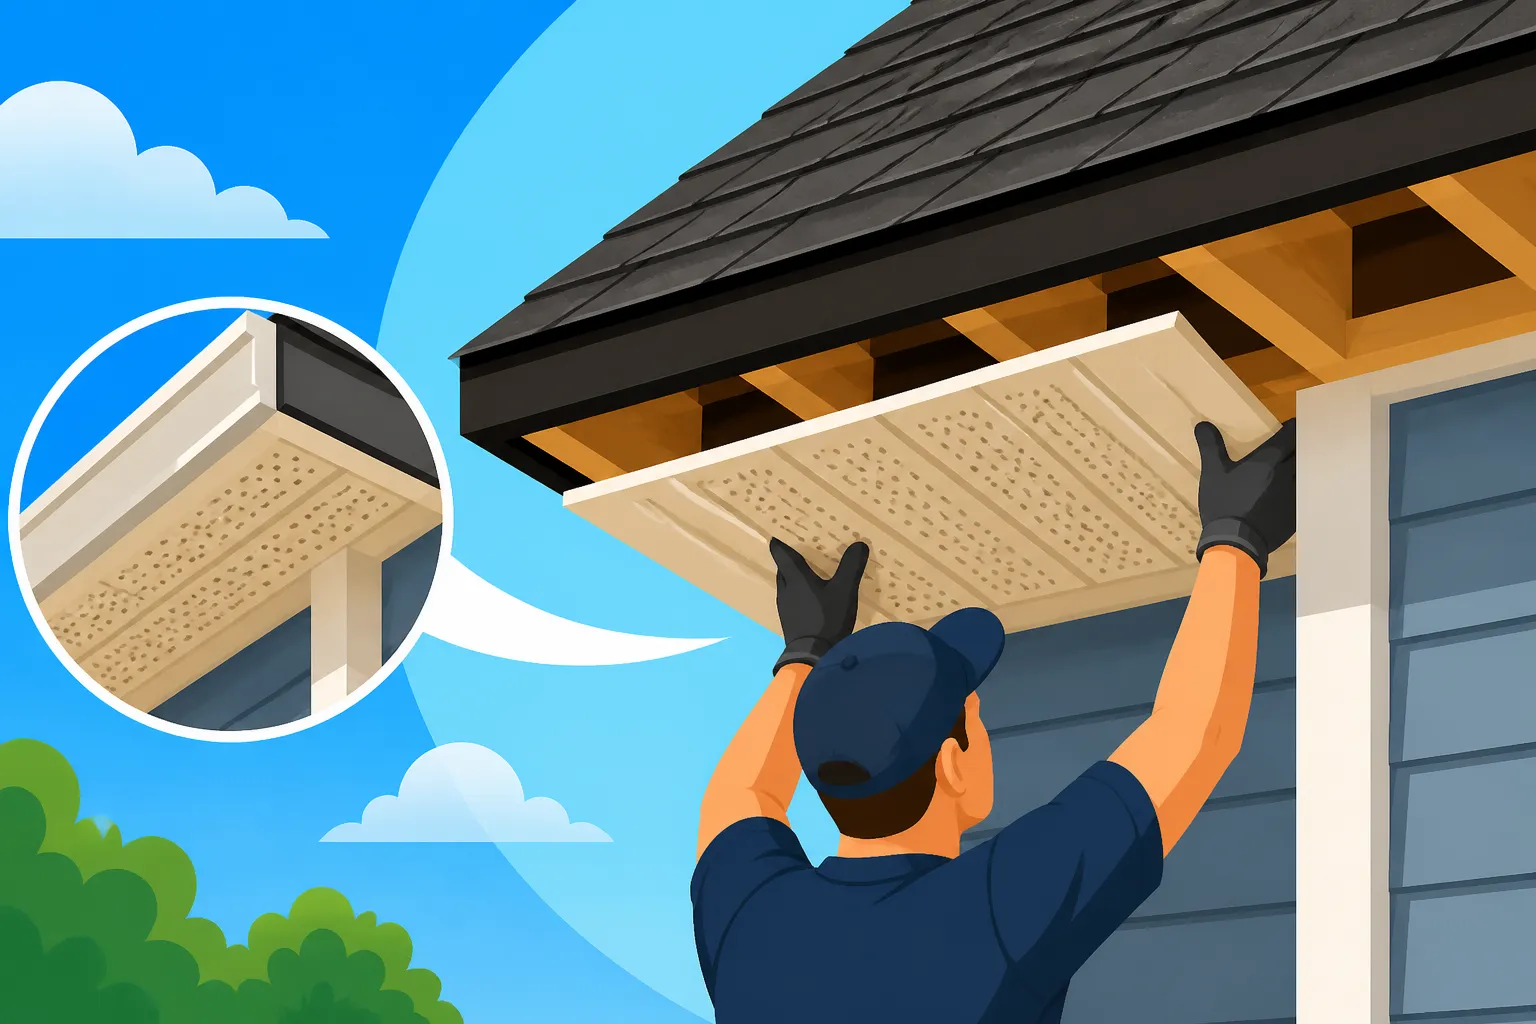
Once cut, carefully insert one edge of the soffit panel into the F-channel on the wall. Then, gently bow the panel slightly and push the other edge into the J-channel on the fascia. The panel should snap into place with a little wiggle room for movement. Once in place, secure the soffit panel by nailing or screwing through the nailing flange (the flat strip on the edge of the panel that's hidden by the next panel) into the underside of the sub-fascia or blocking. Do not nail or screw too tightly, as this will restrict the panel's ability to expand and contract, leading to buckling. Just snug enough to hold it firmly. Continue this process, interlocking each new panel with the previous one, working your way around the entire perimeter of your home. It’s also wise to stagger the joints of your soffit panels, much like how you would install shingles, to create a stronger and more aesthetically pleasing finish. This helps to prevent long, continuous seams that might be more noticeable or prone to issues.
Finishing Touches and Ensuring Proper Ventilation
As you near the end of the installation, it's time for those crucial finishing touches that separate a good job from a great one. Don't rush these final steps!
Once all the main soffit panels are installed, take a step back and inspect your work. Look for any panels that aren't fully seated, any fasteners that are too tight or too loose, or any gaps. Ensure all corner pieces are mitered correctly and fit snugly. The goal is a clean, continuous, and level appearance all around your home's eaves.
Crucially, ensure that your vented soffit sections are unobstructed. Remember, the whole point of vented soffit is to allow cool, fresh air into your attic. If insulation, pest screens, or debris are blocking these vents, you've defeated the purpose. Climb into your attic (if accessible) and visually inspect the soffit vents from the inside. Make sure they are clear and that there's nothing impeding the airflow. Sometimes, homeowners inadvertently push insulation too far into the eave cavity, blocking the crucial air intake. Installing baffles in the attic before insulation is key to maintaining this airflow. This integration with a ridge vent at the top of your roof creates a balanced ventilation system, which is paramount for your roof's health and your home's energy efficiency. Understanding how this full roofing system explained works together is critical for maximizing its benefits and ensuring your shingles last as long as they should.
Common Challenges and Troubleshooting During Soffit Installation
Even with the best plans, DIY projects (and even professional ones!) can hit a few bumps. Soffit installation is no different, especially when you're working with older homes.
Dealing with Uneven Eaves and Old Structures
One of the most common frustrations arises when dealing with older homes or structures that simply aren't perfectly square or level. You might find that your eaves dip or rise in certain sections, or that the distance from the wall to the fascia isn't consistent. This can make installing those perfectly straight and level channels a real challenge.
If you encounter uneven eaves, don't despair. The key is to compromise slightly for aesthetics and functionality. Instead of strictly following a perfectly level line that might leave large gaps at one end, you might need to "float" your F-channel or J-channel slightly. This means following the general contour of the existing fascia or eave line more closely, ensuring a tight fit for the soffit panels, even if the overall line isn't laser-straight across an entire wall. For minor inconsistencies, shims can be your best friend. Small wood or composite shims can be placed behind the channels to even them out and create a flat plane for the soffit. Another approach is to use a slightly more flexible channel material or even custom-bend aluminum coil stock to bridge minor gaps or inconsistencies. Remember, it's often better to have a slightly wavy but consistent soffit line that's fully enclosed than a perfectly straight line with unsightly gaps or uneven paneling.
Ensuring Adequate Ventilation and Avoiding Mistakes
Beyond the aesthetic challenges, ensuring your soffit actually does its job – providing ventilation – is paramount. It’s surprisingly easy to make mistakes that undermine this critical function.
A common oversight is installing non-vented soffit where vented soffit is needed, or not installing enough vented soffit. Unless your home has alternative intake vents (like gable vents working with exhaust vents), your soffit is the primary source of fresh air for your attic. Always opt for vented soffit along the majority of your eaves to ensure sufficient airflow. If you only install non-vented decorative soffit, your attic will suffer, potentially leading to issues like premature shingle aging or even ice dam formation in cold climates. When you consider how attic ventilation prevents damage, it's clear why this is so important.
Another significant mistake is blocking the soffit vents from the inside. This often happens inadvertently when homeowners or contractors install insulation. If the insulation pushes against the underside of the roof deck or into the eave cavity, it will completely block the incoming airflow from your soffit vents. To prevent this, install insulation baffles (sometimes called rafter vents) in each rafter bay before adding insulation. These lightweight plastic or foam channels sit against the underside of the roof deck, creating a clear airway from the soffit vent up to the attic space. Without these, even the best vented soffit system is useless. Always confirm that your soffit, working in tandem with exhaust vents (like a ridge vent or box vents), forms a clear, unobstructed path for air to move through your attic. This balanced system is critical for extending the life of your asphalt shingles and keeping your home comfortable and dry.
Disclaimer
The information provided in this guide is for general informational purposes only and does not constitute professional advice. While we strive to offer accurate and up-to-date content, roofing work can be complex and dangerous. We strongly recommend consulting with a qualified and licensed roofing contractor for any significant repairs or installations. Always prioritize safety, follow local building codes, and ensure all work complies with manufacturer specifications for warranties.