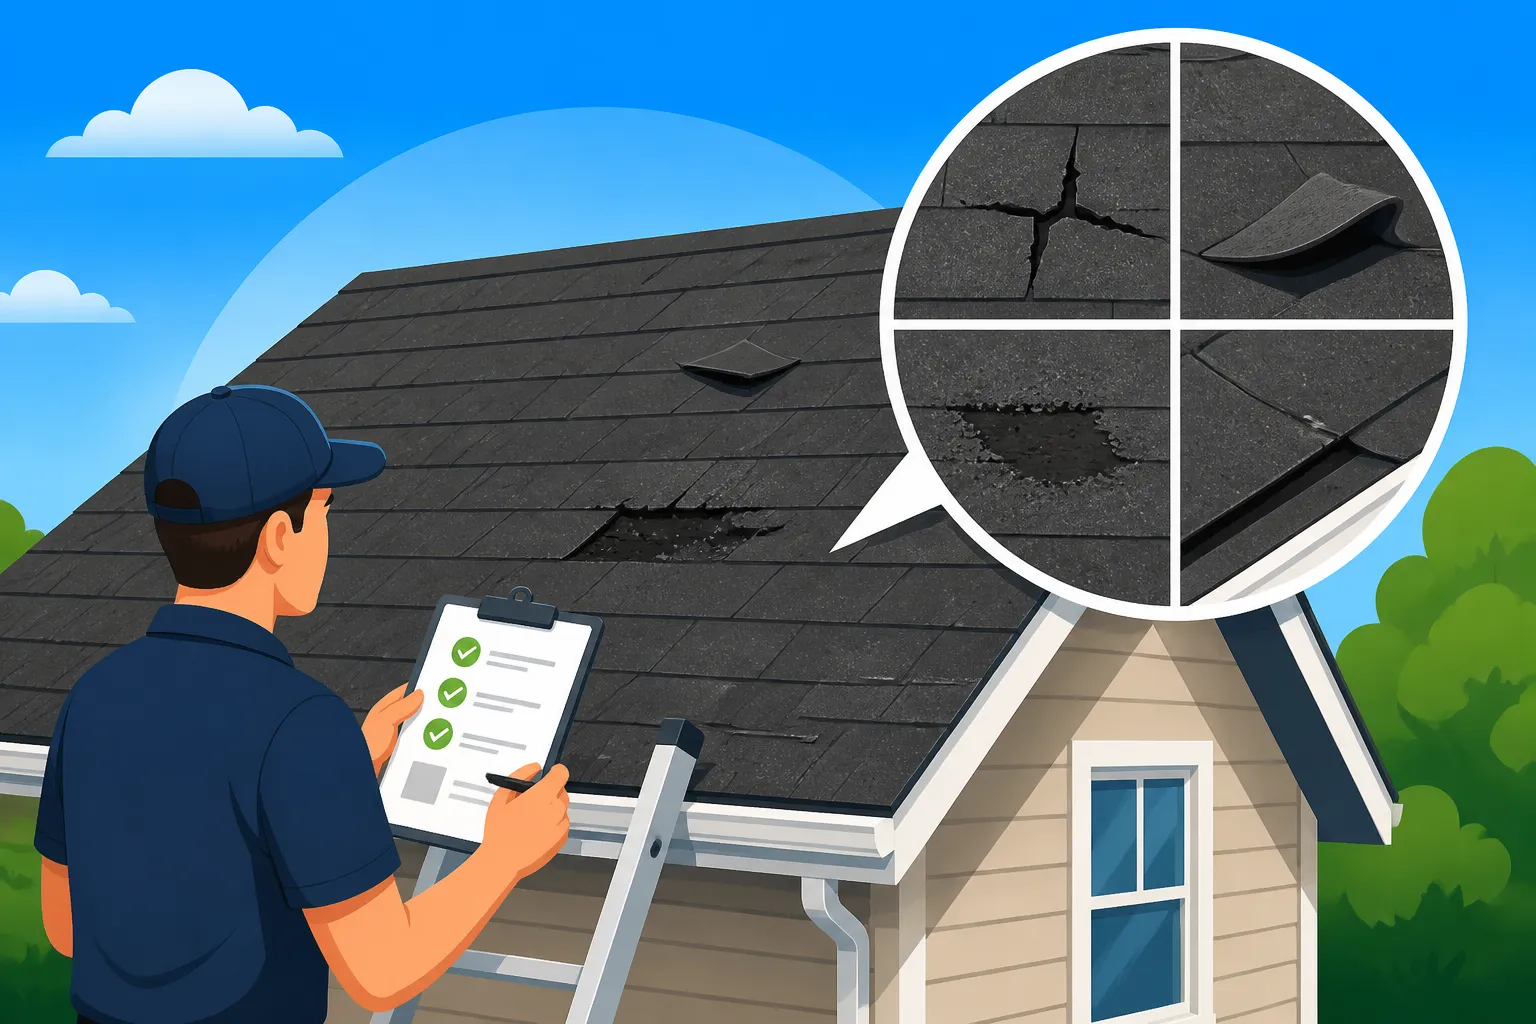
Roof Damage Assessment: A Homeowner’s Guide
It's an awful feeling, isn't it? You walk outside after a big storm, or perhaps you just happen to glance up at your roof, and something just doesn't look right. That knot in your stomach quickly tightens as you wonder, "Is my roof damaged? How bad is it? And what am I going to do about it?" This guide is here to take some of that uncertainty away, walking you through everything you need to know about assessing roof damage yourself, so you can make informed decisions about your home.
Why a Timely Roof Damage Assessment Matters for Homeowners
When it comes to your roof, procrastination can be a truly expensive mistake. It’s not just about aesthetics; your roof is the primary shield protecting your entire home and everything inside it from the elements. Delaying a damage assessment, even if the issues seem minor, can lead to a cascade of problems that are far more costly and disruptive to fix down the line. It's about being proactive and taking charge of your home's well-being.
Protecting Your Investment and Home's Integrity
Your home is likely your biggest investment, and the roof is a critical component in maintaining its value and structural integrity. A compromised roof, even with a small leak, can quickly lead to widespread water damage. We’re talking about ruined insulation, stained ceilings, mold growth in your attic and walls, and even damage to your home’s framing. These issues don't just reduce your home's market value; they can create unhealthy living conditions and seriously undermine the structural stability of your entire house. Think about it: a small leak today could be a collapsed ceiling tomorrow if left unaddressed.
Avoiding Escalating Costs and Major Headaches
This is where the "stitch in time saves nine" adage really hits home. A minor repair, like replacing a few missing shingles or resealing some flashing, is generally quick and affordable. However, if those issues are ignored, they can allow water to penetrate deeper, leading to rotting roof decking, damaged rafters, and extensive interior water damage. What might have been a few hundred dollars for a simple fix can balloon into thousands, or even tens of thousands, for extensive structural repairs, mold remediation, and a full roof replacement. Dealing with insurance companies, finding multiple contractors, and living through extensive repairs can be a significant source of stress and disruption, something every homeowner wants to avoid.
Navigating Insurance Claims with Confidence
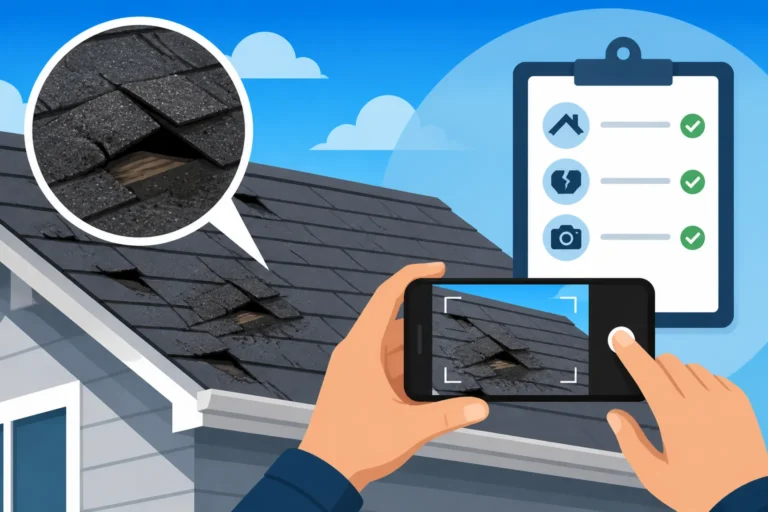
Discovering roof damage often brings up the question of insurance coverage. Many homeowners rely on their insurance to help cover the costs of significant repairs or replacements, especially after severe weather. However, insurance companies typically require a timely claim and clear documentation of the damage. A thorough initial assessment on your part, backed by good photographs and notes, can be invaluable in strengthening your claim. It helps you articulate the extent of the damage to your adjuster and ensures you’re not caught off guard by their assessment. Knowing what to look for and documenting it properly can make the difference between a swift, approved claim and a frustrating, drawn-out process. This early diligence can simplify how you approach getting your insurance claim approved for a new roof.
Common Culprits Behind Asphalt Roof Damage
Asphalt roofs are incredibly durable, but they're not invincible. Over their lifespan, they face a barrage of challenges that can lead to deterioration and damage. Understanding these common culprits is the first step in knowing what to look for during your own damage assessment. It's like knowing what kinds of attacks your fortress is most vulnerable to.
The Impact of Severe Weather Events
Severe weather is arguably the most dramatic and sudden cause of roof damage. We're talking about events that leave visible, immediate signs.
- Hailstorms: When hail stones descend, they don't just bounce off your roof; they can bruise or crack asphalt shingles, dislodge granules, and even create impact marks that look like small craters. Sometimes, the damage isn't immediately obvious, appearing as subtle dimples that can weaken the shingle's protective layer over time, making it more susceptible to future leaks. These impacts often compromise the integrity of the shingle, accelerating its breakdown.
- High Winds: Strong winds are notorious for lifting, tearing, and even completely ripping off shingles. They can get underneath the edges, break the sealant strip, and peel them back. Wind damage often manifests as missing shingles, creased shingles where they’ve been bent back, or even entire sections of the roof having shingles blown away. This can leave vulnerable areas of your roof decking exposed to rain and sun, leading to much bigger problems very quickly.
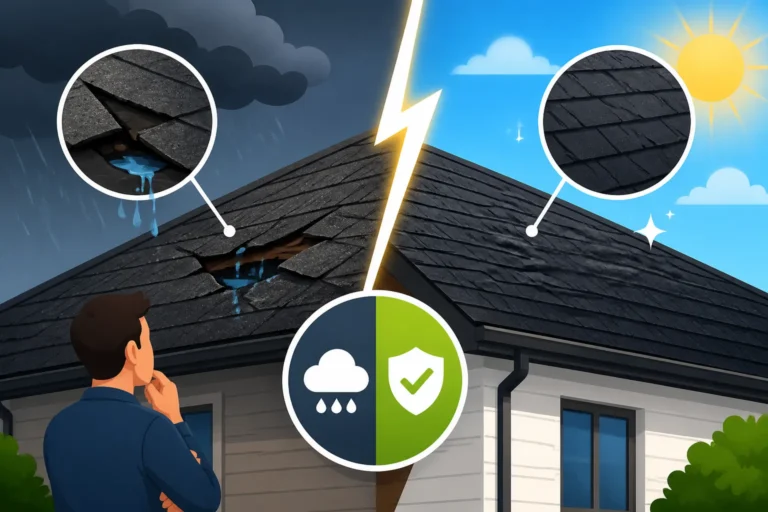
- Heavy Rain: While a healthy roof is designed to shed water, prolonged heavy rain can exploit any existing weaknesses. Improper flashing around chimneys, skylights, or vents, or compromised sealant on shingles, can lead to leaks. Excessive rainfall can also cause gutters to overflow, directing water back onto the fascia or even under the shingles at the eaves, contributing to rot and damage over time.
- Snow and Ice: In colder climates, heavy snowfall and the formation of ice dams pose a significant threat. The sheer weight of a thick layer of snow can stress your roof's structure, especially if it's already old or compromised. Ice dams form when melted snow refreezes at the colder eaves, preventing further meltwater from draining off the roof. This trapped water can then back up under your shingles, causing leaks, water damage, and even structural issues within your attic and walls. This is why proper roof ventilation is so crucial in winter regions.
The Silent Threat of Environmental Factors
Beyond dramatic storms, your roof is constantly battling quieter, persistent environmental threats that chip away at its longevity. These are the slow, insidious forces that wear things down over years.
- UV Radiation: The sun, while life-giving, is also one of the most persistent enemies of an asphalt roof. The sun's ultraviolet (UV) rays cause the asphalt to degrade and dry out over time, leading to brittleness and cracking. It also contributes to the loss of protective granules, which are essentially the sunscreen for your shingles. As granules erode, the asphalt is exposed more directly to UV, accelerating the degradation process.
- Temperature Extremes: Your roof endures a constant cycle of heating and cooling. In summer, it can reach extreme temperatures, causing materials to expand, while in winter, cold causes them to contract. This repeated expansion and contraction puts stress on shingles, sealants, and fasteners, leading to cracks, warping, and nail pops over many years. This constant movement eventually compromises the integrity of the roofing system.
- Vegetation Growth: Overhanging tree branches can constantly abrade shingles, rubbing off granules, especially during windy conditions. Falling branches can also cause direct impact damage. Furthermore, leaves and debris that accumulate on the roof or in gutters can trap moisture, creating an ideal environment for moss, algae, and fungi to grow. This organic growth can penetrate shingles, lift edges, and cause moisture retention, leading to decay and deterioration of the roof material. Removing overhanging branches and keeping gutters clean are essential preventative measures.
The Inevitable Wear and Tear of Time
Even without severe weather or environmental extremes, every roof has a finite lifespan. Time, by its very nature, brings about gradual deterioration. Understanding what makes shingles fail early can help you extend your roof's life.
- Age-Related Deterioration: As an asphalt roof ages, the materials naturally break down. The asphalt oils begin to dry out, causing shingles to become brittle, lose their flexibility, and eventually crack or curl. The adhesive strips that seal shingles together can lose their effectiveness, making them more vulnerable to wind uplift. Granule loss is also a natural part of aging, exposing the asphalt to further UV damage. Generally, an asphalt roof lasts anywhere from 20 to 30 years, depending on the shingle type and climate.
- Manufacturing Defects: While less common with reputable brands like GAF, Owens Corning, or CertainTeed, sometimes shingles can have manufacturing defects that cause them to deteriorate prematurely. This might include issues with the asphalt blend, poor adhesion of granules, or inconsistent shingle thickness. Such defects often become apparent within the first few years of the roof's life and are typically covered by the manufacturer's warranty.
- Poor Installation: Unfortunately, even the highest quality shingles can fail prematurely if they're not installed correctly. Common installation errors include improper nailing (nails driven too deep, too shallow, or at an angle), insufficient overlap, incorrect flashing techniques, or inadequate ventilation in the attic. These issues can lead to leaks, shingle blow-offs, and accelerated deterioration, often voiding manufacturer warranties in the process. This is why choosing a reputable roofing contractor is absolutely vital.
- Lack of Maintenance: A roof, like any part of your home, benefits from regular maintenance. Neglecting simple tasks like cleaning gutters, removing debris, and addressing minor issues promptly can shorten its lifespan. Small problems can compound over time, leading to significant damage that could have been prevented with routine inspections and maintenance. Regular cleaning and inspections can often spot issues like moss growth before they become a major problem.
What to Look For: A Detailed Visual Inspection Guide
Feeling overwhelmed already? Don't worry, I'm going to break down how to actually perform a basic roof damage assessment. You don't need to be a professional roofer to spot many common issues. What you do need is a keen eye, a good pair of binoculars, and a healthy dose of caution. Never compromise your safety for a closer look.
Ground-Level Observations: Your First Clues
Before you even think about getting on a ladder, start your assessment from the safest possible vantage point: the ground. Walk around your entire house, taking your time to look up at every slope of your roof.
- Gutter Check: Begin by looking into your gutters. Are they overflowing with granules? A significant accumulation of sandy, pebble-like material from your shingles indicates considerable granule loss, which means your shingles are losing their protective layer. It's normal to see some granules, especially on an older roof, but large amounts are a red flag. Also, check for debris that could be trapping water.
- Shingle Scrutiny: Use binoculars to get a closer look at the shingles themselves. Scan for any obvious signs of damage:
- Missing Shingles: These are the easiest to spot and a clear sign of wind damage. You'll see patches of bare underlayment or roof decking.
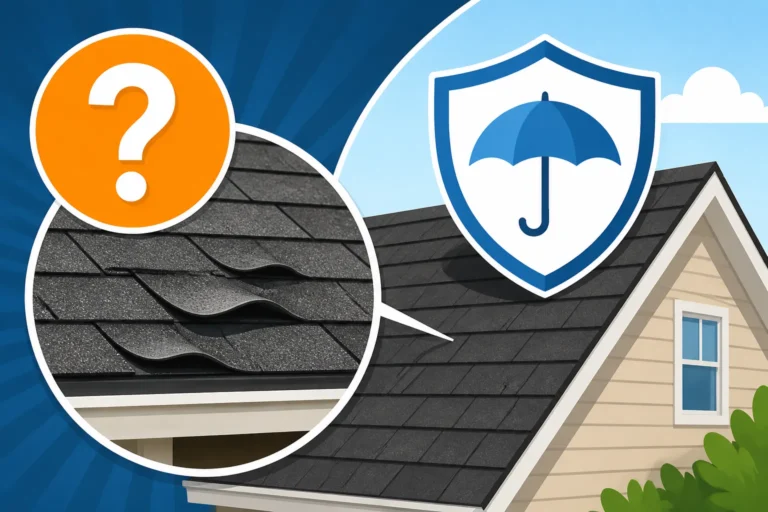
- Curling or Cupping Shingles: Shingle edges that turn upward (curling) or a central depression (cupping) are signs of age, sun exposure, or improper ventilation. This leaves them vulnerable to wind and water.
- Cracked or Broken Shingles: Look for linear cracks or complete breaks, especially near the fastener points. This can be due to age, impact, or expansion and contraction.
- Granule Loss: Beyond the gutters, look for bald spots or areas where the shingle's color appears faded or inconsistent, revealing the black asphalt beneath.
- Discoloration or Streaks: Dark streaks, often black or green, are usually algae or moss growth. While not immediately damaging, they can indicate moisture retention and can eventually compromise the shingles.
- Flashing and Chimney Inspection: Pay close attention to the metal flashing around chimneys, skylights, vents, and any other penetrations in your roof. Look for bent, rusted, or missing flashing. Any gaps or visible caulk that is cracked and dried out are potential entry points for water. A damaged chimney cap or deteriorating mortar joints can also be culprits.
- Soffits and Fascia: Examine the wooden or vinyl components beneath your roof's edge and along the eaves. Look for any signs of water staining, rot, or sagging. These often indicate water backing up from clogged gutters or leaks from the roof deck above. Damaged soffits can also mean inadequate attic ventilation.
Attic Insights: Uncovering Hidden Problems
If you have safe access to your attic, this is a crucial step for finding hidden damage that isn't visible from the outside. Grab a flashlight and head up there, ideally during daylight hours so you can spot natural light coming through any holes.
- Light Penetration: Turn off your attic lights and look for any shafts of light peeking through the roof deck. Even small pinholes can indicate compromised areas that will eventually leak. This is a definitive sign of an issue that needs attention.
- Water Stains and Streaks: Scan the underside of the roof deck, rafters, and insulation for any dark water stains or streaks. These are tell-tale signs of past or present leaks. Even if the stains are dry, it means water got in at some point, and the problem might still exist, especially during heavy rain. Pay extra attention around vent pipes, chimneys, and valleys, as these are common leak points.
- Mold or Mildew Growth: Beyond water stains, look and sniff for any signs of mold or mildew, which often appear as fuzzy, discolored patches (green, black, white). Mold thrives in damp, dark environments and indicates persistent moisture issues. Not only is it damaging to your home's structure, but it can also pose health risks.
- Sagging Decking: Use your flashlight to check the roof decking (the wooden sheathing under the shingles). Look for any areas that appear to be sagging or bowing between the rafters. This could indicate water saturation, rot, or even structural damage to the trusses or rafters themselves. This issue suggests a severe and long-standing water intrusion.
- Ventilation Issues: While not directly damage, poor attic ventilation can contribute to premature roof failure. Check if your attic feels excessively hot and humid, or if insulation is wet or compressed. Adequate ventilation, like a properly installed ridge vent, helps regulate temperature and moisture, extending the life of your roof.
On-Roof Examination: Safety First (and when to call a pro)
Seriously, if you are not comfortable or do not have the right safety equipment, please skip this step and call a professional! Climbing onto a roof can be incredibly dangerous, especially if it's steep, wet, or damaged. However, if you are confident and safety-conscious, an on-roof inspection can provide the most detailed assessment. If you're using a ladder, ensure it's stable, on level ground, and extends at least three feet above the edge of the roof. Consider wearing non-slip shoes and having someone spot you. If your roof is particularly steep or high, consider hiring a professional. Many reputable contractors, like those found through Modernize, offer free inspections, which can be safer and more thorough.
- Walk the Roof Carefully: When on the roof, walk gently and distribute your weight. Avoid stepping on areas that appear soft, spongy, or visibly damaged.
- Individual Shingle Inspection: Get up close to individual shingles. Gently lift the edges of a few to check the sealant strip underneath. If the sealant is brittle or broken, the shingle is no longer properly adhered and is vulnerable to wind. Look for "nail pops" where nails have pushed up through the shingle.
- Shingle Bruising and Dents: After a hail storm, you might not see immediate cracks but rather "bruises" – soft spots where the hail impacted the shingle, displacing granules and compromising the mat beneath. These are often easier to feel than see. Run your hand over the surface gently to feel for depressions.
- Valleys and Edges: These are high-risk areas for water penetration. Carefully inspect the metal or shingle valleys for cracks, gaps, or signs of rust on metal components. Also, check the drip edge along the eaves and rakes (slanted edges) for proper installation and any signs of damage or bending.
- Pipe Boots and Vent Seals: The rubber or plastic seals (boots) around vent pipes are common failure points. Look for cracks, tears, or signs of degradation in the rubber. Critters sometimes chew on these, too.
- Chimney and Skylight Flashing: From the roof, you can get a better angle to inspect the step flashing and counter flashing around chimneys and skylights. Look for any lifting, corrosion, or deteriorated caulk that could allow water to penetrate. Ensuring proper flashing installation around walls is crucial for preventing leaks.
Specific Types of Asphalt Shingle Damage and Their Significance
Now that you know where to look, let's dive into the specifics of what different types of asphalt shingle damage actually mean for your roof's health and longevity. Each type tells a story about the forces impacting your home.
Missing, Cracked, and Curling Shingles
These are some of the most common and visually obvious signs of roof trouble, each with its own implications.
- Missing Shingles: These are usually the result of severe wind uplift. When high winds get underneath a shingle that has lost its adhesive seal, they can literally rip it off the roof. A missing shingle exposes the underlying roofing felt or even the roof deck directly to the elements, making your home highly susceptible to leaks during the next rain. It's not just about one missing shingle; the area around it becomes more vulnerable as well, potentially leading to further blow-offs. This is a critical repair that needs immediate attention.
- Cracked Shingles: Cracks can appear in various forms. Vertical or horizontal cracks often stem from age-related brittleness, thermal expansion and contraction, or even stress from underlying deck movement. "Hairline" cracks might be subtle but can deepen over time, allowing water to wick underneath the shingle. Impact cracks, from hail or falling debris, often appear as starburst patterns or clean breaks through the shingle. Any crack compromises the shingle's ability to shed water and protect the underlying layers, significantly reducing its effective lifespan.
- Curling Shingles: There are typically two types of curling: "cupping," where the shingle edges turn upward, and "clawing," where the edges remain flat but the center lifts. Both are primarily signs of advanced aging and granule loss on the surface, which causes the shingle to dry out and shrink unevenly. Poor attic ventilation, which leads to excessive heat buildup, can accelerate this process significantly. Curling shingles don't lie flat, making them much more vulnerable to wind uplift and allowing water to more easily penetrate beneath them. They are a strong indicator that the roof is nearing the end of its functional life.
Granule Loss and Blistering: Surface Signals
These types of damage speak to the protective layer of your shingles and their resistance to the elements.
- Granule Loss: The small, ceramic-coated granules embedded in the surface of asphalt shingles are more than just for aesthetics. They protect the asphalt from harmful UV rays, reflect sunlight, and add fire resistance. When these granules are dislodged, either by age, severe weather (like hail), or manufacturing defects, the underlying asphalt is exposed. This exposure leads to rapid degradation of the shingle, making it brittle, prone to cracking, and drastically shortening its lifespan. You'll often see granules accumulating in your gutters or on the ground around your home. While a small amount of granule loss is normal over a roof's life, extensive or patchy loss is a major concern, often signaling it's time to consider a replacement. This is a key sign of a failing roof.
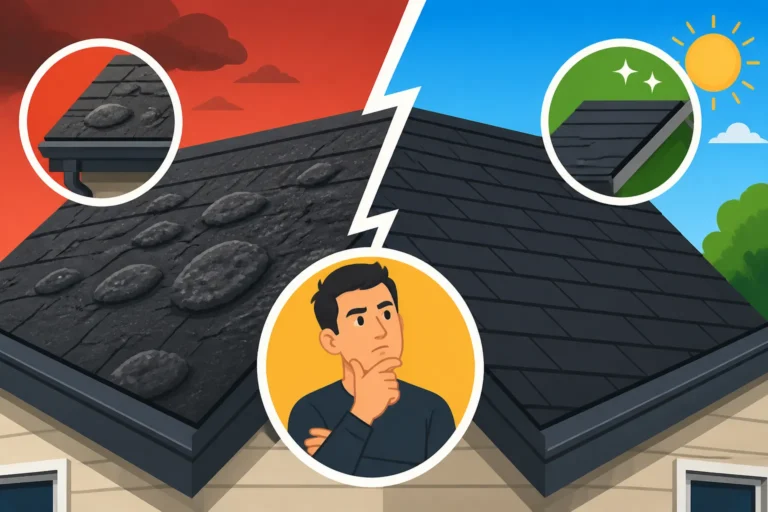
- Blistering: Blisters appear as small, raised bubbles or pockmarks on the surface of the shingle. They form when moisture or volatile gases are trapped within the shingle during the manufacturing process or when moisture from the roof deck gets absorbed into the asphalt. As the roof heats up from the sun, these trapped elements expand, causing the surface to bubble. Over time, these blisters can break open, exposing the asphalt to UV rays and accelerating granule loss. While small, unbroken blisters may not immediately cause leaks, they indicate an underlying issue with shingle quality or roof ventilation and represent a weakened point on the roof's surface.
Flashing and Penetration Failures
The areas where your roof transitions or has penetrations are inherently vulnerable points that require careful attention.
- Damaged or Deteriorated Flashing: Flashing is the metal (or sometimes plastic) material installed around chimneys, skylights, vent pipes, valleys, and wall junctures. Its purpose is to create a watertight seal where the roofing material meets another surface or changes direction. Common flashing failures include bending, rusting, cracking, or loosening. When flashing is compromised, water can easily seep underneath it, leading to leaks in your attic or interior walls. Deteriorated caulk or sealant around flashing is also a frequent culprit. For example, damaged step flashing around a wall can allow water to run directly into the siding and wall cavity below.
- Compromised Vent Pipe Boots: Vent pipes, used for plumbing or exhaust, protrude through the roof deck. They are sealed with a rubber or plastic "boot" that fits snugly around the pipe and is integrated into the shingle layers. Over time, these rubber boots can crack, tear, or become brittle due to UV exposure and temperature fluctuations. When this seal is broken, water can run directly down the vent pipe into the attic below. This is one of the most frequent sources of localized roof leaks.
- Skylight Leaks: Skylights, while lovely for natural light, are complex installations and common points of leakage if not properly installed or maintained. Leaks can occur around the flashing, through cracks in the skylight pane itself, or due to deteriorated seals between the pane and its frame. Water stains around a skylight opening in the ceiling are a clear sign of a problem.
Moss, Algae, and Fungi Growth
Organic growth on your roof isn't just unsightly; it can actively contribute to roof deterioration.
- Moss Growth: Moss typically appears as soft, green, velvety patches, often on the north side of the roof or in shaded, damp areas. Moss retains moisture, keeping the shingles wet for prolonged periods. This constant dampness can lead to premature degradation of the asphalt, and as moss grows, its root-like structures can lift and separate shingles, making them susceptible to wind and water infiltration. Over time, this can lead to rot in the underlying roof decking. It's a clear sign of moisture retention issues on your roof.
- Algae Streaks: Often appearing as black or dark green streaks, algae (specifically Gloeocapsa magma) is a common sight in humid climates. While algae doesn't directly damage the shingles by lifting them like moss, it feeds on the limestone filler in the asphalt and holds moisture, encouraging further growth. This can accelerate granule loss by keeping the shingle surface constantly damp and reducing the shingle's ability to reflect heat, potentially leading to higher attic temperatures and energy bills. Many modern shingles from manufacturers like Owens Corning and GAF now include copper granules to inhibit algae growth.
- Fungi: While less common to see large fungal growths like mushrooms on shingles, dark, patchy fungal colonies can grow alongside moss and algae, further contributing to moisture retention and shingle breakdown. Fungi thrive in persistently damp conditions and can lead to the accelerated deterioration of the organic components within the shingle.
Understanding the Severity: Repair vs. Replace
One of the biggest questions after finding damage is whether you need a minor fix or an entire new roof. This decision isn't always clear-cut and depends on several factors, including the type and extent of the damage, and crucially, your roof's overall age and condition. You can't just slap a band-aid on a gaping wound.
When a Simple Repair Will Suffice
Sometimes, a targeted repair is all that's needed to extend the life of your roof and protect your home. This is often the case for localized issues.
- Isolated Damage: If you have a handful of missing shingles due to a sudden gust of wind, or a small area where granules have been lost from an impact, a repair is usually the most cost-effective solution. This assumes the surrounding shingles and the rest of the roof are in good condition. A qualified roofer can match new shingles as closely as possible to your existing ones and seamlessly integrate them into the roof. The key here is "isolated" – the problem isn't indicative of a larger systemic failure.
- Minor Flashing Issues: Leaks often originate from flashing around chimneys, vents, or skylights. If the flashing itself isn't severely damaged but the sealant has failed, or if a small section of flashing has become loose, a repair involving resealing or re-securing the flashing can resolve the leak. This is typically a less invasive and more affordable fix than replacing entire sections of shingles. However, if the flashing is severely corroded or improperly installed, a more extensive repair or replacement might be necessary.
- Recent or Sudden Damage: When damage occurs due to a specific event, like a tree branch falling or a sudden strong storm, and your roof was otherwise healthy before that event, a repair is usually warranted. For instance, if you have a 10-year-old roof (which has plenty of life left) and a localized section is damaged by hail, repairing that section is a sensible option. This is where your homeowner's insurance might come into play, especially if it's sudden and accidental damage. For more insights, you might want to look into whether insurance covers roof replacement.
Signs That Point to a Full Roof Replacement
Unfortunately, sometimes repairs are just patching over a much larger, systemic problem. Knowing when to bite the bullet and invest in a new roof can save you from continuous headaches and higher costs in the long run. When should you choose roof replacement over repair?
- Widespread Damage: If the damage is extensive and covers multiple areas of your roof, a repair might not be practical or cost-effective. For example, if a severe hail storm has caused significant granule loss and bruising across 50% or more of your roof, attempting to repair every single shingle would be almost impossible and likely lead to a patchwork roof with inconsistent performance. In such cases, insurance companies will often deem the roof "totaled," making a full replacement the logical choice.
- Aging Roof: This is one of the most significant factors. If your asphalt roof is 20 years old or more, it’s likely nearing or past its expected lifespan. Even minor damage, like a few missing shingles, can be a symptom of widespread material degradation. Repairing an old, brittle roof is often futile; new shingles won't adhere well, and attempting to fix one area might inadvertently damage others. An old roof with curling, cracking, and extensive granule loss across all slopes is a prime candidate for a complete tear-off and replacement. Considering your roof age: when to start planning replacement is a crucial decision point.
- Multiple Layers of Shingles: Some older homes may have multiple layers of shingles applied over the original roof (a practice called "reroofing" or "overlay"). While some codes allow for two layers, going beyond that adds excessive weight and can hide underlying decking damage, making it impossible for new shingles to properly adhere or lay flat. If your roof has two or more layers and is showing significant damage, a full tear-off down to the decking is almost always recommended before installing a new roof. This ensures a clean, sound base for optimal performance and warranty validity. Knowing what happens during a roof tear-off can help you understand this process.
Considering Your Roof's Age and Overall Condition
Making the repair vs. replace decision isn't just about the type of damage, but the context of that damage within your roof's overall life cycle.
- Younger Roofs (Under 10-15 years): If your asphalt roof is relatively new and a specific event caused damage, repairs are almost always the sensible and economical choice. A professional assessment can confirm that the rest of the roof structure and materials are robust, making targeted repairs effective. This is typically where manufacturer warranties might still be a significant factor.
- Middle-Aged Roofs (15-20 years): This is often the tricky period. If damage is minor and localized, a repair might still be viable. However, if you're seeing multiple types of damage, even small ones, spreading across different areas, it might signal that the roof's overall integrity is declining. In this scenario, weighing the cost of frequent repairs against the long-term benefits of a new roof becomes critical. You might ask, "Is an asphalt shingle roof worth the money if I'm constantly repairing it?"
- Older Roofs (20+ years): Once your asphalt roof hits the two-decade mark, every repair decision should be carefully considered. Even small leaks can be symptoms of widespread aging. Most roofing professionals, and many homeowners who've been there, will advise leaning towards replacement at this stage, especially if you're seeing signs you need a new roof. While a repair might offer a temporary fix, a new roof provides renewed protection, enhanced curb appeal, and peace of mind for decades to come.
| Damage Type | Common Cause | Signs to Look For | Typical Solution | Severity |
|---|---|---|---|---|
| Missing Shingles | High winds, improper nailing | Bare spots on roof, shingles in yard | Repair (patch) | High |
| Cracked/Broken Shingles | Age, thermal cycling, impact (hail/debris) | Linear cracks, breaks, impact marks | Repair (patch) | Medium-High |
| Curling/Cupping Shingles | Age, UV exposure, poor ventilation | Shingle edges lifting or turning upward | Replace | Medium-High |
| Granule Loss | Age, hail, UV degradation, foot traffic | Bald spots, granules in gutters | Repair (minor), Replace (widespread) | Medium-High |
| Blistering | Trapped moisture/gases, poor ventilation | Small, raised bubbles on shingle surface | Monitor, Replace (if widespread) | Medium |
| Damaged Flashing | Age, improper installation, corrosion, storm impact | Gaps, rust, bends, cracked caulk around penetrations | Repair (seal/replace section) | High |
| Vent Pipe Boot Cracks | UV degradation, age, faulty material | Cracks/tears in rubber/plastic seal around vent pipe | Repair (replace boot) | High |
| Moss/Algae/Fungi Growth | Moisture, shade, humidity | Green patches, dark streaks, discolored areas | Clean, Replace (if widespread/lifting) | Low-Medium |
| Water Stains (Attic) | Active/past leaks, compromised seals | Dark streaks on decking/rafters/insulation | Find source, Repair | High |
| Sagging Roof Decking | Water saturation, structural issues | Visible depressions between rafters from attic | Repair (decking/structure), Replace | Very High |
Documenting Your Findings: A Critical Step
Finding damage on your roof is just the beginning. The next, equally crucial step is to meticulously document everything you observe. This isn't just for your own records; it's vital for communicating with contractors, making informed repair vs. replace decisions, and especially for navigating any potential insurance claims. Think of yourself as a detective, gathering all the evidence.
Photo and Video Evidence: What to Capture
A picture is truly worth a thousand words, especially when dealing with roof damage. Visual documentation provides undeniable proof and helps others understand the scope of the problem without having to climb on your roof.
- Overall Roof Condition: Start with wide-angle photos or videos of each slope of your roof from the ground. Capture the general appearance, showing the context of any damage. For instance, if one side of the roof has significant granule loss, make sure that side is clearly visible. This gives a baseline understanding of the roof's state.
- Specific Damage Points: For every specific issue you identify – a missing shingle, a cracked flashing, a patch of moss – take multiple close-up photos.
- Zoom In and Out: Capture both a close-up that shows the detail of the damage and a slightly wider shot that shows its immediate surroundings. This helps put the damage into context.
- Varying Angles: Take photos from different angles. For example, a curling shingle might look one way from directly above, and another from the side, clearly showing its lifted edge.
- Scale Reference: If possible, place a common object like a ruler, coin, or even your hand (safely!) next to smaller areas of damage to provide a sense of scale. This is especially helpful for things like hail dimples or small cracks.
- Attic Photos: If you went into your attic, photograph any water stains, mold growth, or sagging decking. These interior shots provide compelling evidence of water penetration that may not be visible from the outside. Make sure the lighting is good, using your flashlight if needed, so the details are clear.
- Date and Time Stamp: Most smartphones automatically add a date and time stamp to photos, but if yours doesn't, make sure to note when the photos were taken. This can be crucial for insurance claims, especially if you're documenting damage from a specific storm event. Keep all these photos organized in a dedicated folder on your computer or cloud storage.
Creating a Detailed Damage Log
Beyond visual evidence, a written log provides structure and detail to your findings. This allows you to track specific issues and their locations systematically.
- Location, Location, Location: For each piece of damage, note its precise location on the roof. You might mentally divide your roof into sections (e.g., "front slope, upper right," "above the kitchen window," "near the west chimney"). The more specific, the better. You can even sketch a simple diagram of your roof and mark the locations directly on it.
- Description of Damage: Clearly describe what you see. Is it a missing shingle? A 3-inch crack? A patch of moss roughly 1 foot by 2 feet? Is the granule loss heavy or light? The more descriptive you are, the easier it will be to recall details later and explain them to a professional.
- Estimated Size/Extent: Include measurements where possible (e.g., "crack is 6 inches long," "area of granule loss is approximately 2 square feet"). Even estimates are helpful.
- Date of Observation: Always include the date you observed the damage. If it's related to a storm, note the date of the storm. This chronological record is invaluable for insurance purposes and for tracking the progression of damage.
- Supporting Photos/Videos: Reference the specific photos or videos that correspond to each entry in your log. For example, "Missing shingle, front slope, lower left, near gutter (see photos DSC_001.jpg, DSC_002.jpg)."
Seeking Professional Assistance for a Formal Report
While your personal documentation is a fantastic start, there are times when you'll need the trained eye and official documentation of a professional. Don't hesitate to reach out to local experts. Modernize can connect you with qualified roofing companies in your area who can provide a thorough inspection and detailed report.
- Initial Contractor Assessment: Most reputable roofing contractors offer free inspections and estimates. They have the experience to spot subtle damage you might miss and can safely access all areas of your roof. They'll provide an expert opinion on the type and extent of damage, and whether a repair or replacement is recommended. They often use drones or specialized equipment for a more comprehensive view.
- Insurance Adjuster Report: If you plan to file an insurance claim, your insurance company will send out an adjuster to assess the damage. Having your own thorough documentation ready can greatly assist the adjuster and ensure nothing is overlooked. Your photos can serve as a valuable cross-reference to their findings.
- Public Adjuster (for complex claims): In cases of extensive damage or if you feel your insurance claim is being undervalued or denied, you might consider hiring a public adjuster. Unlike the adjuster employed by your insurance company, a public adjuster works solely for you. They will conduct their own detailed assessment, prepare a comprehensive report, and negotiate with your insurance company on your behalf. This can be particularly useful for navigating complex claims involving significant storm damage or disputed coverage.
Working with Professionals: Getting an Expert Assessment
Once you've done your preliminary assessment and documentation, it's time to bring in the experts. Even the most diligent homeowner can't match the experience, tools, and safety protocols of a professional roofing contractor. This step is critical for accurate diagnosis and a safe, effective solution.
When to Call a Roofing Contractor
Don't wait until water is dripping into your living room to call a professional. Early intervention can save you a lot of grief and money.
- Any Visible Damage: If you've identified any of the damage signs we discussed – missing shingles, cracks, significant granule loss, or especially any signs of water intrusion in your attic – it's time to call a contractor. Even if it looks minor to you, a professional can tell you if it's symptomatic of a larger issue.
- Post-Storm Inspection: After a significant weather event like a hailstorm or a major windstorm, it's always a good idea to get a professional inspection, even if you don't see immediate damage. Hail damage, for example, can be subtle and difficult for an untrained eye to spot from the ground, but it can significantly reduce your roof's lifespan.
- Concerns About Roof Age: If your asphalt roof is approaching or has exceeded 15-20 years, even without obvious damage, a professional inspection can give you a clear picture of its remaining life and help you plan for a future replacement. They can tell you if a "tune-up" repair is viable or if you should start budgeting for a new roof, potentially helping you avoid hidden costs in a roof replacement down the line.
- Before Buying or Selling a Home: A pre-purchase or pre-listing roof inspection by a qualified contractor can uncover hidden issues, giving you leverage in negotiations or allowing you to address problems proactively. This is distinct from a general home inspection, as it's a specialized, in-depth look at the roof.
The Role of a Public Adjuster
This is a professional whose sole purpose is to advocate for you, the homeowner, especially when dealing with insurance claims.
- Understanding Their Purpose: A public adjuster is an independent insurance claims professional who represents the policyholder, not the insurance company. They are licensed and specialize in assessing damage, preparing claim documentation, and negotiating settlements. They typically work on a contingency basis, meaning they get a percentage of the final settlement.
- When to Consider Hiring One: You might consider a public adjuster if:
- Your insurance claim has been denied or undervalued.
- You have extensive or complex damage (e.g., severe storm damage affecting multiple areas of your home, not just the roof).
- You don't have the time or expertise to deal with the insurance process yourself.
- You suspect your insurance company is acting in bad faith.
- You are unsure how to get insurance to pay for a roof claim fully.
- Benefits of a Public Adjuster: They can ensure that all damage is thoroughly documented, accurately estimated, and properly presented to your insurance company. They speak the insurance language and understand the policy nuances, often leading to a fairer and higher settlement than homeowners might achieve on their own. This can be especially important if your roof damage is significant and the cost to replace a roof by house size is substantial.
Questions to Ask During a Professional Inspection
When a roofing contractor comes out, don't be afraid to ask questions. This is your home, and you have a right to understand the assessment.
- "Can you show me the specific areas of damage you found?": A reputable contractor should be able to walk you through their findings, ideally with photos or even pointing out issues on the roof (if safe to do so). This transparency builds trust and helps you understand the problem firsthand.
- "What caused this damage?": Understanding the root cause (e.g., wind, hail, age, installation defect) is important for future prevention and for insurance claims.
- "Do you recommend repair or replacement, and why?": Ask for a clear justification. If they recommend replacement for a relatively new roof, ask for detailed reasoning. If they recommend repair for an old roof, ask about the expected lifespan of that repair. This ties into the larger question of Roof Repair vs Replacement: How to Decide.
- "What would the repair/replacement process involve?": Ask about the steps, timeline, and what you can expect during the work. For a replacement, ask about the different components of the full roofing system they plan to install.
- "Are you licensed and insured?": Always verify this crucial information. A reputable contractor will happily provide proof of their licensing and liability insurance, protecting you in case of accidents or property damage during the job. You can typically verify a roofer's insurance independently.
- "Do you offer a written estimate that details all costs?": A comprehensive estimate should itemize materials, labor, permits, and any other associated fees. This allows you to compare quotes accurately. Make sure to read and compare roofing estimates thoroughly.
- "What warranties do you offer on labor and materials?": Understand the manufacturer's warranty on the shingles and the contractor's warranty on their workmanship. Ask about registration processes and coverage details. Knowing about the roofing warranty: workmanship vs manufacturer is key.
- "Do you use manufacturer-certified installers?": Many shingle manufacturers (like GAF or Owens Corning) offer extended warranties if their products are installed by their certified contractors. This can be a significant benefit.
- "Can you provide references?": Ask for contact information for previous clients who have had similar work done. A good contractor will have a list ready.
- "Who pulls the necessary permits?": For most roof replacements and significant repairs, a permit is required by your local municipality. The contractor should always handle this process.
Disclaimer
The information provided in this guide is for general informational purposes only and does not constitute professional advice. While we strive to offer accurate and helpful content, roofing assessment and repair/replacement are complex tasks that should ideally be performed by qualified, licensed professionals. Always consult with a professional roofing contractor for specific advice regarding your home's roof. We are not liable for any actions taken based on the information presented herein.