How Shingles Are Staggered and Offset
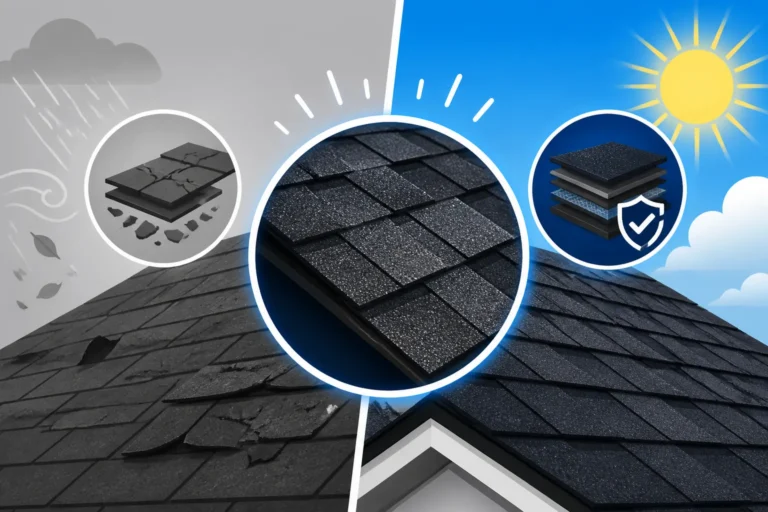
You might not think much about the specific pattern in which your roof shingles are laid, but an improper installation technique can dramatically impact your roof's lifespan, its ability to protect your home from the elements, and even void your warranty. The devil is truly in the details when it comes to roofing, and understanding the critical techniques of staggering and offsetting asphalt shingles is key to a high-quality, long-lasting roof. This guide will take a deep dive into this often-overlooked aspect of roof installation, empowering you with the knowledge to ensure your roof is built to last.
Understanding Shingle Staggering and Offsetting
When you look at a well-installed asphalt shingle roof, you’ll notice a consistent, brick-like pattern. This isn't random; it's the result of careful staggering and offsetting. These two terms describe crucial installation practices that ensure your roof is watertight, structurally sound, and aesthetically pleasing. Without them, your roof would be far more susceptible to leaks and damage.
What is Shingle Staggering?
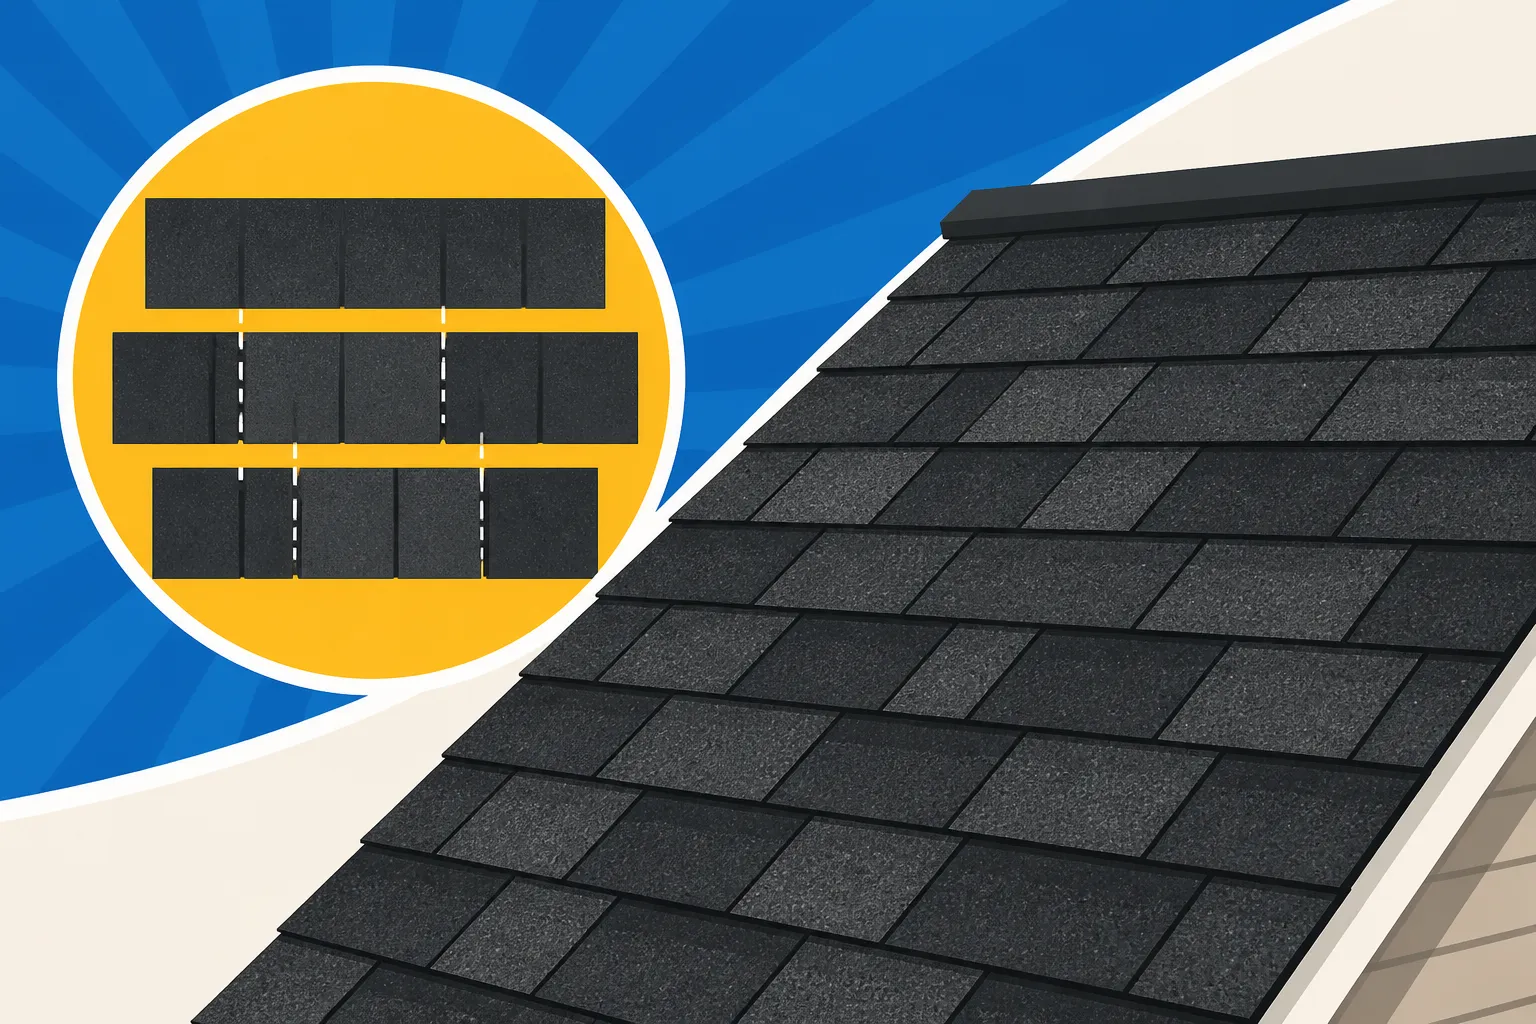
Think of laying shingles like laying bricks on a wall. You'd never line up all the vertical joints directly on top of each other, right? That would create a weak point, a continuous seam that could easily crack or allow water to seep through. Shingle staggering works on the same principle. It's the practice of installing subsequent rows (or "courses") of shingles so that the vertical end joints of individual shingles do not align with the joints in the courses directly above or below them.
This creates a break in the vertical line of each shingle joint, distributing potential weaknesses across the roof surface. Each shingle overlaps the joint of the shingle beneath it, effectively creating a sealed, interwoven barrier. If these joints were to line up, you'd essentially have a series of tiny, direct channels for water, wind, and debris to penetrate your roof's protective layers. Staggering ensures that any water that might get past the edge of one shingle is caught by the solid surface of the shingle below it, guiding it safely down the roof.
The Role of Offsetting in Asphalt Shingle Installation
While staggering refers to the overall pattern of misaligned vertical joints, offsetting often refers to the specific horizontal displacement of shingles, particularly when starting a new course. It's the initial "move" that sets up the staggering pattern for the entire roof. For instance, when beginning a second course of shingles, the first shingle might be cut to a specific length or simply shifted horizontally by a predetermined amount (e.g., half a shingle tab, one-third of a shingle tab) relative to the first shingle in the course below it.
This initial offset is critical because it dictates the staggering pattern for the rest of that course and subsequent courses. If the first shingle of a new course isn't properly offset, it can throw off the entire pattern, leading to misaligned joints down the line. Different types of shingles, such as 3-tab or architectural shingles, often have different recommended offset patterns. Professional roofers follow these guidelines meticulously, sometimes even using different lengths of cut shingles to start each new course, ensuring that no two shingle cutouts or end joints ever align in adjacent rows. This precision is a hallmark of quality asphalt roofing installation.
The Essential Patterns for Proper Shingle Laying
Achieving the correct staggering and offsetting isn't just about looking good; it's a fundamental part of a roof's structural integrity. Professional roofers follow established patterns and manufacturer guidelines to ensure every shingle contributes to a robust, weather-resistant system.
Standard Staggering Techniques
The specific technique for staggering can vary slightly depending on the type of asphalt shingle being installed.
For traditional 3-tab shingles, the staggering pattern is usually quite precise. Imagine a standard 3-tab shingle with three distinct tabs separated by cutouts. A common method involves cutting the first shingle of each new course to a different length. For example, the first course might start with a full shingle, the second course with a shingle that has one tab cut off, the third with two tabs cut off, and the fourth might be a shingle cut down to just one tab. This creates a predictable "step" pattern where each course's tabs are offset from the one below it, ensuring no vertical joints ever align. This consistent, measured approach is vital for the performance of 3-tab shingles.
Architectural (or dimensional) shingles have a less uniform appearance due to their multi-layered, laminated construction. This makes their staggering pattern seem more "random" to the eye, but it's still meticulously planned. Because these shingles don't have distinct tabs and cutouts like 3-tabs, the staggering often involves simply offsetting each shingle by a certain distance, typically 6 inches or more, from the ends of the shingles in the course below it. The goal is always to ensure that no shingle joint on one course falls within a few inches of a joint on the course directly above or below it. The randomness of architectural shingles' edges helps mask any minor inconsistencies, but the underlying principle of offset joints remains paramount. Ultimately, regardless of the shingle type, a key aspect of proper installation is adhering to the manufacturer's specific recommendations, which often detail the required overlap and offset distances. Leading brands like GAF and Owens Corning provide detailed installation instructions that contractors must follow for their products to perform as expected and for warranties to be valid.
Why Continuous Vertical Seams Are a Disaster
While it might seem like a small detail, ignoring proper staggering and allowing continuous vertical seams in your shingle installation is a recipe for disaster. This isn't just about minor aesthetic flaws; it fundamentally compromises your roof's primary function: protecting your home.
Firstly, continuous vertical seams create direct, unobstructed pathways for water ingress. Imagine a heavy downpour or wind-driven rain. If a vertical joint aligns perfectly from one course of shingles to the next, water can flow directly into the underlying layers of your roof, bypassing the protective overlap. This can lead to leaks in your attic, water stains on your ceilings, and ultimately, costly damage to your roof decking, insulation, and interior finishes. This issue is compounded if you live in a region prone to ice dams, as meltwater could easily find these channels and seep into your home.
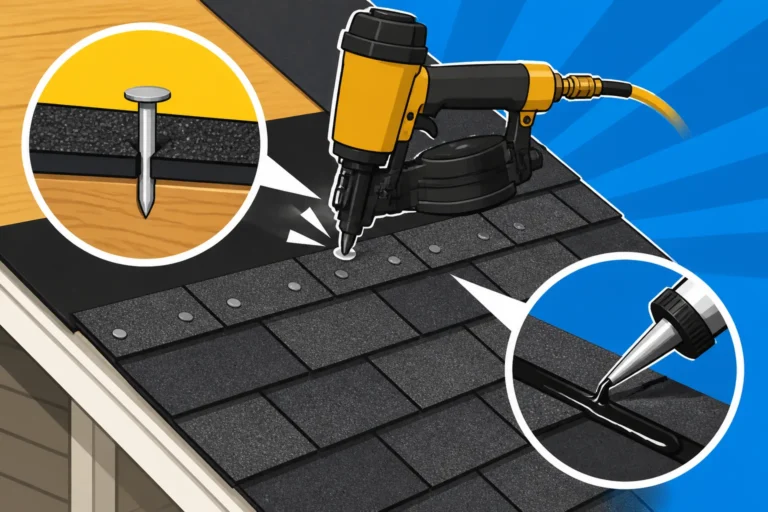
Secondly, these aligned seams create structural weakness. Shingles are designed to interlock and overlap, distributing forces like wind uplift across multiple layers. When vertical seams are aligned, individual shingles are more isolated, making them far more susceptible to being lifted or torn off by strong winds. This isn't just a hypothetical scenario; in a severe windstorm, a roof with poorly staggered shingles can suffer widespread blow-offs much faster than a properly installed one, leaving your home exposed. Proper nailing patterns, combined with correct staggering, are crucial to withstand severe weather. You can read more about How Shingles Are Nailed and Sealed to understand this better.
Lastly, beyond the functional failures, continuous vertical seams are an aesthetic nightmare. They make the roof look sloppy, unprofessional, and poorly constructed. This detracts significantly from your home's curb appeal and can even signal to potential buyers that other aspects of the home might also be poorly maintained. A beautiful, uniform roof pattern is a sign of quality workmanship, something a reputable contractor found through a platform like Modernize will always prioritize.
The Critical Benefits of Correct Shingle Staggering
Proper shingle staggering and offsetting are not merely technical requirements; they are foundational elements that contribute significantly to your roof's overall performance, longevity, and even your home's value. Ignoring these details can lead to a host of problems down the line.
Enhanced Weather Resistance and Leak Prevention
The primary job of your roof is to keep the elements out, and correct shingle staggering is absolutely crucial for this. Each shingle, when properly offset and overlapped, acts like a mini-dam, diverting water away from the seams below it. This creates a multi-layered, impenetrable barrier against rain, snow, and ice. When done correctly, water hits the surface of a shingle and flows downwards, encountering only solid shingle material or the sealant strip of the next shingle, not an open joint.
This precise layering is especially important in preventing water from seeping into your home during heavy downpours or wind-driven rain. Wind resistance is also significantly bolstered by proper staggering. The overlapping and offset pattern helps to create a more unified surface across the roof, making it much harder for strong winds to get underneath individual shingles and lift them. This dramatically reduces the risk of shingle blow-offs, especially critical in areas prone to severe storms. For homeowners considering extra protection, opting for Impact-Resistant Shingle Cost options can further fortify a properly installed roof against hail and wind damage. The synergy between quality shingles and expert installation techniques like proper staggering ensures maximum protection against whatever Mother Nature throws at your home.
Boosting Your Roof's Structural Integrity and Lifespan
Beyond immediate weather protection, the correct staggering pattern plays a vital role in the long-term health and structural integrity of your entire roofing system. When shingles are staggered, the forces acting on the roof – whether from wind, snow load, or even people walking on it – are distributed more evenly across the roof deck. This prevents concentrated stress points that could lead to premature wear or damage.
A roof installed with proper staggering is a cohesive unit, not just a collection of individual shingles. This cohesiveness is what allows the entire system to move and flex minimally with temperature changes and weather events, preventing cracking, curling, and other forms of damage that shorten a roof's life. This is why a properly installed asphalt roof can often reach, or even exceed, its expected lifespan, which is often detailed in articles like How Long an Asphalt Roof Lasts. By preventing water intrusion and resisting wind uplift more effectively, proper staggering ensures that the underlying roof decking stays dry and strong, avoiding issues like rot or mold that can necessitate costly repairs or even a premature roof replacement. Ultimately, this foundational installation technique contributes directly to the overall resilience and longevity of your investment.
Aesthetic Appeal and Warranty Compliance
While functional benefits are paramount, the aesthetic appeal of a properly staggered roof shouldn't be overlooked. A well-installed roof with consistent staggering presents a uniform, attractive appearance that significantly enhances your home's curb appeal. The eye perceives a harmonious pattern, free from jarring, misaligned vertical lines. This polished look is a clear indicator of quality workmanship and contributes positively to your home's overall value.
Even more critically, adhering to proper staggering and offsetting techniques is often a strict requirement for maintaining your roofing manufacturer's warranty. Brands like CertainTeed, Malarkey, GAF, and Owens Corning invest heavily in the performance of their shingles, and their comprehensive warranties are typically contingent on the shingles being installed according to their specific guidelines. If a contractor deviates from these guidelines – for example, by not correctly staggering shingles – it could lead to the warranty being voided, leaving you responsible for future repair costs that would otherwise be covered. Understanding How Shingle Warranties Work is essential, and a reputable contractor will always ensure installation practices comply with these terms. Before you finalize your roofing project, especially if you're engaging with a contractor through a service like Modernize, make sure to inquire about their adherence to manufacturer-specific installation protocols, including staggering, to protect your investment for years to come.
Professional Installation and What Homeowners Should Know
The importance of professional installation cannot be overstated when it comes to asphalt roofing. While staggering and offsetting might seem like simple concepts, executing them flawlessly across an entire roof requires skill, experience, and precision.
The Roofer's Precision: More Than Just Laying Shingles
A truly skilled roofing contractor understands that installing a roof is a complex process, not just a matter of nailing shingles down. It begins with meticulous planning and layout. Before the first shingle is even laid, precise measurements are taken, and chalk lines are snapped across the underlayment to guide the installers. These lines serve as critical benchmarks for ensuring consistent shingle alignment, overlap, and, most importantly, the correct staggering pattern.
The starter course – the first row of shingles laid along the eaves – is exceptionally important. It establishes the base for the entire roof system, and its accurate placement dictates the offsets for all subsequent courses. If the starter course isn't perfectly aligned and installed, the staggering pattern for the whole roof can be thrown off, leading to cumulative errors that compromise the roof's performance and appearance. This initial setup is one of the many steps in How Asphalt Shingles Are Installed: Step by Step.
Experienced crews also bring invaluable knowledge regarding different shingle types and manufacturer specifications. They know, for instance, that a GAF Timberline HDZ shingle might have slightly different installation requirements than an Owens Corning Duration shingle to maximize its warranty and performance. They're adept at cutting shingles accurately for starter courses and ensuring consistent reveal (the exposed portion of each shingle). This expertise ensures that your roof is not just "covered," but genuinely protected. Choosing a reputable, manufacturer-certified roofer, as discussed in Manufacturer-Certified Roofers Explained, offers an extra layer of assurance that these crucial details will be handled with the utmost professionalism.
What to Look For During Installation and Inspection
As a homeowner, you're not expected to be a roofing expert, but understanding the basics of proper installation allows you to monitor the work and ask informed questions. During the installation process, try to observe from a safe distance whether the shingles are being laid in a visibly staggered pattern. You shouldn't see any vertical lines where shingle ends meet directly on top of each other across multiple courses. While architectural shingles can look a bit more random, a good roofer will still maintain a clear offset.
Don't hesitate to ask your contractor about their specific staggering plan. A transparent and knowledgeable roofer will be happy to explain their process and demonstrate how they ensure proper offsets. This proactive communication is key to avoiding issues down the road. If you've used a service like Modernize to find your contractor, you'll likely feel more comfortable asking these questions because you've already vetted their credentials.
Post-installation, a final roof inspection is standard practice and often required by local building codes. This inspection, which is covered in detail in topics like Roofing Inspection: What Inspectors Check, will confirm that the roof meets all local codes and manufacturer specifications, including proper shingle staggering. If you have any lingering doubts, a second opinion from an independent inspector can provide peace of mind. Remember, the goal is a roof that performs exceptionally for decades, and proper staggering is a non-negotiable part of achieving that.
| Feature | 3-Tab Shingles (Traditional) | Architectural Shingles (Dimensional) |
|---|---|---|
| Staggering Pattern | Often a precise, repeating "step" pattern (e.g., full, 2-tab, 1-tab, half-shingle start). | Appears more random due to varied shingle shapes and layers, but still precise offsets. |
| Offset Distance | Specific cut lengths for starter shingles in each course (e.g., 36", 24", 12", 0"). | Typically a minimum of 6 inches, often more, to ensure no joints align. |
| Visual Appearance | Distinct, often uniform vertical lines of shingle cutouts, but staggered. | Blended, textured look where vertical joints are less obvious and randomly spaced. |
| Ease of Laying | Can be more labor-intensive due to precise cutting and measuring for each course. | May seem easier due to less visible cutouts, but still requires careful offset planning. |
| Joint Alignment | Each course's tabs are intentionally offset from the one below it. | Joint of a shingle should not align vertically within a minimum distance (e.g., 6 inches) of a joint in the course below. |
Disclaimer
Please remember that this article provides general information and guidance. Always consult with a qualified and licensed roofing professional for specific advice tailored to your home's needs and local building codes. Roofing work can be dangerous and should ideally be performed by experienced contractors.