How Shingles Protect Against Water
The thought of water seeping into your home can send shivers down any homeowner's spine. That dreaded drip, drip, drip from the ceiling is a nightmare, signaling potential damage to drywall, insulation, and even structural components. It’s a common frustration, especially after a heavy storm rolls through. But what exactly is it about asphalt shingles that makes them such a formidable barrier against the elements? This guide will meticulously break down how asphalt shingles and the entire roofing system work together, layer by layer, to keep your home dry and protected, offering you peace of mind by understanding this vital defense.
The Multi-Layered Defense of Your Roof
When we talk about a roof, many people just think of the shingles they see from the curb. But the truth is, your roof is a complex, integrated system, much like an onion with many protective layers. Each layer has a specific job, and when they all work in harmony, they create an incredibly effective shield against the relentless onslaught of weather, especially water. Neglecting any one part can compromise the integrity of the whole, leading to those frustrating leaks and costly repairs.
More Than Just Shingles: The Complete System
It’s easy to get fixated on the visible shingles, but they’re truly just the outermost skin of a much more intricate defense mechanism. Beneath those colorful tabs lies a whole ecosystem of components, each playing a vital role in keeping your home dry. Think of it like this: if you only focus on the paint job of a car but ignore the engine, tires, and brakes, you’re missing the bigger picture. The same goes for your roof.
The complete roofing system typically includes the roof decking (the wooden foundation), underlayment, ice and water shield, flashing, proper ventilation, and finally, the shingles themselves, along with drip edge and sometimes gutters. If you're undertaking a major project, understanding how a roof replacement works: the full process can give you a better grasp of all these integrated parts. Every single piece is designed to direct water away from your home, prevent moisture buildup, and provide structural stability. For instance, a homeowner might install brand new, top-of-the-line shingles, but if the underlying roof decking has rotten spots or the flashing around their chimney is poorly installed, those beautiful new shingles won't be able to do their job effectively. The most expensive shingles in the world are only as good as the system supporting them. It's truly a team effort, where the failure of one player can bring down the entire defense. For a detailed look at all the various components, you might want to explore the topic of Roof Anatomy: Parts of an Asphalt Shingle Roof.
Why Water is the Ultimate Enemy
Water might seem harmless, but for your home, it's often the most insidious and destructive force. A small leak, left unaddressed, can spiral into a catastrophic problem. We’re not just talking about a stained ceiling tile here; we're talking about extensive damage that can compromise your home’s structure, diminish its air quality, and empty your wallet.
Consider the journey water takes. It finds a tiny breach in your roof, perhaps a cracked shingle or compromised flashing. From there, it saturates the underlayment, potentially weakening it, before seeping into your attic insulation. Wet insulation loses its effectiveness, driving up your energy bills. Then, it might drip onto your ceiling drywall, causing unsightly stains, sagging, and eventually crumbling. Beyond the visible damage, moisture creates a perfect breeding ground for mold and mildew. These aren’t just unpleasant; they can trigger allergies, asthma, and other respiratory issues, turning your otherwise comfortable home into an unhealthy environment. The constant drip, drip, drip isn't just annoying; it's a stark reminder of the expensive repairs looming. Imagine coming home after a long day to find a bucket catching water in your living room – it's not just a physical problem, but a huge source of stress and anxiety for homeowners everywhere.
How Asphalt Shingles Act as the First Shield
Asphalt shingles are the most common roofing material in North America, and for good reason. They're relatively affordable, durable, and come in a vast array of colors and styles. But beyond their aesthetic appeal, their primary function is to be the first, highly effective barrier against rain, snow, and hail. They're not just decorative; they're engineered to perform under pressure.
The Ingenious Design of an Asphalt Shingle
At first glance, an asphalt shingle might seem simple, just a flat piece of roofing material. However, its construction is quite sophisticated, with each component playing a crucial role in its water-shedding capabilities. The core of an asphalt shingle is typically a fiberglass mat, which provides strength and dimensional stability. This mat is then saturated and coated with asphalt, a petroleum-based product known for its excellent waterproofing properties. The asphalt itself is usually modified with mineral fillers to enhance its fire resistance and make it more durable and flexible, especially in varying temperatures.
The outermost layer, and arguably the most visible and important for water protection, consists of ceramic granules. These tiny, colored mineral particles are embedded into the asphalt coating. They serve several critical functions: first, they protect the asphalt from the sun's harsh ultraviolet (UV) rays, which would otherwise break down the asphalt over time, leading to cracking and accelerated aging. Second, and most relevant to water protection, these granules create a textured, uneven surface that helps to shed water efficiently. Instead of allowing water to sit and pool, the granules encourage it to flow rapidly down the shingle and off the roof. Think of how water beads up and rolls off a freshly waxed car – the granules help replicate that effect, preventing water from penetrating the shingle itself. When these granules start to wear off, you'll see them accumulating in your gutters, which is a key sign of an aging roof losing its primary defense.
The Importance of Shingle Overlap and Sealant
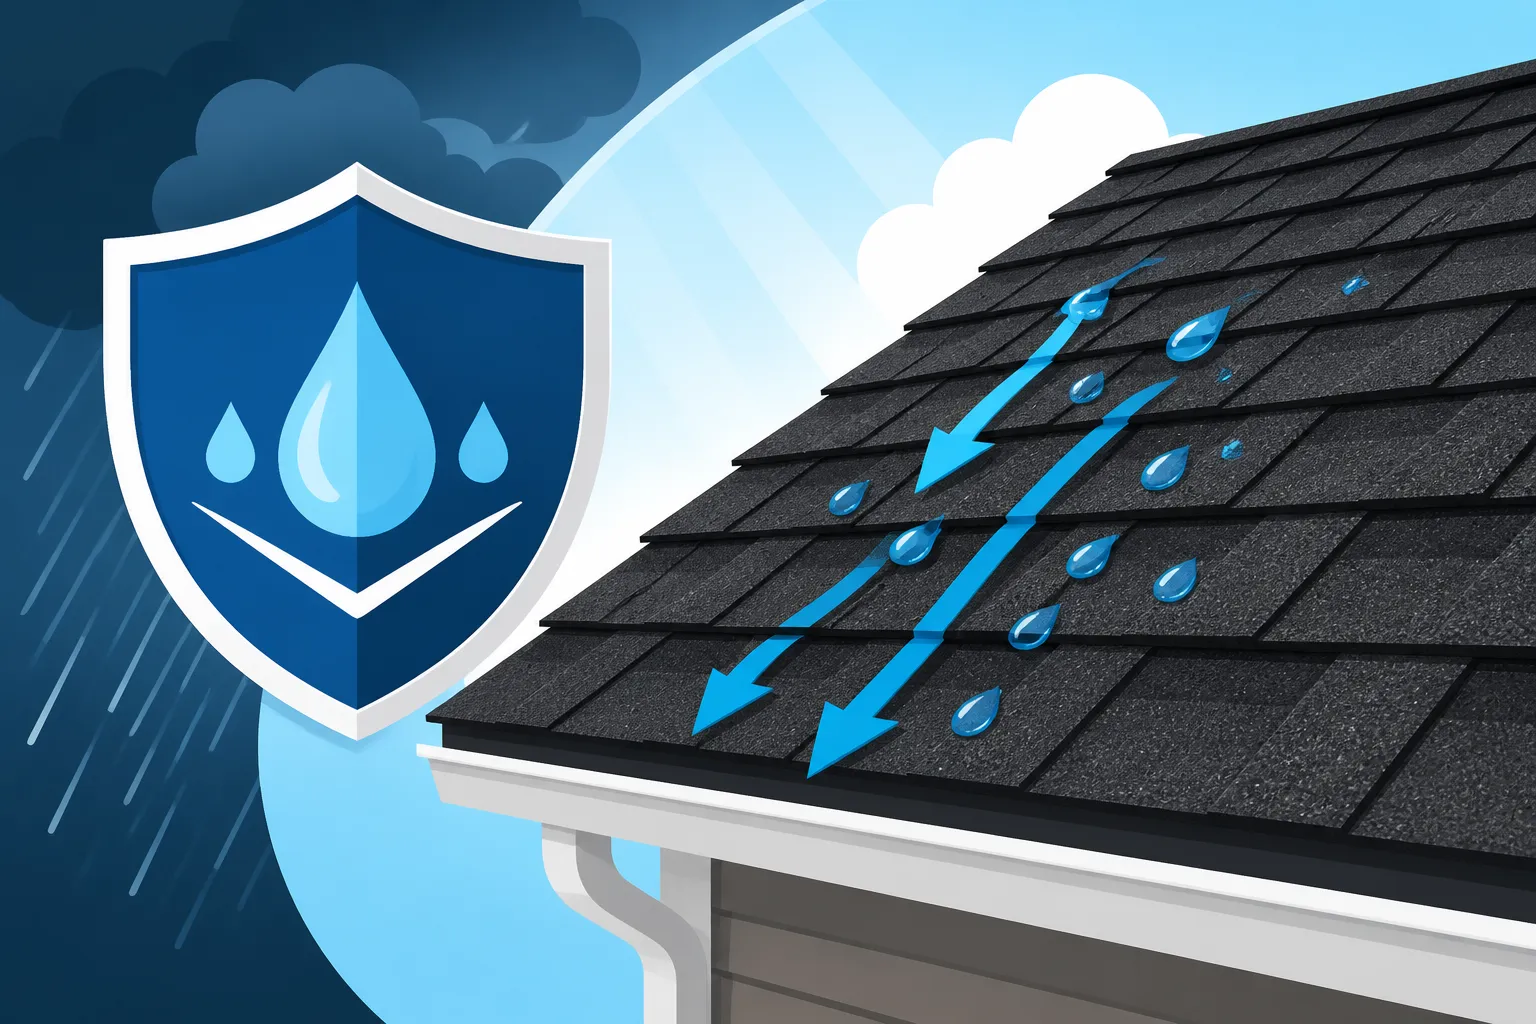
The individual design of an asphalt shingle is impressive, but their true power comes from how they are installed – in an overlapping pattern, much like the scales on a fish or armor tiles on a knight. This staggered arrangement ensures that water cascading down the roof always encounters another shingle beneath it, directing it further down the slope. Each shingle is strategically placed so that its upper portion is covered by the shingle above it, and its side edges are covered by the adjacent shingles, creating a continuous, impenetrable blanket.
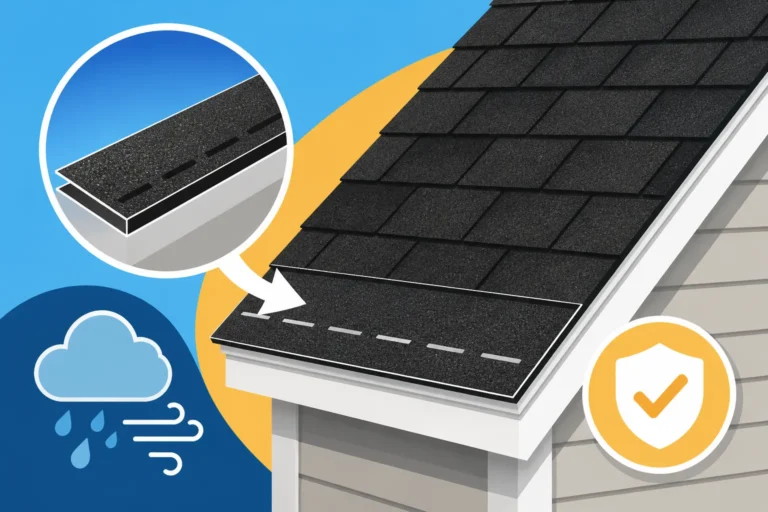
Beyond the physical overlap, modern asphalt shingles employ an ingenious feature: a thermal sealing strip, often referred to as a "tar strip" or "sealant line." This strip, typically made of a modified asphalt adhesive, is applied to the underside of the shingle. Once installed, as the sun heats the roof, this sealant strip activates and literally glues the top of the shingle below it to the bottom of the shingle above it. This thermal bonding creates a strong, wind-resistant seal that prevents strong winds from lifting the shingles and driving rain underneath them. In areas prone to high winds, like coastal regions or open plains, this sealing action is absolutely crucial. A well-sealed roof can withstand much higher wind speeds, preventing entire sections of shingles from blowing off and exposing the vulnerable underlayment beneath. Proper nailing also contributes significantly to this defense, as improperly nailed shingles can loosen, allowing wind and water to penetrate. If you're curious about the mechanics, a deeper dive into how shingles are nailed and sealed can provide more clarity on this critical process.
The Critical Role of Underlayment
While shingles are the visible champions, the underlayment is the silent guardian, providing a vital secondary layer of protection against water intrusion. It's the unsung hero that often goes unnoticed but performs an indispensable role, especially when shingles are damaged or during extreme weather events.
Felt vs. Synthetic Underlayment: The Differences
Beneath the shingles, directly over the roof decking, lies the underlayment. This material acts as a crucial "last line of defense" if water somehow breaches the shingle layer due to a strong storm, ice dams, or shingle damage. It creates a smooth, uniform surface for the shingles to be installed upon and, most importantly, adds an extra layer of waterproofing. For a comprehensive look at this component, check out What Is Underlayment and Why It Matters.
Traditionally, felt underlayment, also known as "tar paper" or "builder's felt," has been used for decades. This material is made from a base mat (often recycled cellulose or fiberglass) saturated with asphalt. It comes in various weights, typically 15-pound and 30-pound, with the latter being thicker and more robust. Felt underlayment provides good water resistance by repelling water, but it's not completely waterproof, especially if it's torn or left exposed for extended periods. It can also wrinkle or become brittle over time.
In recent years, synthetic underlayment has become increasingly popular. These products are often made from polypropylene or polyethylene fibers, offering superior performance compared to felt. Synthetic underlayments are typically lighter, much stronger, and more tear-resistant. They are also highly water-resistant, and many are completely waterproof. They don't absorb moisture, so they won't rot or grow mold, and they lay flatter, which can lead to a smoother shingle installation. While synthetic options usually come with a higher upfront cost, their enhanced durability and longer lifespan can make them a wise investment, particularly in areas subject to harsh weather. When considering a roof replacement, the choice between these two can significantly impact your roof's long-term protection, and understanding Synthetic vs Felt Underlayment Cost might help you make an informed decision.
Ice and Water Shield for Vulnerable Areas
When it comes to specialized water protection, ice and water shield stands out as an essential component, particularly in regions prone to cold winters and heavy snow. This isn't your standard underlayment; it's a highly specialized, self-adhering, and self-sealing membrane designed for critical areas of your roof.
Imagine a homeowner in a place like Minnesota, where winters bring relentless snow and freezing temperatures. Ice dams are a common and destructive problem there. These occur when heat from the attic melts snow on the upper roof, which then refreezes as it reaches the colder eaves, forming a literal dam. Water then backs up behind this ice dam, creeping under the shingles and eventually finding its way into the attic and walls. This is where ice and water shield comes to the rescue. This thick, rubberized asphalt membrane is applied directly to the roof decking along the eaves (typically extending at least 24 inches past the interior wall line), in valleys, around chimneys, skylights, and other roof penetrations. Its unique adhesive quality seals tightly to the decking, and if a nail penetrates it, the rubberized asphalt actually seals around the nail shank, preventing water from seeping through the tiny hole. This makes it incredibly effective at preventing water penetration from ice dams, wind-driven rain, or melting snow. Without it, these vulnerable areas are prime targets for leaks, even on a new roof. It’s an investment that offers substantial peace of mind against some of nature's toughest challenges, and learning more about Ice and Water Shield Explained can highlight its critical benefits.
Flashing and Drip Edge: Directing Water Away
Even the best shingles and underlayment can’t do their job effectively without the specialized components that guide water safely off the roof, especially at those tricky transitions and edges. These unsung heroes—flashing and drip edge—are absolutely critical for preventing leaks where the roof plane is interrupted or where water naturally collects.
The Unsung Heroes: Flashing at Roof Intersections
Flashing might not be the most glamorous part of your roof, but it’s undeniably one of the most vital. Think of it as the highly specialized sealant that protects all the vulnerable joints and intersections on your roof where shingles alone can’t provide adequate protection. These are areas where water naturally gathers or where different parts of the roof meet vertical surfaces, creating perfect opportunities for leaks. Knowing What Is Flashing and Why It Matters is crucial for any homeowner.
There are several types of flashing, each with a specific purpose:
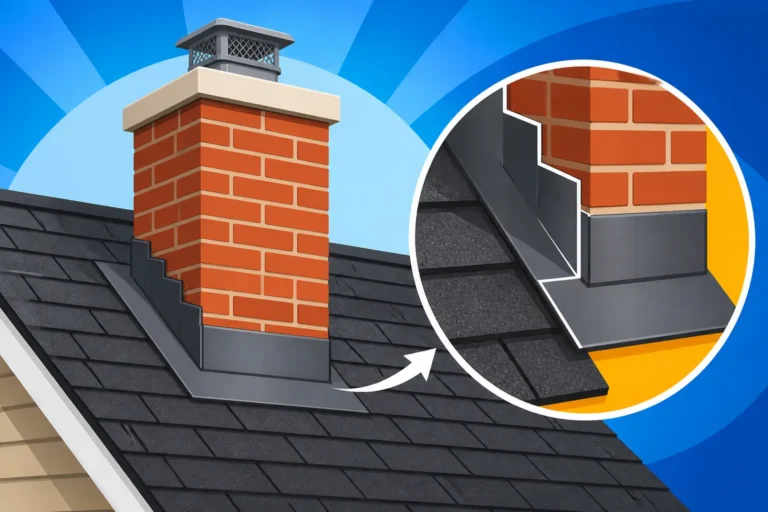
- Step Flashing: This is used wherever a roof meets a vertical wall, such as along a dormer or a side wall. Instead of a single, continuous piece, step flashing consists of individual L-shaped pieces that are integrated with each course of shingles. As a shingle is laid, a piece of step flashing goes over it, and the next shingle covers a portion of that flashing, creating a cascading, watertight barrier that directs water away from the wall.
- Valley Flashing: Roof valleys, where two roof planes meet to form an internal angle, are natural channels for water. Valley flashing, typically made of metal (often aluminum or copper), is installed first in the valley to provide a smooth, durable, and watertight path for water to flow down. Shingles are then trimmed and installed over the edges of the flashing.
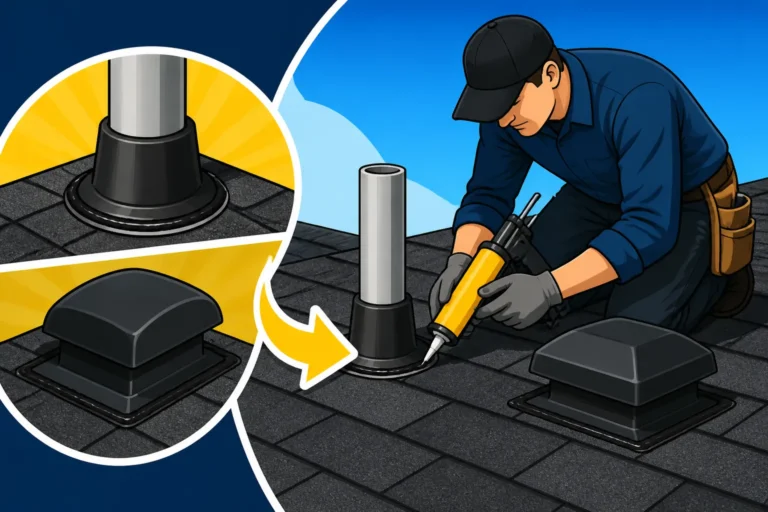
- Pipe Flashing: Any pipe or vent stack penetrating the roof needs a specialized flashing to seal around it. These are usually boot-shaped components made of metal or rubber that fit snugly around the pipe and are integrated with the shingle layers.
- Chimney Flashing: Chimneys are notorious leak spots due to their complex angles and the different materials involved. Chimney flashing typically involves multiple components, including base flashing (around the bottom), step flashing (up the sides), and counter-flashing (mortared into the chimney's masonry to cover the top edge of the base and step flashing).
Improperly installed or deteriorated flashing is one of the most common causes of roof leaks. Imagine a home in Atlanta where heavy thunderstorms are frequent. If the chimney flashing is old, rusted, or wasn't installed correctly, water will inevitably find its way through those tiny gaps, leading to a nasty ceiling stain in the living room below. A skilled roofing contractor pays meticulous attention to flashing details because they know it’s where a roof’s integrity is truly tested.
Drip Edge: Protecting the Roof’s Edges
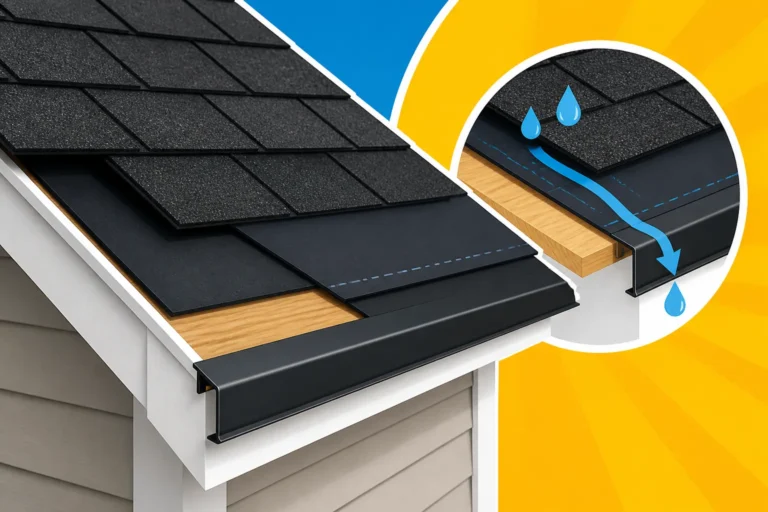
Often overlooked but incredibly important, drip edge is another essential component for effective water management. It's a non-cosmetic trim piece, usually made of aluminum, galvanized steel, or copper, that is installed along the perimeter of your roof's eaves and rake edges. If you're wondering about its function, What Is Drip Edge and Why It Matters explains it well.
Its primary purpose is right in its name: to ensure that water drips cleanly off the roof and into your gutters, or away from the fascia and siding if no gutters are present. Without drip edge, water tends to cling to the underside of the shingles and can wick back onto the fascia board and even into the soffit and roof decking. This consistent moisture can lead to a host of problems:
- Fascia Rot: The wooden fascia board, which caps the ends of your rafters, is highly susceptible to rot if constantly exposed to moisture.
- Soffit Damage: Water wicking back can damage the soffit, which protects your attic from pests and weather.
- Gutter Inefficiency: Without drip edge, water might overshoot the gutters, rendering them less effective and leading to splash-back against your home's foundation.
- Pest Entry: Deteriorated fascia or soffit can create openings for pests like wasps, birds, or rodents to enter your attic.
Drip edge effectively extends the edge of the roof by a small margin, creating a clean break for water flow. It's a simple, inexpensive component that offers significant long-term protection against water damage to critical parts of your home's exterior.
Effective Ventilation and Drainage for Longevity
Even the most perfectly installed shingles, underlayment, flashing, and drip edge won't provide optimal long-term water protection if the attic isn't properly ventilated and the exterior drainage system isn't functioning correctly. These two elements play a less direct but equally crucial role in managing moisture and preventing premature roof failure.
The Importance of Proper Attic Ventilation
Many homeowners don't realize that their roof's health isn't just about what's on top, but also what's underneath. Proper attic ventilation is absolutely crucial for the longevity and performance of your entire roofing system, and it plays a significant role in preventing moisture-related damage. Learn more about how roof ventilation works for a clearer picture.
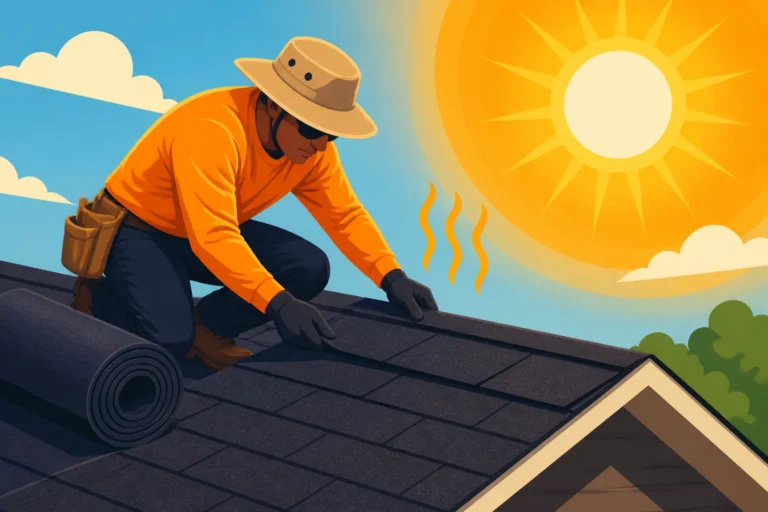
During hot summer months, the sun bakes your roof, transferring a tremendous amount of heat into your attic. Without adequate ventilation, this hot, stagnant air gets trapped, leading to several problems:
- Premature Shingle Aging: The extreme heat can literally "cook" your shingles from the underside, causing the asphalt to dry out, leading to cracking, curling, and granule loss long before their expected lifespan. This compromises their ability to shed water effectively.
- Increased Energy Costs: A super-heated attic radiates heat back into your living space, making your air conditioning work harder and driving up your utility bills.
- Moisture Buildup in Winter: In colder climates, warm, moist air from your living space (from showering, cooking, etc.) rises into the attic. If this moisture can't escape, it condenses on the cold underside of the roof decking, leading to mold growth, mildew, and eventually rot. This rot weakens the decking and can cause the shingles above to loosen or sag, creating prime opportunities for leaks.
An effective ventilation system typically involves a balance of intake vents (usually soffit vents along the eaves) and exhaust vents (like ridge vents along the roof peak or box vents). This creates a continuous airflow, drawing cool, fresh air into the attic from the soffits and expelling hot, moist air through the exhaust vents. This airflow helps maintain a consistent temperature, preventing both excessive heat buildup in summer and condensation in winter, thus protecting your shingles and underlying structure from moisture-related deterioration.
Gutters and Downspouts: The Final Water Management Step
After all the layers of your roof have done their job of shedding water, there's one more crucial system that takes over to complete the process: your gutters and downspouts. These are often seen as separate from the roof, but they are an integral part of your home's overall water management strategy, especially in preventing water damage to your foundation and landscaping.
Imagine a beautiful new roof, shedding thousands of gallons of water during a heavy rainstorm. If that water is allowed to simply cascade off the eaves, it will fall directly around your home’s foundation. Over time, this constant deluge will erode the soil, create puddles, and can lead to significant foundation problems like cracks, bowing walls, or even basement flooding. This is where gutters step in. They act as channels, collecting all that roof runoff and directing it to specific points where downspouts then carry it safely away from the house, typically into a drainage system or onto a splash block.
When gutters become clogged with leaves, twigs, and debris, they can't perform their job. Water will then overflow, cascading over the sides of the gutters and causing the very problems they are designed to prevent. This overflowing water can also seep behind the fascia boards, causing them to rot, or even find its way into your home's walls. Regularly cleaning and maintaining your gutters, and ensuring your downspouts are properly extended away from the foundation, is a simple yet critical task that protects not only your foundation but also the long-term integrity of your home's entire exterior. Neglecting them is akin to meticulously polishing your armor but leaving your shield on the ground – you're still vulnerable.
Common Weak Points and How to Ensure Maximum Protection
While the asphalt roofing system is designed to be incredibly robust, like any complex system, it has its weak points. Understanding these areas and knowing how to address them is key to ensuring your home remains watertight and your roof lasts its full intended lifespan.
Identifying Vulnerable Areas on Your Roof
Even with the best materials and installation, certain areas on your roof are inherently more prone to water infiltration than others. These are typically spots where the roof plane is interrupted, where water naturally collects, or where different materials meet. Being aware of these common weak points allows you to perform targeted inspections and address issues before they become major leaks. A regular Roof Damage Assessment: A Homeowner's Guide can help you keep an eye on these areas.
Here are the prime suspects for leaks:
- Valleys: These are the V-shaped channels where two roof slopes meet. They funnel a significant amount of water, making them highly susceptible to leaks if the valley flashing is compromised, cracked, or improperly installed. Debris can also accumulate here, causing water to pool.
- Around Chimneys: Chimneys create a large, square obstruction in the roof plane, requiring complex flashing. Expansion and contraction of both the chimney masonry and the roof materials can cause flashing to separate or crack over time. The porous nature of brick and mortar can also allow water to seep through if not properly sealed.
- Skylights: While beautiful, skylights are essentially holes cut into your roof. Their frames, seals, and flashing around the glass can deteriorate, leading to leaks. Improper installation or damaged seals around the glass are common culprits.
- Vent Pipes and Other Penetrations: Any pipe, exhaust fan, or plumbing vent that protrudes through your roof needs a tight seal. The rubber boots on pipe flashing can crack or degrade over time due to UV exposure, allowing water to sneak in around the pipe.
- Dormers: Dormers create multiple vertical walls and valleys on a roof, essentially multiplying the number of vulnerable flashing points. Each intersection needs meticulous attention.
- Low-Slope Sections: While asphalt shingles are designed for sloped roofs, some homes may have areas with a very shallow pitch. On low-slope sections, water drains more slowly, increasing the chance of it backing up under shingles, especially during heavy rain or if debris accumulates. Standard asphalt shingles are generally not recommended for pitches below 2:12.
Homeowners should periodically (and safely!) inspect these areas from the ground with binoculars or consider a professional inspection to catch potential issues early. Waiting until you see a stain on your ceiling usually means the problem has been brewing for a while.
The Role of Professional Installation and Maintenance
You can buy the highest-quality, most technologically advanced asphalt shingles on the market, but if they aren't installed correctly, they might as well be cardboard. The biggest variable in your roof's long-term protection against water isn't necessarily the brand of shingle, but the expertise of the people installing it. This is why the role of professional installation is paramount.
A skilled, reputable roofing contractor understands not just how to lay shingles, but the entire complex interplay of all the roofing system components. They know the correct nailing patterns, how to integrate the underlayment and ice and water shield, the intricacies of flashing around various penetrations, and the local building codes that govern everything from ventilation to wind resistance. An inexperienced or shoddy installer might cut corners – using too few nails, failing to seal flashing properly, or rushing through underlayment installation – creating tiny vulnerabilities that will inevitably lead to leaks down the line. It's often these subtle installation errors that cause the most headaches for homeowners a few years after a new roof.
That's why choosing the right contractor is a decision that shouldn't be rushed. Resources like Modernize can connect you with qualified local professionals who understand the nuances of asphalt roofing and are committed to quality workmanship. Beyond initial installation, ongoing maintenance is equally important. Regular inspections (at least once a year, and especially after major storms) by a professional can identify minor issues like loose shingles, cracked flashing, or clogged gutters before they escalate into costly water damage. Timely repairs to these small problems can significantly extend the life of your roof and maintain its watertight integrity for decades. As you embark on this journey, learning how to choose a roofing contractor will be invaluable.
Advanced Shingle Technologies for Enhanced Water Resistance
The world of asphalt roofing isn't static; manufacturers are constantly innovating to produce shingles that offer even greater protection, durability, and performance. These advancements address specific challenges that can compromise a roof's ability to shed water, offering homeowners enhanced peace of mind.
Impact-Resistant and Class 4 Shingles
For homeowners living in regions frequently battered by hail or high winds, the thought of roof damage is a constant worry. A severe hailstorm can leave a standard asphalt shingle roof looking like a battlefield, with countless indentations, cracks, and granule loss – all prime entry points for water. This is where impact-resistant, particularly Class 4, shingles come into their own.
These specialized shingles are engineered with tougher, more resilient materials to withstand significant impacts. They often incorporate a polymer-modified asphalt, such as SBS (styrene-butadiene-styrene), which makes the shingle much more rubbery and flexible. This allows the shingle to absorb the energy of a hailstone impact without cracking or fracturing. Some designs also feature a reinforced fabric or mesh embedded within the shingle for added strength. The Class 4 rating is the highest achievable under the UL 2218 standard, meaning these shingles have been tested to withstand impacts from a 2-inch steel ball dropped from 20 feet without cracking.
The direct benefit for water protection is clear: fewer cracks and damaged areas mean fewer opportunities for water to penetrate the shingle surface. By maintaining their integrity, these shingles ensure a continuous, uncompromised barrier against rain and melting snow. In many hail-prone states like Colorado or Texas, insurance companies even offer significant premium discounts for homes equipped with Class 4 shingles, recognizing their superior protective qualities and reduced risk of claims. For those interested in this robust option, exploring Impact-Resistant Shingles: How They Work offers a more detailed explanation.
Algae and Cool-Roof Shingles
Beyond structural integrity against impacts, other environmental factors can subtly degrade a shingle's water-shedding capabilities over time. Two key innovations, algae-resistant and cool-roof shingles, address these challenges.
Algae-Resistant Shingles: If you've ever seen unsightly black streaks or discoloration on roofs, especially in humid climates like Florida or along the coasts, you've witnessed the work of blue-green algae (Gloeocapsa magma). While primarily an aesthetic issue, this algae growth can hold moisture on the shingle surface for longer periods, potentially fostering mildew and accelerating the breakdown of granules. Algae-resistant shingles combat this by embedding copper granules or zinc particles into the shingle surface during manufacturing. As rain washes over the roof, trace amounts of copper or zinc are released, creating an environment that inhibits algae growth. By keeping the shingle surface clean and free of biological growth, these shingles maintain their intended water-shedding properties and overall integrity for a longer period, preventing moisture from lingering and causing damage.
Cool-Roof Shingles: The sun’s intense heat is another silent enemy of an asphalt roof. High temperatures can cause shingles to degrade faster, leading to premature cracking and brittleness, which directly impacts their ability to protect against water. Cool-roof shingles are designed to address this by reflecting more sunlight and absorbing less heat than traditional dark-colored shingles. They achieve this through special highly reflective granules that scatter UV radiation. By reducing the surface temperature of the roof, cool-roof shingles mitigate the heat stress on the asphalt, helping the material remain more flexible and resilient for longer. This extended material integrity directly translates to better long-term water protection, as the shingles are less prone to developing cracks and vulnerabilities that could allow water intrusion. Plus, they can significantly reduce your home's cooling costs! You can delve deeper into how these work by reading Cool-Roof Shingles Explained.
| Roofing Component | Primary Role in Water Protection | Key Benefit | Risk if Compromised |
|---|---|---|---|
| Asphalt Shingles | First line of defense; granular surface sheds water, overlapping design channels flow, and thermal sealant resists wind uplift that drives rain underneath. | Direct water runoff; primary weatherproof barrier. | Missing/cracked shingles allow direct water penetration to underlayment. |
| Underlayment | Secondary barrier beneath shingles; provides an extra layer of water resistance and protection for the roof deck, especially if shingles are damaged or during installation. | Backup water barrier; protects deck from minor breaches. | Compromised underlayment means water directly reaches roof deck, causing rot. |
| Ice & Water Shield | Self-adhering, self-sealing membrane used in critical areas (eaves, valleys, penetrations) to prevent water backup from ice dams or wind-driven rain, sealing around fasteners. | Prevents water intrusion from ice dams and severe weather in vulnerable spots. | Ice damming and wind-driven rain can push water under shingles and into the home. |
| Flashing | Metal or other material installed at roof penetrations (chimneys, vents, skylights) and intersections (valleys, walls) to create watertight seals and direct water away. | Seals complex junctions where shingles can't; redirects concentrated water flow. | Leaks at penetrations and intersections, leading to significant interior damage. |
| Drip Edge | Metal strip along roof edges that extends beyond the fascia board, ensuring water drips clear of the roof structure and into gutters. | Protects fascia and soffit from water wicking; ensures proper gutter function. | Water damage and rot to fascia and soffit; water pooling around foundation. |
| Roof Ventilation | Circulates air in the attic, removing heat and moisture. Prevents condensation and premature shingle aging, which maintains shingle integrity. | Prevents heat/moisture buildup that degrades roof components. | Condensation and mold in attic; premature shingle failure; increased leak potential. |
| Gutters & Downspouts | Collects water runoff from the roof and directs it safely away from the building's foundation. | Protects foundation and landscaping from concentrated water flow. | Foundation damage, basement flooding, landscape erosion if water pools around the home. |
Disclaimer
Please remember that the information provided in this article is intended for general informational purposes only and does not constitute professional advice. Roofing work can be dangerous and complex. Always consult with a qualified, licensed, and insured roofing professional for inspections, repairs, and replacements to ensure safety and compliance with local building codes.