Roofing Underlayment Code Requirements
One of the most overlooked, yet absolutely critical, components of any asphalt shingle roof system is the underlayment. Many homeowners find themselves scratching their heads when contractors start talking about felt paper, synthetic barriers, and ice and water shield, often wondering why it's all so complicated. The truth is, selecting and installing the right underlayment according to strict code requirements is paramount to your roof's long-term performance and your home's protection against the elements. This comprehensive guide will demystify roofing underlayment code requirements, helping you understand why these regulations exist and how they safeguard your investment.
Understanding the Basics of Roofing Underlayment
Before we dive deep into the specific codes, let's clarify what roofing underlayment actually is and why it holds such an important place in your roofing system. It’s not just an afterthought; it’s a foundational layer that works hand-in-hand with your shingles.
What is Roofing Underlayment and Why It's Crucial
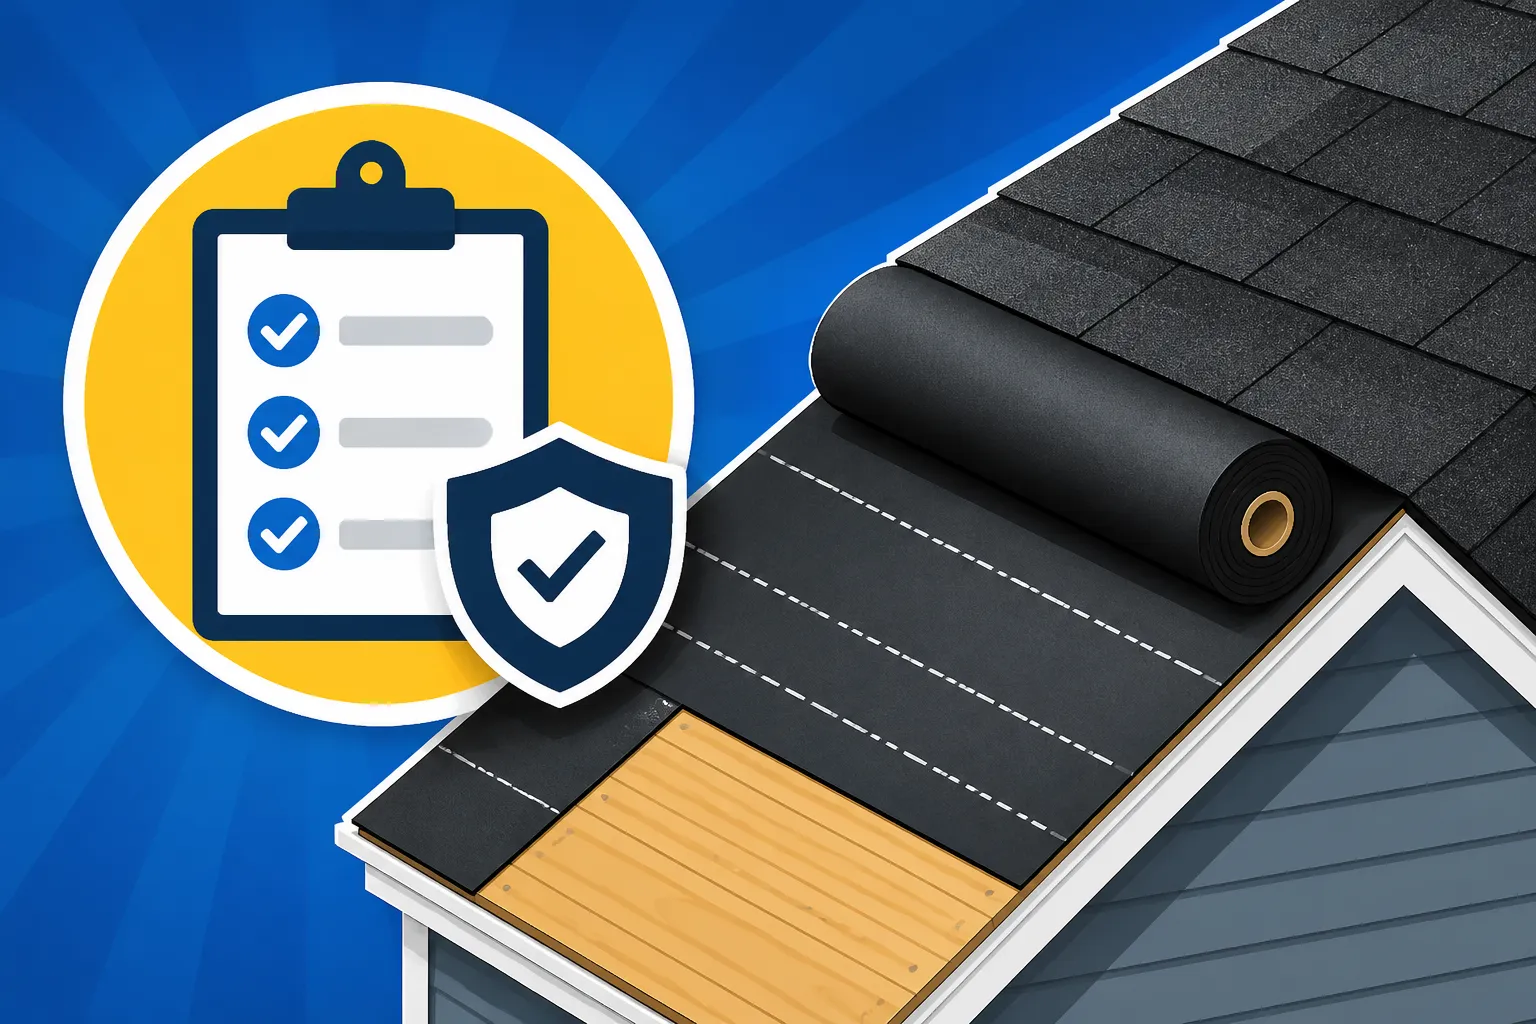
Think of roofing underlayment as your roof's second line of defense – or even its first, depending on the severity of the weather. It's a protective layer of material, typically rolled out and fastened directly onto your roof decking before any shingles go down. Its primary job is to create a crucial barrier against moisture, especially during heavy rains or wind-driven snow that might sneak past your shingles. It also protects the roof deck from water damage if shingles get dislodged or fail over time.
Beyond water resistance, underlayment provides a smoother, more uniform surface for shingle installation, which can help your shingles lay flatter and seal better. Some advanced underlayments even offer temporary protection for your roof deck during installation, giving your home some defense if a sudden downpour hits before the shingles are fully in place. Understanding its function is key to appreciating why specific codes exist for it. If you're curious about the overall process, we have a detailed guide on [.
The Role of Building Codes in Roofing
Building codes aren't just arbitrary rules designed to make your life harder; they are a set of minimum standards designed to ensure the safety, structural integrity, and durability of your home. When it comes to roofing, these codes address everything from the materials used to the methods of installation, including underlayment. National codes, like the International Residential Code (IRC) and the International Building Code (IBC), provide a baseline. However, these codes are then adopted and often modified by individual states, counties, and cities to account for local climate conditions, seismic activity, or specific regional hazards.
For instance, a home in Miami, Florida, will have much stricter wind uplift requirements than one in Phoenix, Arizona, due to hurricane risks. Similarly, a house in Buffalo, New York, will have rigorous ice dam protection requirements that a home in San Diego, California, simply won't need. Compliance with these codes isn't just about legality; it's about making sure your roof can withstand the elements it's likely to face. Skipping proper underlayment installation or choosing non-compliant materials can lead to premature roof failure, denied insurance claims, and even serious structural damage to your home. It's also vital for ensuring your roof is up to snuff if you ever decide to sell your home.
General Underlayment Code Requirements
While specific requirements can vary widely by location and the type of underlayment you choose, there are some fundamental code requirements that apply broadly across most jurisdictions. These are the non-negotiables that every roofing project involving underlayment must adhere to.
Minimum Number of Layers and Overlaps
One of the most basic aspects of underlayment installation governed by code is the number of layers and how those layers are overlapped. Generally, standard asphalt shingle installations require a single layer of underlayment. However, there are critical exceptions and specific nuances:
- Standard Single Layer: For most roof slopes (pitches of 4:12 or greater), a single layer of approved underlayment, such as asphalt-saturated felt or synthetic underlayment, is acceptable. The key here is proper overlap. The code typically mandates a minimum headlap (the amount the upper layer overlaps the lower layer horizontally) of 2 inches. This overlap ensures that water shed by the upper layer flows over the lower layer, preventing it from seeping into the roof deck.
- Double Layer for Low Slopes: If your roof has a low slope (generally 2:12 to 4:12), the code often requires a double layer of underlayment, or at the very least, a much greater overlap to enhance water shedding capabilities. For example, some codes might require a 19-inch headlap on roofs with slopes between 2:12 and 4:12, ensuring almost full coverage with each layer. This extra protection is crucial because low-slope roofs shed water much slower than steeper roofs, making them more susceptible to leaks.
- Self-Adhering Membranes: When using self-adhering membranes like ice and water shield, the overlap requirements are often different because the material sticks to itself and the deck. These products typically require a minimum 3-inch headlap and sidelap to create a watertight seal. This is a topic we discuss more in depth in our guide on [.
It’s not just about the numbers; it’s about creating a continuous, impervious barrier. Any gaps or insufficient overlaps can create pathways for water, compromising the entire roof system. A skilled roofer will pay meticulous attention to these details, ensuring every seam is properly protected.
Fastening Requirements
Once the underlayment is laid down, it needs to be securely fastened to the roof deck. This might seem like a straightforward step, but codes have very specific guidelines regarding fasteners to ensure the underlayment stays put, especially during installation and when exposed to wind before shingles are applied.
- Type of Fasteners: The most common fasteners for underlayment are roofing nails or staples. However, some codes, especially in high-wind regions, may mandate the use of plastic cap nails. These fasteners have a wider head, which provides greater resistance to tear-off, ensuring the underlayment doesn't rip around the fastener during strong winds. The choice of fastener often depends on the type of underlayment too; synthetic underlayments, being more tear-resistant, can sometimes use standard roofing nails, while felt paper might benefit more from caps.
- Nailing Patterns and Spacing: Codes specify not just what to use, but how to use it. Fasteners must be installed in a grid pattern, typically along the edges and in the field (middle) of the underlayment. For instance, a common requirement might be fasteners spaced 6 inches on center along the vertical laps and 12 inches on center in two staggered rows in the field. In high-wind areas, this spacing might be reduced significantly, sometimes to 4 or 6 inches on center across the entire underlayment, to provide enhanced wind resistance. These specific nailing patterns are critical because they prevent the underlayment from ballooning or detaching under wind uplift, which could expose the roof deck to severe weather. This also ties into the overall wind rating of your shingles, as the underlayment plays a role in the system's ability to resist blow-offs.
Without proper fastening, even the best underlayment can become a liability. A strong gust of wind during installation, or even after, could tear poorly secured underlayment, exposing the vulnerable roof deck and leading to potential water damage before the shingles even have a chance to protect it.
Decking Preparation Before Underlayment Installation
You can have the best underlayment and follow all fastening rules, but if your roof decking isn't properly prepared, the entire system can fail. Building codes also touch upon the condition of the roof deck before underlayment installation, because a compromised deck undermines everything built on top of it.
- Clean and Dry Surface: The first and most critical rule is that the roof deck must be clean, dry, and free from any debris. Any moisture trapped between the underlayment and the deck can lead to mold, mildew, and rot over time. Debris can create bumps that compromise the flatness of the underlayment and, consequently, the shingles.
- Sound Decking: The decking itself must be structurally sound. This means no rotted wood, no significant holes, and no loose panels. If there's rotten or damaged plywood or OSB, the code typically requires it to be repaired or replaced before new underlayment is installed. This ensures that fasteners have a solid surface to adhere to and that the roof deck can properly support the weight of the roofing materials and any snow or wind loads.
- Even Surface: The roof deck should be as even as possible. Protruding nails from previous roofing, large knots, or uneven seams in the decking material can create imperfections that might show through the shingles or create stress points in the underlayment, potentially leading to tears or premature wear. Contractors will often address these issues by sanding down high spots, filling small gaps, or counter-sinking errant nails. This meticulous preparation is foundational for a long-lasting and code-compliant roof.
Ensuring the roof deck is pristine before applying underlayment is a mark of a quality roofing job. It's often the unsung hero that prevents future headaches and unexpected expenses down the road.
Climate-Specific Underlayment Code Requirements
It's clear that a roof in Alaska faces different challenges than a roof in Arizona. That's why building codes are often tailored to specific climate conditions, with underlayment requirements being a prime example. These specialized codes are designed to combat region-specific threats.
Ice and Water Shield Requirements in Cold Climates
For homeowners in colder regions, few things are as universally dreaded as ice dams. These ridges of ice form at the edges of a roof, preventing melting snow from draining properly. When water backs up behind an ice dam, it can seep under shingles, through the underlayment, and into your attic and home, causing extensive damage. This is precisely why codes in these areas mandate the use of ice and water shield.
- What it is: Ice and water shield, often referred to as a self-adhering membrane, is a specialized, rubberized asphalt underlayment that creates a watertight seal directly to the roof deck. Unlike felt or synthetic underlayments, it has an adhesive backing that seals around fasteners, preventing water from penetrating nail holes.
- Mandatory Use: In areas prone to freezing temperatures and heavy snowfall, such as New England, the Great Lakes region (e.g., Michigan, Wisconsin), and parts of the Pacific Northwest and Rockies, ice and water shield is not optional. The International Residential Code (IRC) generally requires an ice barrier be installed along the eaves that extends from the edge of the roof to a point at least 24 inches inside the exterior wall line of the building. This means the shield must extend far enough up the roof to cover the area where ice dams are most likely to form and cause issues.
- Specific Coverage Areas: Beyond the eaves, codes often require ice and water shield in other critical areas where water tends to collect or penetrate:
- Valleys: These are natural channels for water on your roof and are highly susceptible to leaks. Proper flashing and underlayment here are crucial.
- Around Penetrations: This includes chimneys, skylights, vent pipes, and other areas where the roof surface is interrupted. These spots are notorious for leaks if not properly sealed.
- Low Slopes: Even in moderate climates, any roof section with a low pitch (below 4:12) may require ice and water shield to ensure adequate water resistance.
Failure to install this critical barrier where required by code can lead to costly water damage, potentially void your homeowner's insurance coverage for such damage, and even lead to local code enforcement issues. This specialized underlayment, while a higher upfront cost, offers invaluable protection for your home.
High-Wind Zone Requirements
Coastal regions, areas prone to hurricanes, tornadoes, or simply consistently strong winds have vastly different underlayment requirements than calmer inland areas. These codes are designed to prevent the catastrophic failure of a roof system under extreme wind uplift.
- Enhanced Fastening: As mentioned earlier, high-wind zones often mandate more aggressive fastening schedules for underlayment. Instead of nails spaced 12 inches on center in the field, you might see requirements for 6 inches on center or even closer, often with plastic cap nails to maximize tear resistance.
- Specific Underlayment Types: Some high-wind codes may require the use of heavier, more robust synthetic underlayments known for their superior tear strength and wind resistance. For instance, in Florida, with its stringent building codes due to hurricane exposure, you'll find requirements for specific types of self-adhering underlayments or heavily reinforced synthetics, often applied with specific attachment methods to meet or exceed wind load calculations. These underlayments act as a secondary water barrier even if all the shingles are blown off, offering a critical layer of protection until repairs can be made.
- Adhesive Strips or Fully Adhered Systems: In the most extreme wind zones, codes might specify underlayments with factory-applied adhesive strips or even fully adhered systems that are glued down to the deck rather than mechanically fastened. These systems eliminate nail holes and create a monolithic barrier that is much harder for wind to lift and peel away. These regions are also likely to have stringent requirements for other components, like drip edge, to ensure the entire system is properly secured.
Complying with high-wind underlayment codes is not just about passing inspection; it's about giving your home the best chance to survive a severe weather event. This is especially true in places like the Gulf Coast or tornado alley states where these events are a regular threat.
Fire Resistance and Underlayment
While asphalt shingles themselves have a fire rating, the entire roofing assembly, including the underlayment, contributes to the overall fire resistance of your home. In certain regions, particularly those prone to wildfires, codes place a higher emphasis on fire-resistant materials.
- Overall Roof Assembly Rating: Underlayment plays a role in achieving specific fire resistance classifications for a roof assembly (Class A, B, or C). Often, the underlayment is chosen to complement the shingles in achieving a desired fire rating, especially Class A, the highest rating. This is particularly relevant in areas with significant wildland-urban interfaces (WUI zones), such as parts of California, Colorado, and the Pacific Northwest, where codes are designed to reduce the spread of wildfire.
- Non-Combustible Underlayments: While most traditional asphalt-saturated felt or synthetic underlayments are not inherently "non-combustible," they are designed to perform within the tested parameters of the entire roof system. However, in extreme fire-prone areas, specific codes might recommend or require enhanced fire-retardant underlayments or alternative non-combustible sheathing materials under the underlayment itself. These requirements are less common for asphalt shingles but can exist in highly specialized zones.
- Protecting the Deck: The underlayment also serves to protect the combustible roof deck (plywood or OSB) from embers that might penetrate damaged or missing shingles. A well-installed underlayment can buy valuable time and prevent a small spark from turning into a full-blown attic fire. Your contractor should be well-versed in these specific requirements, particularly if you live in a WUI zone.
Different Underlayment Types and Their Code Implications
The world of roofing underlayment has evolved quite a bit. What was once a simple choice between different weights of felt paper is now a more complex landscape with synthetic options and specialized membranes. Each type has its own set of characteristics and, consequently, different code implications.
Asphalt-Saturated Felt Underlayment (Felt Paper)
This is the traditional workhorse of roofing underlayment, used for decades before synthetic options became popular. It's essentially a mat of organic fibers or fiberglass saturated with asphalt, giving it water-resistant properties.
- Common Types: You'll typically encounter 15-lb felt and 30-lb felt. The "lb" refers to the weight per 100 square feet (a "square" in roofing terms).
- 15-lb felt: Lighter and less expensive, often still code-accepted for standard slopes in many regions. It offers basic water resistance and provides a decent barrier.
- 30-lb felt: Heavier, more tear-resistant, and offers better water resistance. Many codes, especially in more demanding climates, either recommend or require 30-lb felt as a minimum, or specify that it be used for low-slope applications with increased headlap.
- Traditional Use and Code Acceptance: Felt paper has a long track record, and it remains a code-accepted underlayment in most areas when installed correctly. However, its limitations are also well-known: it can absorb moisture, leading to wrinkles and buckles, especially if exposed to the elements for too long before shingles are installed. It also has less tear resistance than synthetic options.
- Limitations: While code-compliant, felt paper is generally less durable and less effective in extreme conditions than modern synthetics. Its performance can degrade over time, and it offers little to no self-sealing around fasteners, making it more vulnerable to leaks from nail penetrations. This is a key reason why many homeowners and contractors now opt for synthetic alternatives, even where felt is still technically permitted.
Synthetic Underlayment
Synthetic underlayments have become increasingly popular over the last couple of decades, offering significant advantages over traditional felt paper. They are typically made from woven polypropylene or polyester, coated with polymers to enhance water resistance.
- Advantages:
- Durability and Tear Resistance: Synthetic underlayments are incredibly tough. They resist tearing much better than felt, which is a huge benefit during installation, especially on steep roofs or in windy conditions. This resilience means they are less likely to be damaged by foot traffic or blown off before shingles are installed.
- Lighter Weight: Despite their strength, synthetic rolls are often lighter and cover a much larger area per roll than felt, making installation faster and less labor-intensive.
- Water Resistance: They shed water exceptionally well and don't absorb moisture, so they won't wrinkle or buckle. Many synthetic underlayments also offer extended UV exposure ratings, meaning they can be left exposed for longer periods (e.g., 6 months) without degrading, providing more flexibility in project scheduling.
- Code Acceptance and Product Approvals: Most building codes readily accept synthetic underlayments, often recognizing them as superior to felt. However, specific products must meet ASTM standards (e.g., ASTM D226 for asphalt-saturated felt or ASTM D4869 for asphalt-saturated organic felt, and newer standards for synthetics) and often require manufacturer-specific product approvals (like ESR reports from ICC-ES) to ensure they perform as advertised. Leading brands like Owens Corning with their ProArmor underlayment or GAF with their Deck-Armor are examples of widely approved synthetic products that meet or exceed code requirements and are often part of enhanced warranty systems.
- Cost vs. Performance: While synthetic underlayments generally have a higher material cost than felt, their performance benefits, ease of installation, and contribution to a more durable roofing system often justify the investment, especially when considering the long-term protection of your home. They are a common choice for those looking to maximize their roof's lifespan and protection. We have a dedicated article comparing [.
Self-Adhering Underlayment (Ice & Water Shield)
This specialized underlayment category deserves its own discussion due to its unique properties and critical role in specific code requirements. As we touched on earlier, it's designed for maximum water protection.
- Mandated Use and Specific Code Benefits: The primary code-driven use for self-adhering underlayment is in areas requiring ice barriers. Its rubberized asphalt composition creates a watertight seal, and its adhesive backing seals tightly around roofing fasteners (nails, staples), preventing water from entering through these penetration points. This "self-sealing" property is its greatest advantage over felt or synthetic underlayments, making it invaluable in areas prone to ice dams or wind-driven rain.
- Application Areas Beyond Cold Climates: While mandatory in cold climates, self-adhering membranes are also frequently installed in other high-risk areas, regardless of climate, because they offer superior protection:
- Valleys: A critical junction on any roof where two slopes meet, channeling large volumes of water.
- Around all Roof Penetrations: Skylights, chimneys, plumbing vents, and other interruptions in the roof plane are prime areas for leaks. Self-adhering membranes provide an extra layer of defense here.
- Eaves and Rakes: Even in warmer climates, extending this membrane along the eaves can provide excellent protection against wind-driven rain.
- Low-Slope Sections: Any part of a roof with a pitch less than 4:12 can benefit from the superior waterproofing of a self-adhering membrane, even if a full ice barrier isn't mandated by climate.
- Installation Challenges: While highly effective, self-adhering membranes require careful installation. The adhesive creates a strong bond, so precise placement is key, as adjustments are difficult once it's stuck. Temperature can also affect adhesion, with manufacturers typically specifying ideal installation temperatures. Despite these nuances, its unparalleled waterproofing capabilities make it an indispensable component of a code-compliant, high-performance roof in many scenarios.
Permits, Inspections, and Warranty Considerations
Understanding underlayment codes isn't just about what materials to use and how to install them; it also ties directly into the administrative aspects of a roofing project: permits, inspections, and your all-important roof warranty. Ignoring these connections can lead to significant problems.
The Importance of Permits and Inspections
You might groan at the thought of paperwork and inspections, but trust me, they're there for your protection. When you undertake a major home improvement like a roof replacement, a building permit is almost always required.
- Why Permits are Necessary: A roofing permit signals to your local building department that you'll be performing work that needs to adhere to safety and building codes. It’s a mechanism to ensure that the work is done correctly and safely. Without a permit, you could face fines, difficulty selling your home, or even issues with your insurance company if a future problem arises. We have a detailed guide on [.
- What Inspectors Check: Once the permit is issued, it's very common for your local jurisdiction to require at least one, sometimes two, inspections during the roofing process.
- Decking/Underlayment Inspection: Often, an inspector will want to see the roof decking and the underlayment before the shingles are installed. This is their chance to verify that:
- The roof deck is sound, clean, and properly repaired if needed.
- The correct type of underlayment (e.g., 15-lb felt, 30-lb felt, synthetic, ice and water shield) is being used as per local code.
- The underlayment is installed with the correct overlaps (headlap, sidelap) and fastened according to code specifications (fastener type, spacing, pattern).
- Ice and water shield is correctly applied in mandated areas (eaves, valleys, penetrations) and extends the required distance.
- Final Inspection: After the shingles and all other components are installed, a final inspection ensures that the entire roof system is complete and code-compliant.
- Decking/Underlayment Inspection: Often, an inspector will want to see the roof decking and the underlayment before the shingles are installed. This is their chance to verify that:
Passing these inspections confirms that your roof meets the minimum standards for safety and durability. If an underlayment issue is caught during the inspection, it can be corrected before the shingles are installed, preventing a much larger and more expensive repair down the line. It's often the unsung hero that prevents future headaches.
Underlayment's Impact on Manufacturer Warranties
Your roof's warranty is your safeguard against manufacturing defects or premature failure. While the shingles themselves are typically covered, the entire roofing system, including the underlayment, often plays a critical role in the validity and scope of your warranty.
- System Warranties: Many leading shingle manufacturers, such as GAF, Owens Corning, and CertainTeed, offer "system warranties" (e.g., GAF's Golden Pledge or Owens Corning's Platinum Protection Roofing System). These extended warranties don't just cover the shingles; they cover an entire suite of components from that manufacturer—shingles, underlayment, starter strips, hip and ridge caps, and ventilation.
- The "Approved Underlayment" Clause: A common requirement for these enhanced system warranties is the use of the manufacturer's proprietary underlayment or an approved equivalent. For example, if you're installing GAF Timberline HDZ shingles and want their best warranty, you'll likely need to use GAF's Deck-Armor or FeltBuster underlayment. Using a generic, unapproved underlayment, even if it technically meets local building codes, could potentially void the manufacturer's enhanced warranty for the entire system, leaving you with only a basic shingle-only warranty.
- Installation Requirements: Beyond the type of underlayment, manufacturers also have specific installation guidelines, including fastening patterns and overlaps, that often exceed basic building code minimums. Adhering to these strict manufacturer specifications is essential for the warranty to remain valid. A certified contractor, like a GAF Master Elite Contractor or an Owens Corning Platinum Preferred Contractor, is usually required to install these systems to manufacturer specs for the extended warranty to apply, as they are trained in these specific requirements.
- Peace of Mind: Investing in a full roofing system with approved underlayment and professional installation might have a slightly higher upfront cost, but the peace of mind that comes with a robust, long-term warranty can be invaluable. It ensures that if an issue arises years down the line, you have comprehensive protection beyond just the shingles themselves. This is a critical factor when considering the overall value and longevity of your new roof. If you want to know more about the specifics, check out our article on [.
Navigating Local Code Variations
It would be wonderfully simple if roofing codes were identical everywhere, but that's just not the reality. Building codes are dynamic and can differ significantly even between neighboring towns or counties. Navigating these local variations is a key part of any successful roofing project.
How to Research Your Local Requirements
Trying to figure out your local roofing underlayment codes can feel like a scavenger hunt, but it's a necessary step.
- Local Building Department Websites: This should be your first stop. Most cities and counties have a building or planning department with a website that lists their adopted building codes, local amendments, and permit requirements. You might find a direct link to the specific roofing section or a downloadable guide. For example, if you're in Hillsborough County, Florida, you'd look up their specific amendments to the Florida Building Code, which would outline stricter requirements for high-wind resistance. In contrast, Denver, Colorado, might focus more on hail-resistant underlayment or heavier gauge materials due to its frequent hailstorms.
- Speaking with Contractors: Reputable local roofing contractors are often the best resource for current code requirements. They deal with these codes daily and know the ins and outs of what your specific municipality demands. They'll also know about any recent changes or interpretations. When you're getting quotes, don't hesitate to ask them explicitly about the underlayment codes for your area and how they plan to comply. This is a crucial question to ask any potential contractor.
- The Variability of Codes: Understand that codes are not static. They are updated periodically to incorporate new technologies, lessons learned from natural disasters, and evolving best practices. What was compliant five years ago might not be today. Always refer to the most current adopted code for your jurisdiction. This also applies to things like [.
This research isn't just about avoiding fines; it's about ensuring your roof is built to the standards necessary to withstand the specific environmental challenges of your location.
Working with a Knowledgeable Roofing Contractor
Given the complexity and variability of building codes, especially regarding underlayment, selecting the right roofing contractor is paramount. This isn't a DIY job for the faint of heart, or for someone who isn't intimately familiar with local regulations.
- Essential for Code Compliance: A local, reputable roofing contractor will have extensive experience with the building department in your area. They know precisely which permits are needed, what the local inspectors look for, and the nuances of the underlayment code requirements specific to your city or county. They'll ensure the correct underlayment type is chosen, installed with proper overlaps and fastening, and that any climate-specific requirements (like ice and water shield or enhanced wind fastening) are met. They can also advise on the cost implications of these various requirements, as sometimes the best practices exceed the minimum code.
- Asking About Their Knowledge: When interviewing potential contractors, don't be shy about asking pointed questions:
- "What are the specific underlayment code requirements for my address in [Your City/County]?"
- "Which type of underlayment do you recommend for my roof, and why?"
- "How will you ensure compliance with ice and water shield requirements/high-wind fastening codes for my property?"
- "Have you pulled permits for jobs in my neighborhood recently?"
A confident and detailed answer to these questions is a strong indicator of a contractor's expertise and professionalism. Conversely, vague answers or dismissive attitudes about codes are major red flags. Choosing a contractor who is well-versed in local codes is one of the best ways to protect your investment and ensure your new roof is built to last. For more guidance on this, our article on [.
| Underlayment Type | Key Characteristics | Common Code Considerations | Pros | Cons |
|---|---|---|---|---|
| Asphalt-Saturated Felt | Organic or fiberglass mat, asphalt-saturated | Standard single layer (15-lb) or double layer (30-lb) for low slopes | Affordable, widely accepted, familiar | Less durable, prone to wrinkling, minimal self-sealing |
| Synthetic Underlayment | Woven polypropylene or polyester, polymer-coated | ASTM-compliant, often specified for enhanced wind/durability | High tear strength, lightweight, UV resistant, non-absorbent | Higher material cost |
| Self-Adhering (Ice & Water) | Rubberized asphalt, adhesive backing, seals to deck | Mandated in cold climates, required in valleys, penetrations, low slopes | Superior waterproofing, self-sealing around fasteners | Higher cost, challenging installation (sticky), temperature sensitive |
Disclaimer
Please note that building codes and regulations are subject to change and can vary significantly by state, county, and municipality. This article provides general information and should not be considered legal advice or a substitute for consulting with a qualified, licensed roofing contractor and your local building department. Always verify specific requirements for your location and project before proceeding with any roofing work.