Roof Replacement and Insurance Claims
Dealing with roof damage can be an incredibly stressful and confusing experience, often made worse by the daunting prospect of navigating insurance claims. You’ve got a damaged roof, perhaps even a leak, and now you're faced with mountains of paperwork, complicated terminology, and the worry of whether your insurance company will actually cover the cost of a full replacement. This comprehensive guide is here to demystify the entire process, helping you understand your policy, identify insurable damage, manage your claim effectively, and ensure your roof gets the quality replacement it deserves.
Understanding Your Homeowners Insurance Policy
Let's be honest, most of us don't pore over our homeowners insurance policies until disaster strikes. But when your roof is damaged, your policy becomes your best friend – or your biggest headache. Knowing the ins and outs before you need to file a claim can save you a world of grief and potentially a lot of money. It’s not just about having coverage; it's about understanding what kind of coverage you truly have.
Deciphering Coverage Types: ACV vs. RCV
This is perhaps the most critical distinction in your policy when it comes to roof replacement: Actual Cash Value (ACV) versus Replacement Cost Value (RCV). The difference between these two can mean thousands of dollars out of your pocket.
- Actual Cash Value (ACV): Think of ACV as the "garage sale" value of your roof. It's what your roof is worth today, factoring in its age and condition. The insurance company will calculate the cost to replace your roof, then subtract depreciation. Depreciation considers how old your roof is, its expected lifespan, and its overall wear and tear. For example, if you have a 15-year-old asphalt shingle roof with an expected lifespan of 20 years, your insurer will factor in that five years of useful life have already been "used up" before paying out. This means you'll receive a smaller initial payout, and you'll be responsible for covering the difference between that depreciated amount and the actual cost of a new roof. This can be a huge financial burden, especially for older roofs or those nearing the end of their typical lifespan. Imagine getting a check for a fraction of what a new roof truly costs – it's a frustrating reality for many homeowners.
- Replacement Cost Value (RCV): This is the gold standard of coverage, the one you ideally want for your roof. RCV pays to replace your damaged roof with a new one of similar quality without deducting for depreciation. How it usually works is that the insurance company first pays out the ACV portion. Once your roof replacement is completed, and you provide proof (like invoices and photos), they then release the depreciation holdback, paying you the difference. So, if your new roof costs $20,000, and your ACV payout was $12,000, once the work is done and verified, they’ll send you the remaining $8,000. This effectively means you only pay your deductible, and the insurer covers the rest of the cost to bring your roof back to pre-loss condition, or even better, with a brand new roof. This type of policy gives homeowners much more peace of mind, knowing they won't be footing a significant portion of the bill simply because their roof wasn't brand new. When considering your homeowners insurance, understanding the nuances of Actual Cash Value vs Replacement Cost Roof Claims is absolutely vital.
Navigating Deductibles and Depreciation
Beyond ACV vs. RCV, your deductible and the process of depreciation recovery are key financial components.
- Deductibles: This is the amount you're responsible for paying out-of-pocket before your insurance coverage kicks in. For roof damage, deductibles can vary significantly. Standard deductibles might be a flat dollar amount ($500, $1,000, $2,500), or they could be a percentage of your home's insured value (e.g., 1% or 2%). The percentage-based deductibles are particularly common in areas prone to specific perils like hurricanes or hail. For instance, if your home is insured for $300,000 and you have a 1% hurricane deductible, you’d be responsible for the first $3,000 of damage. Always check your policy for these specifics, especially if you live in a high-risk weather area. A higher deductible usually means lower monthly premiums, but it also means a larger out-of-pocket expense if you need to file a claim.
- Depreciation and How It Works with RCV: As mentioned, with an RCV policy, depreciation is initially withheld. Let's say your 15-year-old roof is damaged, and the replacement cost is $20,000. Your insurer determines the ACV is $12,000 (meaning $8,000 was depreciated). They'll cut you a check for $12,000 minus your deductible (say, $1,000), so an initial payout of $11,000. Once your contractor replaces the roof for $20,000, you submit the final invoice to your insurer. They then release the $8,000 depreciation holdback, effectively covering the full cost minus your original deductible. It's a two-step payment process that can sometimes confuse homeowners, but it’s designed to ensure the work is actually completed before the full amount is disbursed. It is important to know that states like Florida and Texas often have specific guidelines on how roof depreciation and insurance interact, especially after significant weather events.
What Your Policy Doesn't Typically Cover
Just as important as knowing what's covered is understanding what isn't. Many homeowners are surprised by exclusions, leading to denied claims and unexpected costs.
- Neglect and Lack of Maintenance: Insurance policies are generally designed to cover sudden, accidental damage, not issues that arise from a lack of proper care. If your roof fails because you've neglected maintenance for years – like allowing moss and algae to grow unchecked, not clearing gutters, or ignoring minor leaks that escalated – your claim could be denied. Insurers expect homeowners to take reasonable steps to maintain their property.
- Wear and Tear: This is a big one. An aging roof that simply reaches the end of its natural lifespan is not typically covered for replacement by insurance. If your 25-year-old asphalt shingle roof simply degrades and starts leaking due to old age, that’s usually considered wear and tear. Insurance kicks in for damage, not for routine aging or expected replacement. This is why regular roof inspections and understanding your roof's age are so crucial.
- Specific Perils: While most policies cover a wide range of perils, certain events might be excluded or require separate riders. For instance, standard homeowners insurance rarely covers flood damage (that's a separate flood insurance policy) or earthquake damage. Depending on your region, certain types of mold or rot might also be excluded if they're deemed to have developed over time due to neglect rather than a sudden, covered event. Always check the "Exclusions" section of your policy for these critical details.
Recognizing Insurable Roof Damage
When you suspect your roof has been damaged, knowing what to look for and what qualifies as insurable damage can make a huge difference in filing a successful claim. Not all roof issues are created equal in the eyes of an insurance company. What might look like a simple aesthetic flaw to you could be a major structural concern to an adjuster.
Hail Damage: The Silent Destroyer
Hail can be incredibly deceptive. Often, after a hailstorm, your roof might look fine from the ground, but hidden damage could be compromising its integrity.
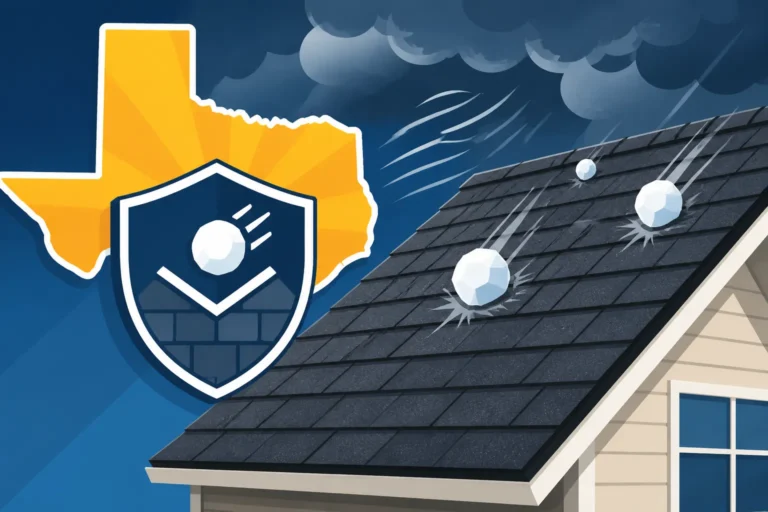
- Bruising and Granule Loss: This is the most common sign of hail impact on asphalt shingles. Hailstones, especially larger ones, can strip the protective granules from the shingle surface. These granules are vital for reflecting UV rays and protecting the asphalt layer. Loss of granules exposes the underlying asphalt, accelerating its deterioration. You might see small, dark spots where granules are missing, or feel soft spots if you gently press on the shingle. Over time, these spots can lead to premature aging, blistering, and leaks. Often, you'll find these granules accumulating in your gutters and downspouts after a storm.
- Fractures and Cracks: More severe hail can actually crack or fracture the fiberglass mat within the shingle, even without breaking through the surface entirely. These "starburst" cracks are often subtle but can compromise the shingle's watertight seal. From the ground, these might be invisible, which is why a professional roof inspection is so important after any significant hailstorm. A roofer can get up close and identify these hairline fractures that an untrained eye might miss.
- Impact on Other Materials: Don't forget to check other exterior elements for corroborating evidence of hail. Damage to gutters, siding, window screens, or even air conditioning units can help support your roof damage claim. If hail was severe enough to damage these, it's highly likely your roof suffered too. Many homeowners don't realize the extent of the damage until months or even years later when leaks start to appear, long after the statute of limitations for filing a claim has passed. That's why acting quickly after a storm is paramount.
Wind Damage: More Than Just Missing Shingles
High winds can wreak havoc on a roof in various ways, not just by ripping shingles off.
- Missing or Lifted Shingles: This is the most obvious sign. Strong gusts can tear shingles completely off the roof, leaving exposed underlayment or decking. Even if shingles aren't entirely missing, they might be lifted or creased, breaking the sealant strip that holds them firmly to the shingles below. This broken seal makes them vulnerable to future winds and allows water to seep underneath, leading to leaks. You might see shingles that are "flapping" or out of alignment.
- Creased or Torn Shingles: Wind can cause shingles to bend back on themselves, creating a crease that weakens the shingle and breaks its waterproof seal. Even if the shingle lays back down, that crease is a point of vulnerability. In some cases, wind can tear the shingle directly, leaving jagged edges. The corners or edges of your roof, known as the rake and eaves, are particularly susceptible to wind uplift.
- Granule Loss from Wind Scour: While hail causes direct granule loss from impact, strong winds can also cause "wind scour." This happens when wind-driven debris (like grit or small branches) constantly abrades the shingle surface, or when the shingles themselves flap and rub against each other, leading to granule erosion. This type of granule loss will often be more widespread and appear as faded or worn areas. Understanding the specific signs of roof wind damage will help you effectively communicate issues to both your contractor and your insurance adjuster.
Other Perils: Fire, Falling Trees, and Vandalism
While less common, these types of damage are typically covered under standard homeowners insurance policies.
- Fire Damage: Even if your entire home doesn't burn down, a localized fire (e.g., from an attic electrical issue or an external source) can cause significant damage to your roof structure and shingles. Insurance will cover the repair or replacement necessary to restore the roof.
- Falling Objects (e.g., Trees, Debris): A tree limb crashing onto your roof during a storm, or even a satellite dish being ripped off and damaging shingles, falls under this category. This is generally covered, assuming the tree didn't fall due to your negligence (e.g., you knew a dead tree was poised to fall and did nothing). This kind of impact damage is usually quite obvious and can range from punctured shingles to structural damage to the roof decking and rafters.
- Vandalism: If your roof is intentionally damaged by vandals, such as having shingles torn off, graffiti applied, or objects thrown onto it, your insurance policy typically covers these repairs. It's crucial to report vandalism to the police and obtain a police report, as your insurer will likely require it.
The Step-by-Step Insurance Claim Process
Navigating an insurance claim can feel like a labyrinth, but breaking it down into manageable steps can significantly ease the burden. Knowing what to expect at each stage and how to advocate for yourself is key to a smooth process and a successful outcome. This journey often involves clear communication and thorough documentation.
Initial Damage Assessment and Documentation
Your actions immediately following roof damage are critical for a successful claim.
- Safety First: Before doing anything else, ensure your property is safe. If there's significant damage, active leaks, or compromised structural elements, take immediate steps to prevent further damage. This might involve temporarily tarping your roof to stop leaks, but only if it's safe to do so. Never put yourself or others at risk. Documenting these temporary repairs with photos is also important.
- Document, Document, Document: This cannot be stressed enough. Take abundant photos and videos of all visible damage from multiple angles. Get close-ups of specific issues (missing granules, lifted shingles, dents) and wider shots showing the overall condition of your roof and property. Note the date and time of the photos. If you find debris in your yard or gutters, photograph that too. This visual evidence will be invaluable for your claim and helps establish the extent of the damage.
- Contact a Reputable Roofing Contractor: Before calling your insurance company, it's highly advisable to get a professional assessment from a local, licensed, and insured roofing contractor. They have the expertise to safely inspect your roof, identify all types of damage (even the subtle kind that might be missed by an untrained eye), and provide an expert opinion. They can often provide photographs from the roof, which are extremely helpful. Many contractors specialize in working with insurance claims and can help you understand the damage in terms of what your insurer will look for. Choosing a good contractor is a major component of How to Choose a Roofing Contractor.
Filing Your Claim and Working with Your Adjuster
Once you've assessed the damage and gathered initial documentation, it's time to officially initiate your claim.
- Notify Your Insurance Company Promptly: Call your insurance provider as soon as possible after discovering damage. Delaying can sometimes complicate your claim, especially if your policy has a strict reporting deadline. Provide them with all the details you’ve gathered, including the date of loss, the type of damage, and your initial assessment. This is the first step in the Roofing Insurance Claim Process Step by Step.
- Your Dedicated Adjuster: Your insurer will assign an adjuster to your case. This individual's job is to investigate the damage, determine what's covered under your policy, and estimate the cost of repairs or replacement. Be prepared to schedule a time for them to visit your property.
- Meeting with the Adjuster: Ideally, you want your chosen roofing contractor present during the adjuster's inspection. This allows your contractor to point out damage the adjuster might miss, ensure all affected areas are considered, and discuss the scope of work from an expert perspective. They can speak the "language" of roofing and insurance, which can be immensely beneficial. Don't be afraid to ask questions, politely challenge assessments if they seem incomplete, and ensure everything is thoroughly documented. Remember, the adjuster works for the insurance company, so having your own expert advocate is crucial. Sometimes, a homeowner might feel overwhelmed during this stage, but remember it's okay to ask for clarification.
Understanding the Adjuster's Report and Scope of Work
After the inspection, the adjuster will compile a report detailing their findings and the estimated cost of repairs.
- Reviewing the Adjuster's Report: This report is your roadmap for the claim. It will outline the determined cause of loss, the scope of repairs or replacement deemed necessary, the estimated costs, and how your policy's terms (like depreciation and deductible) apply. Carefully review every detail. Does it accurately reflect all the damage you and your contractor observed? Are all components of your roof system included (shingles, underlayment, flashing, vents, drip edge)?
- Comparing with Your Contractor's Estimate: This is where having your contractor's detailed estimate comes into play. Compare it side-by-side with the adjuster's report. Are there discrepancies in the scope of work, material quantities, or labor costs? For example, if your contractor notes extensive decking damage requiring replacement, but the adjuster's report only accounts for shingle replacement, you have a basis for discussion. Many times, adjusters use standardized estimating software like Xactimate, and contractors also use similar tools, so they should be able to communicate effectively about line items and pricing. Don't simply accept the first offer if it doesn't align with what your trusted contractor believes is necessary for a complete and proper repair. This is how to get insurance to pay for a roof fully and fairly.
- Negotiating Discrepancies: If there are significant differences, your contractor can help you negotiate with the insurance company. They can provide additional documentation, explain industry standards, and advocate for a revised scope of work. This is often where "supplemental claims" come into play if additional damage or necessary code upgrades are discovered during the project that weren't in the initial adjuster's report.
| Coverage Type | Description | Initial Payout | Final Cost to Homeowner | Ideal Scenario |
|---|---|---|---|---|
| Actual Cash Value (ACV) | Pays the depreciated value of your roof (replacement cost minus wear & tear). | Lower (ACV minus deductible) | ACV amount + deductible | Not ideal; significant out-of-pocket |
| Replacement Cost Value (RCV) | Pays to replace your roof with new materials of similar quality, no depreciation. | Higher (ACV minus deductible initially) | Deductible only (after depreciation release) | Most desirable; minimal out-of-pocket |
Choosing the Right Roofing Contractor for Your Claim
The roofing contractor you choose is arguably the most important partner in your roof replacement and insurance claim journey. They are not just installers; they are your advocate, your expert, and the key to a smooth process and a well-installed roof. Making the wrong choice can lead to headaches, shoddy work, and ongoing disputes. This is truly a situation where cutting corners can cost you far more in the long run.
Why a Local, Reputable Contractor is Key
It's tempting to go with the first company that knocks on your door after a storm, especially if they promise to "handle everything" with your insurance. But resist that urge.
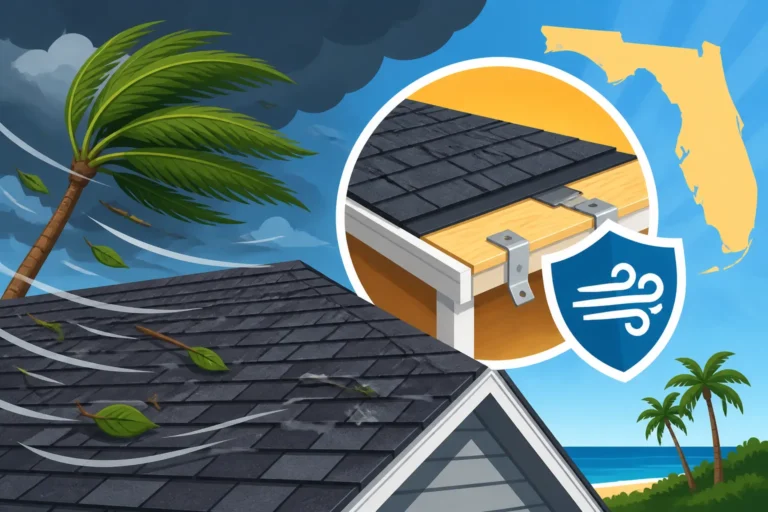
- Knowledge of Local Codes and Regulations: Roofing codes vary significantly from city to city and state to state. A local contractor will be intimately familiar with the specific building codes in your area, including requirements for things like wind uplift resistance, ice and water shield installation, and ventilation. This knowledge is crucial for ensuring your new roof meets current standards and passes any required inspections. For example, if you live in Miami, Florida, your roofer must understand the specific high-wind roofing codes in Florida, which are some of the strictest in the nation.
- Familiarity with Local Insurance Practices: Local contractors often have established relationships with insurance adjusters and know the common practices of local insurance companies. They understand what documentation is typically required and how to effectively communicate with adjusters, streamlining the claim process. They're also more likely to be around to honor their workmanship warranty years down the line.
- Reputation and Accountability: A local, reputable company relies on its reputation within the community. They have a physical address, local reviews, and are invested in satisfied customers. This contrasts sharply with "storm chasers" – out-of-state companies that descend on storm-damaged areas, do quick, often subpar work, collect payment, and then disappear, leaving homeowners with no recourse for warranty issues or complaints. Always check for a physical address, local references, and online reviews. Look into how to vet a roofing company thoroughly.
The Importance of a Detailed Estimate
A comprehensive, transparent estimate from your chosen contractor is your blueprint for the project and a vital tool for your insurance claim.
- Line-Item Detail: A good estimate won't just give you a lump sum. It will break down costs by line item: tear-off, disposal, specific shingle type and quantity, underlayment, drip edge, flashing, ventilation, labor, permits, and any unforeseen repairs like roof decking replacement. This level of detail allows for a direct comparison with the insurance adjuster's scope of work.
- Matching the Insurance Scope: Your contractor's estimate should ideally align with, or at least be comparable to, the scope of work outlined in your insurance adjuster's report. If there are differences, the detailed estimate provides the basis for your contractor to explain why certain items are necessary and justify the costs to the insurance company. This helps avoid "hidden costs in a roof replacement" that can surprise you later.
- Material Specifications: The estimate should clearly state the specific materials to be used, including the brand, type, and color of shingles (e.g., GAF Timberline HDZ, Owens Corning Duration, CertainTeed Landmark Pro), the type of underlayment (synthetic vs. felt), and any other components. This ensures you're getting the quality you expect and that the materials meet local building codes.
Navigating Contractor Agreements and Payment
Understanding the contract and payment structure is crucial to protect yourself throughout the project.
- The Written Contract: Never, ever proceed with a roofing project without a detailed, written contract. This document should include: the full scope of work, materials to be used, project timeline, total cost, payment schedule, cleanup procedures, and clear warranty information (both for materials and workmanship). Read every word carefully.
- Payment Schedules: A common and fair payment schedule is an initial deposit (often 10-30% of the total cost) to secure materials and schedule the job, with subsequent payments tied to project milestones (e.g., completion of tear-off, delivery of materials, substantial completion of work), and the final payment due only upon your complete satisfaction and after the final inspection. Be extremely wary of any contractor who demands 50% or more upfront, or full payment before any work has begun. This is a major roofing contractor red flag to avoid.
- Lien Waivers: Once you make a payment, especially the final one, ensure you receive a lien waiver from your contractor. This document confirms that all subcontractors and material suppliers have been paid, protecting you from potential liens being placed on your property if the contractor fails to pay their vendors.
- Insurance Company Payouts: Understand that your insurance company will often issue checks in stages, or sometimes co-payable to both you and your mortgage company. Your contractor will guide you on how to properly endorse and distribute these funds. Remember, if a roofer gets injured on your property, having a licensed and insured roofer means their general liability and workers' compensation insurance should cover it, protecting you from potential liability. Always verify their insurance.
Common Challenges and How to Overcome Them
Even with the best preparation, the insurance claim process can throw curveballs. Denied claims, disputes over costs, and unexpected findings during replacement are all frustrating but common hurdles. Knowing how to react and what avenues are available can empower you to successfully navigate these challenges.
Denied Claims and How to Appeal
Receiving a claim denial can feel like a punch to the gut, especially when you know your roof is damaged. But a denial isn't always the final word.
- Common Reasons for Denial: Understanding why your claim was denied is the first step. Common reasons include:
- "Wear and Tear" or "Neglect": The adjuster determined the damage was due to age or lack of maintenance, not a sudden, covered event.
- Insufficient Damage: The adjuster found damage, but deemed it not severe enough to warrant repair or replacement under your policy.
- Damage Pre-Existed Policy: The insurer believes the damage occurred before your current policy started.
- Policy Exclusions: The specific cause of damage (e.g., flood, certain types of mold) is explicitly excluded from your coverage.
- Late Reporting: You waited too long to report the damage according to your policy's terms.
- Steps for a Successful Appeal:
- Request a Detailed Explanation: Get a written explanation for the denial. This is crucial for understanding their reasoning and formulating your counter-argument.
- Gather More Evidence: Work with your trusted roofing contractor to gather additional, irrefutable evidence. This might include more detailed photos from the roof, drone footage, a comprehensive report from an independent roofing engineer, or a thorough damage assessment that clearly contradicts the adjuster’s findings. For instance, if the initial adjuster claimed "wear and tear," your contractor might be able to provide clear evidence of hail bruising that goes beyond simple aging.
- Request a Re-Inspection: With your new evidence, formally request a re-inspection, ideally with your contractor present. Sometimes, a second adjuster might be assigned, or the original adjuster will take a fresh look.
- Write a Formal Appeal Letter: Clearly and concisely outline why you believe the denial is incorrect, referencing specific policy language and providing all your supporting documentation. Be factual and avoid emotional language.
- Consider a Public Adjuster: If you're still hitting roadblocks, you might consider hiring a public adjuster. Unlike the insurance company's adjuster, a public adjuster works solely for you. They are experts in policy language, damage assessment, and negotiation, and can be incredibly effective in getting denied claims reversed or significantly increasing payouts. They typically work on a contingency fee basis (a percentage of the settlement), so ensure you understand their fees.
- Legal Counsel: As a last resort, if all other avenues fail, you may need to consult an attorney specializing in insurance claims. This is a serious step but sometimes necessary to protect your rights. For a deeper dive into this, consult our guide on what to do if a Roof Insurance Claim Denied.
Supplementing Your Claim for Additional Costs
It's common for adjusters to miss some damage or for new issues to be discovered once the old roof is torn off. This is where supplementing your claim comes in.
- Unforeseen Damage: When the roofing crew begins the tear-off, they might uncover unexpected problems, such as rotted roof decking, inadequate ventilation that needs upgrading, or more extensive flashing damage than initially visible. These are legitimate, necessary repairs that must be addressed for a durable, code-compliant roof.
- Code Upgrades: Building codes are constantly evolving. If your old roof was installed under older codes, a full replacement will likely require upgrades to meet current standards. This could include adding more ice and water shield, improving attic ventilation (like installing a proper ridge vent), or adhering to stricter nailing patterns for wind resistance. These code-mandated upgrades are often covered by your policy, sometimes under a specific "Ordinance or Law" endorsement. Your contractor should identify these necessary upgrades.
- The Supplement Process: When additional damage or code upgrades are identified, your contractor will document them thoroughly (with photos) and create a "supplemental estimate." They will then submit this directly to your insurance company, explaining why the additional work is necessary. The insurance company will typically review the supplement, sometimes sending an adjuster out for a second look, and then issue an additional payment if approved. This process is common and a sign of a diligent contractor who ensures your roof is properly repaired and up to code.
Dealing with Underpayment and Disputes
Sometimes, your claim isn't denied, but the payout simply isn't enough to cover the actual cost of a quality roof replacement.
- Comparing Estimates: As discussed, a detailed estimate from your contractor is your best tool. If the insurance payout is significantly lower, it might be due to discrepancies in material costs, labor rates, or an incomplete scope of work on the adjuster's part.
- Market Value Discrepancies: Insurance adjusters often rely on industry-standard pricing databases, but these don't always reflect the exact market rates for quality materials and labor in your specific area. Your contractor can provide justification for their pricing based on local market conditions and material availability. For instance, asphalt roof replacement cost in California might be vastly different than in a lower cost-of-living area.
- Negotiation and Reconsideration: Don't be afraid to engage in polite but firm negotiation. Your contractor can act as your intermediary. They can call the adjuster, discuss the line items where there are discrepancies, and provide reasons why their estimate is more accurate. Often, these discussions can lead to an increased payout without needing to file a formal appeal.
- Mediation or Appraisal: If direct negotiation fails, your policy might include options for mediation or an "appraisal clause." Appraisal is a formal process where both you and the insurance company hire an independent appraiser, and these two appraisers then select an umpire. The umpire decides the claim's value if the appraisers can't agree. This can be a more expedient and less costly alternative to legal action.
- Know Your Rights: Many states have consumer protection laws regarding insurance claims. Educate yourself on these, or work with a public adjuster or attorney who is familiar with them, to ensure you are treated fairly.
Protecting Your Investment and Future Claims
Getting a new roof is a significant investment, and ensuring its longevity and protecting its value extends beyond the installation day. Proactive measures can prevent future issues, uphold your warranty, and make any subsequent insurance claims much smoother. Think of it as caring for the most important shield protecting your home.
Ensuring Quality Workmanship and Warranty Coverage
A new roof is only as good as its installation and the warranties backing it. Don’t overlook these crucial elements.
- Proper Installation is Paramount: Even the highest quality shingles won't perform if they're not installed correctly. This means adherence to manufacturer specifications, local building codes, and industry best practices. Key aspects include correct nailing patterns, proper underlayment installation, meticulous flashing around chimneys, skylights, and valleys, and adequate ventilation. A poorly installed roof can lead to leaks, premature shingle failure, and even void your manufacturer's warranty. This is why choosing a reputable, manufacturer-certified contractor is so important. They undergo training and adhere to strict installation guidelines.
- Manufacturer Warranties: Most asphalt shingle manufacturers (like GAF, Owens Corning, CertainTeed, and IKO) offer warranties on their products, typically ranging from 25 years to limited lifetime coverage. These warranties protect against manufacturing defects. However, the warranty is often contingent on proper installation. Many manufacturers offer enhanced warranties when an entire "roofing system" (shingles, underlayment, ventilation, etc.) from their brand is installed by one of their certified contractors. These enhanced warranties can often provide better coverage, including material and labor costs for a longer period, sometimes even for the original homeowner's lifetime. Understanding how shingle warranties work is crucial.
- Workmanship Warranties: Your roofing contractor should also provide a separate workmanship warranty, covering the quality of their installation for a specific period (e.g., 5, 10, or even 25 years). This is your protection if the roof leaks due to an installation error, not a product defect. Ensure this warranty is in writing and clearly states what it covers and for how long. The interplay between your roofing warranty: workmanship vs manufacturer can sometimes be confusing, so ensure you have clear documentation for both.
Regular Maintenance and Roof Inspections
Just like your car, your roof benefits from routine check-ups. Preventative care can significantly extend your roof's lifespan and prevent small issues from becoming expensive problems.
- Annual Visual Inspections: It's a good idea to visually inspect your roof annually, ideally from the ground with binoculars, or by a professional. Look for missing or damaged shingles, accumulation of granules in gutters, moss or algae growth, cracked caulk around flashing, or any other obvious signs of wear. After major storms, a quick visual check is even more critical.
- Professional Inspections: Consider hiring a professional roofer to conduct a thorough roof inspection every 3-5 years, or after a severe weather event. They can safely access the roof, identify subtle damage, assess the condition of flashing, check for proper ventilation in the attic, and flag potential issues before they escalate into costly repairs or leaks. This proactive approach can catch small problems, like a loose shingle or minor flashing issue, before they lead to interior water damage. Finding a trusted expert to do your roof inspection: what they check is invaluable.
- Clear Gutters and Drainage: Regularly clean your gutters and ensure downspouts are clear of debris. Clogged gutters can cause water to back up under your shingles, leading to rot and leaks, especially along the eaves. Proper drainage is essential for preventing water accumulation on your roof.
- Trim Overhanging Branches: Trees provide shade but can also cause problems. Overhanging branches can rub against shingles, causing granule loss. During storms, they pose a significant threat of falling and causing impact damage. Trimming back branches can reduce direct roof damage and keep gutters clearer.
Keeping Accurate Records
Detailed records are your best friend, especially when dealing with insurance or selling your home.
- Installation Documents: Keep all paperwork related to your roof replacement in a safe place. This includes your contractor's signed contract, detailed estimate, invoices, proof of payment, and both the manufacturer's and contractor's warranties.
- Maintenance History: Document any repairs, maintenance, or professional inspections, including dates, what work was done, and who performed it. Include photos if available. This creates a valuable timeline of your roof's care.
- Insurance Claim Records: Keep a dedicated file for any insurance claims, including claim numbers, adjuster contact information, all correspondence (emails, letters), the adjuster's report, and all payout details. This comprehensive record will be invaluable for future reference, whether you need to file another claim, demonstrate the roof's history to a potential home buyer, or address any warranty issues. These records prove you've done your due diligence in maintaining your property and can be critical evidence if you ever need to appeal a future claim or transfer a roof warranty to a new homeowner.
Disclaimer
Please remember that this guide provides general information about roof replacement and insurance claims. Insurance policies and local building codes can vary significantly. Always consult your specific insurance policy, your insurance agent, and a qualified local roofing contractor for advice tailored to your individual situation and location.