Roof Leak but No Visible Damage: What Now
There's almost nothing more frustrating for a homeowner than seeing signs of a roof leak – a mysterious water stain on the ceiling, a persistent drip in the attic – but when you go up to investigate, there's absolutely no obvious damage to be found. It's like your house is playing a cruel trick on you, leaving you wondering where the water is coming from and how much hidden damage might be lurking beneath the surface. This comprehensive guide is here to shed light on those perplexing "invisible" roof leaks, helping you understand their common causes, how to track them down, and what steps to take next to safeguard your home.
The Frustration of an Invisible Roof Leak
That sinking feeling when you discover a water stain is bad enough, but it’s often compounded by the inability to find the source. You might inspect your shingles, check around vents, and even venture into the attic, only to find everything seemingly intact. This scenario is incredibly common, and it can leave you feeling helpless and worried about potential long-term damage.
The Misleading Nature of Water Stains
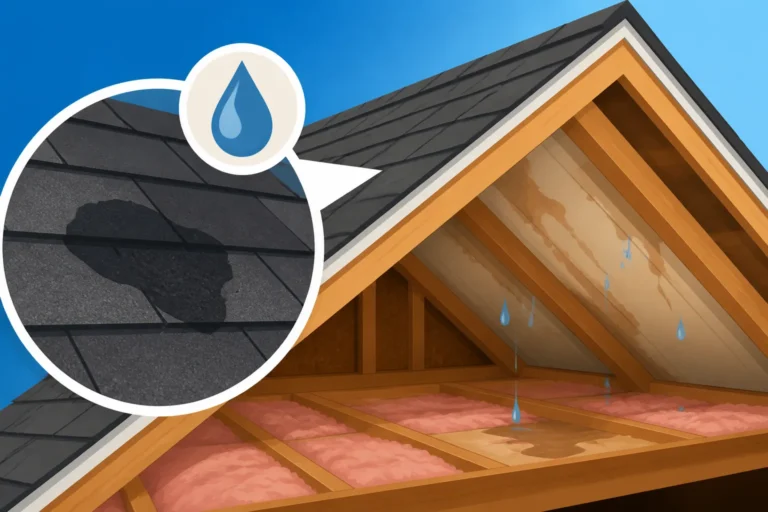
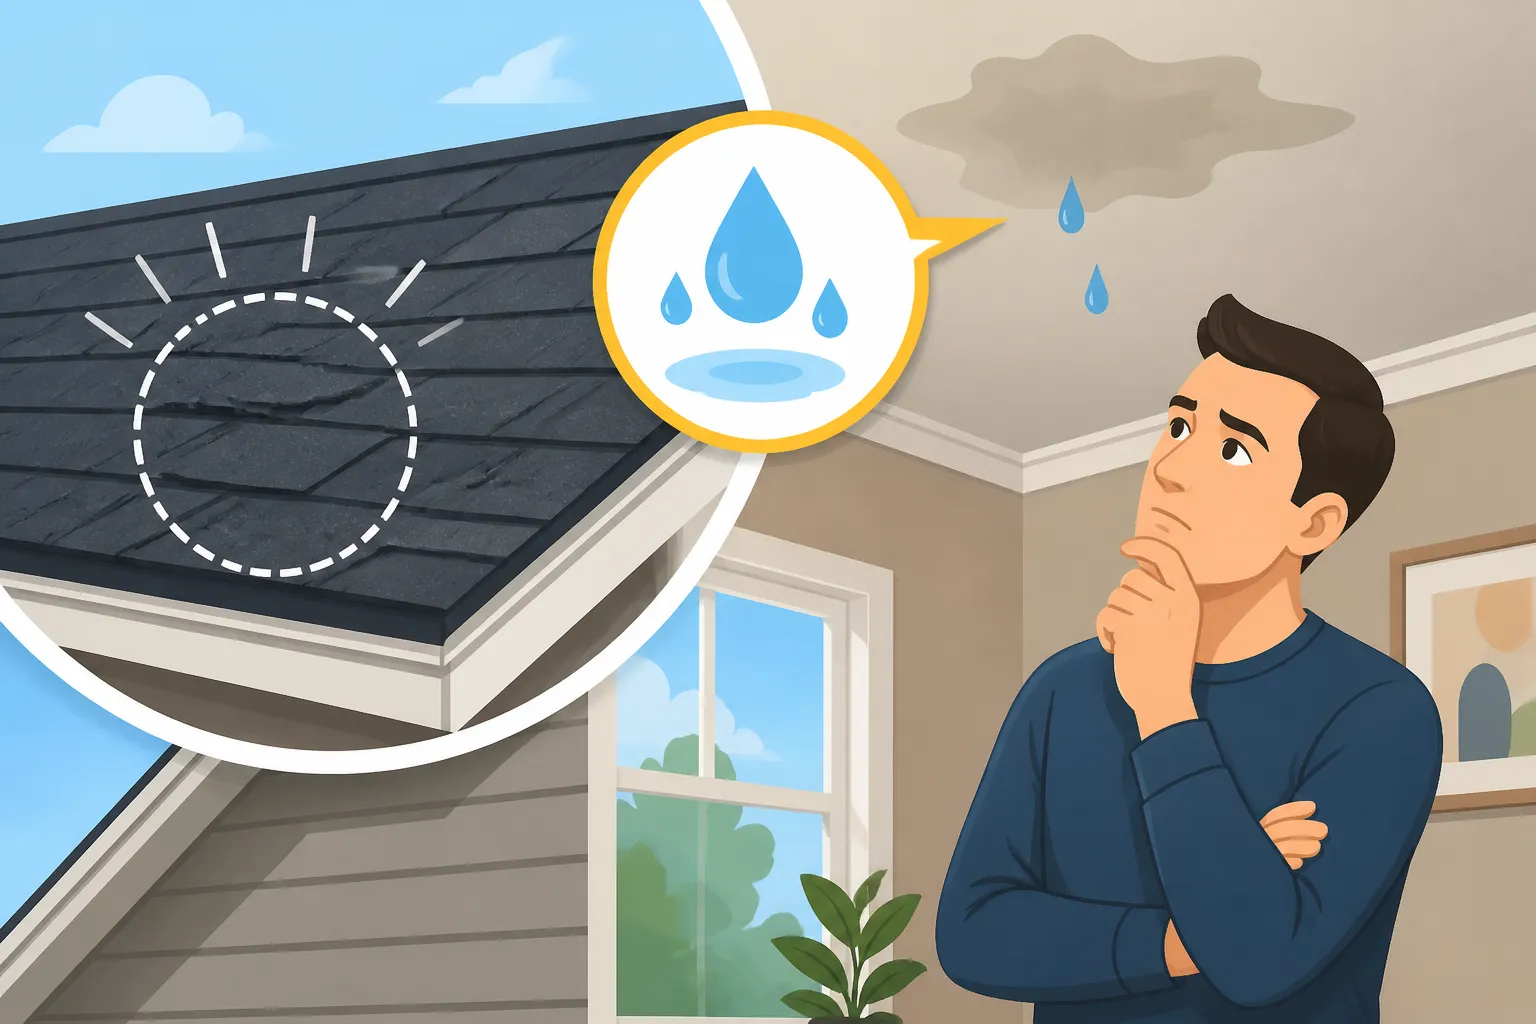
Water has a sneaky way of traveling. A leak might start at one point on your roof, trickle down a rafter, spread across the attic floor or insulation, and finally manifest as a stain on your ceiling many feet away from the actual point of entry. This makes the detective work incredibly difficult for the average homeowner. The spot you see on your kitchen ceiling might be a symptom of a problem near the chimney on the opposite side of the house, or even a small, almost imperceptible crack higher up the roof slope. Without proper knowledge of how water behaves once it breaches your roof system, you’re often chasing ghosts.
For instance, you might see a stain directly below a attic fan, and logically assume the fan is the problem. But if the fan's flashing looks fine from the outside and the internal wiring is dry, the water could be wicking along the electrical conduit from a breach much further up the roofline or even from a nail hole created years ago that has just now opened up due to material expansion and contraction.
The Psychological Toll of Lingering Doubt
Knowing you have a leak but not knowing where it is, or how much damage it's causing, can be incredibly stressful. Every time it rains, you might find yourself listening for drips, anxiously checking ceilings, and dreading the worst. This lingering doubt isn't just unpleasant; it can prevent you from addressing the problem proactively. Without a clear source, it’s hard to even know where to begin repairs, and delaying action can lead to more extensive and costly issues like mold growth, damaged insulation, rotted roof decking, and compromised structural integrity. The hidden nature of these leaks means they often fester for months or even years before obvious damage makes them undeniable, at which point the repair bill can be significantly higher.
Common Culprits Behind Invisible Roof Leaks
Even when you can't see outright holes or missing shingles, there are many subtle ways water can infiltrate your roofing system. Understanding these common culprits is the first step in tracking down your elusive leak.
Underlayment Issues and Ice Dams
Your roof's underlayment is a critical barrier designed to protect your roof decking from moisture. However, if this layer is compromised or improperly installed, it can allow water to seep through without any visible damage to the shingles above. Synthetic vs Felt Underlayment Cost can vary, but their primary purpose is the same: a backup defense. Over time, underlayment can tear, degrade, or get punctured by improperly placed nails that haven't quite sealed themselves. This often happens on older roofs, where the felt underlayment has become brittle and less effective.
Ice dams are another major factor, especially in colder climates. When snow on your roof melts and refreezes at the eaves, it forms a barrier that prevents subsequent meltwater from draining off the roof. This trapped water then backs up under your shingles, bypassing the shingle layers and soaking into the underlayment and roof decking. You might not see any damaged shingles, but the ice dam forces water into areas it's not designed to go. The resulting leaks often appear in exterior walls or ceilings at the edge of the house, far from any obvious shingle damage. Addressing Ice Dam Damage: Repair Options quickly is crucial to prevent structural harm.
Compromised Flashing and Sealants
Flashing is your roof's waterproof armor around protrusions like chimneys, skylights, vent pipes, and wall intersections. It's often metal, but sealants (like caulk or roof cement) are used to bridge gaps or seal joints. These are incredibly common points of failure for invisible leaks. A tiny crack in a sealant bead around a chimney, a slightly lifted edge on a piece of step flashing, or even a rusted nail hole in metal flashing can create a minuscule pathway for water.
Over time, sealants can dry out, crack, and pull away. Flashing can also corrode, become bent, or separate from the materials it's meant to protect due to constant expansion and contraction from temperature changes. These failures are often so small that they're nearly impossible to spot from the ground or even during a quick visual inspection on the roof. The water trickles in, finds a path along framing members, and appears far from the initial entry point, making Flashing Leak Repair a tricky diagnosis.
Subtle Shingle Damage and Installation Errors
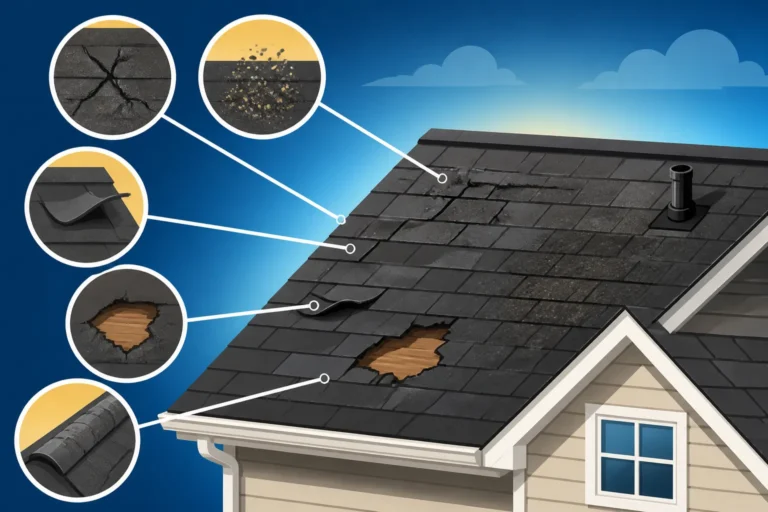
While you might not see missing or overtly damaged shingles, even minor issues can lead to persistent leaks. Granule loss, for example, is a natural part of shingle aging, but excessive loss in certain areas can expose the asphalt layer to UV rays, accelerating its deterioration and making it more susceptible to water penetration. Cracked Shingles: Causes and Fixes can be subtle, sometimes hairline fractures not easily seen.
Sometimes, the problem isn't with the shingles themselves, but how they were installed. Improper nailing patterns, nails driven too deep or not deep enough, or even nails that miss the underlying wood decking can create small holes that become entry points for water. A common issue is "nail pops," where nails push up through the shingle, breaking its seal and creating a tiny channel for water. These often go unnoticed until a leak develops. Even if the roof was recently installed, a single misplaced nail could be the source of your woes.
Ventilation and Condensation Problems
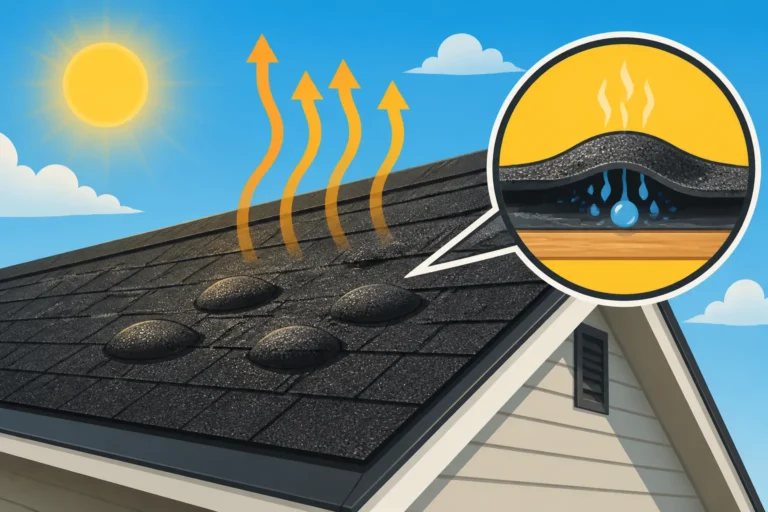
This is one of the trickiest "invisible" leak culprits because it's not a roof leak at all, but rather condensation mimicking a leak. If your attic isn't properly ventilated, warm, moist air from your home can rise and become trapped. When this warm, moist air meets the cold underside of your roof deck, it condenses into water droplets, which can then drip onto your insulation, beams, or even through your ceiling. This looks exactly like a roof leak, but the solution isn't roof repair, but rather improving your attic's airflow.
This is particularly common in winter months when there's a significant temperature difference between your heated living space and a cold attic. Proper roof ventilation works by allowing cooler outside air to enter through soffit vents and warmer, moist air to exit through ridge vents or other exhaust vents. If these systems are blocked, inadequate, or non-existent, you're essentially creating a condensation chamber in your attic. Understanding how roof ventilation works is key here, as it can save you from unnecessary roofing repairs.
The Detective Work: How to Pinpoint Hidden Leaks
Finding an invisible leak requires patience, a methodical approach, and sometimes, a little bravery to venture into your attic. Always prioritize safety when inspecting your roof or attic. If you're uncomfortable with heights or confined spaces, or if your roof pitch is steep, it's always best to call a professional.
Indoor Clues: Attic, Ceilings, and Walls
Start your investigation inside, as this is where the symptoms appear.
- Attic Inspection (Safely!):
- Grab a Flashlight and Camera: Head into your attic, preferably during daylight hours after a rain event, or when snow has been melting. Look for water stains on the underside of the roof decking, rafters, and insulation.
- Follow the Water Trail: Water almost always travels downhill. Even if you see a stain on a rafter, look above it to trace the path. You might see a faint discoloration or streak that leads to the actual entry point.
- Check for Mold: Mold growth is a tell-tale sign of chronic moisture. If you find fuzzy, discolored patches on wood or insulation, you've likely found a consistent leak spot.
- Inspect Around Protrusions: Pay extra attention to areas around vent pipes, chimneys, skylights, and any points where the roof meets a wall (e.g., dormers). These are prime suspects for flashing issues. You might even feel damp wood or insulation.
- Look for Drips or Puddles: If it's actively raining, listen for drips. Place buckets or tarps to catch water and prevent further damage.
- Inspect Insulation: Wet, compacted, or discolored insulation is a clear indicator of a leak. If it's condensation, the wetness might be more widespread and evenly distributed on the underside of the decking, rather than originating from a specific point.
- Ceilings and Walls: If you can't access your attic, or the leak is manifesting in a finished ceiling, look for patterns.
- Stain Location: Note the exact location of water stains. Are they near exterior walls? Near a fireplace? In the middle of a room? This helps narrow down the overhead area on the roof.
- Texture Changes: Sometimes, you won't see a dark stain, but rather a slight bubbling, peeling paint, or a subtle change in the texture of your drywall or plaster.
- Wall Stains: Water stains running down an interior wall can indicate a leak in the roof-to-wall flashing, or a leak high up on the roof that's traveling down the wall framing.
Outdoor Inspection: What You Can (Carefully) Look For
Once you have an idea of the general area from your interior inspection, it's time to carefully inspect the exterior of your roof.
- Shingle Scrutiny:
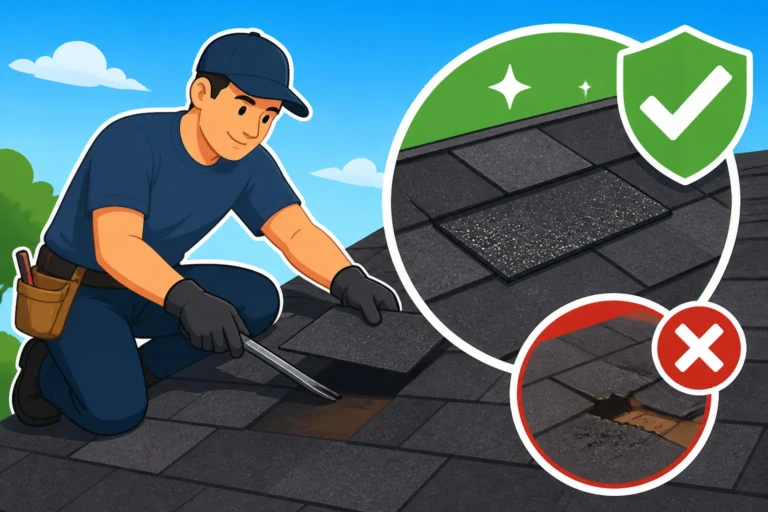
- Look for Subtle Damage: While no obvious damage, meticulously check for very faint cracks, areas with excessive granule loss, or shingles that are slightly lifted or curling. You might need to gently lift shingles (on a warm day when they're more pliable) to check the integrity of the underlayment beneath.
- Nail Pops: Look for small bumps or protrusions under shingles that could indicate a nail pushing through.
- Shingle Alignment: Are all shingles lying flat? Are there any areas that look uneven or slightly dislodged?
- Flashing Focus:
- Chimneys and Vents: Carefully inspect all flashing around chimneys, plumbing vents, and exhaust vents. Look for cracks in sealant, gaps where flashing meets the roof or chimney brick, or any signs of corrosion or tears in the metal. The sealants often wear out first.
- Skylights: Skylights are notoriously prone to leaks. Check the flashing and seals around the entire perimeter.
- Valleys: Roof valleys are critical areas where two roof planes meet. They're designed to channel large amounts of water, so any compromise in the valley flashing or shingles can lead to significant leaks.
- Eaves and Gutters: Check your gutters for excessive shingle granules, which could indicate accelerated shingle wear. Ensure gutters are clean and not overflowing, as backed-up water can also creep under eaves. Also, examine the fascia and soffit for any signs of water damage, which could point to an issue with drip edge or ice dam formation. For older roofs, consider a Roof Damage Assessment: A Homeowner's Guide to get a clearer picture of its overall health.
The Water Test: A Last Resort
If you've exhausted all other avenues and still can't find the source, a controlled water test can be effective, but it requires at least two people and careful execution to avoid further damage.
- How it Works: One person goes into the attic with a flashlight while the other systematically hoses down small, isolated sections of the roof above where the leak appears indoors.
- Start Low, Go Slow: Begin by soaking the area directly above the interior stain. If no leak appears after 5-10 minutes, move to the section of the roof immediately above that, and so on. This helps isolate the problem area.
- Focus on Problem Zones: Concentrate on vulnerable areas like flashing around vents, chimneys, and valleys.
- Caution is Key: Use a garden hose with a moderate stream, not a high-pressure washer, which can damage shingles. Only soak one section at a time. The person in the attic must communicate immediately if a drip appears. If no leak is found after 15-20 minutes in a section, move on.
- When to Stop: If the leak appears, you've found your general area. If you go through the entire roof section above the leak and still find nothing, you might be dealing with condensation or a very intermittent leak that only appears under specific weather conditions (e.g., high winds driving rain sideways).
- Consider a Pro: If you're uncomfortable doing this or can't locate the leak, a professional roofer is equipped with specialized knowledge and tools, and can often identify the source far more efficiently and safely. Resources like Modernize can help you connect with qualified local professionals who specialize in leak detection.
| Hidden Leak Clue | Common Indoor Location | Potential Outdoor Source | Action Steps |
|---|---|---|---|
| Random Ceiling Stain | Middle of room, far from wall | Shingle damage, underlayment tear, loose nail high on roof | Check entire roof slope above stain for subtle shingle issues, granule loss, or minor flashing defects. Trace water path in attic if accessible. Consider a water test. |
| Wall Stains/Peeling Paint | Top of exterior walls | Roof-to-wall flashing, siding interface, gutter overflow | Inspect step flashing, counter-flashing, and vertical siding where roof meets wall. Ensure gutters are clear and drip edge is correctly installed. Look for signs of ice damming in cold climates. |
| Attic Drips/Wet Insulation | Near chimney, vent pipes, skylights | Compromised flashing, dried-out caulk, worn seals | Meticulously examine all flashing and sealants around roof penetrations. Check for rust on metal flashing or gaps. Inspect chimney crown for cracks. Ensure proper installation and sealing. |
| Widespread Attic Dampness | Underside of roof deck, rafters, insulation | Inadequate attic ventilation, condensation buildup | Check soffit and ridge vents for blockages. Assess attic insulation levels and vapor barrier. Use a hygrometer to measure attic humidity. This might not be a "roof leak" but a ventilation issue. |
| Slightly Damp Eaves/Soffit | Exterior overhangs | Ice dams, compromised drip edge, clogged gutters | Look for signs of ice dams in winter. Verify drip edge is correctly installed and extends into gutters. Clean gutters and ensure downspouts are clear. Check for rotted fascia or soffit panels. |
| Small Isolated Drips | Any spot in attic, intermittent | Nail pops, minor shingle crack, small underlayment puncture | Locate exact nail causing issue. Gently lift shingle (on warm day) to inspect underlayment. Look for very fine shingle cracks. Consider applying a small dab of roofing cement as a temporary fix if identified. |
What to Do Once You've Found the Source
Once you've managed to pinpoint the elusive leak, the next step is to assess the severity and determine the best course of action. This could range from a simple DIY fix to needing a professional repair, or even considering a partial roof replacement.
Minor Repairs You Might Tackle
For very small, isolated leaks, a homeowner with a bit of DIY experience and a healthy respect for safety might be able to manage a minor repair.
- Nail Pops: If you've identified a nail pop, you can usually carefully lift the shingle, remove the old nail, drive a new roofing nail slightly offset from the original hole, and seal it with a dab of roofing cement.
- Small Cracks in Sealant: For minor, superficial cracks in caulk or roof cement around flashing, you might be able to clean the area thoroughly and apply a new layer of high-quality, exterior-grade sealant or roofing mastic. Make sure the area is completely dry before applying.
- Loose Shingles: If a shingle is merely loose but not damaged, you can sometimes apply a small amount of roofing cement underneath it and press it down firmly to re-seal it. However, if the shingle is brittle, attempting this might cause it to break.
- Important Caveat: These are temporary fixes at best and only suitable for extremely minor issues. If you're dealing with anything more than a tiny, superficial crack or a single nail pop, or if you're not confident working on a roof, it's always safer and more effective to call a professional. Improper DIY repairs can often make the problem worse or void your roof's warranty.
Understanding the Scope of Professional Repair
Most hidden leaks, especially those involving flashing, underlayment, or subtle shingle damage over a larger area, require the expertise of a professional roofer. They have the experience, tools, and materials to properly diagnose and fix the problem.
- Thorough Inspection: A professional will conduct a more thorough inspection, often using specialized tools like moisture meters, to accurately assess the extent of water damage. They can also perform controlled water tests more effectively.
- Correct Materials and Techniques: They'll use the right materials (e.g., matching shingles, appropriate flashing metals, durable sealants) and proper installation techniques to ensure a lasting repair. For instance, Flashing Explained details the different types and how they should be installed.
- Warranty Considerations: Many shingle manufacturers require repairs or installations to be performed by certified contractors to maintain warranty validity. Attempting a DIY repair on a complex issue could inadvertently void your warranty.
- Safety: Roofing work is inherently dangerous. Professionals have the necessary safety equipment and training to work on roofs safely.
- Cost vs. Value: While professional repair has a cost, it often prevents more extensive and expensive problems down the line, ultimately providing better value and peace of mind. Many companies, including those you can find through services like Modernize, offer free estimates, so you can understand the scope and cost before committing.
Considering a Partial Reroof vs. Full Replacement
In some cases, a persistent or widespread hidden leak, particularly on an older roof, might indicate a larger underlying problem with the roofing system's integrity. If the leak is a symptom of widespread shingle deterioration, significant underlayment damage, or multiple flashing failures in a specific section, a repair might only be a temporary band-aid.
- Partial Reroof (Patching or Section Replacement): If the leak is confined to a specific section of the roof, and the rest of the roof is in good condition but old, a roofer might recommend a partial reroof. This involves removing shingles and underlayment in the affected area and installing new materials. However, matching new shingles to old, faded ones can be challenging, both aesthetically and in terms of functionality. Also, be aware that some local building codes or even insurance policies might have rules about How Many Layers of Shingles Are Legal or partial replacements.
- Full Roof Replacement: If your roof is nearing its end of life (most asphalt shingle roofs last between 20-30 years, but this depends heavily on the specific shingle type, climate, and maintenance), and you're experiencing hidden leaks, it might be more cost-effective in the long run to consider a full roof replacement. While a significant investment, a new roof offers a fresh start with updated materials, improved warranties, and enhanced protection. It also adds significant value to your home; studies show a strong Roof Replacement ROI Explained. If your roof is 20-25 years old, it's wise to consider a full replacement as a long-term solution. If you're unsure about your roof's age, a professional can usually provide an accurate assessment, often during a Roof Damage Assessment: A Homeowner's Guide.
Prevention and Proactive Measures
The best defense against invisible roof leaks is a good offense. Regular maintenance and proactive measures can help you catch potential issues before they become headaches.
Regular Roof Inspections and Maintenance
Just like your car needs regular oil changes, your roof benefits from routine check-ups. Many homeowners neglect their roof until there's an obvious problem, but consistent inspections can save you a lot of grief and money.
- Annual Visual Inspections: At least once a year, preferably in the spring and fall, conduct a visual inspection of your roof from the ground with binoculars. Look for any signs of wear, such as curling, cracked, or missing shingles. Pay attention to valleys and around roof penetrations. After a major storm, always do a quick check.
- Professional Roof Inspections: Every 3-5 years, or after any significant weather event, it's a good idea to invest in a professional Roof Inspection: What They Check. A qualified roofer can safely get on your roof, meticulously examine all components, and spot subtle issues that you might miss. They can identify minor flashing defects, compromised sealants, or early signs of shingle degradation before they lead to leaks.
- Gutter Cleaning: Keep your gutters clear of leaves, twigs, and debris. Clogged gutters can cause water to back up, leading to rot in fascia boards, damage to the drip edge, and potential water infiltration under the eaves, especially during heavy rains.
- Trim Overhanging Branches: Trees overhanging your roof can drop branches and leaves, causing damage and creating debris that traps moisture. Trim back any branches that are touching or hanging directly over your roof.
Ensuring Proper Attic Ventilation
As we discussed, condensation in the attic can mimic a roof leak. Ensuring adequate attic ventilation is crucial for the health of your roof and your home.
- Check Soffit and Ridge Vents: Make sure that your soffit (intake) and ridge (exhaust) vents are clear and not blocked by insulation, paint, or debris. Proper airflow from the soffits to the ridge helps move moisture out of the attic.
- Insulation Levels: Ensure your attic has adequate insulation, but also that it's not blocking ventilation pathways. Insulation should not be packed tightly against the roof deck at the eaves, as this can impede airflow from soffit vents.
- Sealing Air Leaks: Seal any gaps or cracks in your attic floor that allow warm, moist air from your living space to rise into the attic. This includes sealing around plumbing stacks, electrical wires, and attic hatches. Even small gaps can contribute to significant moisture buildup.
Proactive Measures for Harsh Weather
If you live in an area prone to harsh weather, taking extra steps can significantly reduce your risk of invisible leaks.
- Ice and Water Shield: In regions with heavy snow and freezing temperatures, an ice and water shield is critical. This self-adhering membrane is installed under the shingles, typically at the eaves, in valleys, and around penetrations, to provide an extra layer of protection against ice dams and wind-driven rain. What Is Ice And Water Shield and Why It Matters cannot be overstated.
- High-Quality Shingles and Installation: When it's time for a new roof, invest in high-quality asphalt shingles designed to withstand local weather conditions. For example, some shingles offer enhanced wind resistance, while others are Class 4 Impact-Resistant Shingles designed for hail-prone areas. Proper installation by a manufacturer-certified contractor is just as important as the materials themselves. Always ask about the wind rating and other protective features of the shingles you're considering.
- Roof Age: When to Start Planning Replacement: If your roof is approaching the end of its typical lifespan (20-30 years for asphalt shingles), it's prudent to start budgeting for a replacement. Older roofs are naturally more susceptible to subtle failures that lead to invisible leaks. Don't wait until a major leak forces your hand. Having a plan for when it's time to replace your roof, and knowing your options, can prevent a lot of stress down the line.
When to Call in the Professionals
While finding a hidden leak is frustrating, recognizing when to call in the cavalry is paramount. Some situations simply require the tools, experience, and certifications that only a professional roofing contractor can offer.
Why Expertise Matters for Hidden Leaks
Identifying an elusive leak often comes down to experience and a deep understanding of roofing systems, as well as the unique ways water behaves. Professional roofers have seen it all.
- Diagnostic Skills: They're trained to read the subtle clues that indicate a leak, even when they're not immediately obvious. They understand how different roof components interact and where common failure points lie, which helps them quickly narrow down the possibilities.
- Specialized Tools: Professionals use moisture meters, infrared cameras, and other diagnostic equipment to pinpoint hidden water intrusion that's invisible to the naked eye. This can save immense time and prevent unnecessary exploratory damage to your roof or interior.
- Comprehensive Solutions: A professional won't just patch the leak; they'll diagnose the root cause and recommend the most effective long-term solution, whether that's a targeted repair, a partial section replacement, or a full re-roof. They can also advise on related issues like improving attic ventilation to prevent future condensation.
- Safety First: Working on a roof, especially one that might be compromised by moisture, is dangerous. Professionals have the right safety gear and training to prevent accidents.
Choosing the Right Roofing Contractor
Finding a reputable roofer can feel overwhelming, but it's a critical step in resolving your hidden leak effectively. Don't just go with the first quote you get.
- Look for Experience with Leak Detection: When asking for quotes, specifically mention that you have a hidden leak and ask about their experience in diagnosing such issues. A good roofer will have a methodical approach to leak detection.
- Check Credentials: Always verify that the contractor is licensed, bonded, and insured. This protects you in case of accidents or shoddy workmanship. You can typically check their license status with your state's contractor licensing board. Look for a contractor who has positive reviews and a solid reputation in your community, perhaps by checking online platforms like Modernize which can help connect you with vetted contractors.
- Manufacturer Certifications: Many reputable roofing companies hold certifications from shingle manufacturers like GAF, Owens Corning, or CertainTeed. These certifications indicate that the contractor has met specific standards for installation quality and professionalism. A GAF Master Elite Contractor, for example, has demonstrated a high level of expertise.
- Get Multiple Estimates: Obtain at least three detailed estimates. A good estimate should clearly outline the scope of work, materials to be used, labor costs, and warranty information. Comparing these helps you understand the fair market value for the job. Read our guide on How to Read and Compare Roofing Estimates for more insight.
- Ask for References and See Past Work: A reliable contractor will be happy to provide references. Also, ask if you can see examples of their previous work, especially similar leak repair projects.
- Contract Details: Ensure everything is in writing. The contract should specify the exact work to be done, the timeline, payment schedule, and warranty information (both for materials and workmanship). Never pay for the entire project upfront. This is often a red flag in the roofing industry. Our guide on Questions to Ask a Roofing Contractor Before Hiring provides an exhaustive list of what to cover.
Navigating Insurance Claims for Undetected Damage
If your hidden leak has caused significant interior damage (e.g., stained ceilings, damaged drywall, mold), your homeowners insurance might cover the repairs, depending on your policy and the cause of the leak.
- Document Everything: As soon as you discover signs of a leak, start documenting. Take photos and videos of water stains, drips, and any damaged property. Keep a log of when you noticed the leak and when it rains.
- Contact Your Insurance Provider Promptly: Report the potential damage to your insurance company as soon as possible. Delays can sometimes jeopardize your claim.
- Understand Your Policy: Review your homeowners insurance policy to understand what's covered. Most policies cover sudden and accidental damage, but not damage resulting from neglect or deferred maintenance. Some policies may also differentiate between "actual cash value" and "replacement cost value" for roof damage, which can significantly impact your payout.
- Work with Your Roofer: Your chosen roofing contractor can often help you navigate the insurance claims process. They can provide detailed damage assessments and estimates that your insurer will require. In some cases, they might even coordinate directly with your insurance adjuster.
- Be Patient: The insurance claims process can take time. Provide all requested documentation promptly and follow up regularly.
Dealing with a roof leak when there's no visible damage is uniquely challenging. But by understanding the potential causes, methodically investigating, and knowing when to call in a professional, you can effectively resolve the problem and protect your home from further harm.
Disclaimer
Please note that this guide provides general information and recommendations regarding asphalt roofing and leak detection. Roofing work can be dangerous and complex. Always prioritize safety and consult with a qualified, licensed, and insured roofing professional for specific advice, inspections, and repairs pertaining to your home. Do-it-yourself repairs should only be attempted if you have the necessary skills, tools, and safety equipment, and understand the potential risks involved.