How a Roof Handles Snow Load
The sight of a heavy blanket of snow on your roof can be both beautiful and a little nerve-wracking. Many homeowners fret about whether their roof can truly bear the immense weight of winter's bounty, and those concerns are absolutely valid. This comprehensive guide will explain exactly how your asphalt shingle roof is designed to handle snow load, what structural components come into play, and what you can do to ensure your home stays protected through even the harshest snowy seasons.
Understanding Snow Load on Your Asphalt Roof
When winter storms roll in, bringing with them inches or even feet of snow, it's natural to wonder if your home's roof can take the pressure. Snow isn't just light, fluffy powder; it can become incredibly dense and heavy, especially when it starts to melt and refreeze, turning into ice. Understanding how this weight, known as "snow load," is calculated and distributed is the first step to peace of mind.
What is "Snow Load" Exactly?
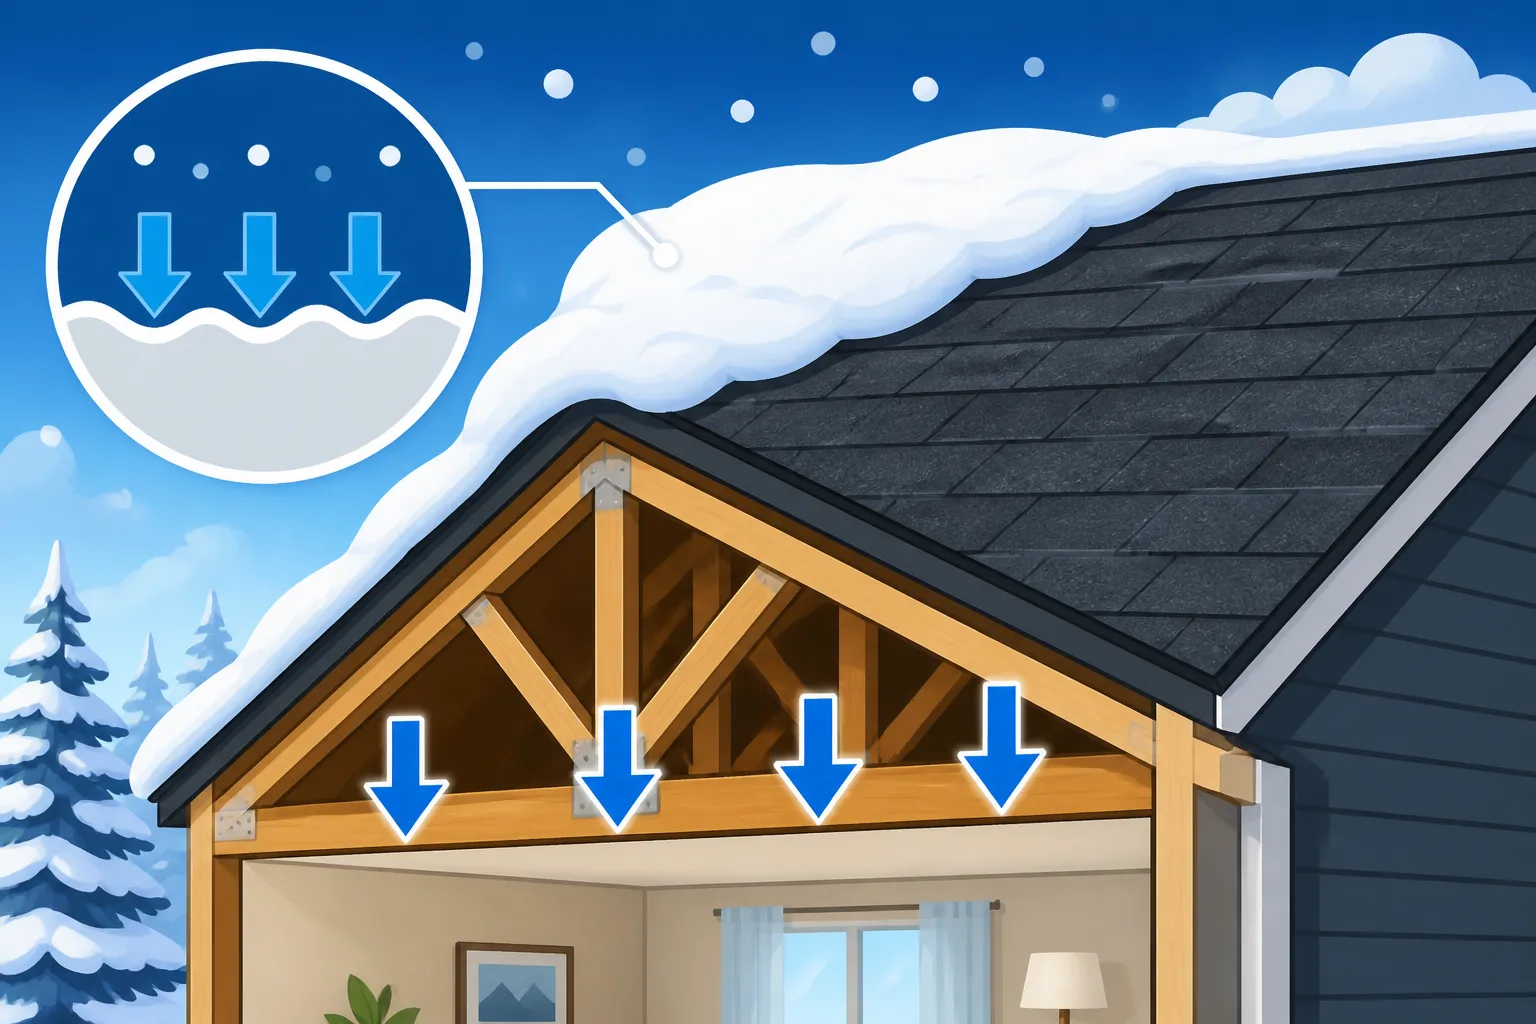
Snow load refers to the total weight of snow and ice that accumulates on a roof. It's not a static number, but rather a complex calculation influenced by several factors. Firstly, the depth of the snow is obvious, but equally important is its density. Fresh, dry snow might weigh only a few pounds per cubic foot, but wet, heavy snow can weigh upwards of 15 to 20 pounds per cubic foot, and ice can be a staggering 57 pounds per cubic foot. Imagine several feet of that on your roof! This is why a foot of fluffy snow isn't the same as a foot of sleet or ice.
Another critical factor is snow drift. Wind doesn't just clear snow off your roof; it often redistributes it, piling it much deeper in certain areas, particularly around dormers, chimneys, and in roof valleys. These drifts can create concentrated points of extreme weight, sometimes exceeding the uniform load capacity of the roof structure. Building codes in areas prone to heavy snowfall consider these variables, setting specific minimum ground snow loads that dictate how robust a roof's structure must be. For instance, a home in Buffalo, New York, will have much higher snow load requirements than one in Phoenix, Arizona. These codes are in place to ensure your roof is built to withstand the typical maximum snow accumulation for your specific region, providing a fundamental level of safety.
Why Asphalt Shingles Matter with Snow
While the structural integrity of your roof frame is paramount, the asphalt shingles themselves play a supporting role in how snow is managed. Asphalt shingles provide the primary weather barrier, protecting the underlying roof decking from moisture, but they aren't designed to bear the snow load in the structural sense. That job falls to the framing. However, the condition and type of your asphalt shingles can indirectly affect how snow behaves on your roof.
For example, a rougher, more textured architectural shingle might hold onto snow more readily than a smoother 3-tab shingle, which could allow snow to shed more easily once it begins to melt. Additionally, older, worn shingles with significant granule loss might not provide as much friction, potentially leading to faster shedding but also potentially posing a risk if large sheets of snow and ice slide off quickly. The key, regardless of shingle type, is that the shingles must be properly installed and sealed to prevent water intrusion once the snow starts to melt. If shingles are cracked, lifted, or missing, melting snow and ice can easily seep underneath, leading to leaks and water damage. This is why ensuring your roof is in good condition before winter hits is crucial.
How Your Roof Structure Manages the Weight
The true hero in the battle against heavy snow is your roof's underlying structure. This intricate network of wood components is meticulously engineered to distribute and support the immense forces placed upon it, far more than just the weight of the shingles themselves. This structural integrity is what allows your home to stand strong, season after season.
The Role of Rafters and Trusses
At the core of your roof's strength are the rafters or trusses. These are the main structural members that span from the exterior walls to the ridge of your roof. In essence, they form the skeletal framework that dictates your roof's shape and bears the brunt of external loads, including wind, rain, and, crucially, snow.
- Rafters: In traditionally framed homes, individual rafters are cut and installed on-site, forming a triangular structure. The size and spacing of these rafters (e.g., 2x8s spaced 16 or 24 inches on center) are critical. Larger rafters and closer spacing provide greater strength and stiffness, allowing the roof to carry more weight without excessive deflection or failure. The pitch of the roof also influences how effectively rafters distribute load down to the supporting walls.
- Trusses: More common in modern construction, trusses are prefabricated, engineered wooden frameworks that are delivered to the job site ready for installation. They consist of a series of triangles, which is one of the strongest geometric shapes. Trusses are designed by engineers to handle very specific loads based on local building codes and expected snow accumulations. They are highly efficient at distributing weight across a wider area and down to the exterior walls, often requiring fewer interior load-bearing walls.
The choice between rafters and trusses, and their specific dimensions and spacing, is determined during the architectural and engineering phases of home construction, always with local snow load requirements in mind. When you're considering a roof replacement or looking to understand your home's resilience, a professional can often assess these underlying components to give you a clear picture of your roof's inherent strength. For more insights into how these components fit together, check out our guide on what makes up the individual parts of an asphalt shingle roof, "Roof Anatomy: Parts of an Asphalt Shingle Roof".
Roof Decking and Its Contribution
Sitting atop the rafters or trusses is the roof decking, also known as sheathing. This is the flat surface, typically made of oriented strand board (OSB) or plywood, to which your underlayment and shingles are attached. While it seems like a mere surface, the roof decking plays a vital role in unifying the roof structure and further distributing the snow load.
The decking material itself contributes to the overall strength by tying the individual rafters or trusses together, creating a diaphragm effect. This means that forces applied to one area of the roof are spread out across a larger section of the framing. The thickness of the decking (e.g., 1/2-inch or 5/8-inch) is chosen based on the spacing of the rafters/trusses and the expected loads. Thicker decking provides greater rigidity and resistance to sagging between supports. If your existing decking is showing signs of weakness, such as soft spots or rot, addressing it during a roof replacement is critical. Understanding the potential costs involved can be found in our article on "Roof Decking Replacement Cost".
Proper Installation for Snow Resistance
Even the strongest materials are only as good as their installation. For a roof to effectively handle snow load, every component must be installed correctly, adhering strictly to manufacturer specifications and local building codes. This includes the fastening of the roof decking to the rafters/trusses, the application of underlayment, and the nailing of the shingles themselves.
Correct fastening of the decking ensures it acts as a cohesive unit with the framing. If the decking is not adequately nailed, it can lift or flex excessively under heavy loads, compromising the entire system. Similarly, shingles must be nailed properly, using the right number of nails in the correct locations, to ensure they remain securely attached and prevent wind uplift, which can be exacerbated when snow creates additional pressure points. Professional roofers understand these nuances. Organizations like Modernize can help connect you with experienced, local contractors who are well-versed in the specific building codes and best practices for snow-prone regions. They ensure that not only the aesthetics but also the structural integrity of your roof installation meets the highest standards.
Beyond Structure: Other Factors for Snow Handling
While a robust underlying structure is non-negotiable, a roof's ability to handle snow load isn't solely about brute strength. Several other critical components and design choices work in concert to manage snow effectively, preventing accumulation, mitigating ice dams, and ensuring proper drainage when the thaw eventually arrives.
The Importance of Roof Pitch
The slope or "pitch" of your roof is arguably one of the most significant factors in how it handles snow. Simply put, steeper roofs shed snow more efficiently than flatter ones.
- Steep Pitches (e.g., 8/12 or higher): On a very steep roof, gravity does most of the work. Snow has a harder time accumulating and tends to slide off naturally, especially as temperatures fluctuate and the bottom layer begins to melt. This significantly reduces the overall weight burden on the structure. Homes in mountainous regions or areas with consistently heavy snowfall often feature steep roofs for this very reason.
- Moderate Pitches (e.g., 4/12 to 7/12): These are common in many residential areas. They'll hold some snow, especially lighter, fluffier varieties, but will still shed a good portion of it as it melts or with strong winds. The accumulated weight needs to be accounted for in the structural design, but these roofs generally perform well.
- Low Pitches (e.g., 2/12 to 3/12): On lower pitched roofs, snow is much more likely to accumulate and stay put. This means the structural framing must be significantly stronger to support potentially greater, more prolonged snow loads. These roofs are also more susceptible to ice dam formation because water can pond behind melting snow and refreeze. For a deeper dive into how roof slope affects overall performance, consider reading our article on "Roof Pitch and Slope Explained".
Here's a quick comparison of how different pitches generally handle snow:
| Roof Pitch Ratio | Angle (Approx.) | Snow Shedding Tendency | Structural Load | Ice Dam Risk |
|---|---|---|---|---|
| 2/12 | 9.5° | Very Low | High | Very High |
| 4/12 | 18.4° | Low to Moderate | Moderate to High | High |
| 6/12 | 26.6° | Moderate | Moderate | Moderate |
| 8/12 | 33.7° | High | Low | Low |
| 12/12 (45°) | 45° | Very High | Very Low | Very Low |
Proper Roof Ventilation
Perhaps counter-intuitively, adequate roof ventilation is a secret weapon against the problems caused by melting snow, primarily ice dams. An ice dam forms when heat escapes from your living space into the attic, warming the roof deck and melting snow from underneath. This meltwater then flows down the roof until it reaches the colder eaves, which are not directly heated by the attic. Here, the water refreezes, creating a ridge of ice that blocks further meltwater from draining off the roof. This trapped water can then back up under your shingles and into your home, causing significant water damage.
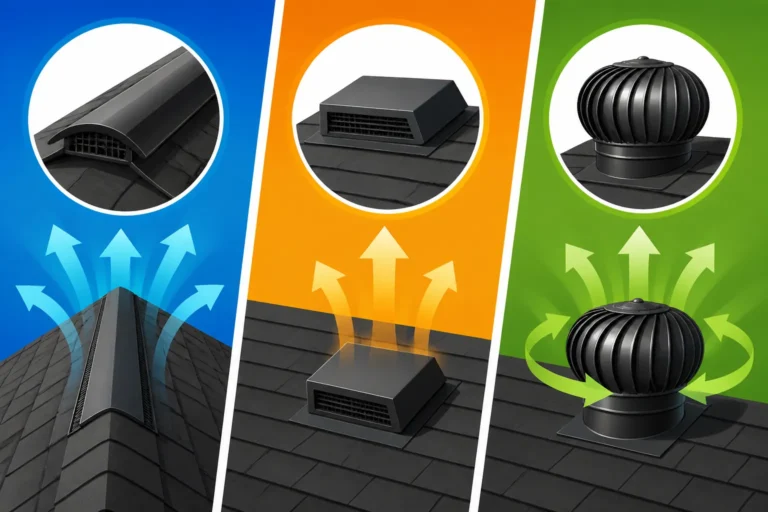
Proper attic ventilation, through components like soffit vents, ridge vents, and gable vents, ensures that the temperature across your entire roof surface remains as consistent as possible with the outside air. By allowing cool air to enter the attic and warm air to escape, it prevents warm spots from forming on the roof deck, thus minimizing the chances of snow melting prematurely and forming ice dams. This continuous airflow also helps keep your attic dry, preventing moisture buildup that could lead to mold or rot. Learning about the different types of ventilation and their benefits can be further explored in our guide "How Roof Ventilation Works".
Ice and Water Shield and Drip Edge
While a good structure and ventilation deal with the weight and melting of snow, the final line of defense against water intrusion from snow and ice is the underlayment, specifically ice and water shield, and the drip edge.
- Ice and Water Shield: This self-adhering, waterproof membrane is applied directly to the roof decking, typically along the eaves, valleys, and around penetrations like chimneys and skylights – areas most prone to ice dam formation and water backup. Unlike standard felt or synthetic underlayment, ice and water shield creates a watertight barrier that seals itself around nails, providing superior protection against water penetration, even if it backs up significantly under your shingles. It's an indispensable component in snowy climates, acting as a crucial backup when shingles are compromised by ice. We delve deeper into this protective layer in "Ice and Water Shield Explained".
- Drip Edge: This metal flashing is installed along the edges of the roof (eaves and gables) beneath the underlayment and shingles. Its primary purpose is to direct water away from the fascia board and into the gutters, preventing it from running down and damaging the trim or penetrating the roof edge. In snowy conditions, it helps prevent meltwater from freezing and building up along the very edge, which could otherwise create small ice dams or damage the vulnerable fascia. To understand its full function, refer to our article "Drip Edge: What It Does".
Together, these components create a robust defense system that complements your roof's structural strength, ensuring that even when snow melts and refreezes, your home remains dry and protected.
Signs Your Roof is Struggling with Snow Load and What to Do
Even the best-engineered roofs can face challenges, especially during unusually harsh winters or if they've aged. Recognizing the warning signs that your roof might be struggling with excessive snow load is critical for preventing serious damage. Being proactive can save you from costly repairs and ensure your family's safety.
Warning Signs of Excessive Snow Load
It's tempting to think your roof will just handle whatever nature throws at it, but prolonged, heavy snow can take its toll. Keep an eye out for these indicators, both inside and outside your home:
- Interior Signs:
- Sagging Ceilings: This is a major red flag. If you notice any part of your ceiling sagging or bowing, particularly on the top floor, it indicates that the roof structure above is under immense stress and potentially failing.
- New Cracks in Walls or Ceilings: While houses settle, new or rapidly expanding cracks, especially near the top of walls or where walls meet the ceiling, can suggest structural movement due to excessive weight.
- Doors or Windows Sticking: If doors and windows on your upper floors suddenly become difficult to open or close, it could be a sign that the house frame is distorting under the roof's load.
- Popping, Creaking, or Groaning Noises: While houses make noises, unusual or persistent sounds coming from the attic or upper stories during a heavy snowfall could be the roof structure straining.
- Exterior Signs (from a safe distance):
- Excessive Sagging of the Roof Line: If you can safely observe your roof from the ground (or from a neighbor's property), look for any visible sagging between the rafters or trusses. This is easier to spot if you know what your roof typically looks like.
- Leaking in the Attic or Top Floor: Even with proper ice and water shield, extreme ice damming or structural compromise can lead to leaks. Don't ignore any drips or water stains. Our article on "When to Repair a Roof Leak vs Replace the Roof" can offer guidance here.
- Compromised Gutters: Gutters that are pulled away from the fascia or severely bent might indicate not just ice accumulation within them, but also structural issues or massive ice dams putting pressure on the roof edge.
If you observe any of these signs, it's crucial to act immediately. Contacting a professional structural engineer or a reputable roofing contractor, like those found through Modernize, is the best course of action. They can safely assess the situation and recommend the appropriate steps.
When to Consider Snow Removal
The general advice from roofing professionals is not to remove snow from your roof yourself. This is due to several significant risks:
- Safety Hazard: Falls from icy roofs or ladders are extremely dangerous.
- Roof Damage: Improper snow removal techniques, such as using shovels, picks, or even certain snow rakes, can easily damage shingles, flashing, or other roof components, leading to leaks.
- Insurance Issues: Damage caused by DIY snow removal might not be covered by your homeowner's insurance.
However, there are specific situations where professional snow removal becomes advisable or even necessary:
- When Warning Signs Appear: If you're seeing any of the stress signals mentioned above, professional snow removal can immediately reduce the load and prevent further damage or collapse.
- Excessive Snow Depth: If your area has received significantly more snow than typical for its building code, or if there are multiple layers of snow and ice accumulation, it's safer to have it removed. For example, if a "foot" of snow is actually a foot of packed, icy snow, it's far heavier than a foot of fresh powder.
- Persistent Ice Dams: While good ventilation helps, sometimes ice dams become so severe they threaten to cause immediate leaks or damage to gutters and fascia. Professionals can safely remove or break up ice dams.
If you decide snow removal is necessary, always hire a licensed and insured professional roofing contractor. They have the right equipment, training, and safety protocols to perform the job without damaging your roof or risking injury.
Long-Term Solutions for Snow-Prone Areas
If you live in a region that consistently experiences heavy snowfall, or if your current roof is frequently struggling, it might be time to think about long-term solutions, especially during a roof replacement.
- Structural Reinforcement: During a roof replacement, if your home is older or has experienced issues, a structural engineer can assess whether additional reinforcement to your rafters or trusses is needed. This might involve adding sister rafters, strengthening connections, or upgrading to thicker roof decking.
- Enhanced Underlayment: Investing in full coverage of ice and water shield, rather than just the code-required minimums, can provide superior protection against meltwater intrusion. This is especially beneficial for lower-pitched roofs or those with complex geometries.
- Improved Ventilation: Evaluate your current attic ventilation system. Upgrading to a more efficient system (e.g., adding more soffit vents or installing a continuous ridge vent if you only have passive box vents) can dramatically reduce the risk of ice dams.
- Higher-Grade Shingles: While not directly load-bearing, some advanced asphalt shingles offer better cold-weather performance, and many new systems from brands like GAF or Owens Corning offer superior wind resistance, which can be critical when heavy snow and strong winds combine.
- Snow Guards or Heating Cables: For specific areas like entryways or walks, snow guards can help prevent large sheets of snow and ice from suddenly sliding off and endangering people below. Heating cables installed along the eaves can also prevent ice dam formation in problematic areas, though they consume energy.
By considering these options during your next roof project, you can ensure your asphalt roof is not just visually appealing, but also robustly prepared to handle many more snowy winters to come, extending its lifespan. Knowing when to plan for a new roof is crucial, and our guide on "Signs You Need a New Roof" offers further details on recognizing those critical moments.
Disclaimer
Please remember that this article provides general information and recommendations. Every roof and home is unique, and local building codes, climate conditions, and specific structural details can vary significantly. Always consult with a qualified, licensed, and insured roofing professional or structural engineer for specific advice regarding your home and its ability to handle snow load. Do not attempt to climb onto your roof or remove snow yourself if you are not trained and properly equipped.