How a Roof Replacement Works: The Full Process
The decision to replace your roof often comes with a whirlwind of questions and anxieties. You might be staring up at curling shingles after a harsh winter, or noticing those dreaded dark streaks, wondering if your home's most vital shield is about to give out. The whole process can feel overwhelming, like stepping into a complicated construction project without a blueprint. This comprehensive guide is designed to demystify the entire asphalt roof replacement process, walking you through every step from that first tell-tale sign of trouble to enjoying your beautiful, brand-new roof.
Understanding When It's Time for a New Roof
One of the biggest anxieties homeowners face is knowing when to pull the trigger on a full roof replacement versus a simple repair. It’s easy to put it off, hoping a small patch will do the trick, but sometimes the writing is clearly on the wall. Recognizing the early warning signs can save you a lot of headache and expense down the line, preventing minor issues from escalating into major structural damage or costly interior leaks.
Common Signs of Roof Failure
Your roof has a way of communicating its distress, if you know what to look for. One of the most obvious indicators is missing or severely damaged shingles, especially after a heavy storm. If you see bald spots where granules have eroded away, leaving the asphalt exposed, that's a clear sign of wear and tear, reducing your shingles' ability to protect against UV rays and moisture.
Beyond the visible damage, keep an eye out for signs of water intrusion inside your home. Water stains on your ceiling, peeling paint, or a musty odor in your attic are huge red flags. Even subtle changes in your attic, like excessive humidity or visible light filtering through the roof deck, can point to compromised roofing. Ignoring these signs can lead to much bigger problems than just a roof replacement, like extensive mold remediation or structural wood rot in your attic space.
The Role of Roof Age and Wear
Asphalt shingle roofs aren't designed to last forever, and their lifespan is significantly affected by local climate conditions. In regions like the humid Southeast or the storm-prone Midwest, a roof might age faster than one in a milder climate. Most asphalt shingle roofs are typically expected to last between 20 to 30 years, though environmental factors, maintenance, and the quality of initial installation can either extend or shorten this timeframe. For more details on this, you might find our guide on How Long Does an Asphalt Roof Last helpful.
If your roof is approaching or has exceeded this general lifespan, even without obvious leaks, it’s wise to start thinking about replacement. Older shingles become brittle, their protective granules shed away, and their sealing strips lose effectiveness. This natural degradation leaves your home vulnerable. A good rule of thumb is to have your roof professionally inspected once it hits the 15-year mark, just to get an expert opinion on its remaining life and potential weak spots.
Assessing Storm Damage
Hailstorms and high winds are notorious for causing extensive roof damage that isn't always immediately apparent. Hail, for instance, can create bruises or impact marks on shingles, which might not leak right away but significantly reduce their lifespan and protective qualities. Wind can lift and tear shingles, especially around edges and vents, creating avenues for water intrusion.
After any significant storm, it's crucial to perform a visual inspection from the ground. Look for lifted, creased, or missing shingles. If you suspect damage, getting a professional roof inspection is key. They can safely access your roof, identify subtle damage that an untrained eye might miss, and provide the necessary documentation if you need to file an insurance claim. Remember, acting quickly after storm damage can prevent secondary damage to your home's interior.
Choosing the Right Roofing Contractor
Once you've determined that a roof replacement is indeed in your future, the next critical step, and arguably the most important, is finding a reliable, trustworthy roofing contractor. This isn't a small home improvement project, and the quality of the installation directly impacts your roof's longevity and performance. Don't rush this decision; a good contractor is worth their weight in gold. For a deep dive into this crucial topic, read our guide on how to choose a roofing contractor.
Vetting and Verification
The roofing industry, unfortunately, has its share of less-than-reputable players. This is especially true after major storms, when "storm chasers" descend on affected areas, often performing shoddy work and disappearing when problems arise. To protect yourself, always look for contractors who are licensed and insured in your state or locality. A contractor should carry both liability insurance (to cover any damage to your property) and workers' compensation insurance (to protect their crew and you from responsibility if someone gets injured on your property). Don't just take their word for it; ask for current certificates of insurance and call the insurance provider to verify their validity.
Beyond licensing and insurance, check their reputation. Look at online reviews on platforms like Google, Yelp, and the Better Business Bureau. Ask for local references and actually call them to inquire about their experience with the contractor. Were they professional? Did they stick to the timeline and budget? Did they clean up thoroughly? You can also check if they are certified by major shingle manufacturers like GAF, Owens Corning, or CertainTeed. These certifications often mean they adhere to higher installation standards and can offer enhanced warranties. When you're ready to start getting quotes, platforms like Modernize can be a great starting point to connect with vetted local professionals.
Getting and Comparing Estimates
It's always recommended to get at least three detailed estimates from different roofing contractors. This isn't just about finding the cheapest price; it's about comparing the scope of work, materials, warranties, and contractor professionalism. A good estimate will be itemized, clearly breaking down costs for things like tear-off, roof decking replacement, underlayment, shingles, flashing, and labor. Be wary of estimates that are significantly lower than others, as they might be cutting corners on materials, labor, or even neglecting necessary components.
When comparing, pay close attention to:
- Materials: Are they quoting comparable quality shingles and accessories (e.g., starter strips, ridge caps, ventilation)?
- Scope of Work: Does it include everything from permits and dumpster rental to thorough clean-up?
- Warranties: What kind of workmanship warranty do they offer, and what manufacturer warranty applies to the shingles?
- Timeline: How long do they estimate the project will take?
Don't hesitate to ask questions about anything that's unclear. A transparent contractor will be happy to explain their proposal in detail. Our guide on how to read and compare roofing estimates can offer invaluable advice here.
Understanding Contracts and Warranties
Before any work begins, you must have a written contract that clearly outlines all aspects of the project. This contract should include the total cost, payment schedule, start and completion dates, a detailed scope of work, specifics of materials to be used, clean-up procedures, and all applicable warranties. Never sign a blank contract or one with vague terms. Ensure any verbal promises are put in writing.
Regarding warranties, there are generally two types: the manufacturer's warranty covering the materials, and the contractor's workmanship warranty covering the installation. Manufacturer warranties on asphalt shingles can range from 20 years to limited lifetime, with options for enhanced warranties if a full roofing system from a single manufacturer is installed by a certified contractor. The workmanship warranty typically ranges from 2 to 10 years, though some top-tier contractors offer longer periods. Understand what each warranty covers, how long it lasts, and what steps you need to take to keep it valid (e.g., registration requirements). A robust warranty provides peace of mind long after the work is done.
The Pre-Installation Phase: Permits, Materials, and Prep
With a contractor selected and a contract signed, the physical work might still be a little ways off. There's a crucial pre-installation phase that sets the stage for a smooth and successful roof replacement. This involves administrative tasks, material logistics, and important steps you, as the homeowner, need to take.
Navigating Roofing Permits and Regulations
Almost every major roofing project requires a permit from your local building department. This isn't just bureaucratic red tape; it's a vital safeguard to ensure the work is done to current building codes and safety standards. Typically, your chosen roofing contractor will handle the permit application process, as they are familiar with the local requirements and necessary documentation.
The permit process involves submitting plans, and often, an inspector will conduct a final review of the completed work to ensure compliance. Skipping a permit might seem like a shortcut, but it's a huge risk. Unpermitted work can lead to fines, difficulties with insurance claims, and even problems when you try to sell your home. Different jurisdictions have varying rules, so it's always best to understand the specific building codes for your area. For instance, some areas might have specific requirements for high-wind nailing patterns or ice and water shield installation, which a permit ensures are followed.
Material Selection and Delivery
Once the permit is in hand, your contractor will finalize the material order. This includes the shingles themselves – choosing between 3-tab, architectural, or even designer shingles – as well as all the necessary accessory components. These include starter strips, hip and ridge cap shingles, synthetic or felt underlayment, drip edge, ice and water shield, and proper ventilation components like ridge vents or soffit vents.
The delivery of these materials typically happens a day or two before the installation crew arrives. Don't be surprised if a large truck shows up with bundles of shingles that are loaded directly onto your roof via a conveyor belt. This is standard practice, making the materials readily accessible for the crew and minimizing trips up and down ladders. Ensure you have cleared any vehicles or obstacles from your driveway and around your home to allow the delivery truck and later, the dumpster, easy access.
Homeowner Preparations for Installation Day
Your contractor will likely provide you with a checklist of things to do before their crew arrives, but it's worth going over the key preparations. This project is going to be loud and messy, so planning ahead makes a big difference.
- Protect Valuables: Remove any fragile items, wall hangings, or chandeliers from walls and ceilings, especially on the top floor. The hammering and vibrations can cause things to fall.
- Secure Outdoor Items: Move patio furniture, grills, planters, and any other outdoor decor away from the house perimeter. Cover gardens, shrubs, and delicate landscaping if your contractor hasn't already planned to.
- Clear the Driveway: Ensure unobstructed access for the crew's vehicles, material delivery, and the waste dumpster.
- Inform Neighbors: A courtesy heads-up to your neighbors about the upcoming noise and potential disruption is always appreciated.
- Pet and Child Safety: Keep pets indoors or away from the property during working hours, as the noise can be frightening, and there will be nails and debris. Supervise children closely to ensure they stay clear of the work zone.
- Vehicle Relocation: Move your cars out of the garage and away from the house, protecting them from falling debris and ensuring they aren't blocked in.
- Attic Preparation: Clear out any items directly under the roof deck in your attic that might be susceptible to dust or vibration.
Taking these steps helps ensure the safety of your family and property, and allows the roofing crew to work efficiently without needing to stop and move your personal items.
Tear-Off: The Foundation of a New Roof
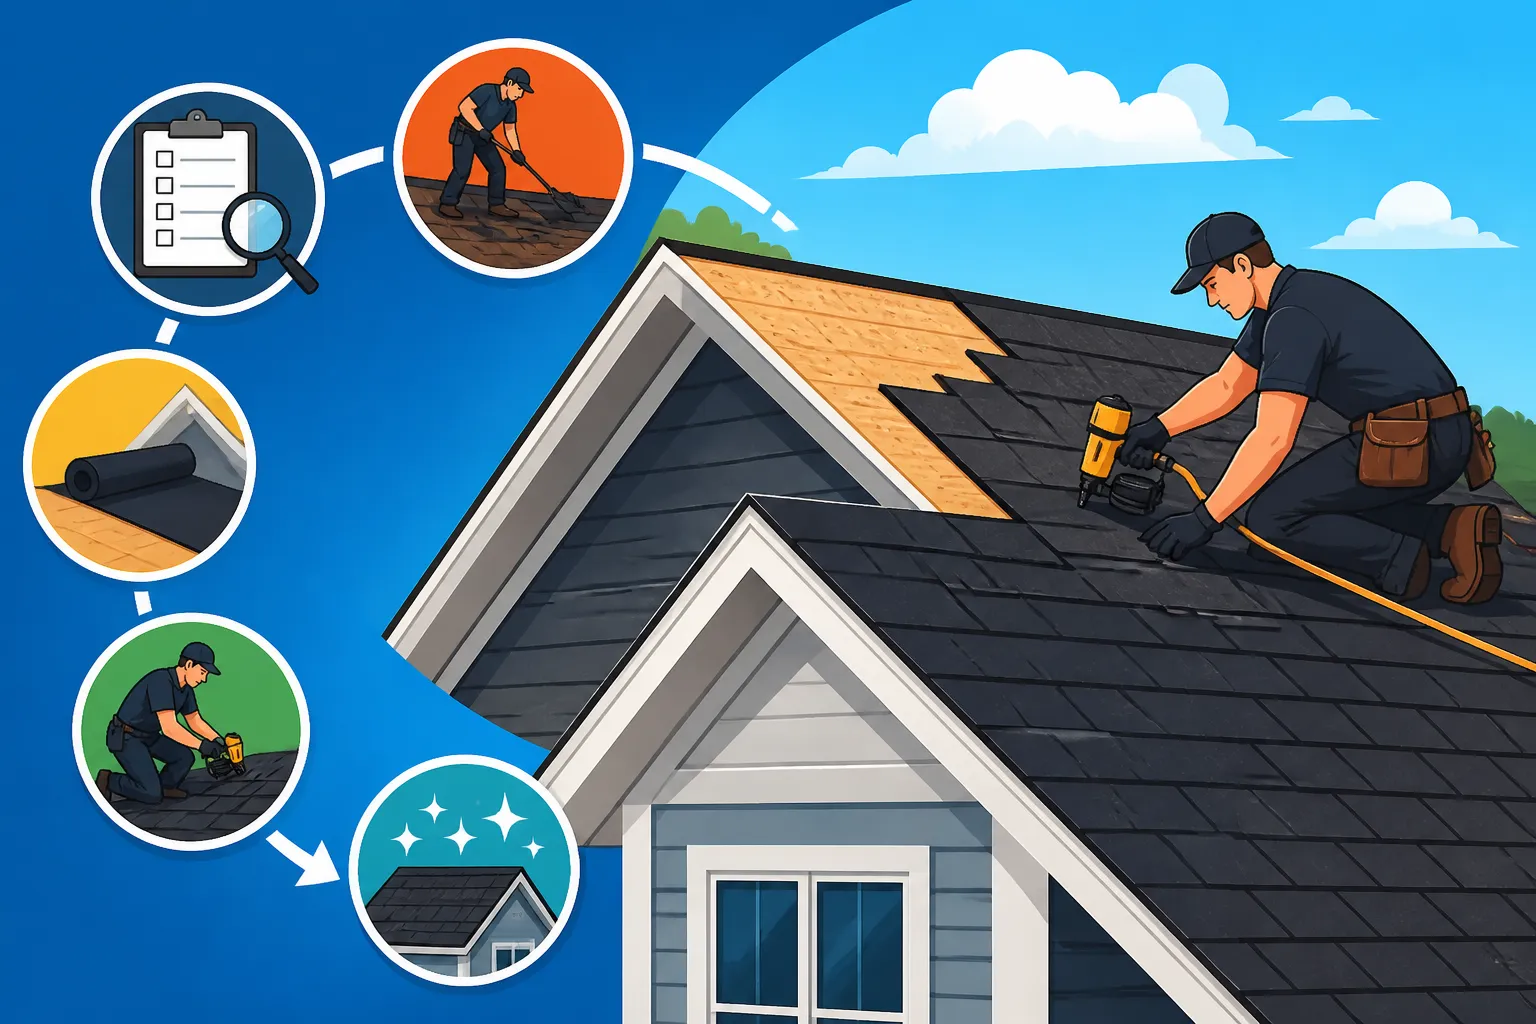
The first actual step in replacing your asphalt roof is the tear-off. This isn't just about stripping off the old materials; it's a critical phase that allows for a thorough inspection of your roof deck and ensures a clean, solid base for your new roofing system. A proper tear-off is fundamental to the longevity and performance of your new roof.
Protecting Your Property During Tear-Off
Before any old shingles are removed, a good roofing crew will take extensive measures to protect your property. This often involves placing tarps or heavy-duty netting around the perimeter of your home, extending several feet out from the foundation. These tarps are essential for catching falling debris, nails, and shingle fragments, preventing them from littering your landscaping or damaging windows and siding.
They'll also typically cover bushes, trees, and delicate plants that are close to the house. Some contractors might even temporarily remove exterior lights or decorative elements that are in the line of fire. Communication is key here; don't be afraid to discuss their protection plan with your contractor beforehand to ensure you're comfortable with the measures they're taking.
Safe and Efficient Debris Removal
The tear-off process itself is noisy and labor-intensive. Crew members will use specialized tools, like roof shovels, to efficiently remove old shingles, nails, underlayment, and any other components down to the bare roof deck. All this debris is then carefully tossed or slid into a large waste dumpster, often positioned strategically close to the house for easy disposal. For insight into the costs involved, you may want to check out our guide on the Cost of Roof Tear-Off and Disposal
It's astonishing how much material comes off a roof – thousands of pounds of old shingles and nails. Ensuring this waste is handled safely and responsibly is paramount. Reputable contractors will manage the dumpster rental and disposal, often recycling the old asphalt shingles if facilities are available in your area. This commitment to proper disposal not only keeps your property clean but also minimizes environmental impact.
The Importance of a Clean Deck
Once all the old roofing materials are removed, the bare roof deck is exposed. This is a critical moment for inspection. The crew will carefully examine the plywood or OSB decking for any signs of damage, such as rot, soft spots, or delamination, which can occur from previous leaks or long-term moisture exposure. They'll also ensure all old nails are removed or hammered flat.
If damaged decking is found, it will be removed and replaced with new material. This step is non-negotiable; installing new shingles over a compromised or uneven deck will drastically shorten the life of your new roof and can void manufacturer warranties. A solid, clean, and smooth roof deck is the ultimate foundation, ensuring that every shingle lays flat and adheres properly, providing maximum protection for your home. Our detailed guide on How Roofers Fix Rotted Decking covers this aspect in depth.
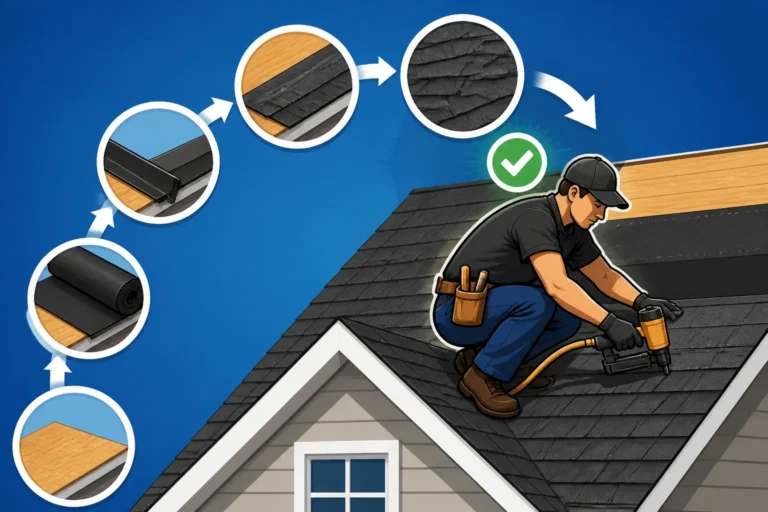
The Installation Process: Building Your New Asphalt Roof Layer by Layer
This is where the magic happens – seeing your new roof take shape, piece by painstaking piece. An asphalt roof replacement isn't just about slapping shingles on; it's a multi-layered system designed to provide comprehensive protection against the elements. Each component plays a vital role in keeping your home dry and safe for decades to come.
Underlayment and Ice & Water Shield Application
The first layer to go down on your clean roof deck is the underlayment. This protective barrier acts as an extra line of defense against moisture, especially if wind-driven rain gets underneath your shingles. Historically, felt paper was used, but modern synthetic underlayments are far more durable, tear-resistant, and provide superior water resistance. This crucial step is extensively covered in our guide, Underlayment Explained: Synthetic vs Felt
In colder climates or areas prone to heavy snow and ice, an additional, self-adhering membrane called ice and water shield is applied along the eaves, in valleys, and around penetrations. This rubberized asphalt material seals directly to the roof deck, creating a watertight barrier that prevents water from backing up under shingles due to ice dams or extreme weather. It’s an investment that pays dividends in preventing damaging leaks.
Flashing and Penetration Sealing
Flashing is one of the most critical, yet often overlooked, components of a watertight roof. These thin sheets of metal (typically aluminum or galvanized steel) are strategically installed at vulnerable points where the roof meets a wall, chimney, skylight, or vent pipe. Flashing diverts water away from these transitions, preventing it from seeping into your home.
Proper installation involves layering the flashing with the shingles in a way that creates a continuous seal. For instance, step flashing is used along sidewalls, with each piece integrated with a shingle course. Around chimneys, a combination of step flashing and counter-flashing is used to create a durable, waterproof seal. All pipe penetrations for plumbing vents are sealed with rubber boots or specialized flashing. Any misstep here can lead to persistent leaks, making meticulous flashing installation absolutely vital.
Shingle Installation and Nailing Patterns
Now for the star of the show: the shingles! Before the main field shingles are laid, starter shingles are installed along the eaves. These have a sealed edge that provides a clean, straight line for the first course of shingles and adds extra wind resistance. Then, the main field shingles are installed, typically starting from the bottom edge of the roof and working upwards towards the ridge.
Each shingle course is carefully aligned, staggered to prevent water penetration, and fastened with roofing nails. The nailing pattern is crucial for wind resistance and adherence. Manufacturers specify precise nailing zones and the number of nails per shingle (usually 4 to 6, depending on wind rating). Improper nailing – nails placed too high, too low, or at an angle – can severely compromise the shingle's ability to seal and resist high winds, potentially voiding your warranty. The detailed process of how asphalt shingles are installed: step by step is an art form.
Ridge Caps and Ventilation Systems
As the shingles approach the peak of the roof, specialized hip and ridge cap shingles are installed. These thicker, often pre-formed shingles cover the exposed edges of the roof hips and the very peak (ridge), providing a finished look and crucial protection.
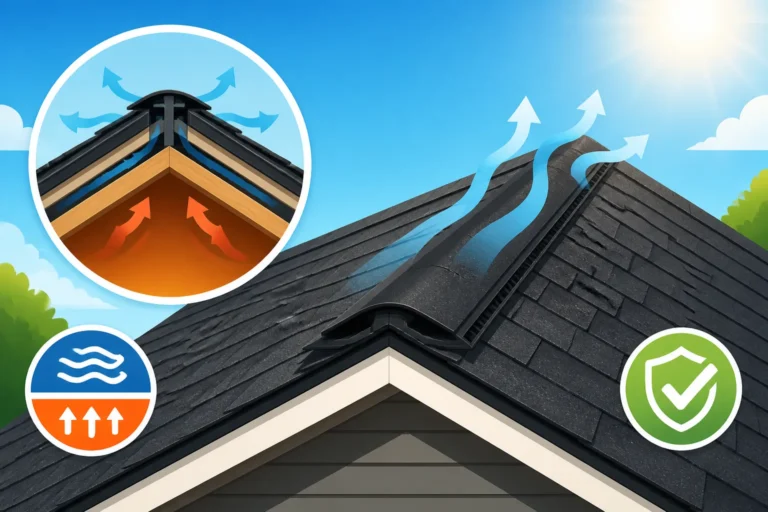
Simultaneously, if your contractor is upgrading or installing new ventilation, components like a ridge vent will be integrated. A ridge vent creates a continuous opening along the entire peak of your roof, working in conjunction with soffit vents at the eaves to create a natural airflow through your attic. This continuous air movement is essential for preventing heat and moisture buildup, which can cause premature roof deterioration, higher energy bills, and even structural issues. Understanding How Roof Ventilation Works highlights how critical proper airflow is for your roof's health and your home's efficiency.
Post-Installation: Clean-up, Inspections, and Final Steps
The last shingle is laid, the ridge vent is capped, and the tools are being packed away. But the job isn't quite finished yet. The post-installation phase is just as important as the installation itself, ensuring your property is restored, the work meets standards, and you understand how to protect your investment for years to come.
Thorough Site Clean-up
A professional roofing crew prides itself not just on quality installation but also on leaving your property cleaner than they found it. After the last shingle is down, the cleanup process begins in earnest. This involves gathering all leftover debris, shingle scraps, and, most importantly, meticulously scanning the entire property for nails.
Crews often use large magnetic rollers to pick up stray nails from your lawn, flowerbeds, and driveway. Despite their best efforts, it's always a good idea for homeowners to do a final sweep themselves, especially if you have pets or children who might step on a rogue nail. All tarps are removed, and any moved outdoor items are typically put back in their place. The goal is to ensure that the only sign of their presence is your beautiful new roof.
Final Inspections and Walkthroughs
Once the cleanup is complete, your contractor should perform a final walkthrough with you. This is your opportunity to inspect the finished work, ask any remaining questions, and ensure everything is to your satisfaction. Look for consistent shingle alignment, properly installed flashing, and a clean, aesthetically pleasing finish.
Beyond your personal inspection, if a permit was pulled, the local building inspector will usually conduct a final inspection to ensure the work meets all local codes and standards. This independent verification provides an extra layer of assurance that your new roof was installed correctly and safely. Many homeowners also opt for a third-party inspection, especially if they are unsure or want additional peace of mind.
Understanding Your New Roof Warranty
Before the final payment is made, ensure you receive all necessary warranty documentation. As mentioned earlier, you'll typically have both a manufacturer's warranty for the materials and the contractor's warranty for the workmanship. Confirm how to register the manufacturer's warranty, as many require online registration within a certain timeframe to be fully valid.
Understand the terms and conditions of both warranties: what they cover, what voids them, and how to file a claim if an issue arises. For example, some manufacturer warranties might require specific ventilation to be in place or limit the transferability to a new homeowner. Having a clear understanding of your Roofing Warranties: Manufacturer vs Workmanship is crucial for protecting your long-term investment.
What to Expect During the Project
Embarking on a roof replacement project can feel like a major undertaking for any homeowner. Knowing what to realistically expect throughout the process can help alleviate stress, manage expectations, and ensure a smoother experience for everyone involved. It's not always a quiet, pristine process, but a well-managed one will minimize disruptions.
Typical Project Timeline
Most standard asphalt shingle roof replacements on a single-family home can be completed within 1 to 3 days, assuming good weather conditions and no unexpected complications like extensive deck repair. This timeline includes the tear-off, deck inspection, material installation, and cleanup.
However, several factors can influence the duration. Larger homes, steep or complex rooflines with multiple valleys and dormers, or homes requiring significant roof decking replacement will naturally take longer. Bad weather, like heavy rain or strong winds, can also cause delays, as roofing work generally cannot proceed safely or effectively under adverse conditions. Your contractor should provide you with an estimated timeline and keep you informed of any potential delays. For more insight into project duration, you might appreciate our article on How Long a Roof Replacement Takes
Noise, Debris, and Access Considerations
A roof replacement is an inherently noisy construction project. Expect constant hammering, the sound of shingles being torn off, and crew members moving materials. If you work from home or have small children, planning to be out of the house during the most active hours can be beneficial.
While contractors take great care with cleanup, some debris is inevitable. Dust from old shingles can settle, and nails might occasionally escape the tarps. As discussed, magnetic sweeps are used, but homeowners should still be vigilant. Access around your home will also be restricted, with ladders, equipment, and the dumpster occupying space. It's important to keep clear of the work zones for safety.
Weather Contingencies
Weather is the biggest wild card in any outdoor construction project, and roofing is no exception. Rain, strong winds, and extreme temperatures can all impact the schedule and safety. Reputable contractors will closely monitor weather forecasts and have contingency plans in place.
If rain is expected, they will typically halt work, ensuring that any exposed sections of your roof are covered with tarps or temporary membranes to prevent water intrusion. This might mean starting earlier, working later, or even postponing work for a day or two. Trust your contractor's judgment on weather-related decisions; rushing a job in bad weather can compromise the quality and integrity of your new roof.
Disclaimer
Please remember that this article provides general information and recommendations. Every roofing project is unique, and local regulations, climate conditions, and individual home specifications can vary. Always consult with qualified and licensed roofing professionals for specific advice, estimates, and services tailored to your situation.