Cost of New Flashing and Drip Edge
The thought of replacing your roof can be overwhelming, and often, homeowners focus solely on the shingles themselves. But what about all those essential components that truly make your roof a watertight system? Overlooking critical elements like flashing and drip edge can lead to frustrating leaks and premature roof failure. This guide will meticulously break down the costs associated with installing new flashing and drip edge, helping you understand where your money goes and what to expect when budgeting for your asphalt roofing project.
Understanding the Unsung Heroes: Flashing and Drip Edge
Before we dive into the numbers, it's crucial to understand what flashing and drip edge are and why they're non-negotiable parts of a robust roofing system. These components might not be as visually striking as your chosen shingles, but they are absolutely vital for directing water off your roof and protecting the vulnerable edges and transitions. Without them, even the most expensive, high-quality shingles won't stand a chance against the elements.
What is Roof Flashing and Its Role?
Flashing refers to thin pieces of impervious material, usually metal, installed at various points on your roof where two surfaces meet, or where the roof transitions around protrusions. Think about areas like chimneys, skylights, vent pipes, valleys, and dormer walls. These are prime spots for water to seep in, and flashing acts as a barrier, creating a watertight seal that channels water away from these vulnerable intersections. Without properly installed flashing, rain and melting snow would exploit these gaps, leading to leaks, rot, and extensive damage to your home's interior. You can learn more about specific types by exploring information on what is flashing and why it matters.
Imagine a sudden downpour in your hometown of Atlanta, Georgia. If your chimney lacks proper flashing, water running down the bricks won't hit the shingles; it'll seep directly behind them, into your attic, and potentially down your walls. Flashing ensures that water is shed over the shingles, keeping everything beneath dry and secure. It's truly a silent guardian, working tirelessly to protect your home from moisture intrusion.
What is Drip Edge and Its Purpose?
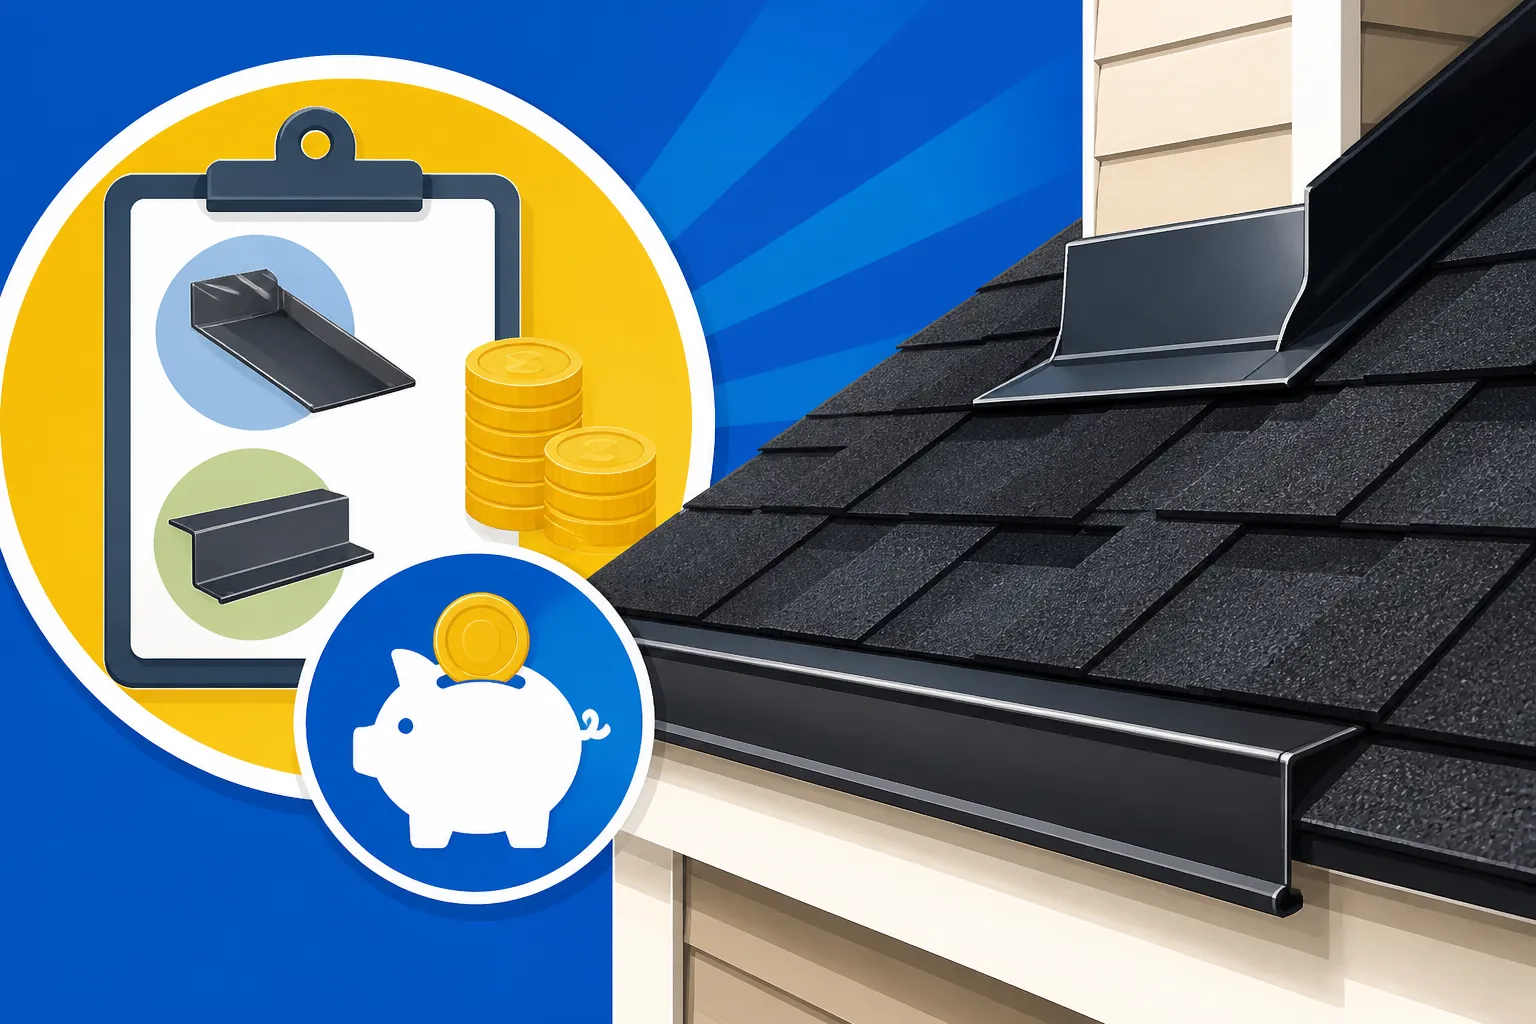
Drip edge is a non-corrosive metal strip installed along the edges of your roof, under the starter shingles and over the roof decking and fascia board. Its primary job is to create a small "drip" point, preventing water from wicking back underneath your shingles and rotting out the fascia and roof decking. It effectively extends the roof's edge, creating a clean path for water to flow directly into your gutters, or harmlessly off the edge of your home. It’s a seemingly small detail that makes a monumental difference in protecting your roof's foundation. For a deeper dive, check out our guide on what is drip edge and why it matters.
Think about what happens when water runs down a flat surface – it often clings to the underside and can travel horizontally. Without drip edge, this clinging water would sneak under your shingles, saturating your roof deck and fascia, especially during heavy rains common in places like Seattle, Washington. This moisture leads to deterioration, mold, and costly repairs down the line. Drip edge is the elegant solution that ensures every drop of water makes its intended exit.
Why Flashing and Drip Edge Are Absolutely Essential
It's easy to view flashing and drip edge as "extra" expenses when you're already budgeting for a substantial project like a full roof replacement. However, cutting corners here is a false economy that almost always leads to bigger problems and more expensive repairs down the road. These components are foundational to your roof's long-term health and your home's structural integrity.
Preventing Leaks and Water Damage
The most obvious and immediate benefit of proper flashing and drip edge is leak prevention. Water is the archenemy of any home, and these metal barriers are your first line of defense. Every seam, every penetration, every edge on your roof is a potential entry point for water, and without dedicated protection, it will find its way in.
Consider the complexity of a roof around a chimney. The joint where the chimney masonry meets the roof slope is incredibly vulnerable. Without expertly installed step flashing and counter flashing, water would effortlessly cascade down the chimney and straight into your attic. This isn't just about a minor drip; persistent leaks can damage insulation, ceilings, electrical wiring, and foster hazardous mold growth, creating an unhealthy living environment and necessitating expensive interior repairs on top of the roof fixes. The true cost of a roof leak extends far beyond the repair itself.
Protecting Your Roof's Structure and Extending Its Lifespan
Beyond preventing interior leaks, flashing and drip edge play a critical role in preserving the structural components of your roof, such as the fascia boards, rafter ends, and roof decking. When water is properly channeled off the roof, these wooden elements remain dry and intact.
Without drip edge, for instance, water can run down the fascia board, leading to paint peeling, wood rot, and a weakened structure. This not only looks unsightly but can also compromise the integrity of your gutters, causing them to pull away from the house. Similarly, if flashing fails or is absent, water can soak into the roof decking, leading to softened plywood or OSB, which can eventually sag or even collapse. Replacing roof decking can add a significant unexpected cost to a roofing project. Investing in quality flashing and drip edge from the start helps protect these critical, unseen parts of your roof, ultimately extending the overall lifespan of your asphalt shingle roof.
Factors Influencing New Flashing and Drip Edge Costs
When you're looking at the cost of new flashing and drip edge, it's not a one-size-fits-all number. Several variables come into play, influencing the final price tag. Understanding these factors will help you decipher quotes and make informed decisions, ensuring you're comparing apples to apples when you receive estimates. Reputable contractors, like those you can find through Modernize, will clearly itemize these elements in their proposals.
Material Selection and Quality
The type of material chosen for both flashing and drip edge significantly impacts the cost. While they all serve the same fundamental purpose, their durability, aesthetic appeal, and price points vary considerably.
- Aluminum: This is a popular and cost-effective choice for both flashing and drip edge. It's lightweight, resistant to rust, and available in various colors to match your existing roof or trim. Aluminum flashing is often used for vent pipes and step flashing, while aluminum drip edge is common due to its balance of price and performance. It's a solid, reliable choice for most homeowners.
- Galvanized Steel: Another common and affordable option, galvanized steel is steel coated with a layer of zinc to prevent rust. It's durable and strong, often used for valley flashing and drip edge. While effective, it can be heavier and may not offer the same color variety as aluminum.
- Copper: This is the premium option. Copper flashing and drip edge are highly durable, corrosion-resistant, and aesthetically pleasing, developing a beautiful patina over time. However, copper comes with a significantly higher price tag, often 3 to 5 times more expensive than aluminum or galvanized steel. It's typically chosen for high-end homes, historic properties, or when homeowners want a specific architectural look.
- Lead: Primarily used for chimney flashing, lead is highly malleable, allowing it to be easily shaped to conform to irregular surfaces. It's very durable but also more expensive and heavier than aluminum.
The quality of the material within each type also matters. Thicker gauges of metal will generally cost more but offer superior durability and resistance to bending or damage over time.
Roof Complexity and Features
The design and features of your roof play a huge role in determining the amount and type of flashing required, and thus, the overall cost. A simple, unobstructed gable roof will naturally be less expensive to flash than a complex roof with multiple dormers, skylights, and valleys.
- Number of Valleys: Valleys are sections where two roof planes meet, forming an internal angle. These are crucial areas for water management and require continuous flashing, either open (where metal is exposed) or closed (where shingles cover the metal). More valleys mean more flashing material and more labor-intensive installation. A home in the hilly areas of Tennessee might have more complex rooflines with numerous valleys compared to a more standard ranch home.
- Chimneys and Skylights: Any penetration through the roof deck—be it a chimney, skylight, or even a plumbing vent—demands specialized flashing. Chimneys, for instance, require multiple pieces of flashing (base flashing, step flashing, and counter flashing) to create a watertight seal. Skylights also need specific kits to ensure they don't leak. The more of these features your roof has, the higher your flashing costs will be.
- Dormers and Wall Intersections: Where a vertical wall meets a roof (like a dormer or an addition), step flashing is essential to prevent water from running down the wall and behind the shingles. Each linear foot of these intersections adds to the material and labor involved.
- Roof Pitch: While it doesn't directly impact the material cost of flashing or drip edge, a steep roof pitch can significantly increase labor costs. Working on a steep roof is more hazardous and strenuous, requiring specialized safety equipment and more time, which translates to a higher hourly rate for roofers. Our guide on the steep roof cost premium delves into this further.
Labor Rates and Regional Differences
Labor is often the largest component of any roofing project, and installing flashing and drip edge is no exception. It requires skilled workmanship to ensure a watertight seal, and rushing the job can lead to costly mistakes.
- Hourly Rates: Roofer labor costs can vary widely depending on your geographic location, the specific contractor's experience, and the demand for roofing services in your area. Urban areas like New York City or Los Angeles typically have higher labor rates than rural communities.
- Installation Time: Complex flashing installations, such as those around large chimneys or multiple intricate valleys, take considerably longer than installing standard drip edge along straight eaves. A skilled roofer will meticulously cut, bend, and seal each piece of flashing, a process that demands precision and time. This is why you'll see a distinct difference in the labor portion of estimates for a simpler roof versus one with numerous architectural features. When evaluating proposals, make sure to read and compare roofing estimates carefully, looking at how labor is itemized.
- Regional Variations: The cost of living and local market conditions directly influence roofing costs. For example, the cost of asphalt roof replacement in California can be significantly higher than the cost of asphalt roof replacement in Ohio, partly due to differences in labor wages and material shipping costs. Even within a state, prices can fluctuate between major metropolitan areas and smaller towns.
Breaking Down Flashing Costs
Now that we understand the factors at play, let's dive into the typical costs associated with different types of flashing you might encounter during a roof replacement. Remember, these are general ranges, and your specific project costs will depend on the materials chosen and the complexity of your roof.
Step and Counter Flashing for Chimneys and Walls
Chimneys and any vertical walls that intersect with your roof (like dormer walls) are critical areas that require comprehensive flashing. This usually involves a combination of step flashing and counter flashing.
- Step Flashing: These are individual L-shaped pieces of metal, woven in with each course of shingles, bending up the side of the chimney or wall. They act as mini-dams, directing water down and over the next shingle. Installing these correctly is a meticulous process, as each piece needs to be properly angled and secured.
- Counter Flashing: This is installed over the step flashing, embedded into the masonry (or wall siding) and then bent down over the step flashing. Its purpose is to protect the top edge of the step flashing, preventing water from running behind it. For chimneys, this often means cutting a reglet (a groove) into the mortar joints to embed the counter flashing securely. This adds another layer of complexity and labor.
For a typical chimney (let's say 4' x 4'), you might expect to pay anywhere from $300 to $800 for aluminum or galvanized steel step and counter flashing installation. For larger or more intricate chimneys, or if you opt for copper flashing, the cost could easily climb to $1,000 to $2,500+. For dormer walls or other wall-to-roof intersections, the cost is usually calculated per linear foot, ranging from $10 to $30 per linear foot for materials and installation. The quality of the installation here is paramount; a shoddy job almost guarantees a leak.
Valley Flashing
Valleys are formed where two roof slopes meet, creating a channel for water to flow down. These areas experience a high volume of water runoff and require robust protection. Valley flashing is designed to prevent water from penetrating the roof deck at these critical junctures.
There are generally two types of valley installations:
- Open Valleys: These are the most common and typically involve a continuous strip of metal (aluminum, galvanized steel, or copper) running down the center of the valley, exposed to the elements. Shingles are then trimmed back from the edge of the metal, leaving a visible channel. The metal protects the underlying structure and provides a slick surface for water to flow freely. For open valley flashing, expect costs to range from $15 to $40 per linear foot, depending on the material.
- Closed Valleys: In this method, the shingles are woven or cut to extend across the valley, concealing the flashing material underneath. While aesthetically seamless, this can sometimes make repairs more difficult. The cost for material is lower as less exposed metal is needed, but labor can be more intensive due to the precise shingle cutting and weaving.
For a typical home with 2-3 valleys, the cost for valley flashing could range from $200 to $800 for aluminum or galvanized steel, or substantially more for copper. An example of this would be a multi-gabled home in a rainy climate like Portland, Oregon, where strong valley protection is absolutely essential. Our article on the cost of a roof with multiple valleys goes into more detail.
Pipe and Vent Flashing
Any pipe or vent stack that penetrates your roof needs a watertight seal to prevent leaks. This includes plumbing vents, furnace vents, and radon mitigation pipes.
- Vent Pipe Flashing: These are pre-formed metal or plastic sleeves that slide over the pipe and are integrated into the shingle layers. They have a rubber boot or collar that fits snugly around the pipe itself. While individual units are relatively inexpensive (often $10-$30 per boot), the labor to properly install them, ensuring they are woven into the shingle pattern and sealed correctly, adds to the cost.
For a standard roof, you might have anywhere from 2 to 5 vent pipes. The cost for installing each vent pipe flashing typically runs between $50 to $150 per pipe, including both the boot and the labor. This includes ensuring proper sealing around the pipe and integrating it into the surrounding shingle system.
Other Flashing Types
Beyond the major areas, other flashing components might be necessary depending on your roof's design:
- Drip Pans or Skylight Flashing Kits: If you have skylights, they come with specialized flashing kits designed to integrate seamlessly with the roof. These kits are usually material-specific to the skylight brand (e.g., Velux) and can add $100 to $400 per skylight for the kit itself, plus installation labor.
- Roof-to-Wall Flashing (Apron Flashing): Similar to step flashing, but used for longer, continuous wall sections, like where a lower roof meets a taller wall.
- Kick-out Flashing: A small, angled piece of flashing installed at the bottom of a roof-to-wall intersection (especially where a gutter ends) to direct water safely into the gutter and away from the wall, preventing rot in the fascia and siding. This small piece is crucial and often overlooked, but costs relatively little (e.g., $30-$75 installed per piece).
The table below provides a general overview of typical flashing costs per linear foot or per unit for common materials:
| Flashing Type | Material | Average Cost Per Linear Foot (Installed) | Average Cost Per Unit (Installed) | Notes |
|---|---|---|---|---|
| Step Flashing (Walls/Dormers) | Aluminum/Galvanized | $10 – $25 | N/A | Labor-intensive, woven with shingles |
| Step Flashing (Walls/Dormers) | Copper | $30 – $60 | N/A | Premium choice, long-lasting, develops patina |
| Counter Flashing (Chimney) | Aluminum/Galvanized | N/A | $300 – $800 (for average chimney) | Requires cutting into masonry, combined with step flashing |
| Counter Flashing (Chimney) | Copper | N/A | $1,000 – $2,500+ (for average chimney) | Significantly higher for copper |
| Valley Flashing (Open) | Aluminum/Galvanized | $15 – $40 | N/A | High water flow area, critical installation |
| Valley Flashing (Open) | Copper | $40 – $80 | N/A | Durable, distinctive look |
| Pipe/Vent Flashing | Rubber/Metal (pre-fab) | N/A | $50 – $150 (per pipe) | Includes boot and installation |
| Skylight Flashing Kit | Manufacturer-specific | N/A | $100 – $400 (per skylight) | Material cost only, plus installation labor |
| Kick-out Flashing | Aluminum/Galvanized | N/A | $30 – $75 (per unit) | Small but vital for diverting water away from walls |
Remember, these figures are estimates and can fluctuate based on your location, the specific contractor, and the current market prices for materials.
Breaking Down Drip Edge Costs
Drip edge, while often simpler in its application than complex flashing, is no less important. Its cost also varies based on material, profile, and installation complexity, particularly if combined with other edge-of-roof components.
Drip Edge Material Options
Just like flashing, drip edge comes in several material types, each with its own cost implications and benefits. The material you choose should ideally match or complement your other roofing components and your home's exterior.
- Aluminum Drip Edge: The most common choice due to its excellent balance of cost-effectiveness, durability, and rust resistance. It's lightweight and easy for installers to work with. Aluminum drip edge often comes pre-painted in various colors like white, brown, or black, allowing for a good aesthetic match with your trim or shingles. You can typically find it in gauges from .019 to .024 inches thick. It’s a reliable choice for most standard asphalt shingle installations.
- Galvanized Steel Drip Edge: A sturdier and more rigid option compared to aluminum. It's also rust-resistant thanks to its zinc coating. Galvanized steel is often favored in areas prone to high winds or where a more robust edge is desired. It typically costs slightly more than aluminum but offers enhanced durability. It generally comes in fewer color options than aluminum, often a standard gray.
- Copper Drip Edge: The most expensive, but also the most durable and aesthetically striking. Copper drip edge is highly resistant to corrosion and weathers beautifully over time, developing a distinctive patina. It’s a premium choice, often selected for luxury homes or those with other copper accents. Due to its cost, it's less common for an entire roof but might be used selectively for aesthetic reasons.
When selecting a material, consider your home's style, the local climate conditions (e.g., coastal areas might benefit from more corrosion-resistant options), and your overall budget.
Drip Edge Profiles and Installation
Drip edge isn't just a flat piece of metal; it comes in different profiles, which affect how it functions and how it's installed. The most common profiles are Type C, Type D, and Type F.
- Type C Drip Edge (L-shaped): This is the simplest and most common profile. It has a flat top flange that sits on the roof decking and a downward-angled flange that extends over the fascia board. It creates a simple, effective drip edge. This type is generally the least expensive to purchase and install.
- Type D Drip Edge (T-shaped or Hemmed): Also known as a "T-style" or "extended" drip edge, this profile features a wider top flange and a more pronounced drip leg, often with a small kick-out or hem at the bottom. The wider top flange provides better protection to the fascia and deck, and the hemmed bottom adds rigidity and a cleaner drip line, preventing water from clinging. Type D is often a slightly more expensive but superior choice, especially in areas with heavy rainfall or where extra protection for the fascia is desired.
- Type F Drip Edge (Gutter Apron): This profile features an extended top flange designed to fit under the first course of shingles and extend further out over the gutter, effectively acting as a "gutter apron." It’s particularly useful for directing water into wide gutters and preventing splashback onto the fascia. This can be more complex to install and is often used in specific scenarios.
The installation of drip edge typically involves fastening it to the roof decking along the eaves (the horizontal edges) before the underlayment is laid, and along the rakes (the sloped edges) over the underlayment. Proper nailing and overlap are crucial.
For standard aluminum drip edge (Type C or D), expect to pay between $3 to $6 per linear foot, installed. For galvanized steel, the cost might be slightly higher, in the $4 to $8 per linear foot range. If you opt for premium copper drip edge, prepare for costs ranging from $15 to $30 per linear foot or even more, due to both the material cost and the specialized labor often required for copper work.
A common single-story ranch home, let's say 1,500 square feet, might have roughly 150-200 linear feet of eaves and rake edges. This translates to an installed drip edge cost of approximately $450 to $1,200 for aluminum or galvanized steel. This price range will cover both materials and labor, ensuring your roof edges are well-protected.
Total Cost Considerations and Budgeting
When you're planning a full roof replacement, the costs for flashing and drip edge are integrated into the overall project. It's not usually a separate line item you get to opt-out of, because these are fundamental protective elements. However, understanding their individual contributions to the total can help you make sense of your estimates.
Combining Flashing and Drip Edge Costs into Your Roof Project
For a typical asphalt shingle roof replacement, flashing and drip edge costs usually represent about 5% to 15% of the total material cost, and a higher percentage of the specialized labor cost. They are generally considered part of the "components" or "accessories" section of your roofing estimate. When considering how much an asphalt shingle roof costs, remember that these details are embedded.
Let's imagine a hypothetical 2,000 sq ft house with a moderately complex roof in a suburban area of Dallas, Texas.
- Roof Area: A 2,000 sq ft house might have a roof surface area of 2,200 – 2,800 square feet, or 22-28 roofing squares.
- Drip Edge: Let's assume 200 linear feet of drip edge. At $5 per linear foot (mid-range aluminum), this is $1,000.
- Flashing: A chimney ($500), two roof valleys (50 linear feet total at $25/LF = $1,250), and four pipe vents ($100 each = $400). Total flashing: $2,150.
- Total for Drip Edge & Flashing (estimated): $1,000 + $2,150 = $3,150.
If the total roof replacement cost for this home is, say, $12,000 to $18,000, then $3,150 represents a significant but necessary portion, roughly 17-26% of the material and specialized labor. This illustrates why focusing solely on shingle price can be misleading. Always remember to factor in the full roofing system explained when budgeting.
Getting Accurate Estimates and What to Look For
The best way to get an accurate understanding of your costs is to obtain detailed, itemized estimates from at least three different reputable roofing contractors. Don't just ask for a lump sum; insist on a breakdown that clearly shows the costs for:
- Shingles: Material and installation.
- Underlayment: Type (synthetic vs. felt) and installation.
- Flashing: Itemized by type (chimney, valley, vent) and material.
- Drip Edge: Material and linear footage.
- Roof Tear-Off and Disposal: If applicable.
- New Roof Decking: If needed.
- Ventilation: Ridge vents, soffit vents, etc.
- Labor: Separated from materials where possible.
- Permit Fees: Always ask who pulls the permit.
When comparing estimates, don't automatically go for the lowest bid. A significantly lower price might indicate a contractor is cutting corners on materials (like using thinner gauge drip edge) or, more dangerously, on proper installation techniques for flashing. Ask specific questions about the materials they plan to use for flashing and drip edge. Are they using pre-bent pieces, or will they custom-bend metal on site for a more precise fit? What type of sealant will they use around flashing? These details matter for long-term performance. Our guide on what a roofing estimate should include offers more advice.
DIY vs. Professional Installation
While some small, simple repairs might be suitable for a DIY enthusiast, installing new flashing and drip edge, especially as part of a full roof replacement, is almost always best left to professionals.
- DIY Appeal: The allure of saving money on labor can be strong. Basic drip edge installation might seem straightforward for a handy homeowner.
- DIY Risks: However, mistakes in flashing or drip edge installation are notorious for causing leaks. It requires precision cuts, proper layering with shingles, correct sealing techniques, and working safely at heights. Improperly installed flashing can lead to water intrusion that damages not only your home but also voids your shingle manufacturer's warranty. The cost of fixing a DIY error often far outweighs the initial savings.
- Professional Expertise: Experienced roofers understand building codes, proper water flow dynamics, and manufacturer installation guidelines. They have the specialized tools, training, and insurance to do the job correctly and safely. Many manufacturers, like GAF, Owens Corning, and CertainTeed, require installation by their certified contractors for their enhanced warranties to be valid.
It's tempting to think you can save a few bucks, but when it comes to the integrity of your roof, the risks of DIY flashing and drip edge installation far outweigh any potential savings. A professional installation ensures your roof is properly protected and that your warranty remains intact. If you're looking for a qualified professional, platforms like Modernize can help you connect with local contractors who are experienced in asphalt roofing.
Conclusion: Don't Skimp on the Details
Replacing a roof is a significant investment, and it's natural to want to optimize every dollar. However, skimping on critical, protective components like flashing and drip edge is a classic example of being "penny wise and pound foolish." These elements are not optional upgrades; they are fundamental to the long-term performance, durability, and watertight integrity of your entire asphalt roofing system.
While their costs might seem like a small line item compared to the overall expense, their value in preventing leaks, protecting your home's structure, and extending your roof's lifespan is immeasurable. By understanding the different material options, profiles, and the impact of roof complexity and labor rates, you'll be better equipped to interpret estimates and ensure your new roof is built to last. Invest in quality flashing and drip edge, and you'll protect your home from the elements for decades to come, providing true peace of mind.
Disclaimer
Please note that the cost estimates provided in this article are general averages and can vary significantly based on your geographic location, the specific materials chosen, the complexity of your roof, and the roofing contractor you select. Always obtain multiple detailed quotes from licensed and insured professionals for an accurate assessment of your project costs. This information is intended for educational purposes only and should not be considered professional financial or construction advice.