Cost of Roof Flashing Replacement
Few things are as unnerving as discovering a water stain on your ceiling or feeling a drip during a rainstorm, especially when you suspect the problem might be your roof's flashing. It’s a common frustration, often leading to immediate panic about the potential for expensive repairs. This guide is here to walk you through the ins and outs of roof flashing replacement costs, helping you understand what flashing is, why it fails, what factors drive the price, and how to approach fixing it so you can get back to a dry, worry-free home.
Understanding Roof Flashing and Why It Fails
Roof flashing is one of those unsung heroes of your roofing system, often overlooked until it stops doing its job. It's designed to divert water away from critical areas of your roof, preventing it from seeping into your home. When it fails, the consequences can be significant, leading to leaks, rot, and even structural damage.
What Exactly Is Roof Flashing?
Think of roof flashing as the waterproofing detail around anything that protrudes from your roof, or wherever two roof planes meet, or where the roof meets a wall. Without it, water would simply run down these obstructions and directly into your house. It’s a crucial component of how shingles protect against water, acting as a secondary line of defense in vulnerable spots.
Historically, flashing was often made of galvanized steel, but today you'll find a variety of materials used, each with its own benefits and cost implications. Aluminum is a popular choice for its affordability and resistance to rust, while copper flashing is often used for its aesthetic appeal and incredible longevity, though it comes at a much higher price point. Other options include lead (especially around chimneys for its malleability), and occasionally even plastic or rubber compounds for vent boots.
There are several types of flashing, each tailored to a specific part of your roof:
- Step Flashing: These are L-shaped pieces used where a roof meets a vertical wall, like a dormer or chimney. Each shingle course has its own piece of step flashing, shingled in for maximum water shedding. You can learn more about what is step flashing and why it matters.
- Valley Flashing: This type protects the valleys of your roof, where two roof planes meet. These are high-flow areas for water, so robust flashing (often metal or a special ice-and-water shield) is essential. You can often see these as metal strips running down the "V" of your roof.
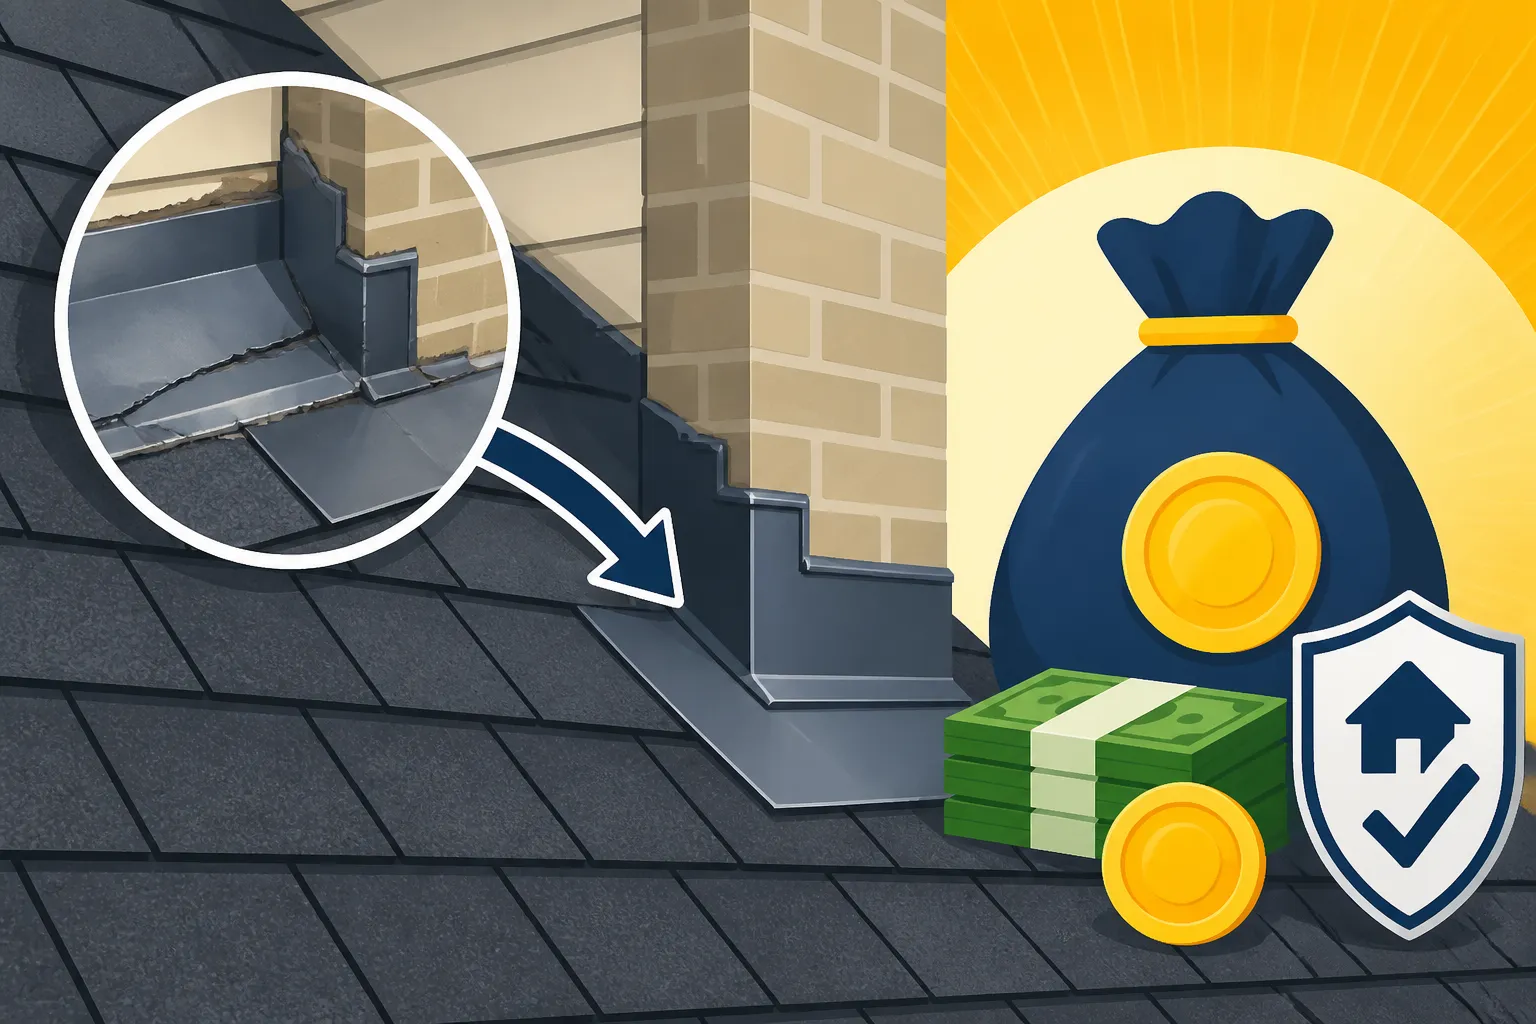
- Chimney Flashing: This is perhaps the most complex, requiring base flashing, step flashing, and counter flashing to create a watertight seal around the chimney.
- Vent Pipe Flashing (Pipe Boots): These are rubber or metal boots that fit over plumbing vents, sealing the area where the pipe penetrates the roof.
- Skylight Flashing: Specialized kits are used to seal around skylights, often incorporating a combination of materials and designs.
- Drip Edge: While technically a type of flashing, drip edge is installed along the edges of your roof to direct water off the roof and into the gutters, protecting the fascia and preventing water from getting underneath the shingles. It's a key part of the overall water management system.
Each of these elements works together as part of a full roofing system explained to keep your home dry and protected.
Common Reasons Flashing Needs Replacing
Flashing doesn't just spontaneously fail; there are usually clear reasons why it gives out, often after years of silent, diligent service. Understanding these causes can help you identify problems early and prevent further damage.
One of the most common culprits is simply aging and wear. Metal flashing, even galvanized steel, can corrode or rust over time, especially in areas with consistent moisture or salty air. Rubber seals on vent pipes can dry out, crack, and become brittle due to constant exposure to UV rays and temperature fluctuations. This gradual degradation often leads to small leaks that can escalate into bigger issues if not addressed.
Poor installation is another frequent cause of flashing failure. If a roofer cuts corners, uses the wrong type of nails, forgets to seal critical joints, or doesn't properly bend the metal to fit the contours of the roof, the flashing's effectiveness will be severely compromised. I've seen countless homeowners deal with leaks just a few years after a new roof, only to find out the flashing was never installed correctly in the first place. This is a common sign of a bad roofing job, and why choosing a reputable contractor is so important.
Storm damage is an obvious but impactful factor. High winds can lift and bend metal flashing, particularly around vulnerable edges or where it's not adequately secured. Hail can dent and compromise the integrity of metal flashing, and even heavy rain can exacerbate existing weaknesses. If you've recently had a significant storm, it's always a good idea to check for signs of roof damage, especially around flashing.
Finally, house settling or shifting can put stress on flashing, causing seals to crack or metal to pull away from surfaces. Over time, the constant expansion and contraction of building materials due to temperature changes can also weaken the flashing's attachment points or sealant, leading to small gaps where water can penetrate. Even a minor roof leak but no visible damage might be an indication of compromised flashing, as water could be seeping in slowly.
Factors Influencing Roof Flashing Replacement Costs
When you’re facing a potential flashing replacement, it’s rarely a one-size-fits-all cost. Several variables come into play that can significantly impact the final price tag. Understanding these factors will help you make sense of the quotes you receive and budget accordingly.
Type and Material of Flashing
The material used for your new flashing will be one of the biggest cost drivers. Different metals have different price points, and their workability also affects labor costs.
- Aluminum: This is generally the most economical choice. It's lightweight, rust-resistant, and relatively easy to cut and bend, which keeps labor costs down. It's a good all-around option for most asphalt shingle roofs.
- Galvanized Steel: Another common and affordable option. It's sturdy and treated to resist rust, but it can eventually corrode, especially if the galvanized coating is scratched or damaged.
- Copper: Copper is the crème de la crème of flashing materials. It's incredibly durable, resistant to corrosion, and develops a beautiful patina over time. However, it's significantly more expensive than aluminum or steel, both for the material itself and for the specialized labor required to work with it. Many roofers who work with copper are true artisans, commanding higher rates.
- Lead: Often used around chimneys due to its exceptional malleability, allowing it to be easily shaped to complex contours. While effective, lead is heavier and its cost can be higher, plus some contractors may have specific safety protocols for handling it.
- Rubber/Plastic Composites: Primarily seen in vent pipe boots, these are relatively inexpensive. The cost comes more from the installation and ensuring a proper, long-lasting seal around the pipe.
Beyond the raw material, the type of flashing also matters. Replacing simple vent pipe flashing (often called a "pipe boot") is usually quicker and less expensive than, say, a full chimney re-flash, which involves multiple layers of metal and sealants. Valley flashing, depending on its length and complexity, can also be a more involved job. Custom-fabricated flashing, especially for unique architectural features or very large chimneys, will naturally cost more than readily available pre-formed pieces.
Here's a quick look at how material costs can stack up:
| Flashing Material | Typical Material Cost per Linear Foot (Approx.) | Notes |
|---|---|---|
| Aluminum (basic) | $1 – $3 | Lightweight, rust-resistant, common |
| Galvanized Steel | $1 – $4 | Durable, but can rust if coating is compromised |
| Copper | $5 – $20+ | High durability, premium aesthetic, higher labor cost |
| Lead (for chimneys) | $4 – $10+ | Highly malleable, specialized use |
| Rubber/Plastic (boots) | $10 – $30 per unit | For vent pipes; unit cost rather than linear foot |
Note: These are material costs only and do not include labor or other project components.
Scope of the Job and Accessibility
The extent of the flashing problem is a major determinant of cost. Are you dealing with a single, leaking pipe boot, or does an entire chimney need to be re-flashed? A small, isolated repair will naturally be far less expensive than a comprehensive replacement of multiple flashing sections across your roof.
Accessibility to the affected area plays a huge role in labor costs. If the flashing is on a easily reachable section of a single-story ranch home with a low roof pitch, the job will be much faster and safer for the crew. However, if the damaged flashing is on a steep roof cost premium or on a multi-story roof cost premium home, especially one with complex angles, dormers, or high peaks, roofers will need more specialized equipment (taller ladders, scaffolding) and will take more time due to safety precautions. This directly translates to higher labor expenses.
Furthermore, if the flashing replacement reveals underlying issues, such as rotten roof decking or damaged fascia boards, the scope of the job will inevitably expand. Discovering compromised wood underneath the flashing is a common scenario, and then you're looking at a roof decking replacement cost in addition to the flashing work. This can significantly increase the total project price, turning a seemingly simple repair into a more involved restoration.
Labor Rates and Regional Differences
The cost of labor is another significant component of roof flashing replacement, and it can vary wildly depending on where you live. Roofing professionals in high cost-of-living areas, like major metropolitan centers in California or New York, will naturally charge more per hour than those in more rural or lower cost-of-living states like Ohio or Tennessee. This is a common theme in construction, reflecting everything from local wages to operational overhead. You can expect regional labor rates for roofing to fluctuate quite a bit.
The complexity of the work also dictates the labor rate. A roofer specializing in intricate custom copper flashing work, which requires specific skills and tools, will charge more than a general asphalt shingle installer performing a standard vent boot replacement. The skill level and experience of the crew directly influence the efficiency and quality of the installation, making it worth paying for an experienced contractor, even if their hourly rate seems higher. Companies like Modernize can help you connect with qualified professionals in your area who understand these nuances.
For example, a standard vent pipe flashing replacement might take a skilled roofer 1-2 hours of actual installation time, plus travel and setup. A full chimney re-flash, however, could take a team a full day or more, especially if custom bending of metal is involved. The more time and expertise required, the higher the labor cost will be. When you’re looking at estimates, make sure to ask for a breakdown of labor versus materials to better understand where your money is going.
Average Costs for Different Flashing Replacements
Let's get down to some numbers. While it's tough to give exact figures without seeing your specific situation, we can explore typical cost ranges for different types of flashing replacement projects. These averages include both material and labor, giving you a more realistic picture.
Spot Flashing Repairs vs. Comprehensive Replacement
Most homeowners needing flashing work are dealing with a localized issue rather than a complete roof overhaul.
- Vent Pipe Flashing (Pipe Boot) Replacement: This is usually the least expensive flashing repair. A single pipe boot replacement typically costs $150 to $400. The higher end might include minor decking repair or if the pipe is in a hard-to-reach area on a steep or tall roof. This kind of repair is often quick and relatively straightforward.
- Step Flashing Repair/Replacement (Localized): If you have a leak around a dormer or wall, it might just be a few pieces of step flashing that have failed. Replacing a small section of step flashing might run $200 to $600, depending on the number of pieces and accessibility. This is a common flashing leak repair scenario.
- Skylight Flashing Replacement: Skylights are notorious for leaks if their flashing fails. A full re-flashing of an existing skylight, which often involves removing surrounding shingles and careful resealing, can cost anywhere from $400 to $1,000 per skylight. If the skylight itself also needs replacement, that cost will be additional.
- Chimney Flashing Replacement: Chimneys are complex and require several types of flashing. A full chimney re-flash is a more involved job, often costing $500 to $1,500. This often includes base flashing, step flashing, and counter flashing, plus careful sealing. If the chimney crown or mortar also needs repair, that would be a separate cost.
- Valley Flashing Replacement: Replacing the flashing in a roof valley, especially if it's a long one or involves multiple valleys, can be a substantial job. This can range from $400 to $1,200 per valley, depending on the material (metal valleys often cost more for material and installation) and length. These areas are critical for water diversion, so proper installation is paramount.
It's important to remember that these are for spot repairs. If you're undertaking a full roof replacement, the cost of roof flashing replacement will be integrated into the overall estimate for how much does an asphalt shingle roof cost. In that scenario, new flashing is a standard part of the job and won't be an "extra" charge unless you upgrade to a more premium material like copper.
Hidden Costs and Unexpected Issues
While you budget for the visible work, it's wise to prepare for the unexpected, as these can easily drive up the total cost of your roof flashing replacement. Roofing projects, even seemingly small ones, have a way of revealing underlying problems.
The most common hidden cost is rotted wood or damaged roof decking underneath the flashing. Flashing leaks, even minor ones, often go unnoticed for extended periods, allowing water to penetrate the roof structure and cause the wood to rot. When the old flashing is removed, a roofer might discover soft, spongy, or visibly rotted plywood or OSB. This necessitates a roof decking replacement cost, which can add hundreds, or even thousands, of dollars to your project, depending on the extent of the damage. You might find yourself needing a full cost to replace roof decking and shingles if the problem is widespread.
Other potential hidden costs include:
- Underlayment Damage: The underlayment (the protective layer beneath your shingles) around the flashing area might also be compromised by water. Replacing sections of synthetic vs felt underlayment adds to the material and labor costs.
- Structural Damage: In severe, long-standing leak cases, water damage might extend beyond the decking to rafters or ceiling joists, requiring more extensive and costly structural repairs.
- Mold Remediation: Moisture intrusion often leads to mold growth in the attic or wall cavities, which will require professional mold remediation services.
- Permit Costs: While small, localized flashing repairs typically don't require a permit, extensive re-flashing, especially as part of a larger repair, might. The cost of a roofing permit varies by locality but generally ranges from $75 to $500. It’s always best to check with your local building department or ask your contractor "Do you need a permit to replace a roof?". A reputable contractor will handle this for you.
- Disposal Fees: Removing old flashing and any damaged materials will incur disposal fees, though these are usually included in the overall estimate.
Always discuss potential hidden costs with your contractor upfront. A good roofer will mention these possibilities and outline how they handle such discoveries, giving you a clearer picture of the potential financial outlay.
Choosing a Contractor and Getting Estimates
Replacing roof flashing isn't a DIY job for most homeowners. The precision required to properly install flashing, especially around complex areas like chimneys or valleys, demands expertise. A poorly installed piece of flashing can lead to significant water damage down the line, costing you far more in the long run than professional installation would have.
Importance of Professional Installation
Hiring a professional for flashing replacement is paramount. Here’s why:
- Expertise and Experience: Professional roofers understand roof anatomy and how to properly install each type of flashing to create a watertight seal. They know the correct nailing patterns, sealing techniques, and material compatibility. They understand what is flashing and why it matters in a way a casual handyman might not.
- Proper Tools and Equipment: Roofers have the right tools for the job, from metal bending brakes to specialized sealants and safety equipment.
- Safety: Working on a roof, especially a steep or multi-story one, is dangerous. Professionals are trained in safety protocols and have the necessary harnesses and equipment to perform the work safely. What happens if a roofer gets injured on your property if they're not properly insured? It's a risk you don't want to take.
- Warranty Protection: Many shingle manufacturers' warranties require that their products (and the entire roofing system, including flashing) be installed by a certified professional to remain valid. A faulty flashing installation could void portions of your how shingle warranties work.
- Licensed and Insured: Always ensure your contractor is licensed and insured roofers why it matters. This protects you from liability in case of accidents or property damage during the job.
Attempting a DIY flashing repair, without the proper knowledge or tools, often leads to bigger problems. I've seen homeowners try to seal a leak with copious amounts of caulk, only for the problem to resurface worse than before because the underlying issue was never properly addressed.
Getting and Comparing Quotes
To ensure you get a fair price and a quality job, it's crucial to get multiple estimates. I always recommend getting at least three, if not more, quotes from different reputable roofing contractors in your area.
Here's how to approach the process:
- Find Reputable Contractors: Start by asking for recommendations from friends, family, or neighbors. You can also use online services like Modernize, which connect homeowners with local, pre-screened roofing professionals. This saves you the headache of sifting through countless listings yourself.
- Schedule On-Site Inspections: Insist on an in-person inspection. Satellite estimates are great for overall roof size, but flashing issues require a close look to assess the damage accurately. During the visit, point out all your concerns and ask questions to ask a roofing contractor before hiring.
- Request Detailed, Itemized Quotes: A good estimate won't just be a lump sum. It should clearly break down:
- Material costs: Specific type and quantity of flashing, sealants, nails, underlayment, etc.
- Labor costs: How many hours or days, and the hourly rate.
- Permit fees: If applicable.
- Disposal fees.
- Warranty information: Both for the materials and the contractor's workmanship.
- Compare Apples to Apples: When you get your quotes, lay them out side-by-side. Don't automatically go for the cheapest bid. Look for consistency in the scope of work, materials specified, and warranty coverage. Sometimes a slightly higher bid indicates a more thorough approach or higher-quality materials that will last longer. Pay attention to any red flags in a roofing estimate.
- Check References and Reviews: Before making a final decision, verify the contractor's license and insurance. Look up their reviews on independent platforms and, if possible, ask for references from past clients who had similar work done.
By taking the time to thoroughly vet contractors and compare detailed quotes, you'll feel confident that you're choosing a professional who will do the job right, protecting your home for years to come.
Disclaimer
Please remember that the cost estimates provided in this guide are general averages. Actual costs for roof flashing replacement can vary significantly based on your specific location, the complexity of your roof, the extent of the damage, current material prices, and the individual contractor you hire. Always obtain multiple detailed quotes from licensed and insured professionals before making any decisions. This guide is for informational purposes only and should not be considered professional financial or roofing advice.