How Starter Shingles Is Installed
One of the most overlooked components of a solid, long-lasting asphalt shingle roof is the starter shingle. Many homeowners, and even some less experienced roofers, might not grasp just how crucial this initial layer is. It's not just about getting the first row of shingles straight; it's about setting the stage for your entire roof's performance against the elements. This guide will walk you through exactly how starter shingles are installed, why they're so important, and what to watch out for to ensure your roof truly stands the test of time.
Why Starter Shingles Are So Important for Your Roof's Integrity
When you're talking about a roofing system, every single component plays a role, but the starter shingle is often the unsung hero. It's the very foundation of your shingle layout, and without it, your roof is significantly more vulnerable to wind uplift and water infiltration right where it's most exposed.
The Critical Role of the First Row
Imagine trying to build a brick wall without a perfectly laid first course – it would be unstable, prone to shifting, and ultimately fail. Starter shingles function in much the same way for your roof. They provide a strong, sealed edge along the eaves and rake edges (the sloped sides) of your roof, which are the most susceptible areas to harsh weather.
Typically, a starter shingle is a factory-manufactured strip of asphalt shingle designed specifically for this purpose. It has an adhesive strip, often called a self-sealing or sealant strip, positioned to bond with the first full course of shingles laid directly over it. This creates a critical "seal down" effect that locks the bottom edge of your roof shingles in place. Without this seal, strong winds can easily get underneath the leading edge of your roof and start lifting, flapping, and eventually tearing off shingles. This is why proper installation of starter shingles is paramount for protecting your home from the very first gust of wind or drop of rain.
Protecting Your Investment from the Ground Up
Think of the starter shingle as the first line of defense against the elements. Its primary job is to protect the roof deck and underlayment from water intrusion along the eaves and rake edges. The way a standard shingle is designed, its cut-outs and spaces between the tabs would leave gaps directly exposed to the roof deck at the very bottom edge of your roof if you simply started with a regular shingle. Starter shingles are specifically designed as a continuous strip, sometimes with a sealant line, to fill these vulnerable spaces and provide a complete, unbroken layer of protection.
This continuous coverage prevents water from wicking up underneath the shingles and rotting your roof decking or causing leaks into your attic. It’s also crucial for preventing granular loss, which is when the protective granules on your shingles start to wear off. By sealing the edges, starter shingles help maintain the integrity of your entire roof system, extending its lifespan and keeping your home dry and safe. You might think it's a small detail, but it's a fundamental part of how shingles protect against water, and it's a huge factor in the overall longevity of your roof.
Preparing for Starter Shingle Installation: Getting Everything Right
Before you even think about nailing down that first starter shingle, a lot of important groundwork needs to be covered. Proper preparation isn't just about making the job easier; it's about ensuring the finished roof performs as it should.
Essential Materials and Tools You'll Need
Having the right equipment on hand is non-negotiable for a smooth and efficient installation. Here’s a rundown of what you’ll typically need:
- Starter Shingles: These are specifically designed for the job. While some roofers might cut up 3-tab shingles to create their own starter courses, factory-manufactured starter shingles (like those from GAF, Owens Corning, or CertainTeed) are generally preferred because they have a pre-applied sealant strip in the correct location and are often perforated for ease of use.
- Roofing Nails: You'll need corrosion-resistant roofing nails, typically 1 to 1.25 inches long, with a wide head. Ensure they are compatible with your local building codes and shingle manufacturer's specifications, especially for high-wind areas.
- Hammer or Coil Nail Gun: A hammer is fine for small repairs, but for a full roof, a pneumatic coil nail gun will save immense time and effort. Make sure you have an air compressor capable of keeping up.
- Utility Knife/Hook Blades: Essential for cutting starter shingles to length or trimming them around obstacles. Hook blades are particularly good for cutting asphalt shingles quickly and cleanly.
- Chalk Line: Absolutely critical for snapping straight lines to guide your shingle placement. Precision here prevents a crooked roof later.
- Measuring Tape: For accurate measurements of overhangs and shingle lengths.
- Safety Gear: Don't even think about getting on a roof without sturdy work boots, gloves, and safety glasses. A safety harness and fall protection system are highly recommended, especially on steeper roofs.
- Pry Bar/Hammer Claw: For removing any old nails or debris.
- Roofing Hatchet: Useful for both cutting and nailing.
Remember, the quality of your tools and materials directly impacts the quality of your finished roof. Don't skimp on these essentials.
Prepping the Roof Deck and Drip Edge
Before any shingle, even a starter shingle, touches your roof, the underlying structure needs to be in tip-top shape. This usually starts after the tear-off of old shingles, exposing the roof decking.
First, the roof deck must be clean, dry, and free of any protruding nails or debris. If you've just had a roof tear-off, take the time to inspect the plywood or OSB decking. Are there any soft spots, rot, or damage? If so, you might be looking at a roof decking replacement, which needs to happen before new shingles go on. Even a small area of damaged decking can compromise the integrity of your new roof.
Next comes the underlayment. This critical layer, whether it's traditional felt paper or a more advanced synthetic underlayment, is laid directly over the roof deck. It provides an extra barrier against moisture, especially during the installation process or if a shingle is damaged later. Proper installation of underlayment, often overlapping according to manufacturer specifications, is key. In many regions, especially those prone to ice dams, an ice and water shield is also installed along the eaves and in valleys.
Finally, the drip edge comes into play. Drip edge is a metal flashing installed along the eaves and rake edges of your roof. Along the eaves, it’s installed under the underlayment but over the fascia board, allowing water to drip clear of the fascia and into the gutters. Along the rake edges, it’s installed over the underlayment. The drip edge helps direct water away from the roof structure and provides a clean, finished edge. It’s absolutely vital that the drip edge is installed correctly before the starter shingles go down, as the starter shingles will overlap it to complete the seal. Getting these foundational elements right ensures that the starter shingles have a perfect surface to adhere to and perform their job effectively.
A Step-by-Step Guide to Installing Starter Shingles
Now that we’ve got all our ducks in a row with preparation, it’s time to get down to the actual installation. This process is more precise than many homeowners realize, and getting it right ensures the entire roof system functions as intended.
Laying Out Your First Course Accurately
The installation of starter shingles typically begins along the eaves, the horizontal edge of your roof that meets the gutters. Accuracy here is paramount, as any misalignment will be amplified with every subsequent course of shingles.
- Determine Overhang: Most building codes and manufacturer specifications require a slight overhang of the starter shingle beyond the drip edge. This overhang is usually between 1/4 inch and 3/4 inch. This ensures water drips into the gutter without running back along the fascia board. Use your measuring tape to establish this consistent overhang.
- Snap a Chalk Line: This is your best friend for keeping things straight. After determining your overhang, snap a chalk line along the eaves that will serve as the top edge guide for your starter shingles. This line ensures your first course is perfectly parallel to the eave. If your roof has rake edges (sloped sides without gutters), you'll also install starter shingles along these, again with a slight overhang.
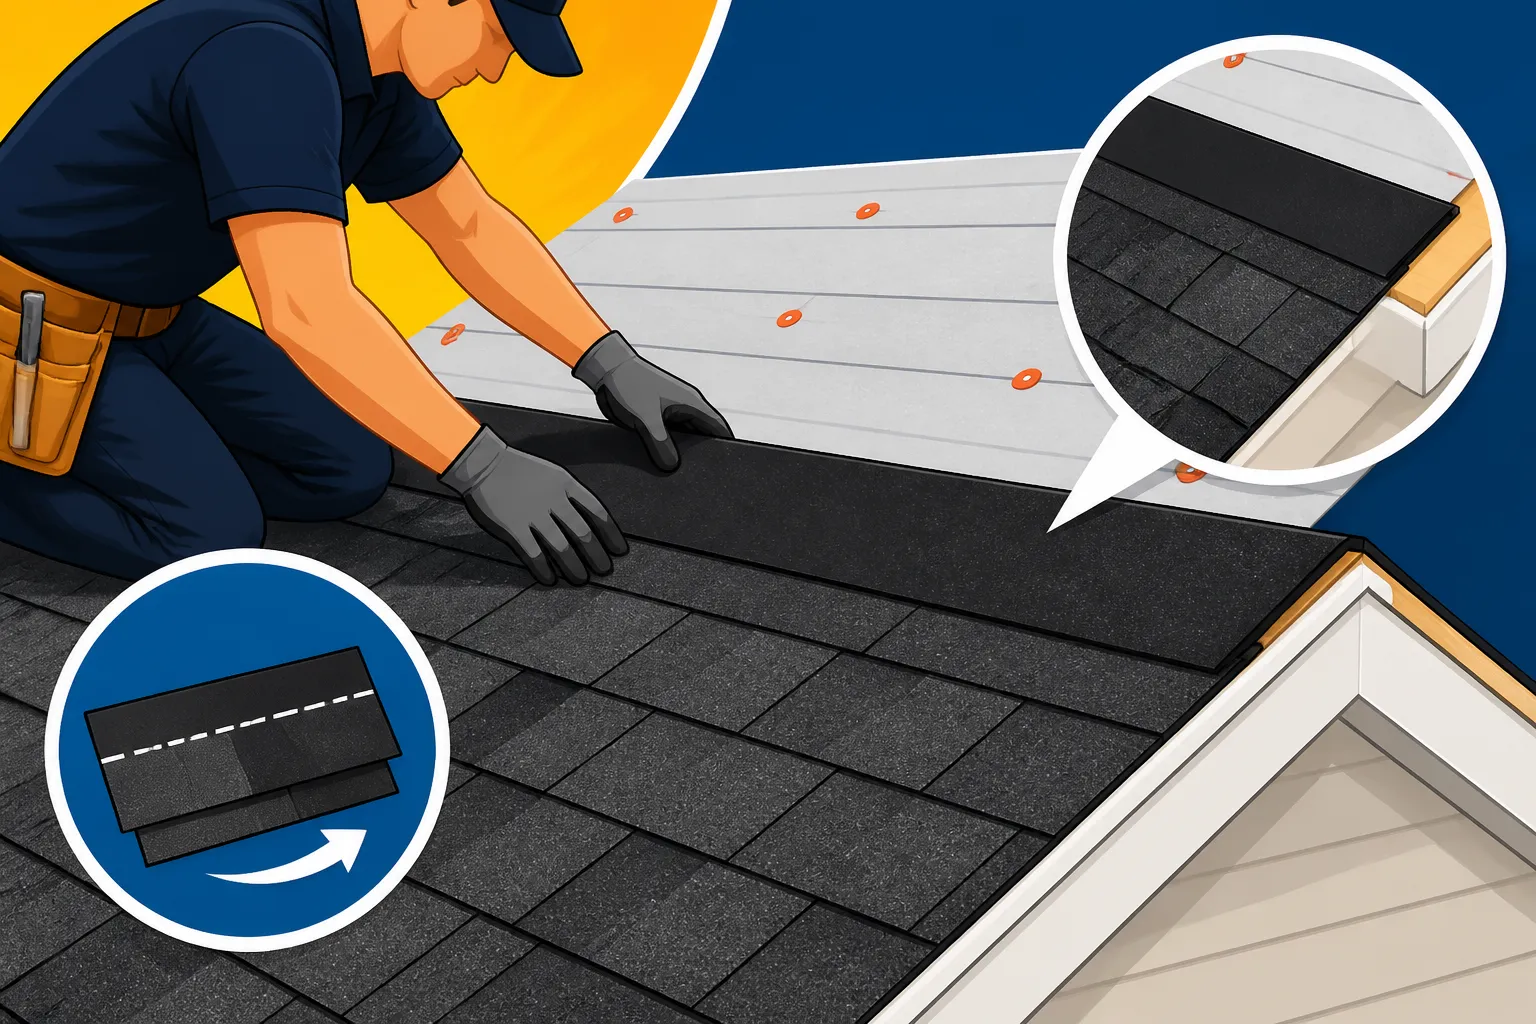
- Start at One End: Begin laying your starter shingles at one end of the eave, typically starting at the lowest corner if your roof has rake edges. Ensure the sealant strip (the tar line) of the starter shingle is positioned towards the eave – this is crucial, as it will bond with the first full course of shingles above it.
- Cut to Fit: Use your utility knife to cut starter shingles to fit the length of your eave. For the very first shingle, you might need to cut off a portion of it to create an offset. Many manufacturers suggest starting the first starter shingle with 3-6 inches trimmed off to ensure that the cutouts (if any) don't align perfectly with the cutouts of the first course of regular shingles. This staggering creates a stronger, more watertight seal.
This initial layout might seem tedious, but it's the foundation for the entire roof's aesthetic and protective qualities.
Fastening and Overlap Techniques
Once the starter shingles are correctly laid out, the next critical step is fastening them securely and ensuring proper overlap.
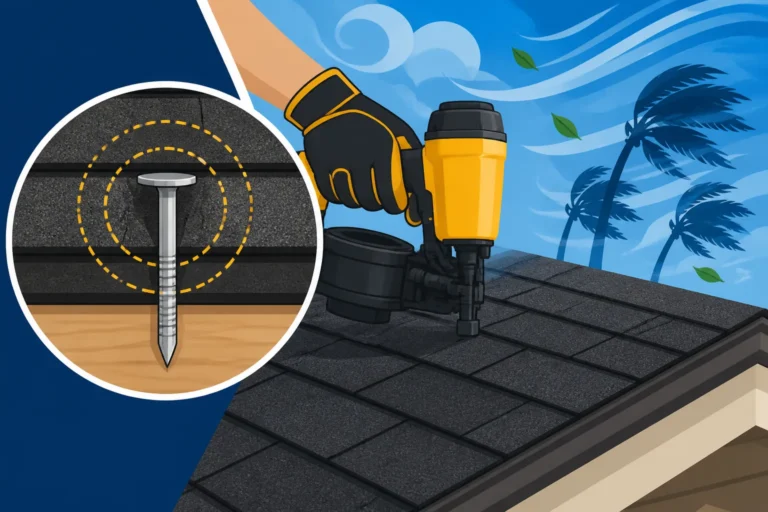
- Nailing Pattern: For standard starter shingles, you typically use 4 nails per shingle. These nails should be placed approximately 1 inch from the bottom edge and 1 inch from each end, and then two more evenly spaced in between. The key is to drive the nails straight, flush with the shingle surface, without overdriving (which can tear the shingle) or underdriving (leaving the nail head exposed). Proper nailing is a key aspect of how shingles are nailed and sealed.
- Continuous Seal: As you lay subsequent starter shingles, ensure they butt tightly against each other without leaving gaps. The goal is to create a continuous band of protection along the eave and rake. If your starter shingles are perforated, you'll simply line them up. If they are individual strips, just make sure they are flush.
- The Role of the Sealant Strip: The factory-applied sealant strip on the starter shingle is vital. When the first course of regular shingles is laid over the starter course, the sun's heat activates this asphaltic sealant strip, causing it to bond with the overlying shingle. This creates a strong, wind-resistant seal that holds the bottom edge of your roof system securely. This is especially important for the long-term durability of your roof, as it resists wind uplift.
- Offsetting: As mentioned, staggering is crucial. The first full shingle of the first course (the regular shingles that go on top of the starter course) should be offset from the joints of the starter shingles below it. Typically, you'd start the first full course with a full shingle, or perhaps a half shingle, to ensure that the vertical seams of the main shingles don't line up directly with the seams of the starter course. This significantly improves the roof's resistance to water intrusion and wind damage.
Dealing with Corners and Valleys
Roof geometry can be complex, and special attention is needed where different roof planes meet, like at corners or in valleys.
- Corners: For outside corners (e.g., on a hip roof), the starter shingles will extend to the corner, and the starter shingles from the adjacent roof plane will butt tightly against them, sometimes requiring a slight trim for a neat fit. The goal is always continuous protection at the edge.
- Valleys: Valleys, where two roof planes meet to form an internal angle, are critical points for water runoff and require specific flashing techniques. Starter shingles are typically not installed directly in the valley itself. Instead, a robust valley flashing system (often metal, or a specific ice and water shield) is installed first to create a watertight channel. The starter shingles then terminate at the edges of this valley flashing, overlapping it slightly, with the main shingles following suit. Understanding how valleys are flashed is crucial for a leak-free roof.
The meticulous installation of starter shingles is often what separates a good roofing job from a great one. It's a foundational step that sets the tone for the entire roof's performance and longevity.
Common Mistakes to Avoid During Starter Shingle Installation
Even seasoned DIYers or less experienced contractors can make errors during starter shingle installation that can compromise the entire roofing system. Knowing what to avoid can save you a lot of headaches, and potentially, expensive repairs down the line.
Improper Overhang and Exposure
One of the most frequent mistakes is getting the overhang wrong.
- Too Little Overhang: If the starter shingle doesn't extend far enough past the drip edge, water can wick back underneath the shingle and eventually seep behind the fascia board, leading to rot. It defeats the purpose of the drip edge itself, allowing water to potentially damage the eaves and even wall sheathing. It also looks unfinished, as the bottom edge of the roof will appear blunt and unsealed.
- Too Much Overhang: Conversely, if the starter shingle hangs too far over the drip edge, it can sag, become brittle, and easily break off in strong winds. This creates an exposed edge that is vulnerable to wind uplift and water infiltration, effectively negating the protective benefits of the starter course. The ideal overhang, as mentioned earlier, is typically between 1/4 to 3/4 of an inch, ensuring that water sheds cleanly into the gutters while providing ample protection.
Incorrect Nailing and Sealing
The fasteners and the sealant strip are what truly lock the starter shingles, and subsequently, the first course of main shingles, in place. Errors here are critical.
- Improper Nail Placement: Nailing too high can mean the nail doesn't adequately penetrate the underlying shingle, making it susceptible to wind. Nailing too low, especially below the sealant strip, can prevent the top shingle from sealing correctly and may expose nail heads to the elements, leading to premature corrosion and potential leaks. Always refer to the manufacturer's specific nailing instructions for their starter shingles, as placement can vary slightly.
- Overdriven or Underdriven Nails: An overdriven nail cuts through the shingle, compromising its integrity and creating a potential tear point. An underdriven nail leaves its head exposed, which can be a point of leakage and can prevent the overlaying shingle from lying flat and sealing properly. Nails should be driven flush with the shingle surface, not crushing it.
- Sealant Strip Misplacement: The sealant strip on the starter shingle must be positioned towards the eave. If it's accidentally installed upside down or facing the wrong direction, it won't be able to bond with the first full course of shingles, leaving that crucial bottom edge susceptible to wind blow-off. This is a common but easily avoidable mistake.
Skipping Starter Shingles Altogether
Perhaps the most egregious error, and one that absolutely frustrates me as a veteran blogger, is when a contractor decides to skip starter shingles entirely to save a few bucks or a bit of time. This is a massive "red flag" when dealing with roofing contractor red flags to avoid. Sometimes, they might simply start with a trimmed-down regular shingle and call it good.
While a trimmed regular shingle might provide some initial coverage, it almost certainly lacks the dedicated sealant strip in the correct location that a proper starter shingle has. The consequences of skipping this vital component are severe:
- Immediate Vulnerability to Wind: Without the sealed edge provided by a starter shingle, the bottom edge of your first course of regular shingles can easily lift in high winds. This leads to blown-off shingles, exposed underlayment, and eventually, leaks. This makes the entire roof system vulnerable to even moderate weather events.
- Increased Risk of Leaks: The design of regular shingles with their cutouts creates gaps. The continuous nature of a proper starter shingle is essential to bridge these gaps and prevent water penetration at the eaves. Skipping it means direct exposure to the elements right at the most critical entry point.
- Voided Manufacturer Warranty: Almost every reputable asphalt shingle manufacturer, whether it's GAF, Owens Corning, or CertainTeed, requires the use of their approved starter shingles (or equivalent) for their full warranty to be valid. Skipping this step means you might not be covered if your roof fails prematurely, which is a significant financial risk.
- Reduced Lifespan of the Roof: All of these factors combined mean that a roof installed without proper starter shingles will simply not last as long or perform as well as one installed correctly. It's a fundamental part of the roof anatomy and a critical layer in how a full roofing system works.
Always, always ensure that proper starter shingles are included in your roofing estimate and that the contractor intends to install them correctly. It's not a shortcut worth taking.
Professional vs. DIY: When to Call in the Experts
Deciding whether to tackle a starter shingle installation yourself or hire a professional is a significant decision. While the steps seem straightforward on paper, the reality of roofing work can be quite different.
The Learning Curve and Safety Considerations
For a confident and experienced DIYer, installing starter shingles on a small, low-slope shed or garage might be a manageable task. However, for an entire residential roof, especially one with multiple stories, steep pitches, or complex geometries, the learning curve is substantial.
- Precision is Key: As we've discussed, everything from overhang to nailing pattern must be precise. A slight error over a few feet becomes a glaring problem across an entire roof slope. Achieving this precision while working on a sloped surface, often in varying weather conditions, is challenging.
- Physical Demands: Roofing is incredibly physically demanding. It involves heavy lifting (shingles are surprisingly heavy!), kneeling, bending, and constantly moving up and down ladders.
- Safety Risks: This is arguably the biggest concern. Falls from roofs are a leading cause of construction-related injuries and fatalities. Even on a single-story home, a fall can result in severe injury. Professional roofers have specialized safety equipment, training, and crew members to ensure safe operations. They're also properly insured, which brings us to the next point.
Ensuring Warranty Compliance and Longevity
Hiring a professional, especially a reputable, manufacturer-certified contractor, offers several key advantages that a DIY project simply cannot match.
- Manufacturer Warranties: Most asphalt shingle manufacturers offer enhanced warranties that cover both material defects and workmanship. However, these often require the roof to be installed by a certified contractor who follows the manufacturer's specific installation guidelines, which absolutely include proper starter shingle installation. If you install it yourself, or hire an uncertified contractor, you might only get a basic limited warranty, which rarely covers labor costs or full system components. For example, a GAF Master Elite Contractor or Owens Corning Platinum Preferred Contractor can offer extended warranty options that DIYers can't access. These certified professionals know the exact specifications for installing elements like GAF Timberline HDZ or Owens Corning Duration shingles, ensuring compliance.
- Expertise and Experience: Professionals have seen it all. They know how to handle tricky roof sections, integrate flashing properly around chimneys and vents, and troubleshoot unexpected issues. They also have the right tools and a crew to get the job done efficiently and correctly, minimizing the time your home is exposed during a roof replacement.
- Insurance and Liability: Reputable roofing contractors carry comprehensive liability insurance and workers' compensation insurance. If a worker gets injured on your property, or if your home is accidentally damaged during the job, their insurance covers it. As a DIYer, you bear all the risk, and your homeowner's insurance may not cover damages or injuries related to a DIY roofing project. Asking for proof of these insurances is one of the key questions to ask a roofing contractor before hiring.
- Peace of Mind: Knowing your roof was installed by experienced professionals, using quality materials, and backed by strong warranties, provides invaluable peace of mind. Services like Modernize can help homeowners connect with vetted local roofing contractors who are experienced and ready to provide detailed estimates for a full roof replacement, including all the necessary components like starter shingles. They can help you compare roofing estimates to ensure you're getting a fair price for a professional job.
Ultimately, while the desire to save money with a DIY approach is understandable, the complexities, safety risks, and warranty implications often make professional installation the smarter and safer choice for a major project like a roof replacement.
Here's a quick comparison of professional vs. DIY for starter shingle installation:
| Feature | Professional Installation | DIY Installation |
|---|---|---|
| Expertise | Experienced, trained crews; adherence to best practices. | Relies on homeowner's research & skill; steep learning curve. |
| Speed | Efficient, often completed in 1-3 days. | Can take days to weeks depending on skill and availability. |
| Safety | Trained staff, proper safety gear, insurance coverage. | High personal risk; homeowner assumes all liability. |
| Tools/Equipment | Specialized, commercial-grade tools. | Requires purchasing or renting specific, often expensive, tools. |
| Warranty | Access to enhanced manufacturer warranties (material & labor). | Often only basic material warranty, no labor coverage. |
| Cost | Higher upfront cost due to labor. | Lower material cost, but potential for costly mistakes. |
| Quality Control | Professional supervision, inspections. | Self-inspection, difficult to spot errors from ground. |
| Permits | Contractor handles permit application and inspections. | Homeowner responsible for obtaining permits and scheduling inspections. |
Wrapping Up Your Starter Shingle Knowledge
Understanding how starter shingles are installed really demystifies a critical part of your roofing system. It's not just a fancy term; it's a foundational element that ensures your roof's first line of defense against wind and water is solid. From meticulously preparing the roof deck and drip edge, to carefully laying out and fastening each strip, every step ensures that the entire roofing system will perform effectively for years to come.
Remember, the small details in roofing, like the correct installation of starter shingles, make a monumental difference in the overall durability and longevity of your roof. It's a testament to the fact that a truly resilient roof is built from the ground up, one precise layer at a time. If you're ever in doubt about this process, especially during a full roof replacement, it’s always best to consult with experienced professionals who can ensure every component, including those vital starter shingles, is installed to the highest standards.
Disclaimer
Please note that this guide provides general information about asphalt roofing and starter shingle installation. Building codes, product specifications, and best practices can vary by location and manufacturer. Always consult with a qualified, licensed roofing professional and refer to local building codes and manufacturer installation instructions for your specific project. Roofing work can be dangerous; prioritize safety and consider professional assistance for any significant roof repairs or replacements.