What to Expect on Roof Installation Day
The day your roof gets replaced can feel like a whirlwind, full of questions and a little bit of apprehension. You're probably wondering what a typical roof installation day looks like, how long it will take, and what you, as the homeowner, should be doing or expecting. It's completely normal to feel a bit overwhelmed, but understanding the process step-by-step can turn that anxiety into confidence. This guide is here to walk you through everything, making your roofing day a smooth experience.
Preparation is Key: Before the Crew Arrives
Even before the first nail is hammered, a significant part of a successful roof installation day happens with good preparation. Many homeowners underestimate the impact a few hours of pre-planning can have on reducing stress and preventing potential issues. Think of it as setting the stage for a smooth operation.
Protecting Your Property and Landscaping
Roofing is inherently a messy job, involving the removal of old materials and the installation of new ones. Old shingles, nails, debris, and dust are inevitable byproducts. To minimize any potential damage to your beloved landscaping or outdoor features, taking proactive steps is crucial. Consider moving delicate potted plants, garden decorations, and patio furniture to a safe indoor space or at least far away from the house's perimeter. If you have any sentimental or fragile items near the house, ensure they are well out of harm's way.
Contractors will typically lay down tarps around the perimeter of your home to catch debris, but strong winds can shift things, and small pieces can still escape. If you have prized flower beds or delicate shrubs right against the house, you might want to consider adding your own layers of protection, like old blankets or additional tarps, secured firmly. Remember, even the most careful roofing crew can't account for every stray shingle fragment or nail, so a little extra effort here can save you a lot of heartache later.
What to Do with Your Vehicles and Outdoor Items
This often gets overlooked until the crew shows up, but it's really important! Your driveway and areas around your home will be bustling with activity. Roofing materials will arrive, a dumpster will be placed, and the crew's vehicles will need space. It's best to clear your driveway completely. Move all vehicles – cars, motorcycles, RVs – out of the driveway and away from the house. Park them on the street, if permissible, or at a neighbor's house if you have to. This ensures they won't be in the way of heavy equipment or susceptible to falling debris, such as errant shingles or even a tool accidentally slipping from a worker's hand.
Beyond vehicles, think about other outdoor items. Grills, playground equipment, bird feeders, and even valuable garden statues should be moved well away from the work zone. If you have an outdoor shed or storage unit, ensure access points aren't blocked, especially if you might need something from inside. The goal is to create a clear, unobstructed perimeter around your home, providing the roofing crew with ample space to work safely and efficiently. You might also want to temporarily remove anything hanging on exterior walls, like decorative signs or lights, that could be jostled or damaged by ladders or scaffolding.
Communicating with Your Family and Neighbors
A roof replacement can be a noisy and somewhat disruptive process, not just for you but also for your immediate neighbors. It's always a good idea to give your neighbors a heads-up a few days before the scheduled installation. Let them know the dates and what to expect regarding noise, dust, and potential heavy equipment in the street. This small courtesy can go a long way in maintaining good neighborly relations.
Inside your home, prepare your family for the sounds and vibrations. Hammering, tearing, and the general clamor can be quite loud, especially if you have sensitive pets or small children. Consider making alternative arrangements for them for the day if the noise might be too much. If anyone in your household works from home, they might want to plan to work elsewhere. It's also a good idea to remove any loose items from walls, like picture frames or shelves, especially on upper floors, as vibrations can sometimes cause them to fall. This type of thoughtful planning truly helps reduce stress for everyone involved. For a detailed look at the entire undertaking, you might want to read our guide on how a roof replacement works: the full process.
The Day Begins: Arrival and Setup
The morning of your roof installation is a flurry of activity. Seeing the crew arrive with all their equipment might feel a bit chaotic at first, but it's all part of a well-orchestrated plan to get your new roof installed efficiently and safely.
The Crew's Arrival and Initial Assessment
Typically, the roofing crew will arrive bright and early, often around 7:00 or 8:00 AM, depending on local regulations and the contractor's schedule. They'll usually show up in company vehicles, sometimes towing trailers loaded with equipment. This is a great opportunity for a brief check-in. The project manager or lead foreman should introduce themselves and confirm the project details with you, making sure everyone is on the same page. This is your chance to ask any last-minute questions or point out any specific areas of concern you might have, like a particular flower bed or a fragile fence.
Before any work begins, the crew chief will usually conduct a quick final walk-around of your property. They'll assess the work area, identify potential obstacles, and decide on the best placement for the dumpster and material delivery. This initial assessment is crucial for planning the workflow and ensuring the safety of both the workers and your property. It also sets the stage for what you'll learn in our guide on how much roofers charge per hour, as efficient planning can contribute to the overall project timeline.
Material Delivery and Placement
Shortly after the crew arrives, or sometimes even the day before, the new roofing materials will be delivered. This can be quite a spectacle! A large truck, often with a crane attachment, will arrive to hoist bundles of shingles and other components directly onto your roof. This method is incredibly efficient as it saves the crew from having to carry heavy loads up ladders all day. However, it requires significant clearance, so ensure that you've moved all vehicles and any other obstructions from your driveway and areas around your home.
Beyond the shingles, you'll also see other materials like underlayment, drip edge, flashing, and ridge vents being offloaded. These will be neatly stacked and organized, either on the roof itself or in designated areas on the ground, ready for use. This systematic approach ensures that the crew has everything they need at their fingertips, minimizing downtime and keeping the project moving smoothly. If you're curious about the specific materials, our article on underlayment explained: synthetic vs felt gives a great overview.
Setting Up Safety Measures and Debris Management
Safety is paramount on any construction site, and a roof installation is no exception. The first order of business for the crew will be to establish a safe working environment. This involves setting up ladders, scaffolding, and sometimes even safety ropes and harnesses for the workers. They will also clearly mark off the perimeter of the work zone, often with caution tape, to prevent anyone from accidentally walking into a hazardous area.
Crucially, a large dumpster or trailer will be strategically placed as close to the house as possible to collect all the old roofing debris. This is a critical component of efficient cleanup. As old shingles are torn off, they'll be tossed directly into this container, minimizing the spread of mess across your yard. You'll likely see additional tarps and protective coverings spread around the house to further safeguard your siding, windows, and landscaping from falling debris and stray nails. A well-prepared crew will have a clear plan for debris management, understanding that a clean site is a safe site, and contributes to the overall efficiency of the job, which also impacts the Cost of roof tear-off and disposal.
The Installation Process: From Tear-Off to New Shingles
This is where the magic (and the noise!) really happens. Once all the preparatory steps are complete, the actual work of transforming your roof begins. It's a systematic process that involves removing the old, checking the structural integrity, and building up the new, weather-tight system.
The Tear-Off Phase: Noise and Debris
The first major task is the tear-off, which involves removing all the old roofing materials down to the roof decking. This is, without a doubt, the loudest and messiest part of the entire process. You'll hear the rhythmic sounds of prying tools, shingles being pulled up, and the thud of debris falling into the dumpster. It can be quite startling, especially if you're inside the house.
During this phase, crew members will work their way across the roof, carefully but quickly removing the old shingles, underlayment, and any damaged flashing. They are usually very efficient, trying to get this stage done as quickly as possible to expose the bare roof deck. Expect a fair amount of dust and granule fallout, especially if your old asphalt shingles were well-weathered. If you have multiple layers of old roofing, this process will take longer and produce more debris, adding to the general chaos. For an in-depth look at this particular stage, our article on what happens during a roof tear-off is a valuable resource.
Decking Inspection and Repairs
Once the old roofing materials are removed, the bare roof decking is exposed. This is a critical moment for inspection. The crew will meticulously examine the plywood or OSB decking for any signs of damage, such as rot, warping, or punctures. Sometimes, underlying issues from previous leaks aren't apparent until the old roof is off. If damaged decking is found, it will need to be replaced.
While most reputable contractors include a contingency for minor decking repairs in their estimates, significant damage might result in additional costs and time. The foreman will typically notify you immediately if extensive repairs are needed, explaining the issue and discussing the options before proceeding. This transparency is crucial, as a sound roof deck is the foundation of your new roof's integrity and longevity. Addressing these issues now, rather than just covering them up, prevents future problems and ensures your new roof has a solid base. We have a detailed guide on roof decking replacement cost if you're curious about potential expenses here.
Installing Underlayment, Flashing, and Starter Shingles
With a clean and sound roof deck, the new roofing system can begin to take shape. The first layer to go down is the underlayment, which acts as an additional barrier against moisture. Depending on your climate and local building codes, this might be synthetic underlayment or traditional felt paper. In colder regions or areas prone to ice dams, an ice and water shield will be applied along the eaves, in valleys, and around penetrations to provide superior protection.
Next, the crew will install critical flashing components around vulnerable areas like chimneys, skylights, vent pipes, and wall junctures. This new flashing, often made of galvanized steel or aluminum, is custom-bent and installed to direct water away from these penetration points, preventing leaks. Simultaneously, or just before the main shingle layers, starter shingles will be installed along the eaves and rake edges. These specially designed shingles provide a sealed, straight edge for the first course of regular shingles and offer added wind resistance. The proper installation of these foundational elements is what makes a roof truly watertight.
Laying the New Asphalt Shingles
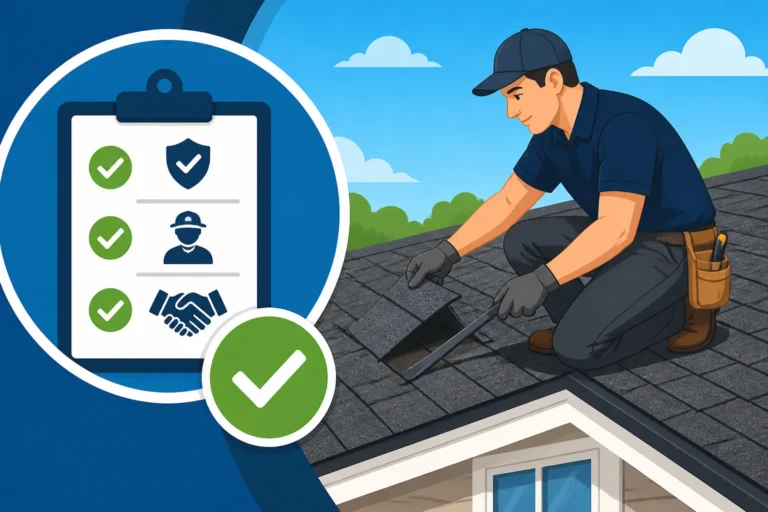
With the underlayment, flashing, and starter shingles in place, the main event begins: laying the new asphalt shingles. This is a methodical process where bundles of shingles are strategically placed and nailed in overlapping courses, starting from the bottom edge of the roof and working upwards towards the ridge. Each shingle is carefully aligned and secured with roofing nails, ensuring proper exposure and a consistent pattern.
You'll see the crew members working in unison, often in teams, efficiently laying down the shingles across different sections of your roof. They'll pay close attention to the manufacturer's specifications for nailing patterns and shingle overlap, as this is vital for warranty coverage and the roof's performance against wind and rain. If you've chosen architectural shingles, you'll start to see the beautiful, textured, and dimensional look emerge, transforming the aesthetic of your home dramatically. This is where the roof's primary protection really comes to life, creating that durable, weather-resistant shell for your home.
Ridge Caps and Ventilation Installation
As the shingle installation progresses towards the top of the roof, the crew will reach the ridge lines. Here, specially designed ridge cap shingles are installed. These caps are thicker and more flexible than standard shingles, designed to bend over the peak of the roof and provide a clean, finished appearance while protecting this critical vulnerable area.
This is also the point where roof ventilation components are often installed or reinstalled. If your home is getting a new ridge vent, it will be placed along the entire peak of the roof, allowing warm, moist air to escape the attic. Other ventilation types, like box vents or turbine vents, would also be cut in and sealed at this stage. Proper attic ventilation is crucial for your roof's longevity and your home's energy efficiency, preventing heat and moisture buildup that can lead to decking rot and premature shingle aging. A properly functioning ridge vent system helps ensure your entire roof system works together, extending its lifespan.
Wrapping Up: Cleanup, Inspection, and Final Steps
As the final shingles are laid and the last pieces of flashing are secured, the job transitions from installation to meticulous cleanup and final checks. This closing phase is just as important as the installation itself, ensuring your property is left spotless and you're fully satisfied with the work.
The Thorough Cleanup Process
A sign of a truly professional roofing company is their commitment to a thorough cleanup. Once the installation is complete, the entire crew will shift their focus to leaving your property immaculate. They'll systematically gather all remaining debris, shingle scraps, and discarded packaging from your roof, gutters, and yard. Tarps will be rolled up, and all tools and equipment will be packed away.
A crucial part of this cleanup involves using powerful magnetic rollers to meticulously sweep your lawn, driveway, and surrounding areas for any stray nails. This step is incredibly important for your safety and the safety of your family, pets, and vehicle tires. Don't be shy about asking the crew to do multiple sweeps, especially in areas where kids or pets play. A top-notch contractor will not consider the job finished until every last piece of debris and every potential hazard has been removed. You can also look for contractors that prioritize comprehensive cleanup, as some, like those listed on Modernize, often highlight this commitment in their service descriptions.
Final Walk-Through and Inspection
Before the crew packs up and departs, a final walk-through with the project manager or foreman is essential. This is your opportunity to inspect the new roof up close (or as close as safely possible from the ground) and address any immediate concerns. They should walk you around the perimeter of your home, pointing out the new features, the quality of the installation, and how the cleanup was handled.
During this walk-through, check for consistent shingle alignment, properly installed flashing around chimneys and vents, and ensure there are no visible gaps or lifted edges. While you might not be able to get on the roof yourself, a good contractor will provide clear photos or even drone footage of the completed roof sections, especially on higher or steeper pitches. This final inspection ensures your satisfaction and confirms that all aspects of the job, as outlined in your initial agreement and what a roofing estimate should include, have been completed to a high standard.
Payment and Warranty Information
Once you're satisfied with the work, the final payment will typically be due. Most reputable contractors will have a payment schedule outlined in their contract, often with a deposit upfront and the remaining balance due upon satisfactory completion. Avoid any contractor who asks for full payment before the job starts, as this is a major red flag.
This is also the time when you'll receive important documents, including your final invoice, proof of payment, and crucially, your roofing warranty information. You should receive both the manufacturer's warranty for the shingles and materials, as well as the contractor's workmanship warranty covering their installation. Make sure you understand the terms, conditions, and how to register your manufacturer warranty, if required. These documents are vital for protecting your investment for years to come and are central to understanding your long-term commitment. Remember to ask about how to transfer a roof warranty if you ever sell your home.
Phase What to Expect Homeowner Action Information is often accompanied by examples, making it clearer. For instance, explaining "How Many Squares of Shingles for a 2,000 Sq Ft Roof" often involves a hypothetical house size, reinforcing the application of the knowledge.
Disclaimer: Please note that this article is for informational purposes only and should not be considered as professional advice. Always consult with a qualified and licensed roofing contractor for any specific questions or concerns about your roof. Roofing projects involve inherent risks, and professional expertise is recommended.